blog
Let's Get Your Creative Juices Flowing!!!
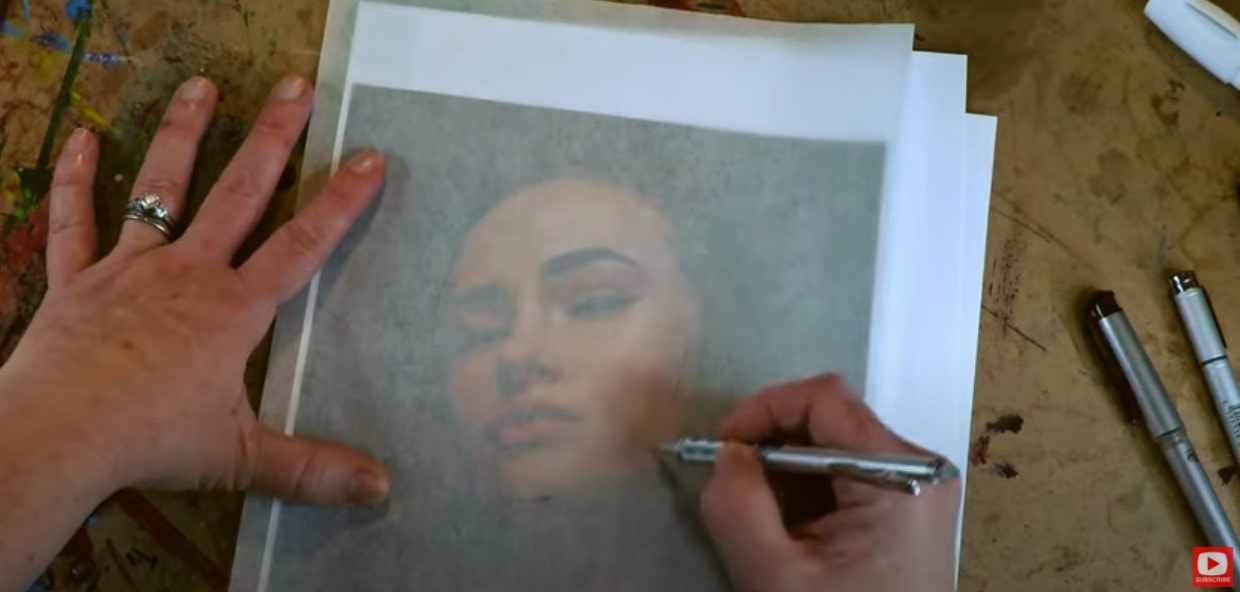
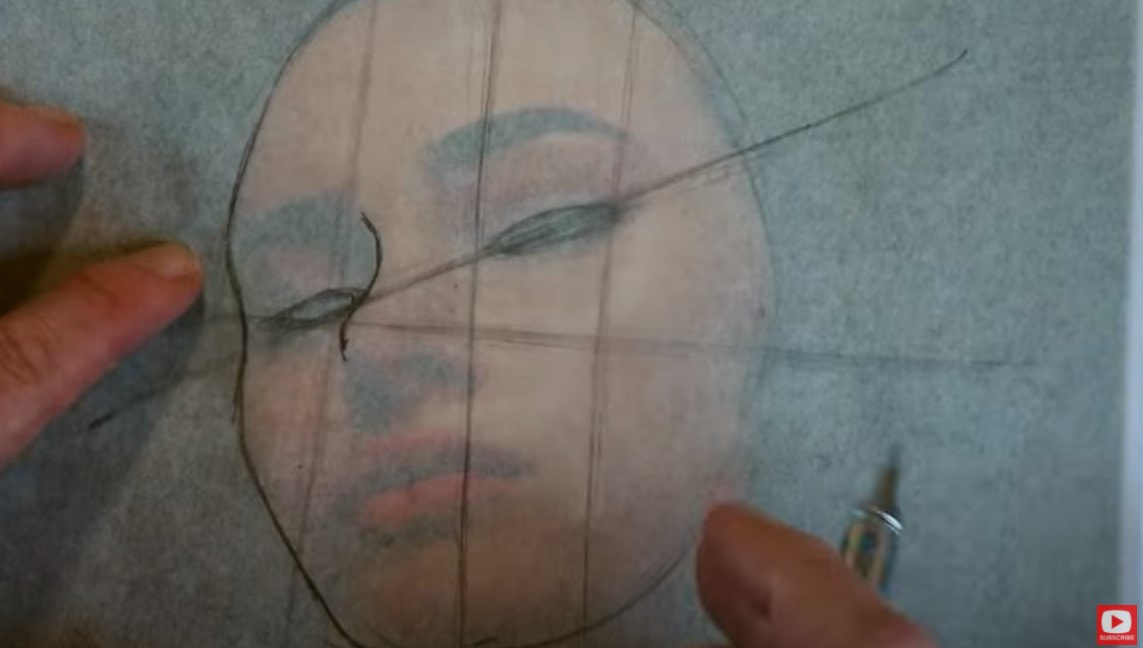
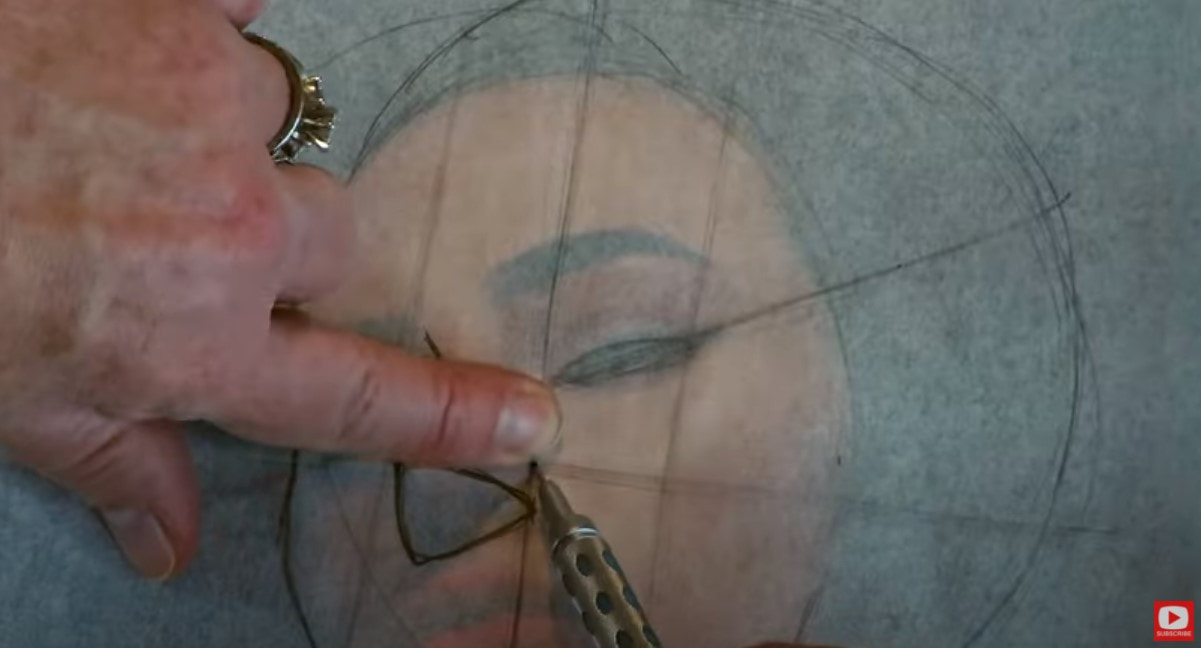
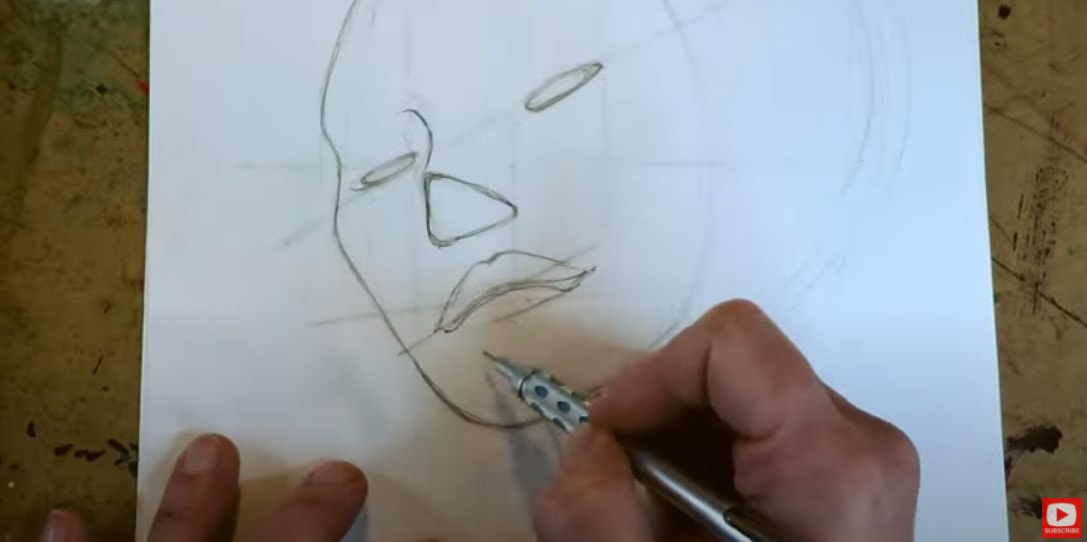
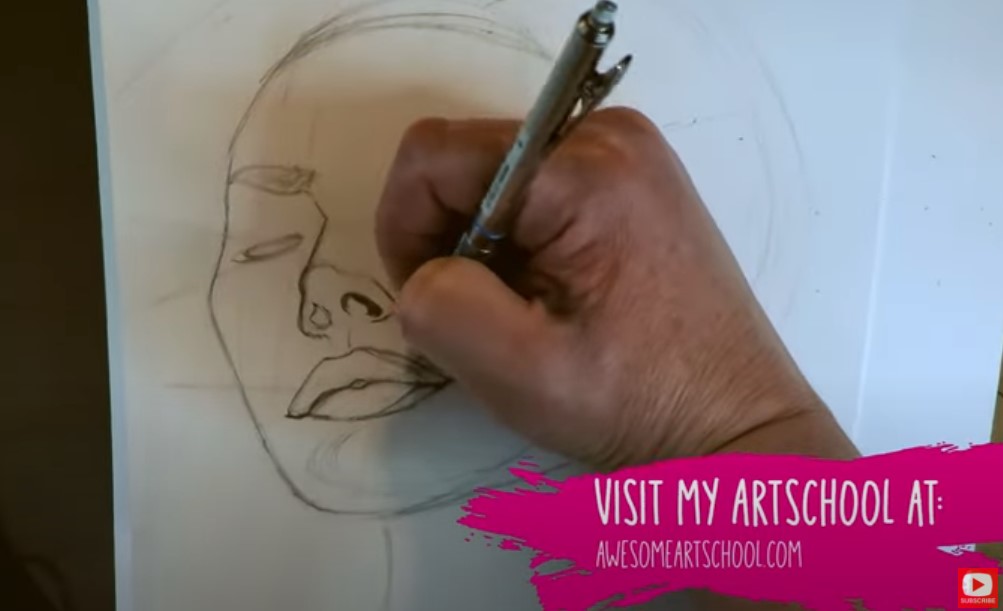
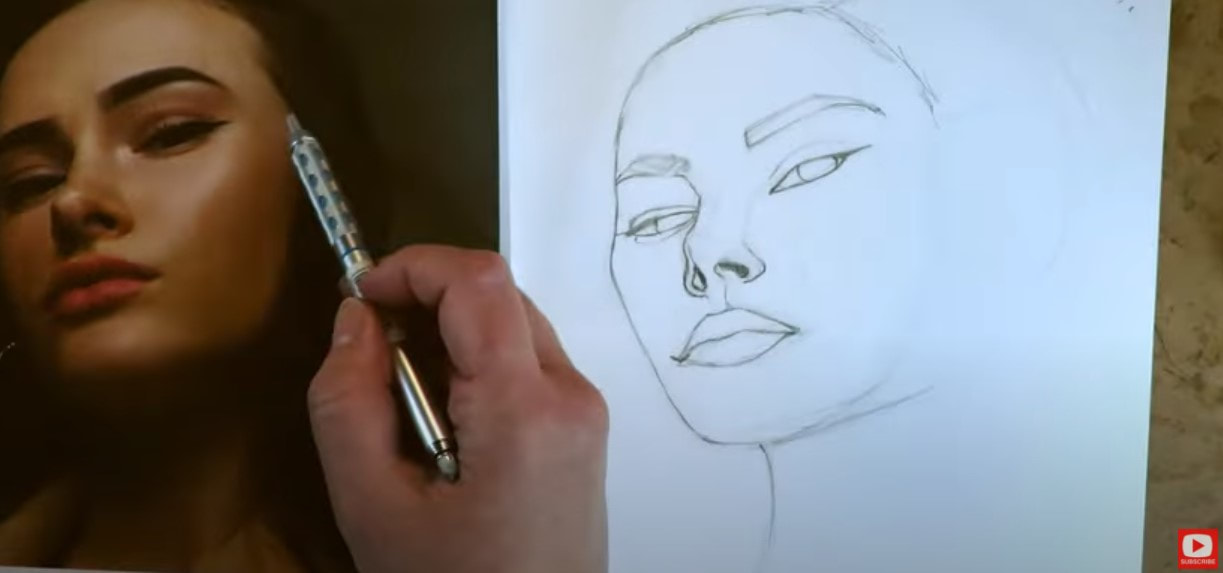
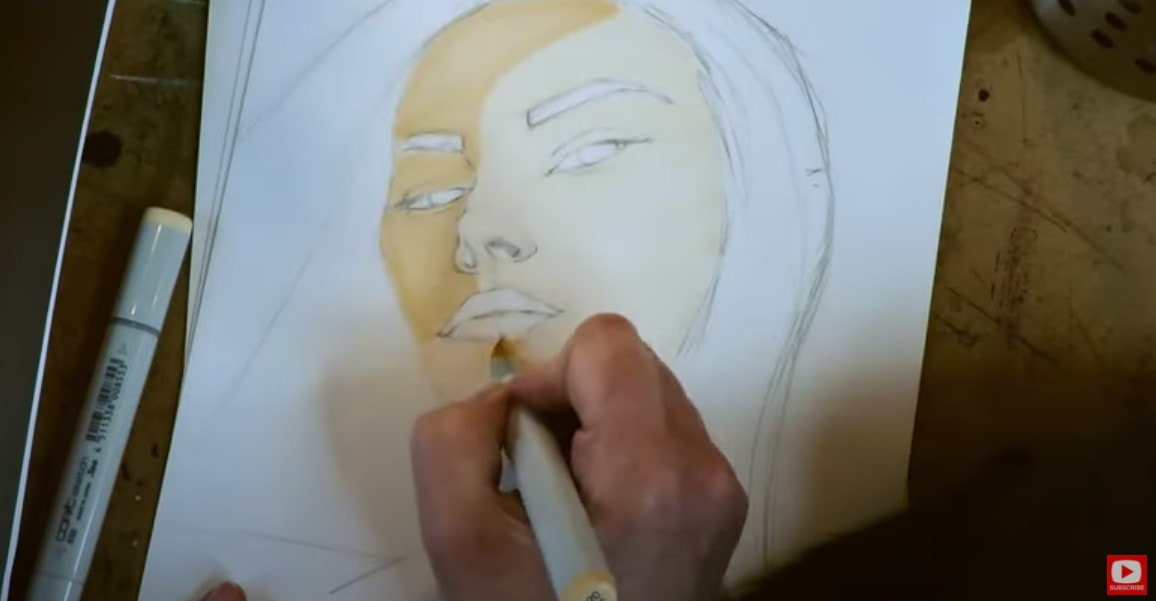
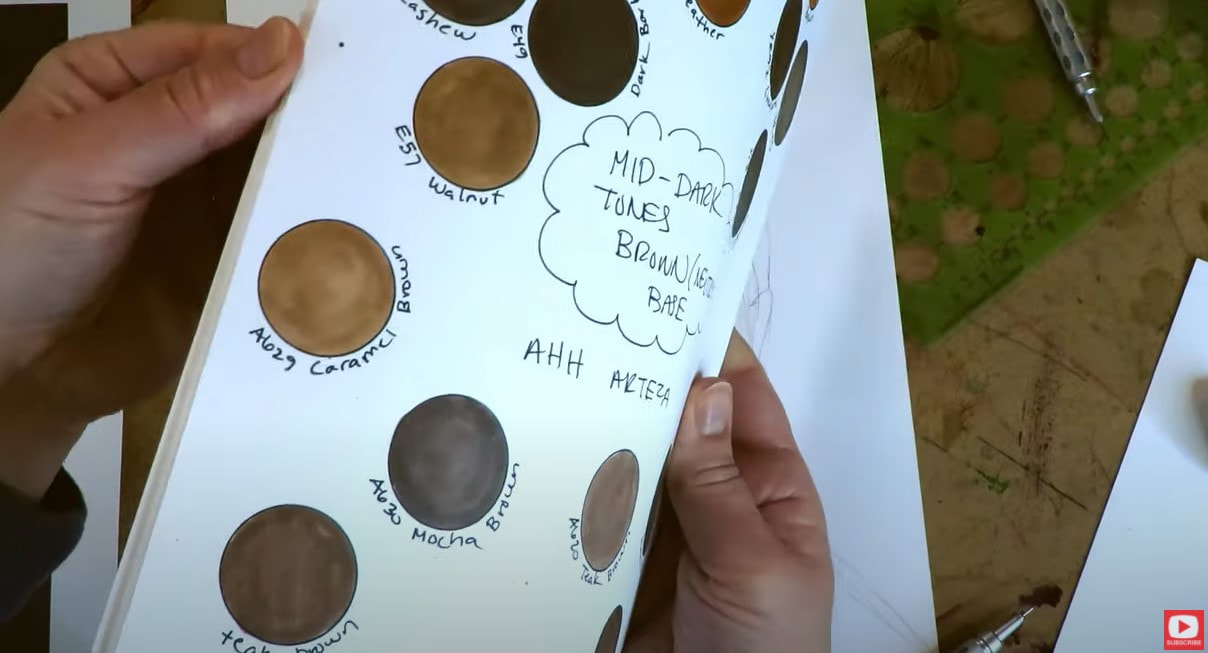
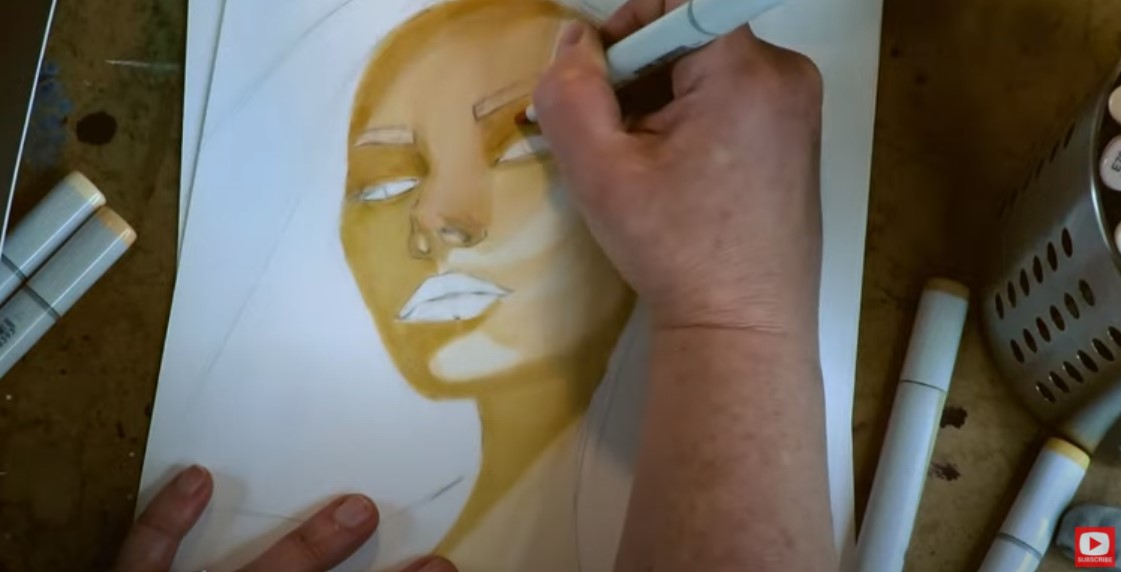
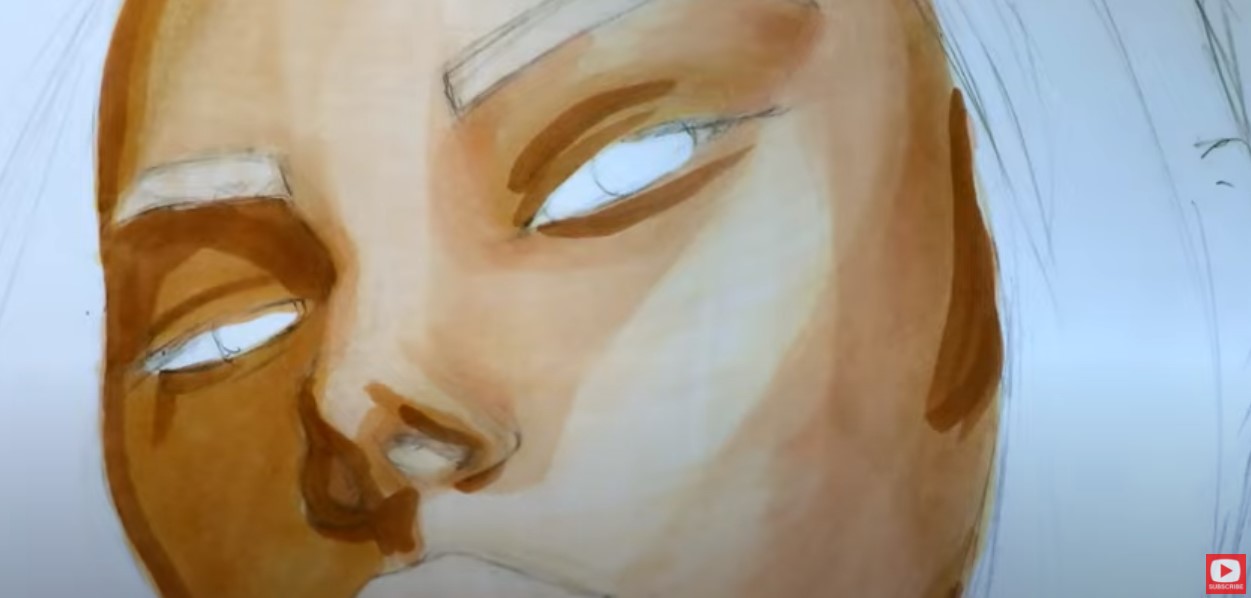
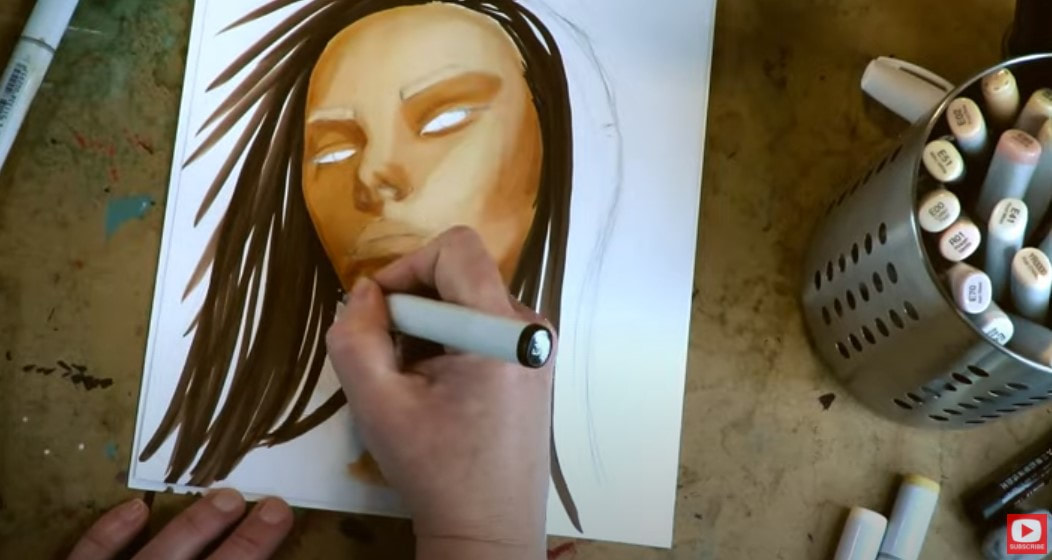
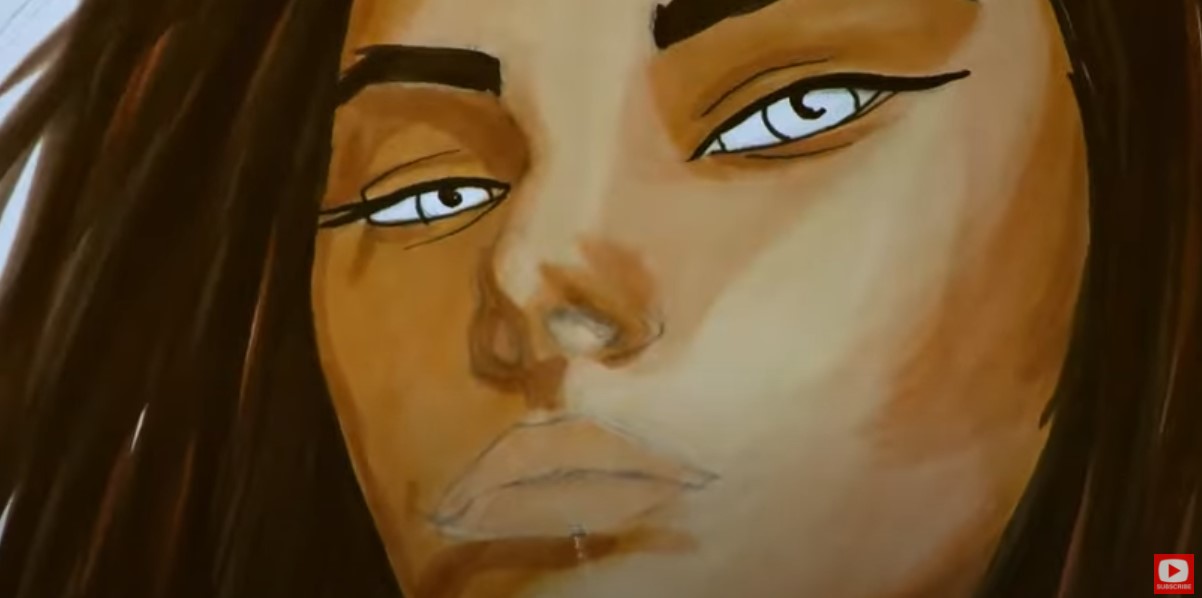
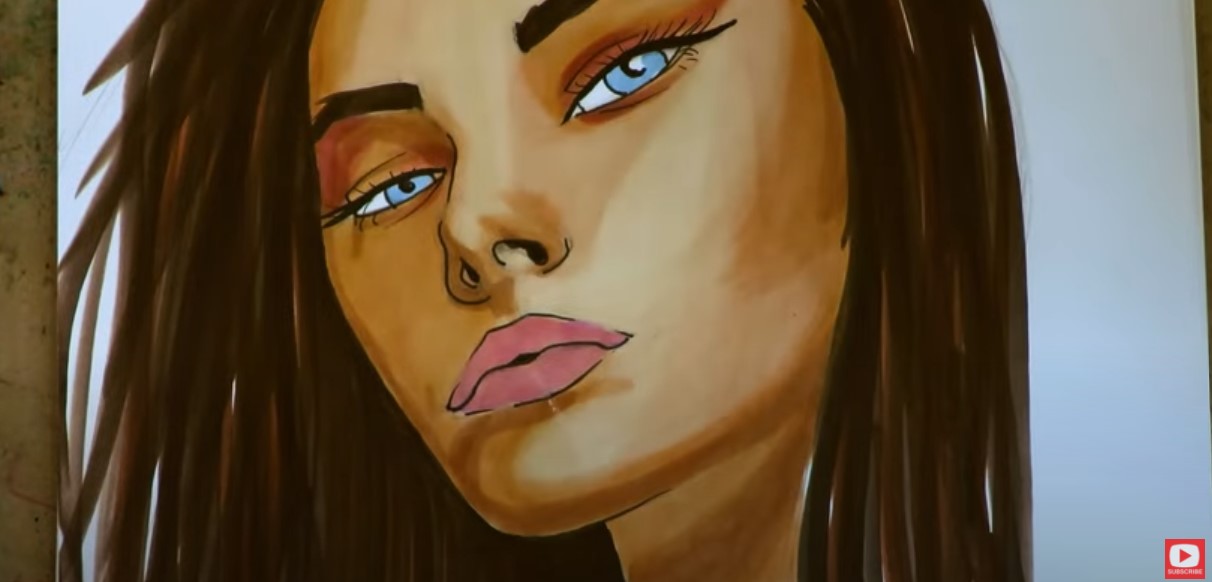
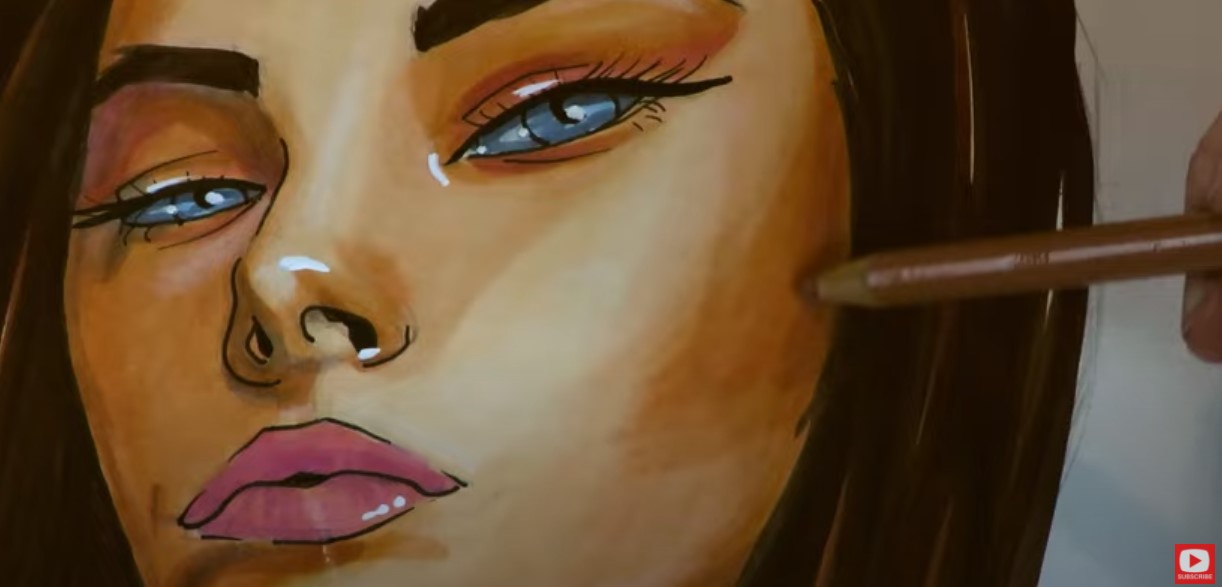
HOW to DRAW & SHADE a WHIMSICAL Face WITHOUT Face Drawing GUIDELINES?! (Whimsical Women #13)11/1/2021 I LOVE teaching how to draw a whimsical face, and have been enjoying creating the whimsical face drawing tutorials in this series! Today's art reference photo features a three quarter view face AND a tricky new head tilt to give us some practice drawing faces at different angles! Because her head tilt is so unique- none of my cheatsheets will work to help you draw her from scratch...SO I'm teaching you how to create YOUR OWN FACE DRAWING GUIDELINES!!! I honestly don't know WHERE this gorgeous model is from, but for the sake of our Whimsical Women of the World portrait drawing series, I'm going to pretend she is from the Ukranie! We've done two, three quarter portraits already in the Whimsical Women of the World series, and I've shown you two different ways to approach drawing faces from this angle here with an Asian model, and here with a Latina model. Because today's model has her head tilted, we can't use the face drawing guidelines from either of our previous lessons. That's actually one of the reasons I selected this photo- because it presents us with a new challenge to learn from! Most artists come up with ways to help themselves accurately replicate what they see in a reference on their own paper. Many will use a light table or some form of grid to at least get them started. If you've seen any of my videos before, you know I really like to draw from scratch as much as I can, because I want to continue developing my drawing skills, building muscle memory, etc. Today I want to teach you how to come up with YOUR OWN guidelines, so you can truly draw faces at any angle! When I have to create my own guidelines from scratch - my trick is to lay a sheet of trace paper on top of my reference image to sketch in key angles and note specifically where the facial features features should be located in relation to one another. As you'll see in the video, I traced the outline of the model's face shape and laid my pencil across her face to help me determine the correct angle of her eyes, nose and mouth. This nose is especially tricky because it's upturned. I found the shape to be very much like a triangle, so sketched that in. Additionally I noted approximately how wide the eyes and lips were, as well as the basic hair shape. When I finished tracing, I laid a sheet of drawing paper to the side of my trace paper and tried to replicate the guidelines I had created for myself on the trace paper. If at any point, this one feels too hard- try something simpler! I've got two playlists on my YouTube drawing channel for beginners: how to sketch and shade a simple face, and how to draw profiles - all in graphite! If that feels more like your pace- start there and pop back here when you're ready! We're not going anywhere :) If you want to do this lesson or ANY of the drawing projects from my Whimsical Women of the World series in REAL TIME - with NO timelapses, you can find these projects in the Whimsical Women of the World Classroom over at AwesomeArtSchool.com. If you're already in my Fun Fab Drawing Club- you'll see the Whimsical Women classroom in your library of club courses! If you haven't been to AwesomeArtSchool.com before, I highly suggest you check it out!!! I've got so much FUN stuff for you to explore whether you like to draw, paint, do mixed media art - it's all there, and there really is something for everyone! Back to today's project! When you feel like your drawing is in good shape and you'd like to start shading, go ahead and erase all of your guidelines. If you are shading in copic markers (or ANY brand of alcohol markers!), be sure you've removed as much as you can of the graphite from your guidelines because the graphite really has a tendancy to smear and get carried away by these juicy markers. One of my little workarounds to make sure this doesn't happen when I'm using my light skin tone markers, is to use kind of a pouncing motion to lift some of the graphite from the facial features I've drawn, so there is less of a chance I'll drag it across my page with my marker. If you're new to shading with alcohol markers, I know there are SO many skin tones and SO many brands out there, it can really be overwhelming when you're first getting started, and/or have a limited budget to spend on art supplies. If you'd like some tips about what skin tone markers go well together, I've recently created a HUGE cheatsheet to help you out!! I say "cheatsheet," but it's really a little book, because this PDF is 12 pages of detailed color swatching!!! Click the button below and I'll sent that straight to your inbox! You'll find recommendations as to which skin tone markers work well for light, medium, and dark complexions across three different alcohol marker brands (Copic, Ohuhu, and Arteza). It's really quite comprehensive, so even if you're not a total newbie to working with alcohol markers - there are still some gems in here for you that you may not have thought of before! When I'm coloring with copic markers, I typically shade light to dark, laying down a foundational shade of the lightest skin tone I'll be using to shade the face. Then I slowly work in an additional 2-4 more skin tone markers to help me indicate the range of shadows I see in my reference photo. Every time I add in another layer of shading in a slightly darker shade, I ONLY shade in the areas where I see shadows on my reference model's face and simply keep darkening smaller sections of the areas I've already shaded. When I have a good four layers of shading down, I will take the lighter skin tones and color the entire face with it - shading in a DIFFERENT direction from my original strokes to try and blend any streaks, color transitions or mistakes. I feel like this particular step is TRULY MAGICAL!! It takes all my previous layers, re-wets them, and BLENDS them together. As you'll see in the video, I also use a combination of skin tone famlies. I started out in yellows and beiges, and eventually worked in some pale pink, which adds a layer of sophistication in the complexity of my shading. Don't be afraid to reach for a wide variety of colors, because it's the BLEND of all these tones that really takes your work to the next level!! When you hit this point of your project, you're about half-way done. Her eyes aren't finished, she hasn't "come alive" yet, and you're in what I lovingly like to call "the ugly phase." Try to be patient and keep working your layers. I promise she WILL come out of it. My biggest advice is DON'T GIVE UP. If you do- the "ugly phase" wins - and you'll never know what your girl could've turned into, SO just KEEP GOING. Hair can be daunting for a lot of us, but the COOL THING about alcohol markers, is you can really sweep your marker from root to tip fairly quickly to fill the space and create the illusion of volume in no time. I like to use three shades of color in the hair of my girls to break up the space and add depth. I LOVE outlining my girls, but if you don't - do whatever works for you! This is just an artistic preference for me, and part of my whimsical /illustrative style. I use my fineliner for this job, and look at THAT... she's coming alive, and busting OUT of her ugly phase. LOVE IT!! I told you it would happen!! Once you're happy with the shading you've done in marker (or whatever art supplies you're using!), it's time to add some colored pencil. If you need help with this part of the project, you can find it in real time over at AwesomeArtSchool.com in the Whimsical Women of the World classroom. I share tips and techniques like how I hold my pencil, and why, so I get the effects I'm after. I suggest you don't add MORE alcohol marker layering on top of your colored pencil, because the colored pencil can really have a waxy finish to it, and can fight with your markers. If you haven't heard, I am writing a book about this series and would love to feature YOUR ARTWORK! Please read the submission requirements and upload your interpretation of this or ANY project from the Whimsical Women series, right here on my website. I hope you learn as much from this drawing project as I did! Please scroll down for supplies used to create this project, and leave a comment if you have any questions!! See ya back here next week!! If you need any new drawing supplies, here are links to all of my favorite supplies that were used in this project! All product links are Affiliate. I may earn a small commission if you choose to order through these links but by law there is never any additional cost to the consumer for doing so. I thank you for your support! 👉Hammermill Cover Cardstock 100lb 8.5" x 11" (fave to use with markers and best value at 4-8 cents per sheet and 250 sheets!!) 👉This Arteza pencil set is a new find and a GOOD one!! 👉Pentel GraphGear Mechanical Pencil Set (only ones I use) 👉Ohuhu Markers 24 piece skin tone set (Around $1/marker and with the brush nib, the best alternative to Copics in my opinion!) 👉Copic Skin Tone Pack of 6 ($33) 👉Copic B Set (my fave which has the most skin tones) (72 Set for $330) 👉Arteza Everblend Skin Pack of 36 ($36 - insane value!!!) 👉Arteza EverBlend Alcohol Markers (60 Set for $112 - also insane value!!) ❤️ Want FREE, immediate access to my Fun Fab Drawing Club and/or Mixed Media Society plus discounts on all my art books, sneak peek at YouTube videos and new book content, behind-the-scenes fun and MORE? Join me over on Patreon today and get HUGE PERKS in return for a small monthly donation. ❤️ CHECK OUT ALL my art books on AMAZON (available in both Kindle and Paperback) ❤️ SIGNED COPIES of my art books on ETSY ❤️ MY FAVORITE ART SUPPLIES on AMAZON ❤️ MY BELOVED FACEBOOK GROUP ❤️ FOLLOW ME ON INSTAGRAM ❤️ FOLLOW ME ON FACEBOOK
0 Comments
Leave a Reply. |
Karen CampbellFounder of Awesome Art School. Mixed Media Artist. Author of 18 Instructional Art Books! Archives
May 2023
Categories
All
|
"Karen is flipping hilarious and she's very real...I like the way she teaches in a way that really gives you confidence, whether you're a beginner or advanced there's always something new to learn!"
- Elizabeth W. |
What Fans Are SayingKaren, you are absolutely fabulous! You make me feel like I can draw anything. I have recently retired and finally have the time to do some of the art that I have loved since I was in school. I am really at the beginning of my art journey and I hope to learn as much as I can. Thank you for all you do. |
Contact ME |