
HOW to DRAW & SHADE a Whimsical MALE Face with Asian Eyes in Copic Markers (Whimsical woMAN #12)3/1/2021 Today I want to show you how to draw a whimsical MALE face just to mix things up a bit with the whimsical face drawing tutorials in this series- especially because I often get requests to draw guys, and I'm a boy mom of 3- so here ya go!! In today's face drawing lesson, I'll also cover how to draw Asian eyes (forward facing), and have an awesome new Skin Tone Marker cheatsheet just waiting FOR YOU if you didn't grab that last week!  To draw this cutie, we start with an oval like always, then we're gonna MAN-ify the facial features! 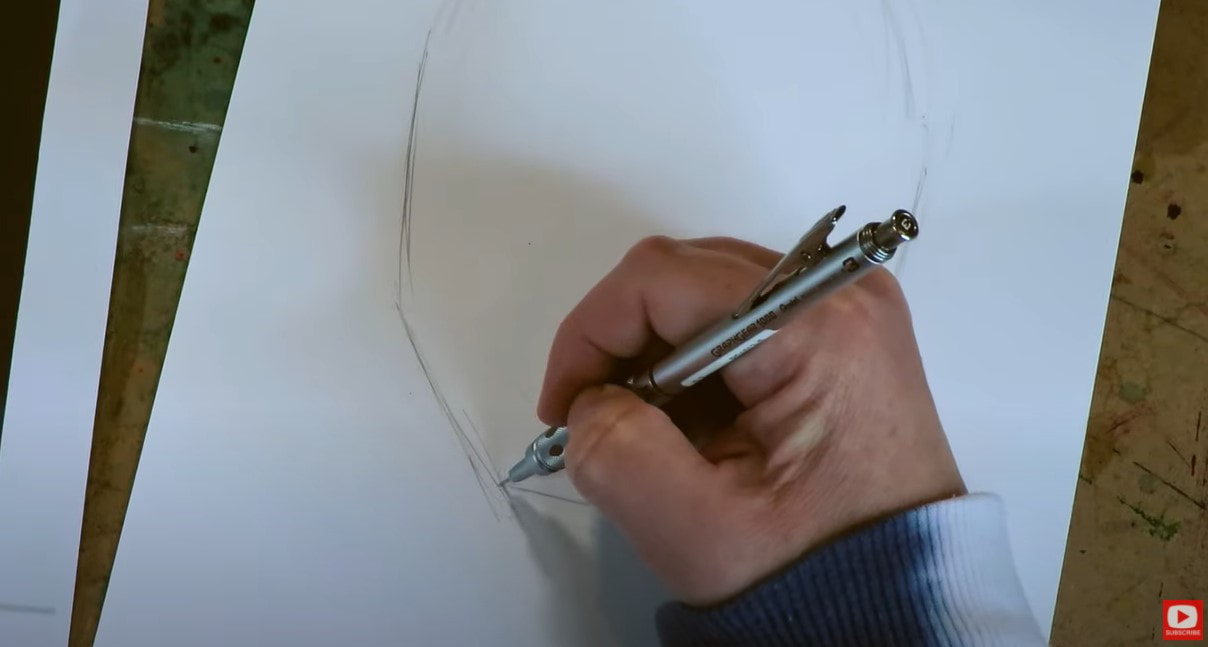 In general, keep in mind that men have more STRAIGHT lines when it comes to drawing. When you're ready to darken the face shape for this dude, start by straightening the lines on the sides of his face (like shown above). Then, as you work your way down toward a chin area, you can imagine we're attaching a triangle to the bottom of his face - just cutting off the pointy part and leaving a straight line. It's probably easier to see this in action, so check out the tutorial over on my YouTube drawing channel. The next main difference when drawing male faces (even whimsically), is to change the width of the neck. The male neck is MUCH wider than a female's. 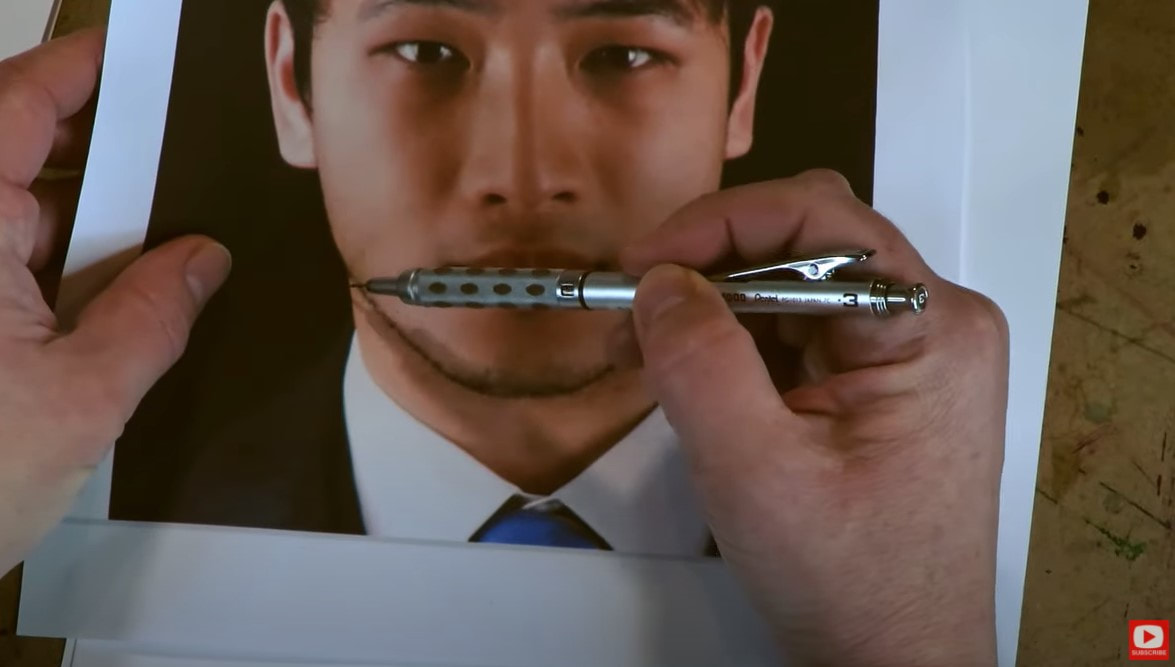 Now it's time to sketch in our face drawing guidelines! I find this fact kind of amazing ... the face drawing guidelines for drawing men and women are identical! Crazy, right? No matter WHAT our ethnicity or gender are - we all start out with the same basical human face shape, and our faces naturally follow the same basic face drawing guidelines to make us look proportionally correct! If you're not sure what I'm talking about, you HAVE to download my FREE Face Drawing Guidelines Cheatsheet to help you out! I printed and laminated mine because drawing proportions of the face are SO important. It's a reference I've ALWAYS got on my art table. Click the button below and I'll send it straight to your email ;)  Back to our drawing!! The biggest difference when you're drawing asian eyes vs. any other ethnicity, is often the absense of a dramatic upper eyelid. That's it! Pretty simple adjustment, right? Watch the video to see how this looks in real time, step by step.  Male hair, like hair for women -also has volume that extends above and outside the face shape oval we've drawn in, so make sure you block in the general shape you see for hair. This will make it much easier later when it's time to shade. 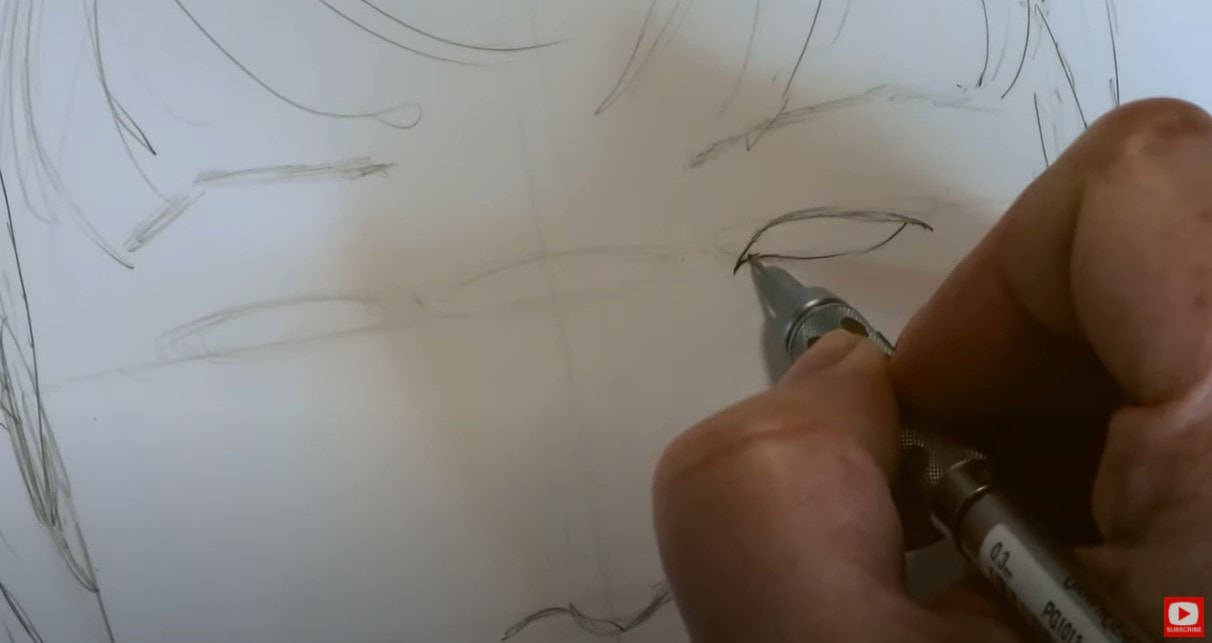 If you're drawing along with me (and I HOPE you are, because you'll learn SO much MORE by doing this than just watching me!!), I think you'll find that drawing eyes on a male face is actually QUITE easier, because there is no makeup to worry about! If you'd like a copy of this reference, or any reference from this series, I've popped them into TWO convenient locations for you over at Awesome Art School! The stand alone, Whimsical Women of the World classroom - where everything (even the color shading part of each lesson) is in real time, step by step has references, as well as my YouTube Cheatsheet & Video Library. If you're a member of the Fun Fab Drawing Club or Mixed Media Society- you've already been given free access to the Whimsical Women of the World classroom. 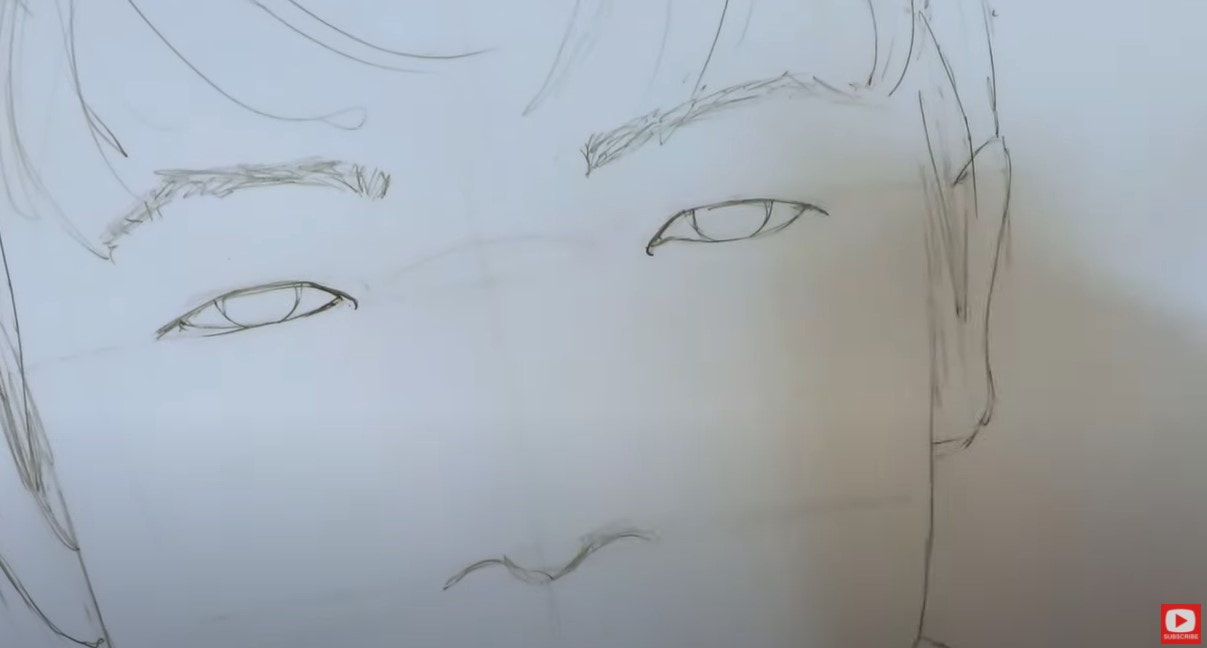 As you'll see in today's whimsical portrait drawing tutorial, when you get to the lips, you have to be careful about not letting them get girly. Watch the shapes carefully here. Even if your model has very full lips, you don't want to draw the lines in super dark, because the more you define them and darken these lines, the girlier your dude will start to look! If you get to a point in this drawing (or ANY drawing!), and you feel like something looks a little off and needs to move - don't be too precious about what you've already drawn in. Go ahead and erase whatever is bugging you and draw it again! You drew it once, you can TOTALLY draw it again. And that adjustement might make your drawing look SO much better! I drew this guy's left eye THREE times before I was happy. Then when I pulled my markers out, I drew BOTH of them over again - I think TWICE!! Don't worry about it. Just do what feels right to YOU. 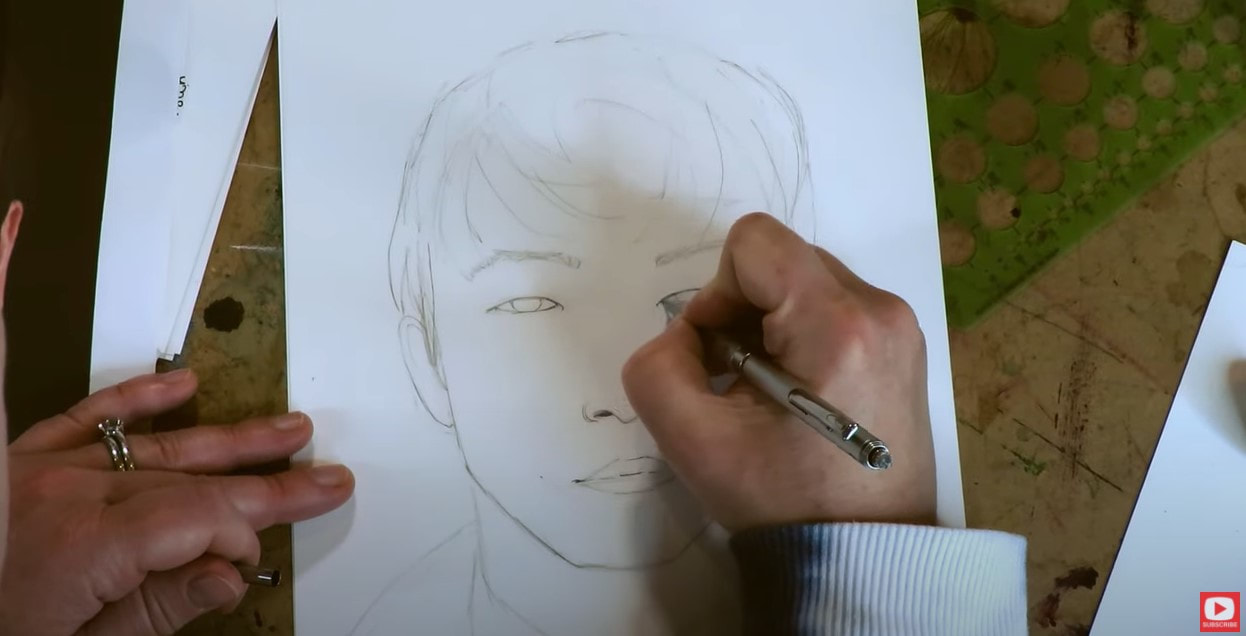 The lighting effect is the main reason I selected this particular image for today's free drawing lesson. I think you're gonna enjoy it when you're ready to shade because it's unique. You'll see the nose bridge is actually in SHADOW today (instead of highlighted as it typically is), because there are TWO light sources for this particular photo. One on either side of his face! Check out the video to see how I show this to you in action. It's super interesting, and if you've been drawing any of the projects from my Whimsical Women series, it's honestly the opposite from what we normally see in terms of light source. I've been using alcohol markers to do all the shading for my Whimsical Women of the World face drawing projects, but PLEASE use whatever art supply YOU LOVE best!! If you are using alcohol markers too - please don't worry if you don't have copic markers. I know they are SO expensive, and I've been collecting them over a long period of time. I totally love the Ohuhu brand as well and they are way cheaper. Arteza also has some good markers for even less. If you're new to shading with alcohol markers, or need some tips on which skin tone markers go nicely together for a variety of ethnicities, I recently created a FREE 12-Page cheatsheet ALL about this to help ya out!! I organized it by color family for skin tones that are light, medium, or dark, and have marker swatches from each brand (Copic, Ohuhu, Arteza) that will work well. This should REALLY save you some swatching and trial/error time! Click the button below and I'll send it straight to your inbox. 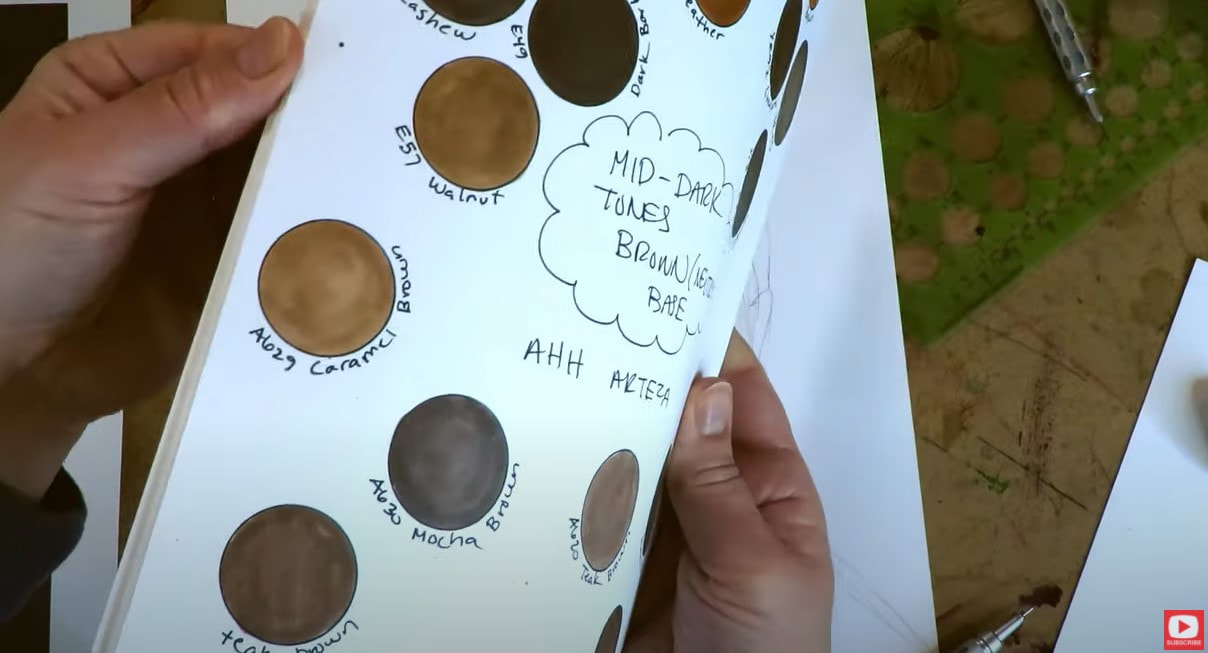 This was actually the first time I used my Skin Tone Marker Guide to help me shade a face in this series and I was thrilled with how easy it made things go! Usually I am swatching like a mad woman off to the side and fly by the seat of my pants, but this really organized my thoughts and totally saved me some time. I really hope it does the same for YOU! 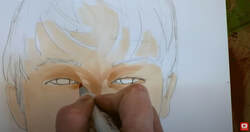 Before we continue, super quick announcement: All prouct links are Affiliate. I may earn a small commission if you choose to order through these links, but by law, there is never any additional cost to the consumer for doing so. I thank you for your support! 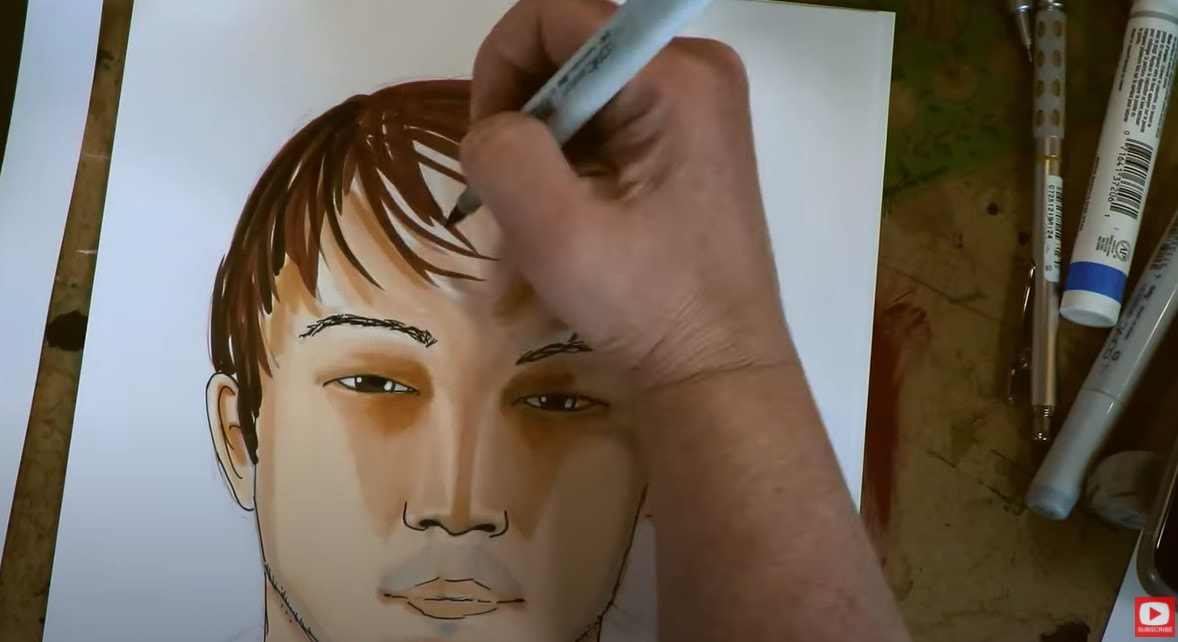 If you're interested in how to draw a male face, and are new to me and my channel, you'll find a few here and there, but I know my audience is most interested in drawing female faces, so that is primarily what you'll see. I do, however, have a book dedicated to drawing guys in a whimsical style called How to Draw Fun Fab Fellas that I created for my own boys when they were younger. It's available on Amazon if you're interested! It covers how to draw a male face from all the main angles- forward facing, profile and 3/4 view. 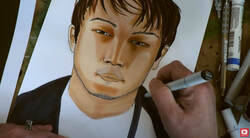 Full transparency here - I'm not in love with the way this project turned out - just being totally honest. I think the model is SUPER CUTE, but sometimes this just happens, and you've got to be honest with yourself. I want to make sure you know how I feel about my own work, so you can own your feelings, and not obsess over them for too long if something you were excited to do, didn't turn out how you'd envisioned. It's ok, and happens to ALL of us! Art is supposed to be FUN. If something doesn't go as planned, change what you can. If the project is done- move on and do something else! It's as SIMPLE as that. I've got 3 more whimsical face drawing projects coming up for you in this series, including a more mature woman with wrinkles and an up-turned face, so keep your eyes peeled for those!! I hope you have fun with this project if you choose to draw along with me!! See ya back here next Monday for more!!
0 Comments
I’ll be honest - Asian eye drawing - especially using a reference photo with a model in ¾ view, made me a little nervous at first, but I’m SO glad I chose this photo for our face drawing practice together!!! I learned so much about drawing Asian eyes while studying the features on this gorgeous model, and hope I can make this easier for you if you haven’t known how to draw Asian eyes, and have been looking for a simple drawing tutorial to break this down for you step by step. I'm excited that this reference photo is in black and white. I really love to teaching in black and white because it really drills down the concept of value scale drawing. 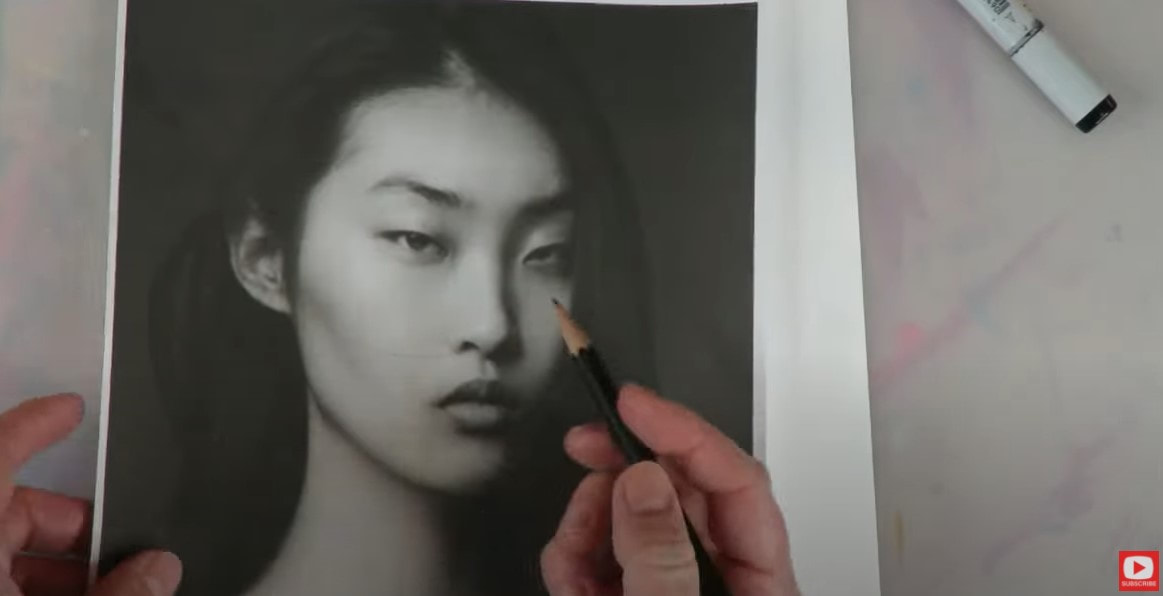 As you can see, this model's face is in 3/4 view. People also refer to this as a three quarter portrait, 3/4 face, three quarter profile, three quarter view, they all mean the same thing. Make sure you've got my cheatsheet on these face drawing guidelines before you begin drawing with me, because they really make a difference when you're trying to get the drawing proportions of the face correct. If you don't have this cheatsheet, - simply request it in the comments of today's video, and we'll email it to ya! 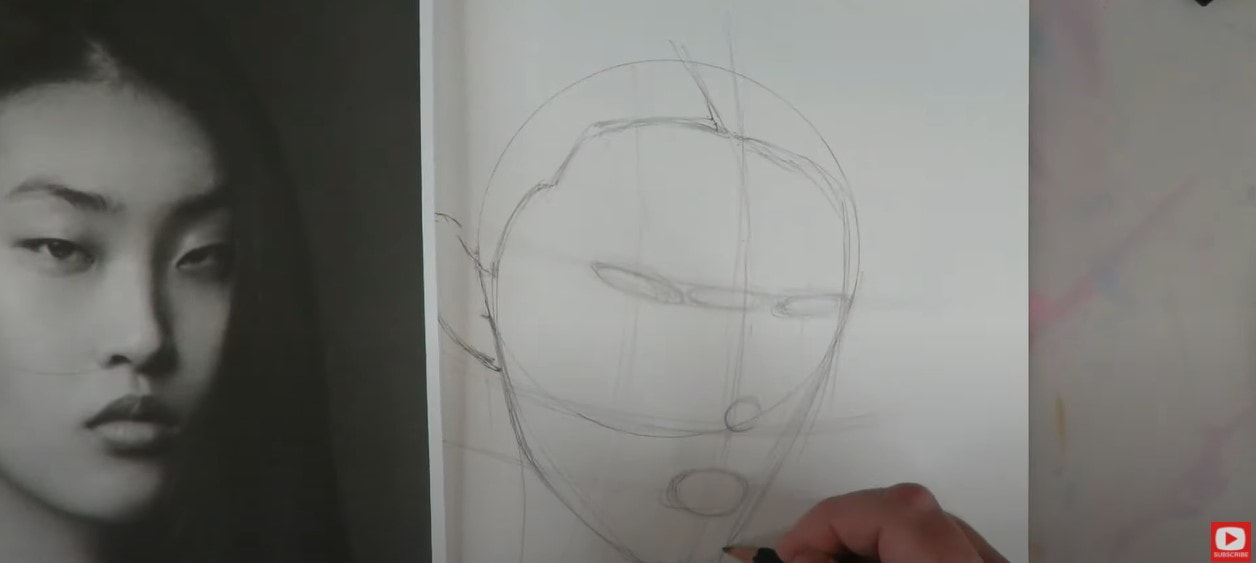 While I'm sketching in the model's face shape, I add a few lines to indicate where the hair is going to go. It's important to remember that hair has volume, and stretches up and over the head, extending beyond the oval of the face you're drawing. It often falls within the oval as well! 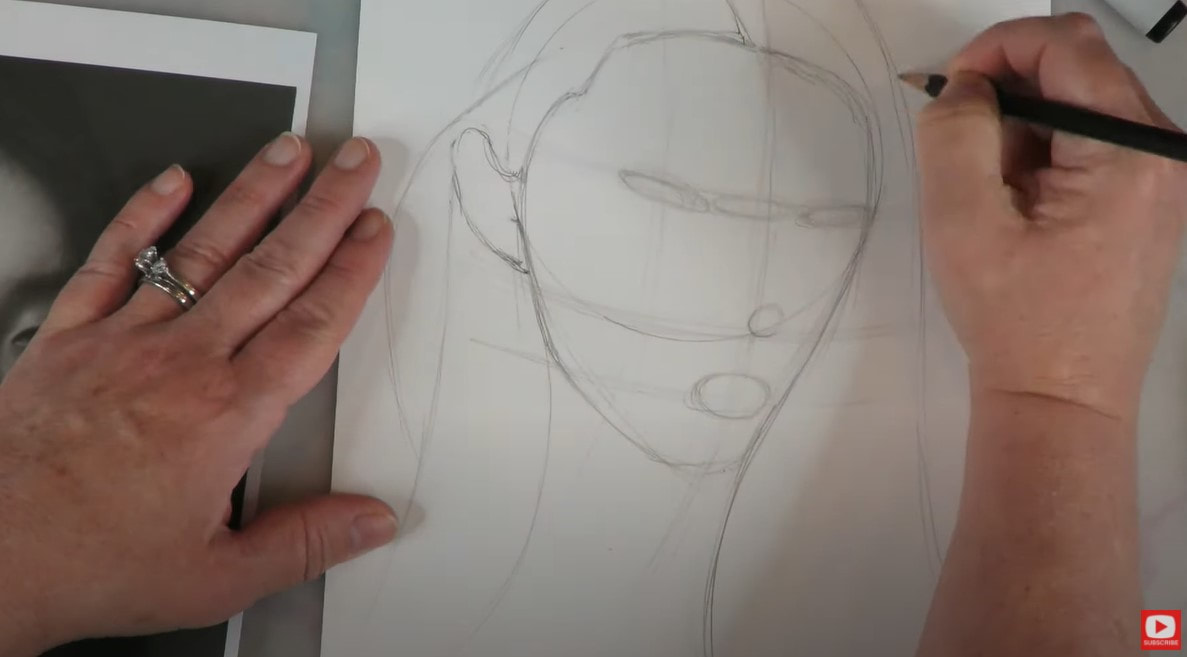 When you're feeling more confident about where your lines should be , start darkening the main hairline, the swoop of the jaw, etc. Take extra time getting the shape and angularity right for the eyes. For some reason the first one didn't give me problems but this second one really did. I did a lot of checking and re-checking on my reference photo because I wanted to make sure I got these right. (I love the eraser on the top of my blackwing pencils or my vanish eraser -depending on how much erasing needs to be done!) Using a circle template helped me confirm my irises were the same size (take help where you can get it! NO SHAME here!!). I also studied the shadow shapes around the model's eyes and drew some of those in as well to help me define their shape and remember these areas later when I was ready to shade. 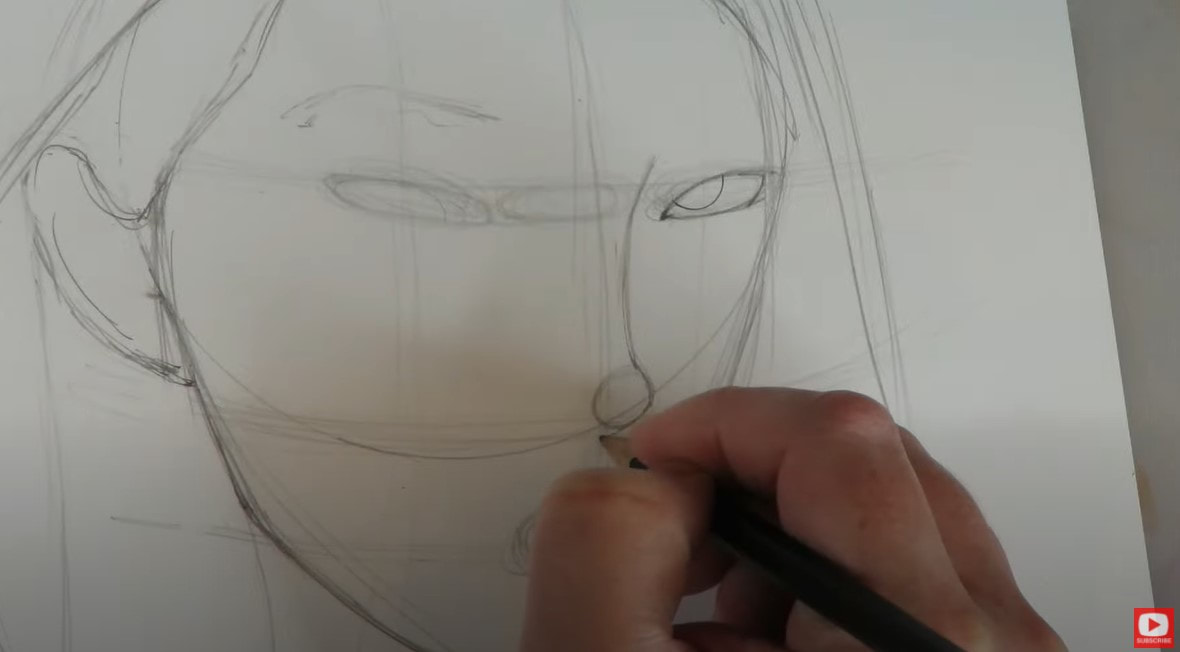 Really take your time on the mouth, because it also is a unique shape. It's tiny, but her lips are lush! 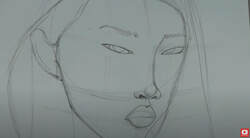 After I got all my lines sketched in, I erased my guidelines and swatched my grayscale copic markers out to compare these to my photo. When I found a good match for the lightest shade of her face, I used that marker to lay down my first layer of color -all over her face and neck. 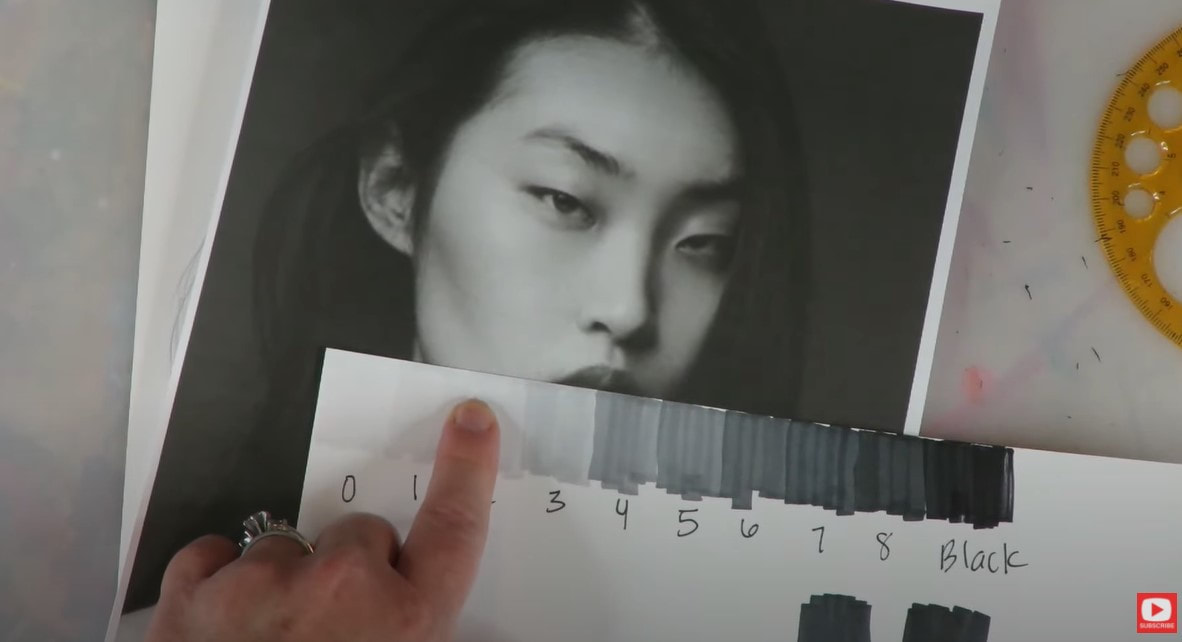 Then I moved up my copic swatch / value scale and selected the next shade up based on the shadows I saw in my reference photo. It's just a tad darker, and I add this in wherever I see slight shadows happening - along the hairline, eyes, nose, mouth and neck. 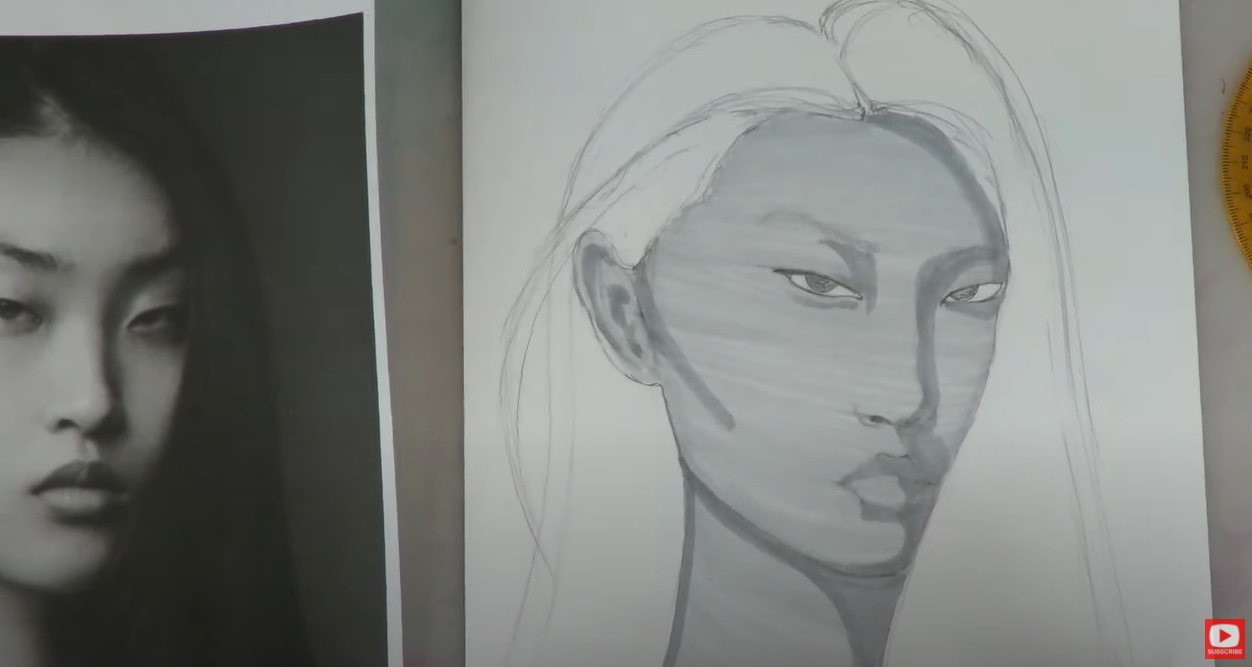 Each time I begin adding a slightly darker shade, I place the nib of my marker into the shadows I've already shaded to make them get darker and deeper. These shadows also become a bit narrower, wherever the darkest darks go. 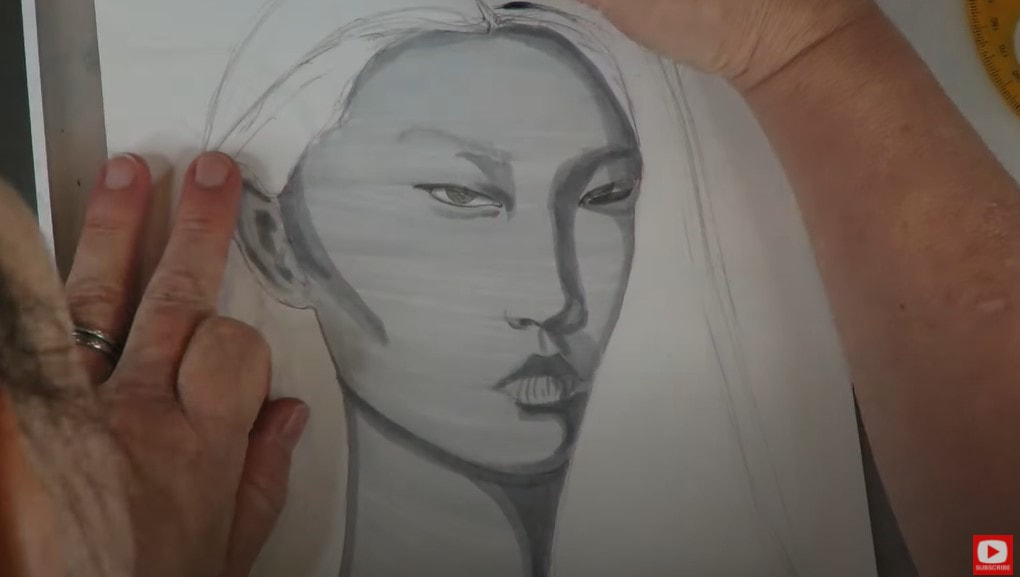 You'll see when you watch today's drawing tutorial, at this point of my drawing, I grabbed what I THOUGHT was an N3 marker. I had actually pulled the N6, and didn't even realize it until I had already touched her eyelid with it!! AHH! I could freak out, but it's important for you to know that this kind of stuff happens to ALL of us, no matter what our experience level is!! And we just have to roll with it. If you're drawing along with me and struggling with anything here- just keep pushing through. What I've learned over the years with art, is most things are fixable and they come together if you keep working at it and don't give up. I decided to move on to the hair, knowing I'd figure something out later to try and fix her eye. 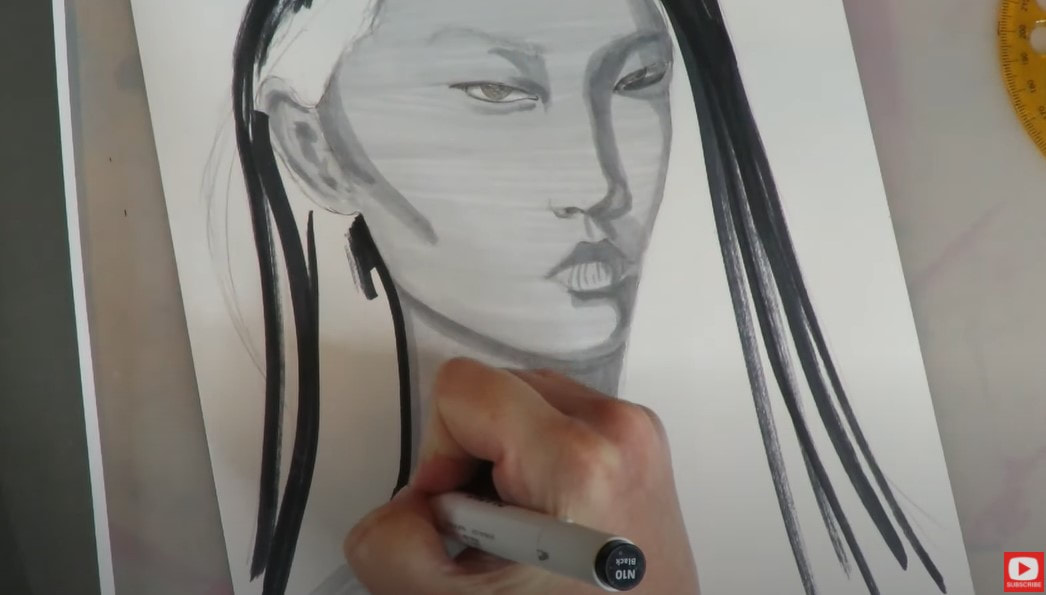 When you're drawing hair- make sure you're drawing the strands from root to tip every time. Imagine how you would brush your own hair. What direction would you brush it in? Root to tip! This is the same way you need to draw in strands of hair if you want them to look more realistic. When I'm happy with my girl's hair, I decide to work on blending out some of those marker streaks in her face. My trick for this is to take the LIGHTEST shade of marker used in this area, and to drag it along the streaky areas in the opposite direction from the original strokes. For this girl, since her skin is so light, I actually pulled a super light gray that was 2 shades lighter than what I'd already used for her lightest skin tone, and kinda love the effect!! 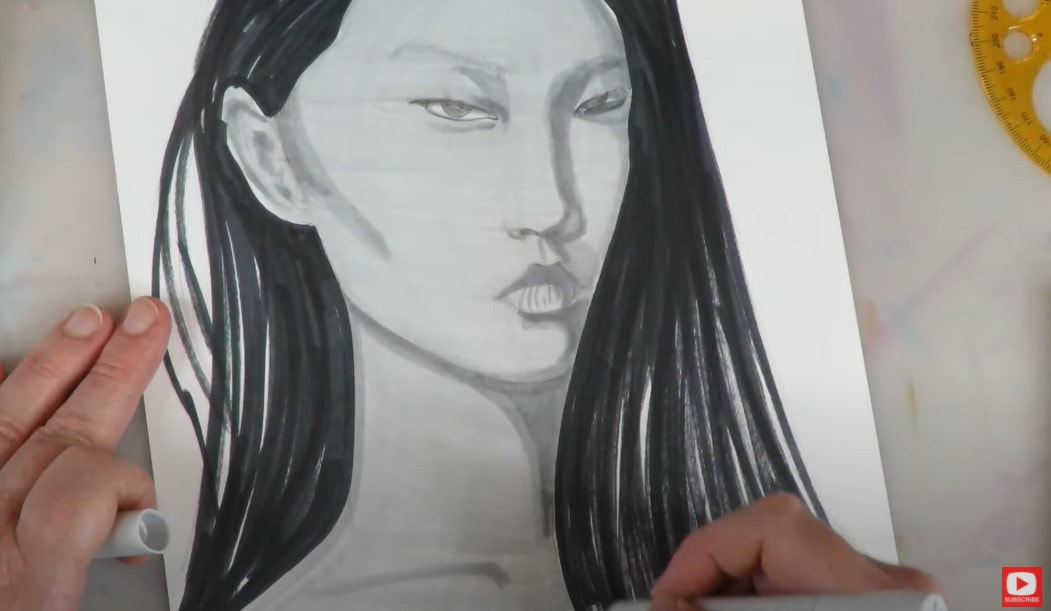 I used my fineliner to get some of the details marked around her eyes, eyebrows, nostrils, mouth, and eyelashes. I even added some wispy strands of hair that I was seeing in my reference photo - near her ear, at the top of the forehead, etc. 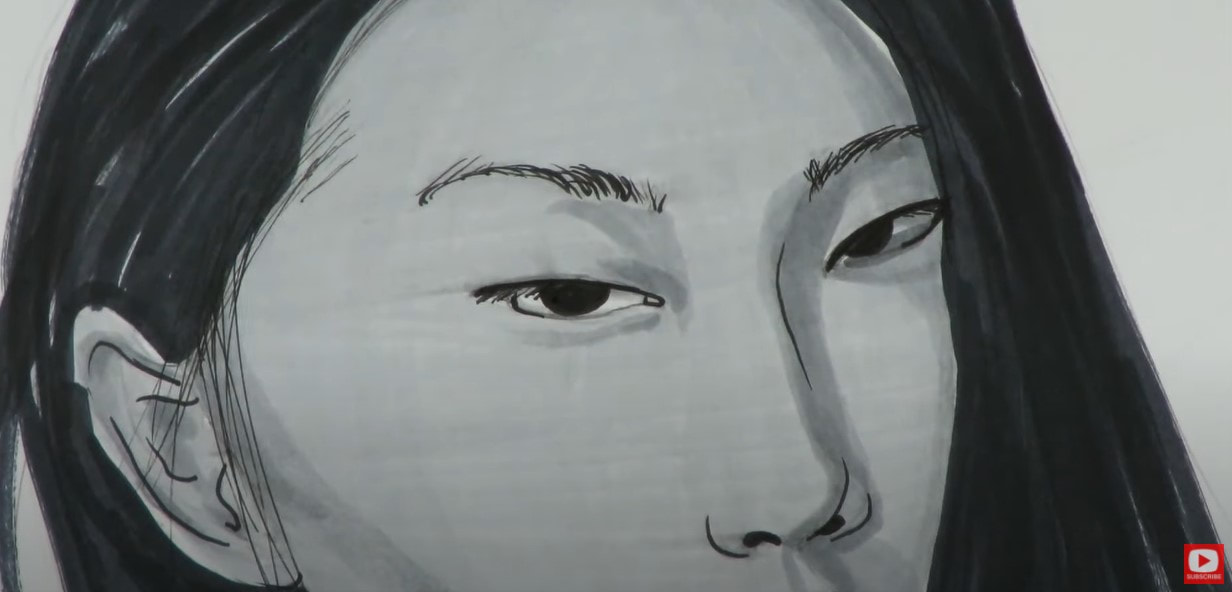 I used my pentel pocket brush to add some darker and thicker streaks to her hair, then pulled out my white colored pencil and added some highlighted streaks on top of that. 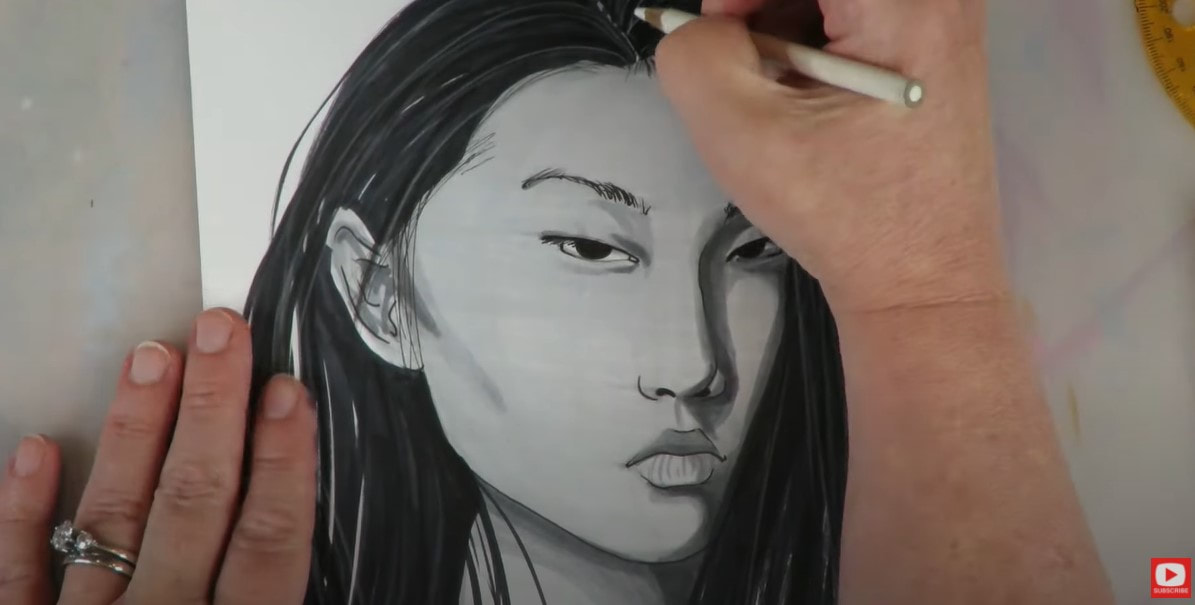 I added some black colored pencil in the thicker block sections of her hair, as well as to the teeny wisps around her ears and forehead. I also grabbed one of my light gray colored pencils to blend and soften some of the harsher shading marks in her face out. 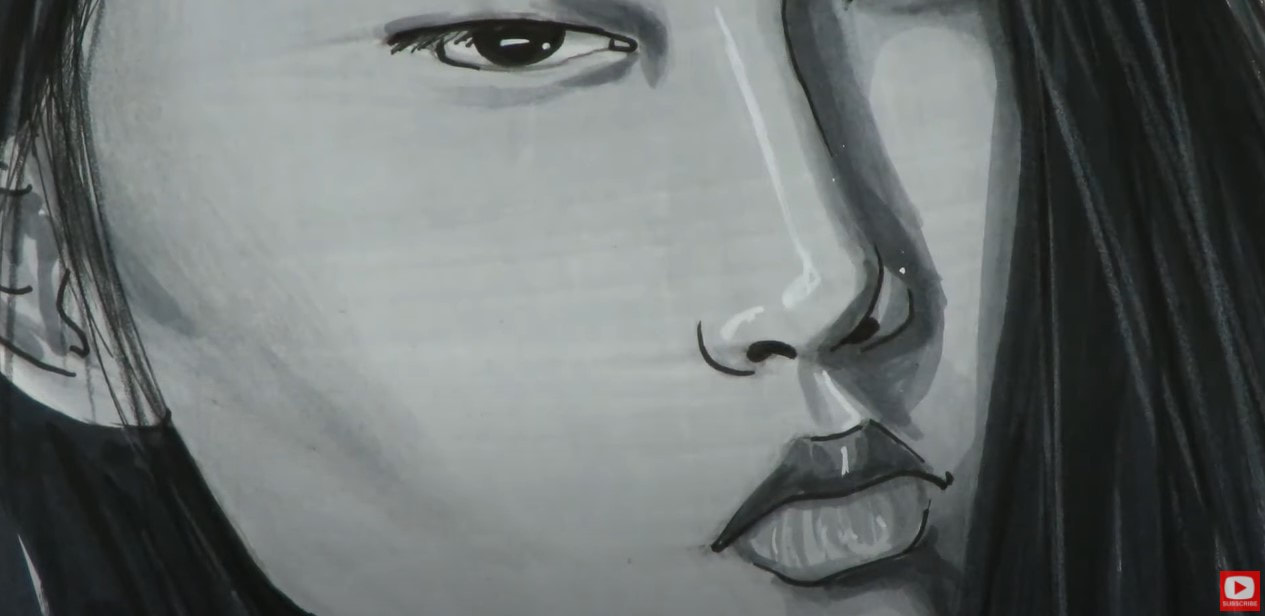 I pulled my posca paint pen out at the end, because I just can't resist punching the highlights up! 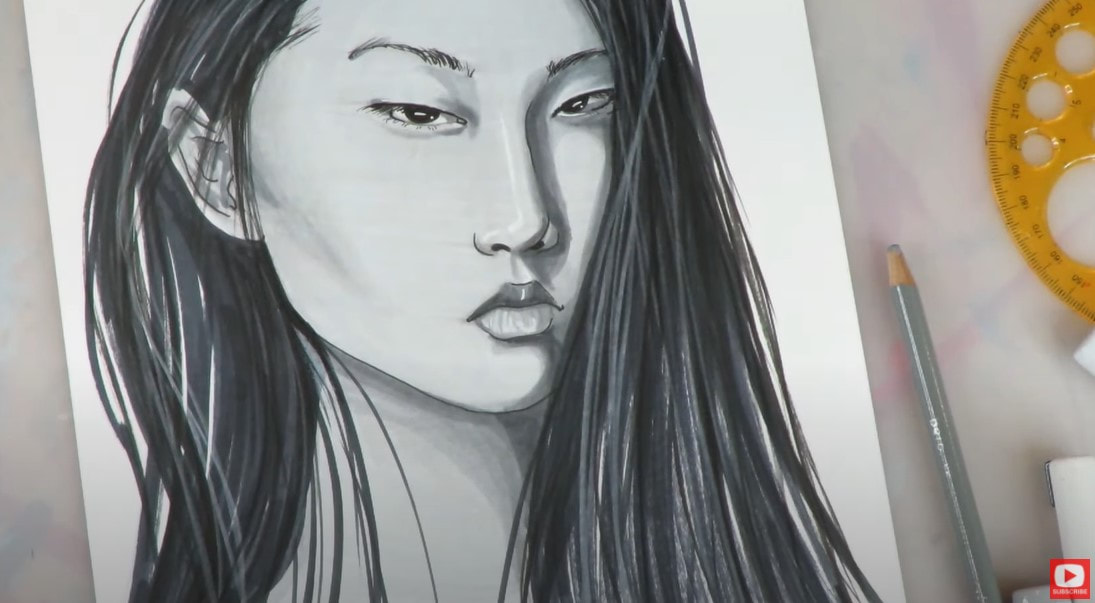 Remember I'm taking submissions of YOUR artwork for my upcoming book! Simply go to GET PUBLISHED, read the submission requirements and submit whatever pieces you did from the Whimsical Women of the World Portrait Drawing series! If you're posting your work on instagram, use #WhimsicalWomen with your post so we can see what you've done!! I hope you enjoy today's drawing tutorial on YouTube!! See you soon!!! |
Karen CampbellFounder of Awesome Art School. Mixed Media Artist. Author of 19 Instructional Art Books! 
Whose work has appeared in...
   
 Archives
July 2024
Categories
All
|
 RSS Feed

"Karen is flipping hilarious and she's very real...I like the way she teaches in a way that really gives you confidence, whether you're a beginner or advanced there's always something new to learn!"
- Elizabeth W. |
What Fans Are SayingKaren, you are absolutely fabulous! You make me feel like I can draw anything. I have recently retired and finally have the time to do some of the art that I have loved since I was in school. I am really at the beginning of my art journey and I hope to learn as much as I can. Thank you for all you do. |
Contact ME |