
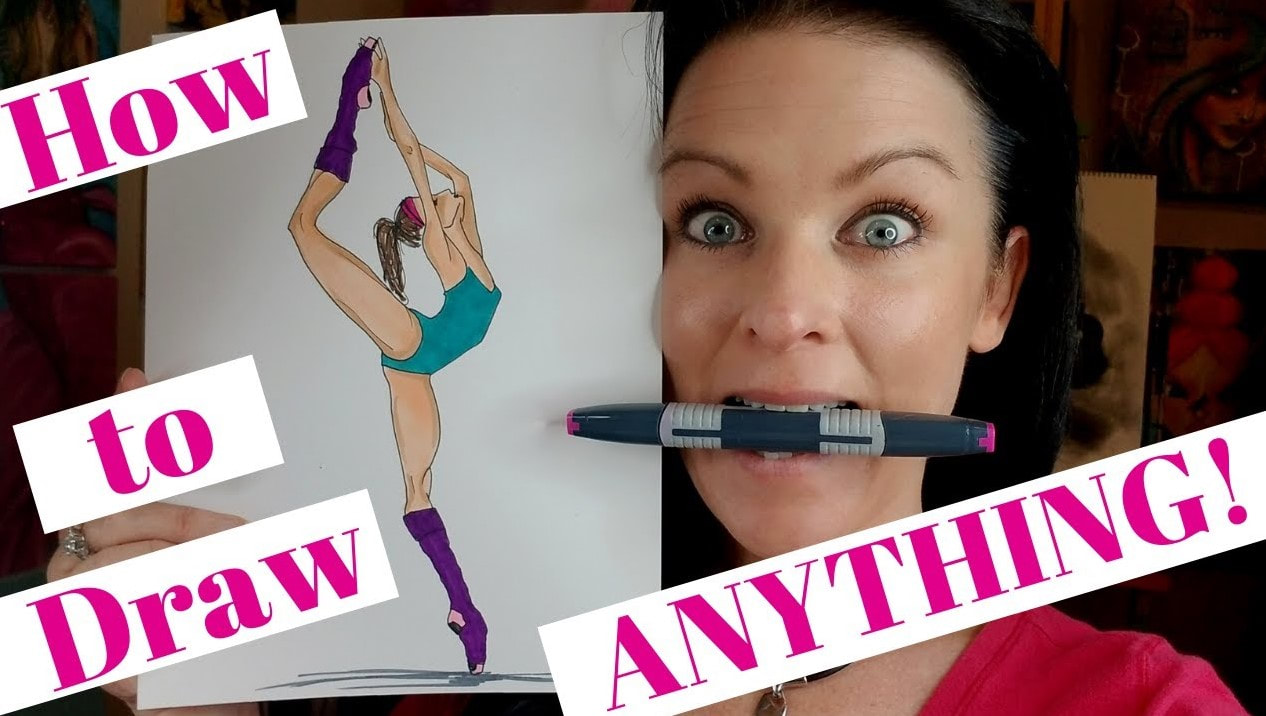
SKIN TONE MARKER SECRETS for Shading GORGEOUS FACES with Copics & Ohuhu Markers [NEW BOOK Flip Thru]27/4/2022
Today I'm spilling ALL my skin tone marker SECRETS for shading gorgeous faces with copics and ohuhu alcohol markers!
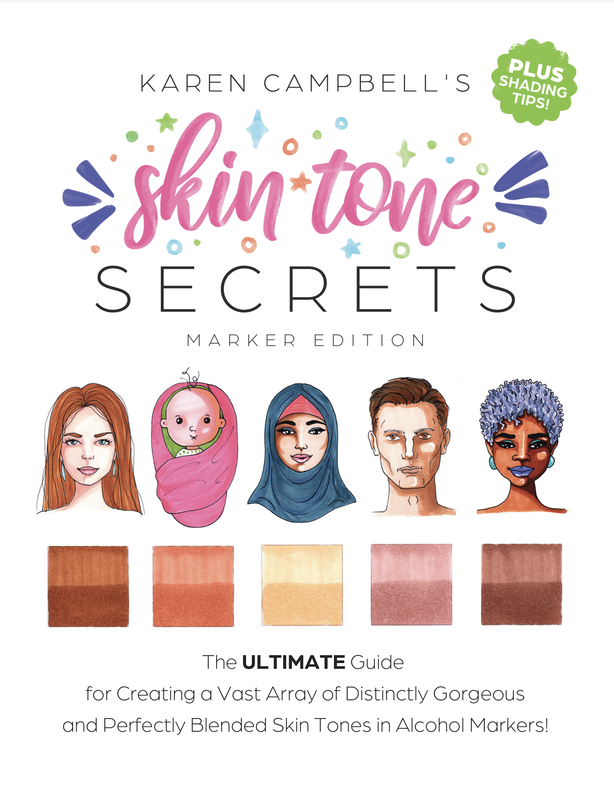
Get a sneak peek at my BEST ohuhu and copic marker blending tips & tricks inside my latest drawing book, "Skin Tone Secrets" - now on Amazons worldwide! Stay with me till the end of this video for a quick face shading demo on an adorable baby face. I'll show you just how EASY it is to add depth to your face drawings using my simple shading guide & just 3 alcohol markers! 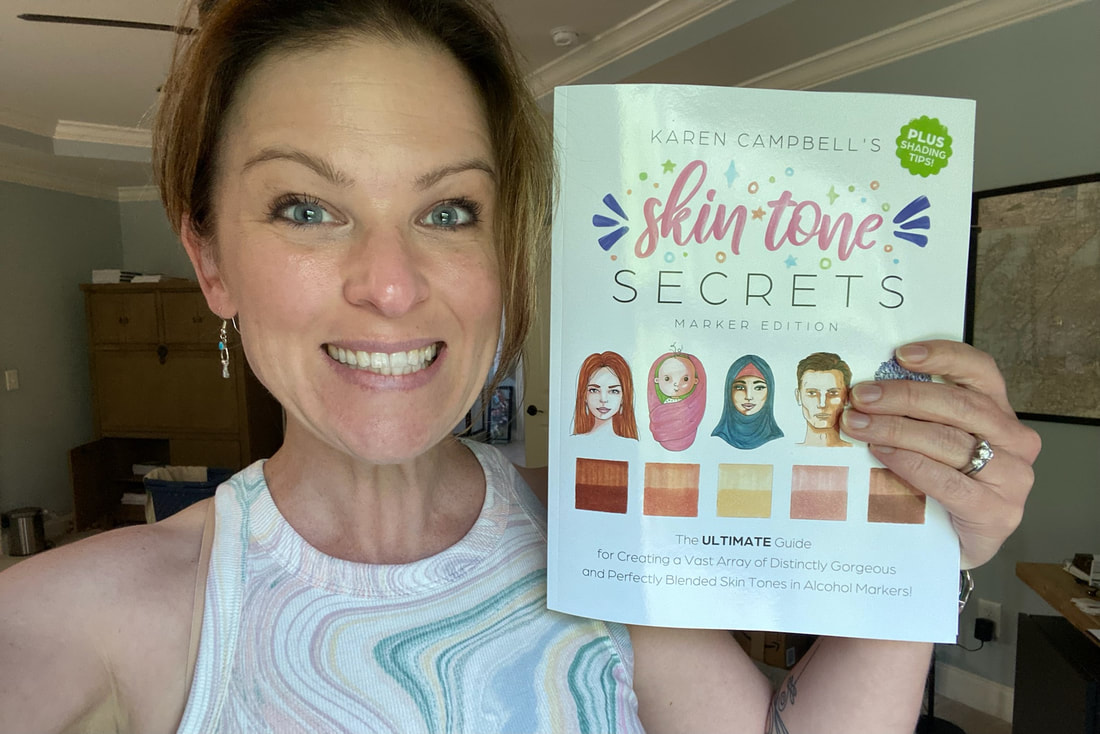
If you're not into drawing, but enjoy coloring (or just love any excuse to use your alcohol markers like I do!), I've got a FREE download just for you.
Simply click on the button below, and I'll send you a 25-Page PDF of Coloring Sheets with faces of all the characters in this fun, new book! 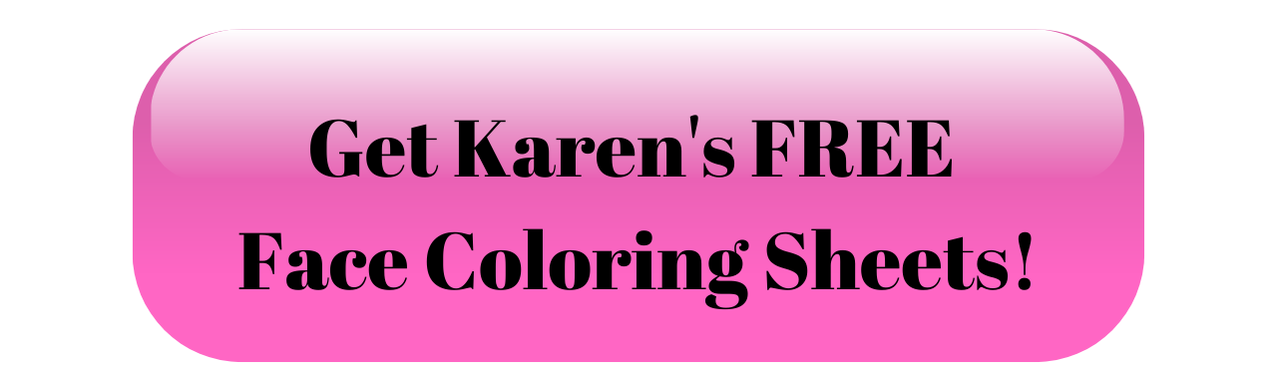
Print them out at home and use them for swatching and coloring away till your heart's content!
Before we continue, super quick announcement: All product links are Affiliate. I may earn a small commission if you choose to order through these links but by law there is never any additional cost to the consumer for doing so. I thank you for your support.
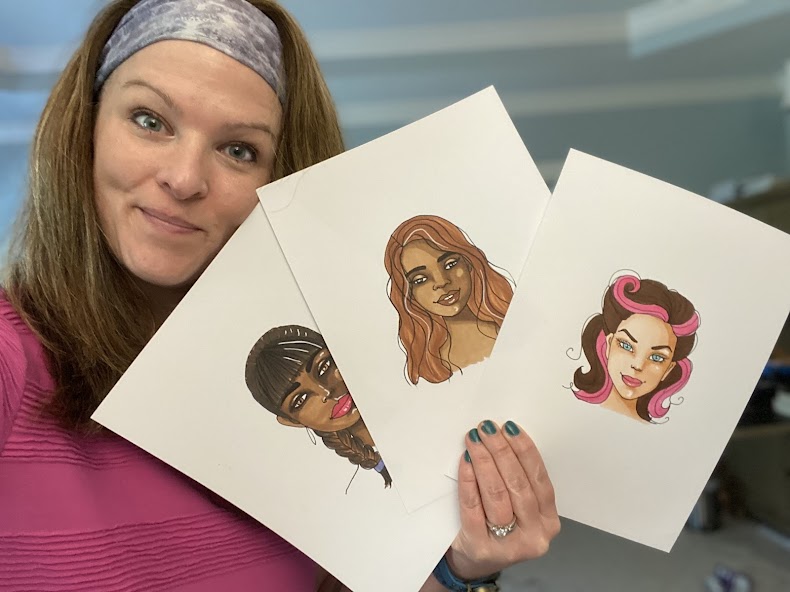
My students always ask me what alcohol marker paper I use for coloring. If you're printing these FREE coloring pages at home, I suggest you use a nice cardstock. My favorite is by Hammermill. I just buy a giant pack off Amazon and it lasts forever. The paper is super smooth, feels like Bristol, but is SO much cheaper!

As you'll see in today's video, my new book opens with a general overview of art markers and an intro about what makes alcohol markers so special (to ME, at least).
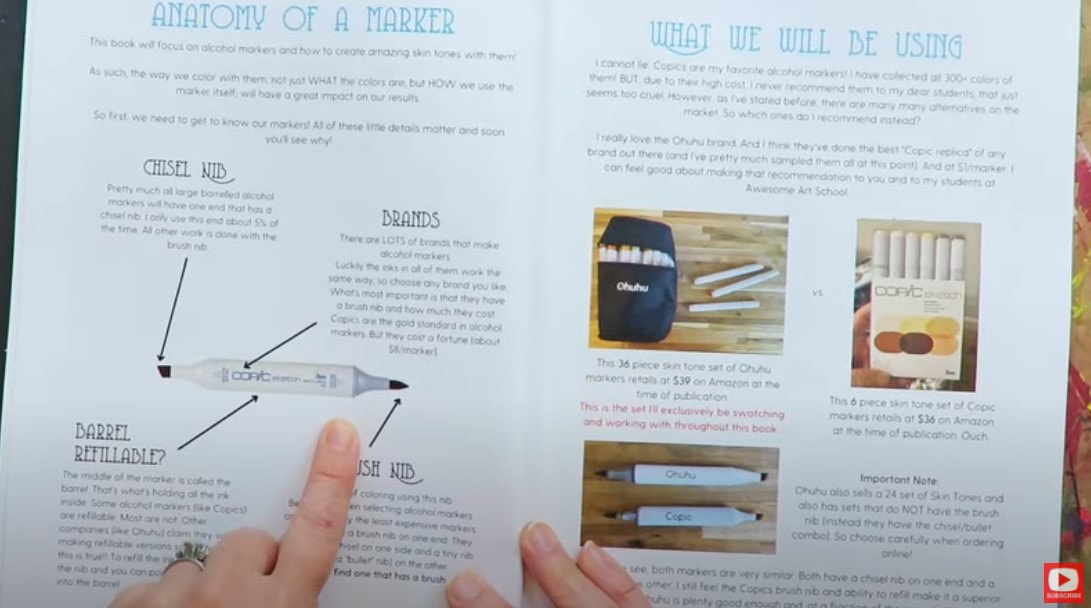
Next you'll get a quick overview of what I call "the anatomy" of an alcohol marker. Many have both chisel and brush tips, plus a refillable barrel.
As you can see off to the right in the above photo, I have two alcohol marker brands I recommend to my students and use ALL the time myself: Copics and Ohuhu brush markers. 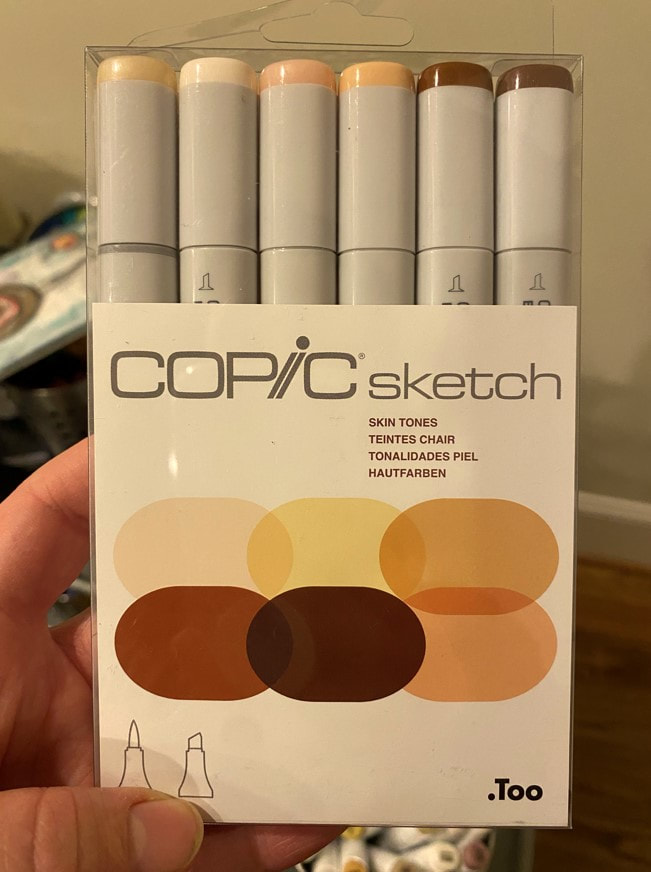
If you've been following me a while, you know I adore my copics and think they feel like butter sliding across my paper.
The only catch is, they are super expensive (the above set of 6 skin tone copic markers on Amazon costs ~$36). I've spent years building my copic marker collection, and just about as long testing copic alternatives so I can recommend another brand to my students who want to enjoy high quality alcohol markers at a lower cost.
About a year ago, while I was working on another book, Whimsical Women of the World, I discoverd an amazing brand of alcohol markers for a fraction of the cost. If you look at the Ohuhu Skin Tone Set (below), there are FOUR TIMES the number of colors provided in the Copic marker skin tone set shown above.
That alone gets my attention, but the price for this ohuhu marker set on Amazon is even better- just $30! It's a no-brainer, right? 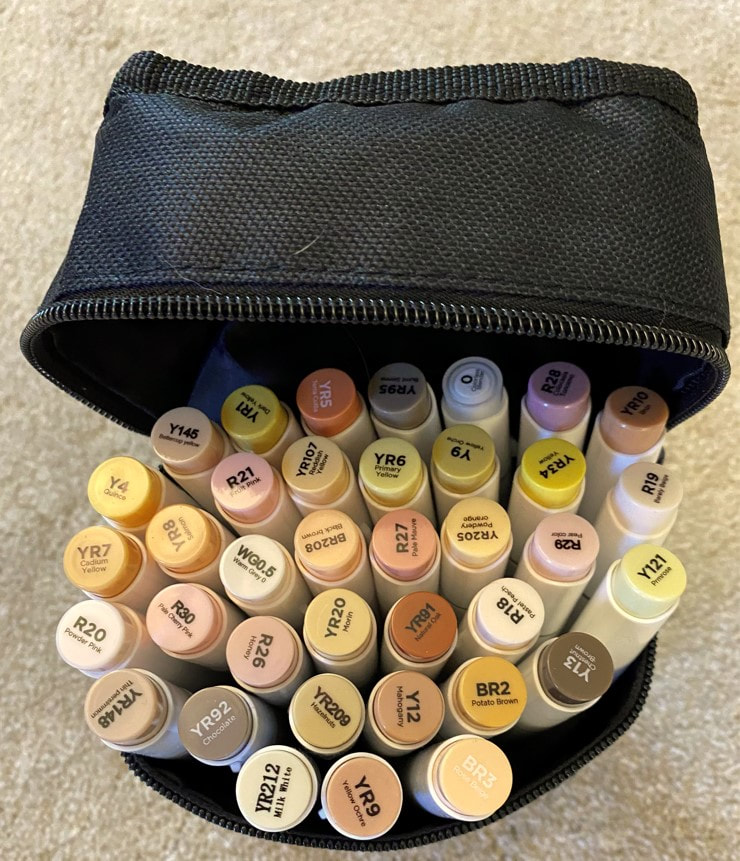
I adore my Ohuhu skin tone marker set and recommend it all the time! There is such a huge array of colors to shade beautiful faces for any and every ethnicity your heart desires. Even better- the quality of these alcohol markers is really up there with copics. Ohuhs also blend interchangeably and beautifully with copics - in case you've already started collecting those, or want to start!
Back to the flip through...
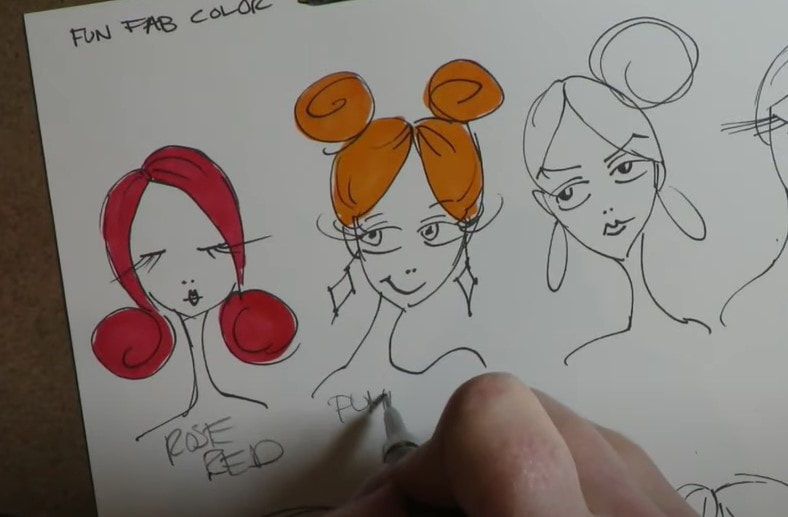
After I run through the basics about alcohol markers in Skin Tone Secrets, my favorite brands, which alcohol marker paper I recommend, how to layer and blend alcohol markers (while avoiding streaking), I'll take you through a series of cute characters that you can draw along with me. You'll notice I spend extra time on their fun hairstyles because TONS of people struggle with how to draw hair. In this book you'll get a little bit of everything from how to draw straight hair and updos, to long hair, short hair, ideas for men and how to draw curly hair! 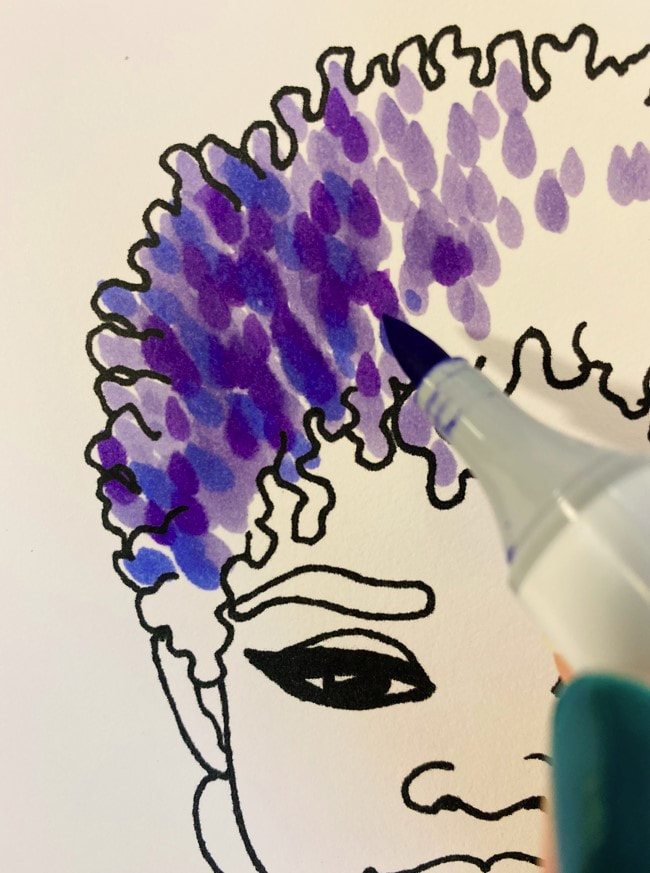
You'll also get TONS of super helpful tips on how to shade faces - by imagining where the light source is coming from for each face you create. It's much easier than people think, once someone shows you how!
You'll also learn about my three FAVORITE face shading patterns and how those are replicated with alcohol markers. 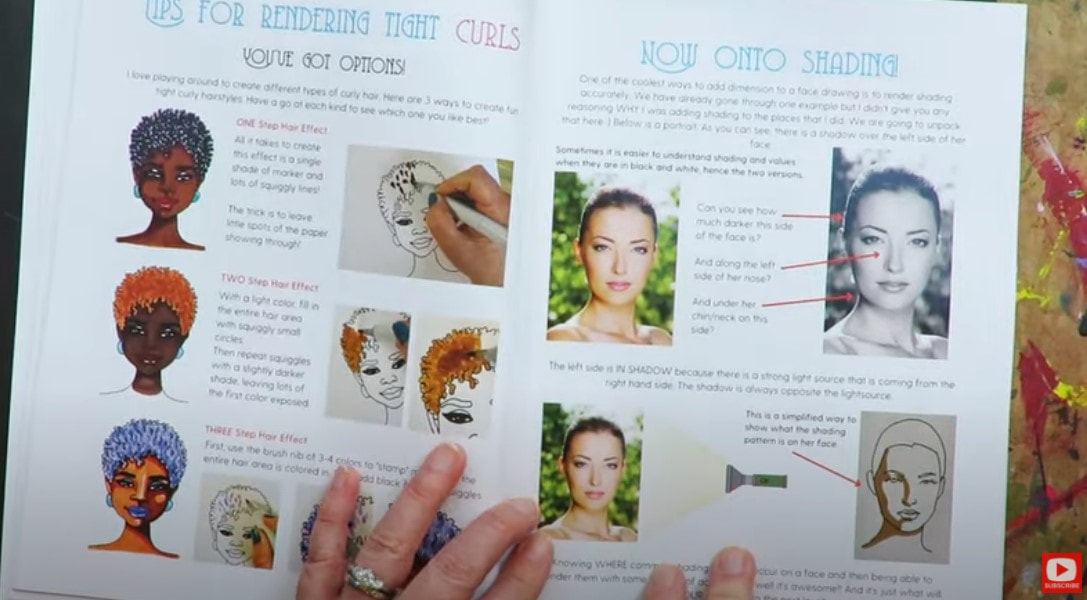
I've even put together a great reference sheet on WHERE to add highlights to your face shading. I'm ALWAYS asked about this, so hopefully this guide clears up any confusion and can become a simple cheatsheet for you to refer back to.
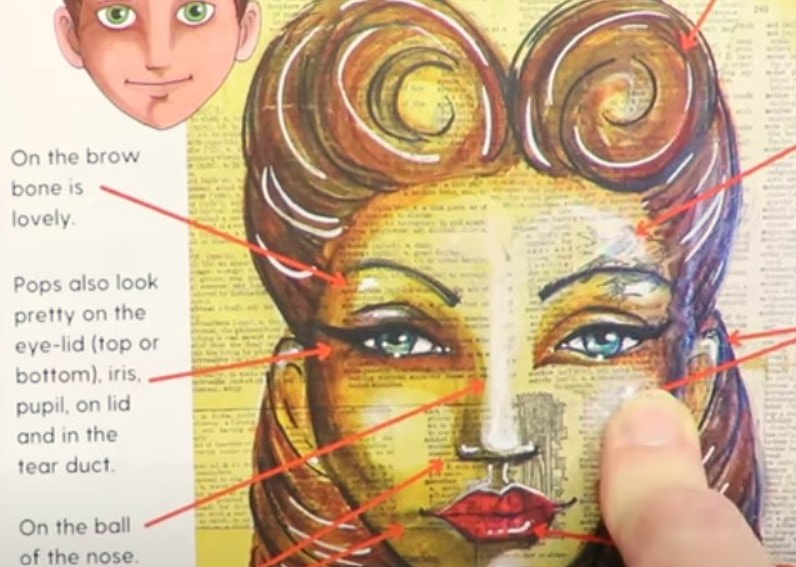
HOT TIP: As you can see in the pic above, these face highlighting tips work for shading faces mixed media style or in any kind of drawing from pencil to toned paper drawing and coloring with alcohol markers.
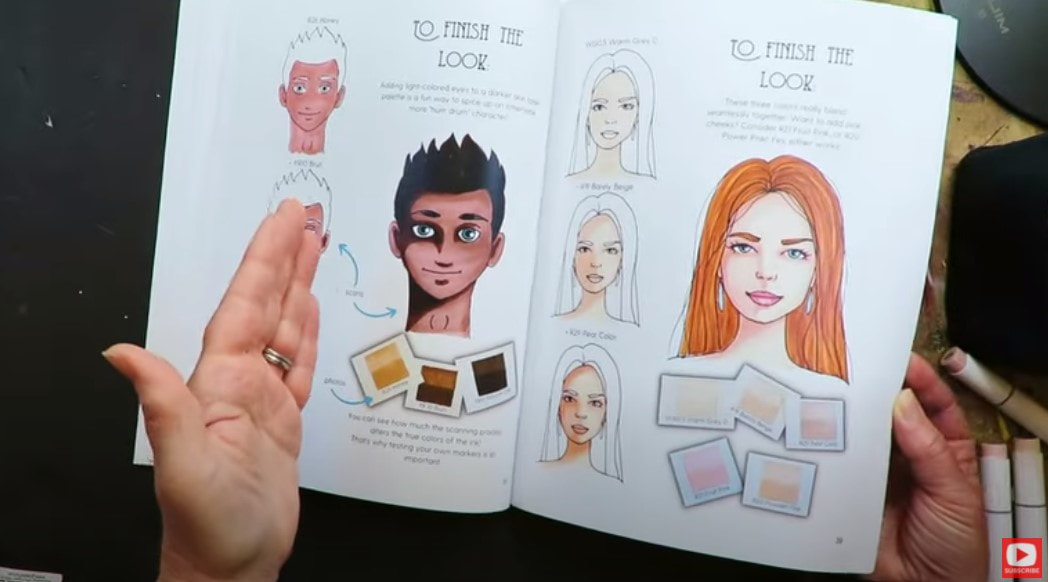
As the book continues, you'll learn exactly HOW and WHERE to layer three skin tone shades of markers on a face step by step, start to finish. I'll teach you exactly which 3-color combos go well together to create light, medium and dark skin tones and will show you the specific marker numbers I'm using in either Ohuhu or Copics.
If you're not into alcohol markers, this book can still be helpful to you because it contains so many valuable tips about how to shade a face. Those concepts are the same, no matter what art supply you want to work with!
Make sure you click over to watch the video so I can walk you through each page, and then show you exactly how to use this book to shade the cute little baby's face!
Are you a club member at Awesome Art School? The ebook version of Skin Tone Secrets is already in your library for free as an additional club perk ? Thanks for hanging out with me today! ❤️ CHECK OUT ALL my art books on AMAZON ❤️ MY FAVORITE ART SUPPLIES on AMAZON ❤️ MY BELOVED FACEBOOK GROUP ❤️ FOLLOW ME ON INSTAGRAM
1 Comment
I LOVE teaching people just how EASY it is to draw a face EVEN IF THEY'VE NEVER DRAWN A FACE BEFORE! Don't have a sketchbook yet? Don't worry! We're gonna start with the basics. All you need is a number 2 school pencil and a piece of paper to get started.
If you're a baby beginner at face drawing- you're in the right place! If you've been drawing faces for a while and want to take your drawings to the next level, you're ALSO in the right place!
Either way - you NEED my FREE whimsical face drawing guidelines. They're super easy to follow, and will help you draw proportional facial features every time. Simply click the button below to request your free guidelines cheatsheet, and I'll email it right over! 
My free face drawing guidelines cheetsheet will help you with today's face drawing tutorial, and is exactly what I use each and every time I draw a whimsical or semi realistic face!
Once you print that out, grab a sheet of any paper you have on hand, a pencil, and eraser and let's get started. 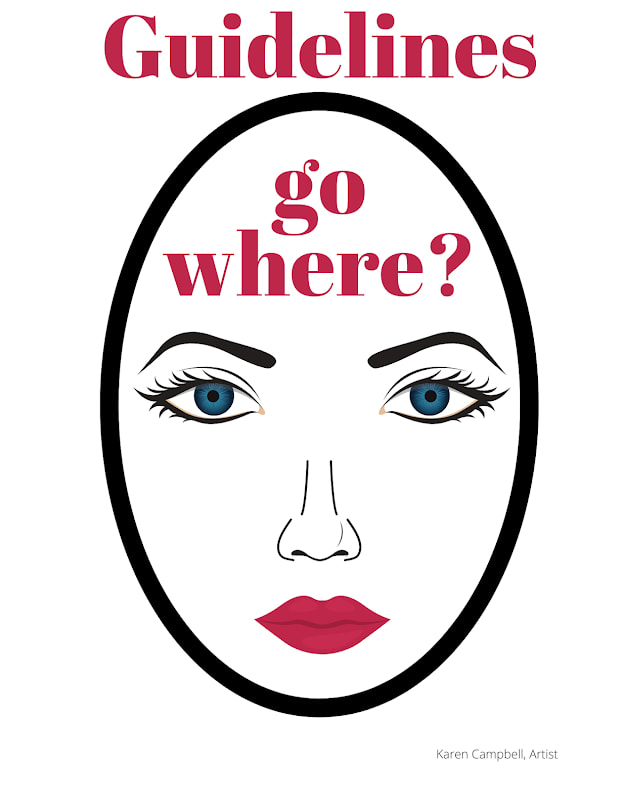
We start out by lightly sketching some large ovals on our paper. If you're totally new to drawing faces, draw as many as you need to - to warm up and get an oval you're happy with for today's face drawing project.
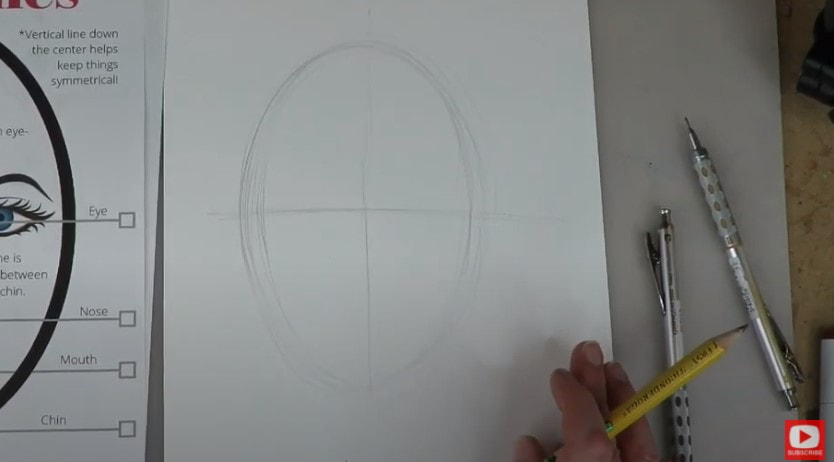
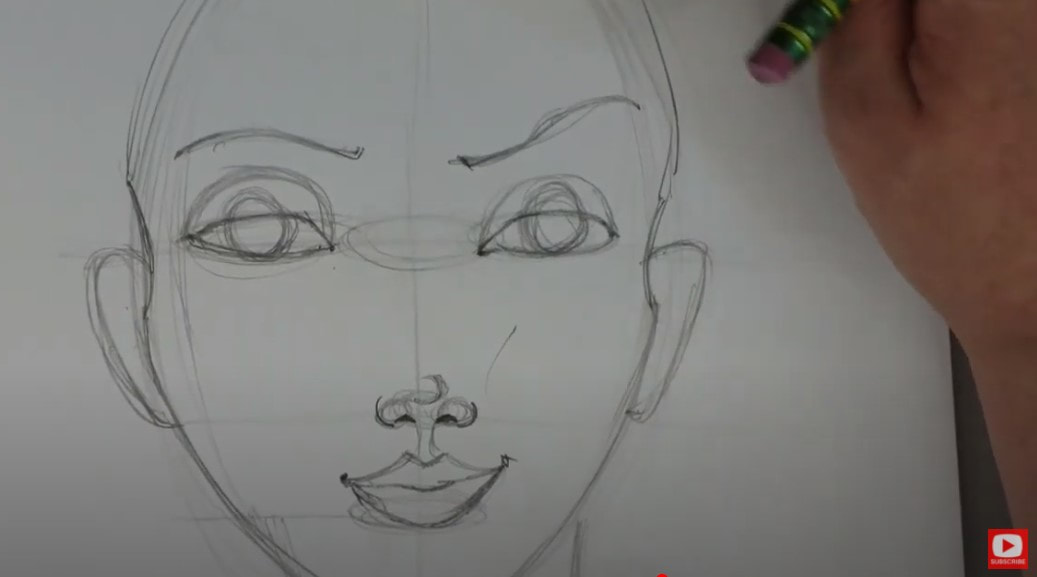
Next we're gonna simply sketch in the guidelines for where all the facial features need to sit on our oval. Even though I've drawn a zillion faces, I STILL ALWAYS sketch in my face drawing guidelines, each and every time because I dont want my faces to come out looking wonky. If I don't use guidelines, that's exactly what's gonna happen.
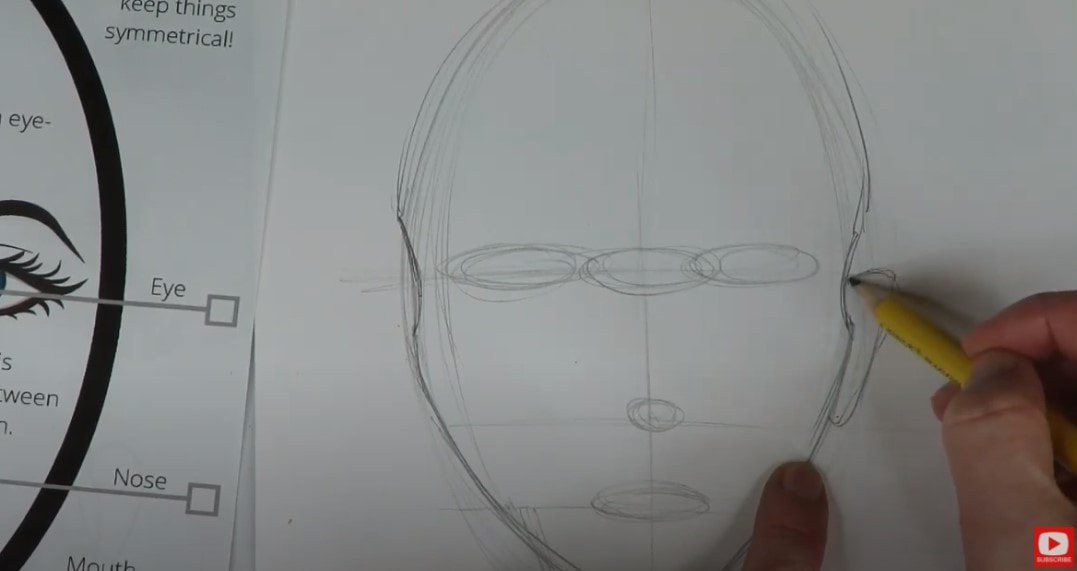
Once all my facial features have been penciled in, it's time to get ready to add some cute hair. Lots of people freak out about drawing hair, but I promise you - it's not nearly as hard as you think! Make sure you click over to the video so you see how simply this is in action.
The first step to drawing hair is to pick a part line - left, right or middle. Then you simply sketch in some lines extending from your part. Make sure they go up and over the head shape, and into the head shape space because hair has volume in real life, and doesn't just sit on top of our head line. We want to show that in our drawing.
Make sure you click over to the video to see just how easy this is! When your drawing is done - keep on watching so you can take your drawing one step further. First, we'll shade her and add dimension with pencil... 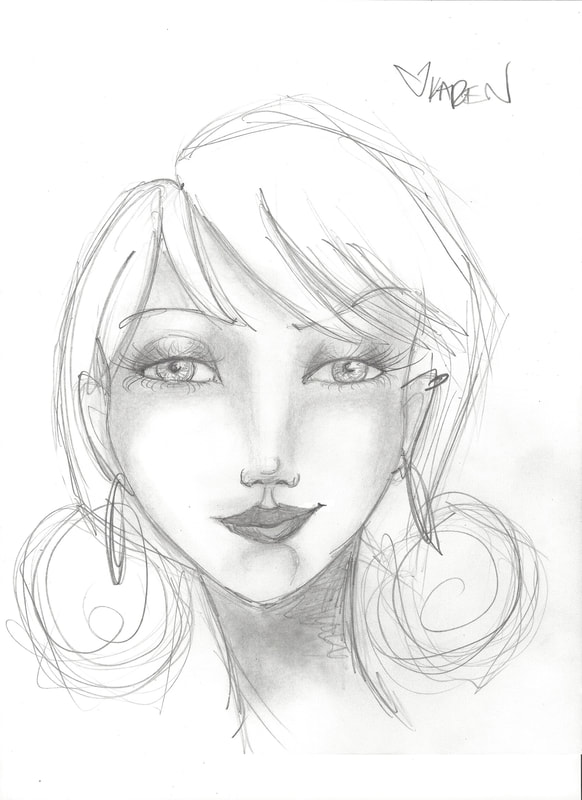
Then, I'll teach you how to shade a face using alcohol markers! 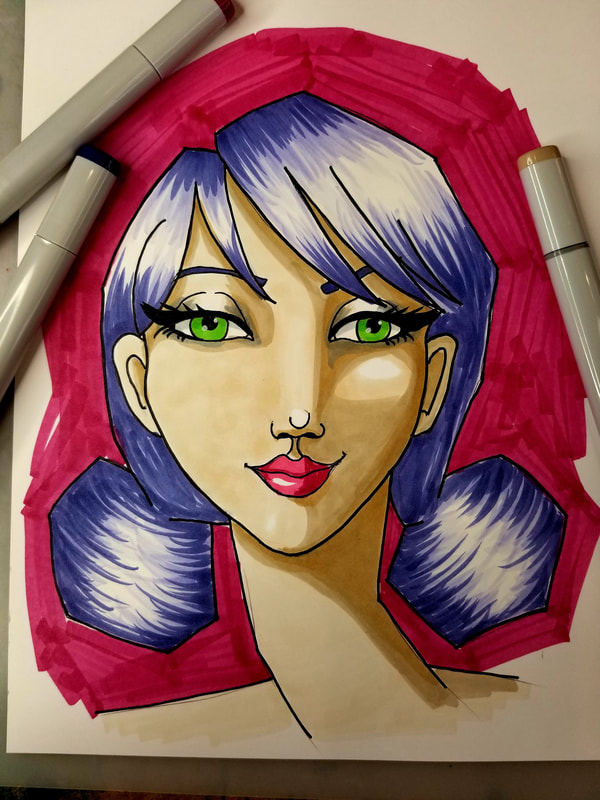
Thanks for hanging out with me today!
❤️ CHECK OUT ALL my art books on AMAZON ❤️ MY FAVORITE ART SUPPLIES on AMAZON ❤️ MY BELOVED FACEBOOK GROUP ❤️ FOLLOW ME ON INSTAGRAM
I've been using Polina Bright brushes in ALL my watercolor and fountain pen ink paintings for the past TWO YEARS!
I know I've told you I'm obsessed with both Polina's art AND her watercolor brushes, but I just got her latest watercolor brushes set & thought you'd love to see the unboxing! If you've been on the hunt for the best synthetic watercolor brushes, or an excellent watercolor brush set for beginners that you can GROW with - today's video is a MUST SEE!! 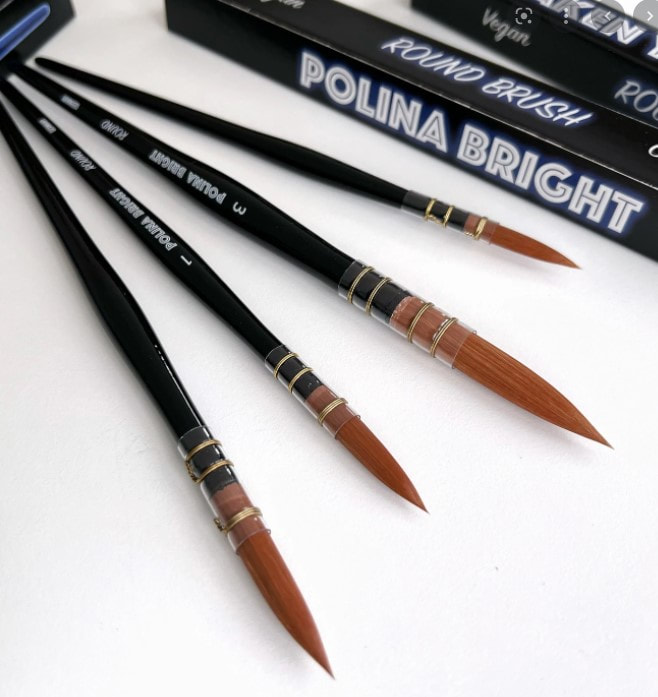
If you're new to watercolor, or have a brand new watercolor palette, make sure you grab my FREE Swatch Sheet so you can swatch your watercolors out before you do your next painting. Simply click on the button below, and I'll send it straight to your email!

Before we continue, super quick announcement: All product links are Affiliate. I may earn a small commission if you choose to order through these links but by law there is never any additional cost to the consumer for doing so. I thank you for your support.
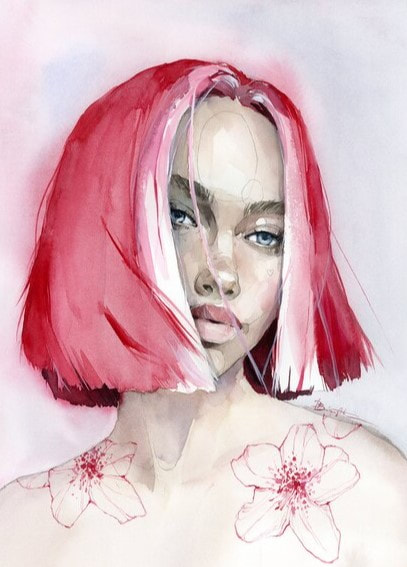
I first purchased Polina Bright's watercolor brushes a couple of years ago just because I love her work (example below), and wanted to support her. I had no idea I would fall so in love with her brushes, or that they would become my absolute favorites for watercoloring and mixed media painting with fountain pen ink, water soluble pencils, pens, markers- you name it!
If you're interested in buying any of these watercolor brushes to try out yourself, Polina created a coupon code for all of my followers. You can SAVE 10% when you purchase brushes on her website. Simply enter the coupon code of my name in all caps, KARENCAMPBELL at checkout.
I used to only be a fan of watercolor brushes with natural bristles (like those found in Black Velvet brushes - at right below), because of their ability to hold MORE water than synthetic brushes.
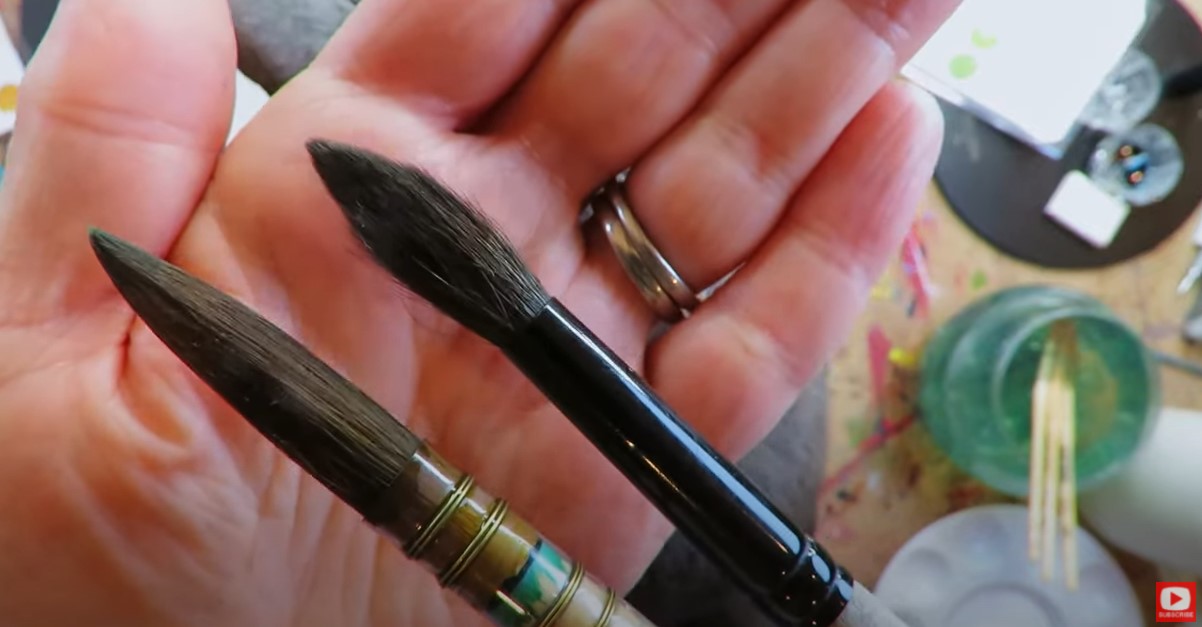
Whatever synthetic material Polina uses to create these brushes, holds water extremely well. I think their ability to absorb so much water also has something to do with the shape of her bristles and their length.
The body of the bristles are about twice as long as those of the Silver Black Velvet brushes (above left).
Having a synthetic bristled brush that has the same absorbency as a natural bristled brush hasn't really been a thing in the world of commercial watercolor brushes, until now. 
As an animal lover, I REALLY love the fact that the bristles on Polina's brushes are vegan and cruelty free.
I also love things that are simple to identify. Polina's numbering system for her brushes just go from 0-3. Plus there is a "mop brush" (for laying down large swaths of color), and a "rigger brush" (for detail work). Easy! 
Hop over to the video to see these beauties in action! I demo a quick comparison against a Silver Black Velvet watercolor brush.
Then, if you're in the market for a new watercolor brush set -make sure you take the coupon code of my name in all caps (KARENCAMPBELL) either to Polina's website to get 10% off! Thanks for hanging out with me today! ❤️ CHECK OUT ALL my art books on AMAZON ❤️ MY FAVORITE ART SUPPLIES on AMAZON ❤️ MY BELOVED FACEBOOK GROUP ❤️ FOLLOW ME ON INSTAGRAM
If you're new to the world of mixed media art, you're in THE BEST PLACE!! I have so many mixed media ideas, tutorials & tips for you.
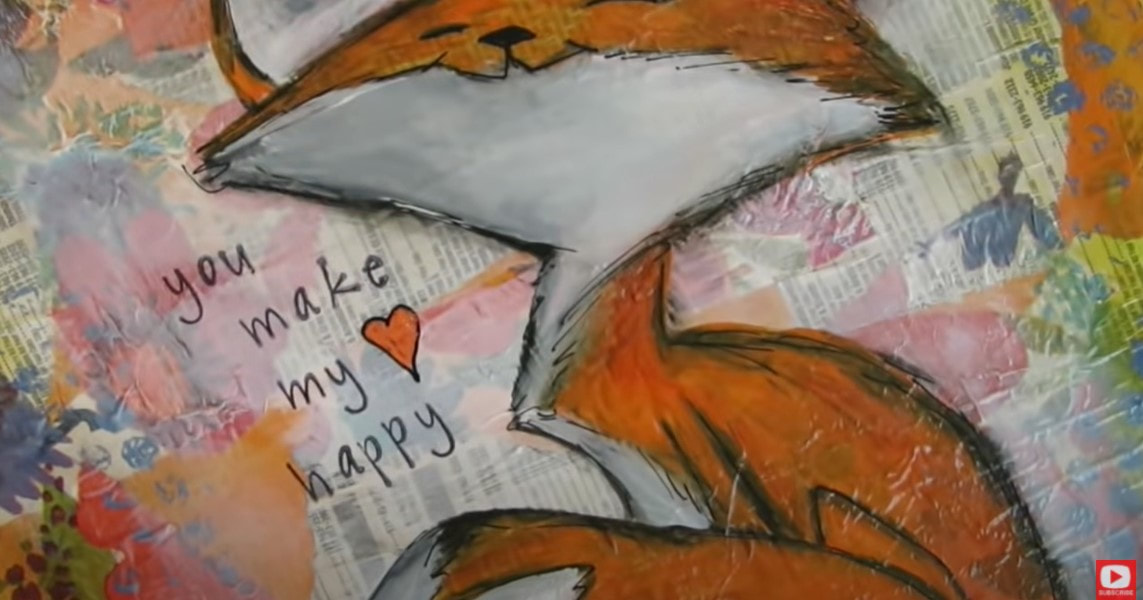
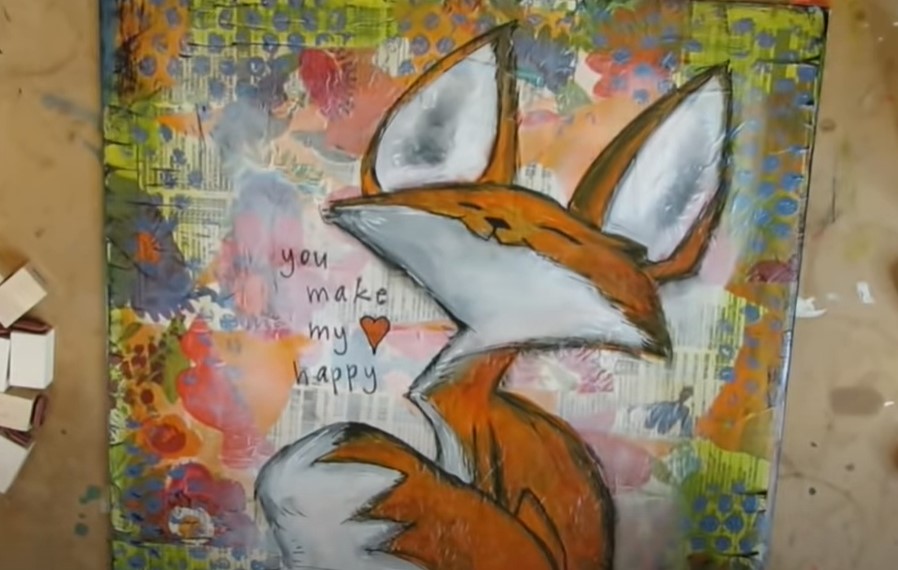
If you're intimidated by mixed media, or struggling with how to layer your supplies, I'd love to teach you my SIMPLE mixed media technique for layering my supplies (it's the exact process I used to create this adorbale fall fox!).
Simply download my FREE Mixed Media Hamburger Cheatsheet. I know, "hamburger" sounds funny - but I pile on my art supply layers one by one - like I'm making the perfect burger. Click the button below, and you'll see exactly what I mean!
After you click the button above, you'll get an email with your cheatsheet. Make sure you print it out because it's an awesome reference to keep at your art table.
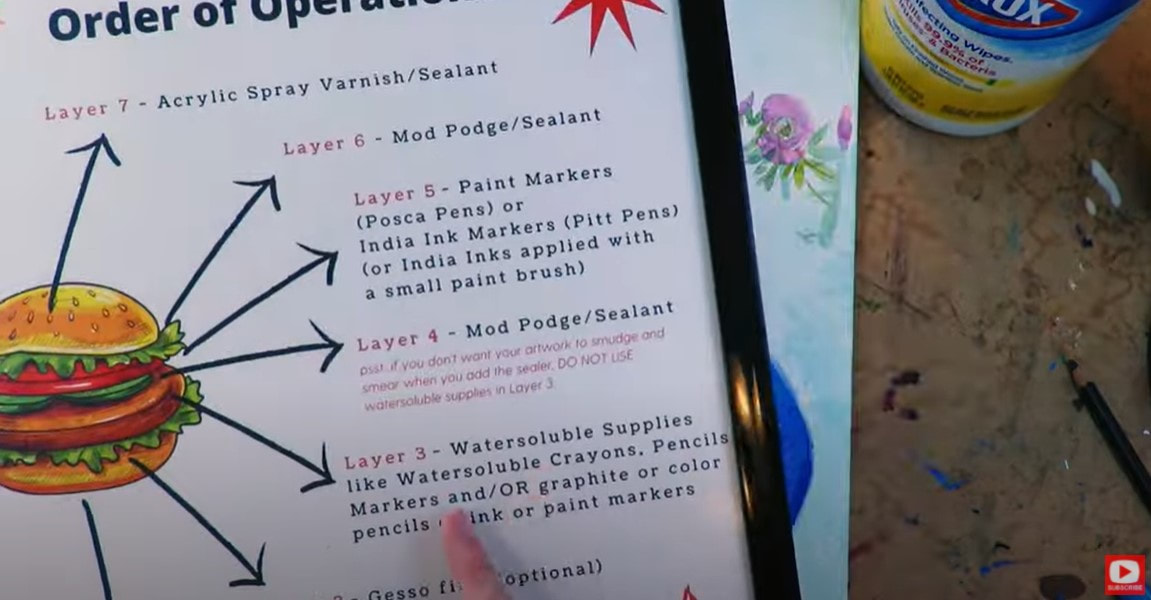
Now you're ready for action and have TWO choices...
#1: Learn how to make this adorable fall fox (stay right here & keep reading). OR #2: WATCH my entire FREE Mixed Media Hamburger Playlist on YouTube. There's a video for every single layer of the cheatsheet (you printed that out, right?!) to help you learn my signature process from start to finish, step by step. 
Before we continue, super quick announcement: All product links are Affiliate. I may earn a small commission if you choose to order through these links but by law there is never any additional cost to the consumer for doing so. I thank you for your support.
Yay! I'm glad you stayed. Let's get moving on the fox project!
If you haven't met me yet, you'll soon learn I love hoarding art supplies as much as the next girl, but I ALSO love saving money and upcycling thrift store finds for my art. One of my tricks is to purchase old record album covers to turn them into canvas! Kinda brilliant right? They're dirt cheap and I love the square shape. 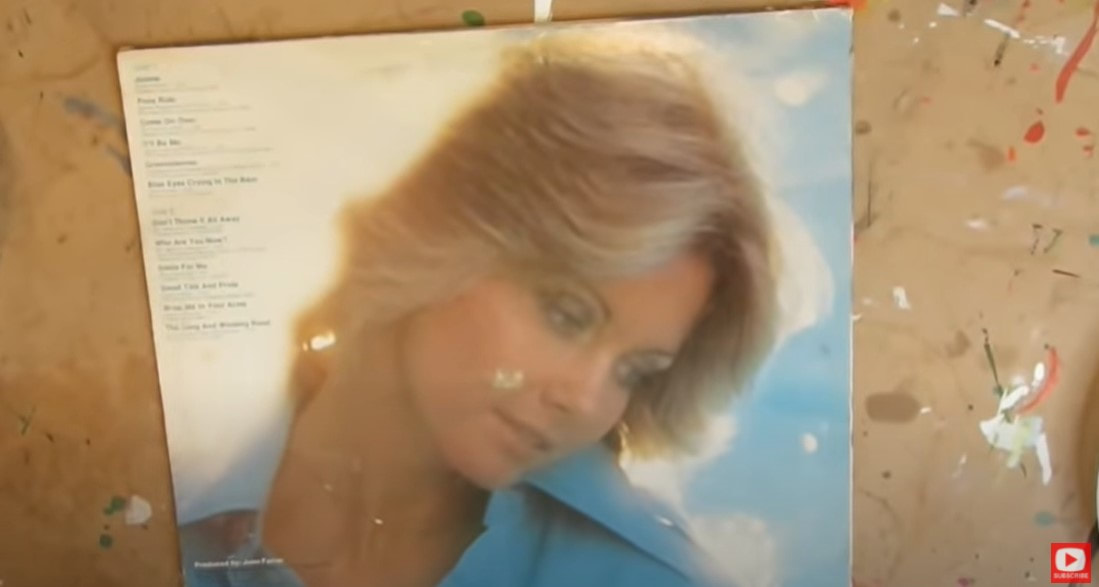
You can also create your own mixed media fox on canvas, canvas panel, or in an art journal (just make sure the paper is super thick -preferrably watercolor paper). Do what YOU love!
If you're upcycling any old surface like a once glossy record cover, we need to cover it with a light layer of gesso. 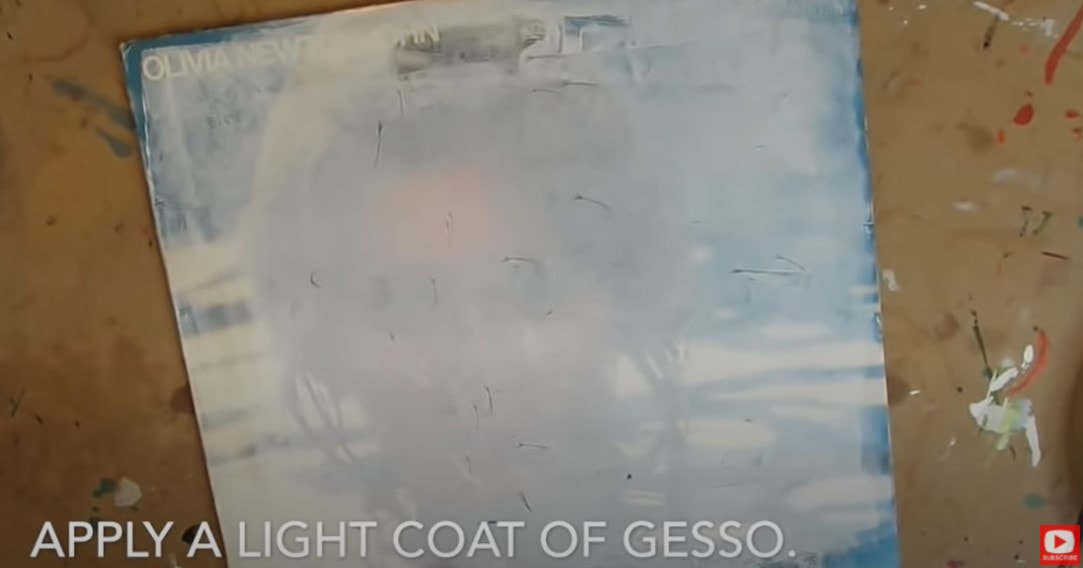
Now it's time to start painting!
Apply a thin layer of orange acrylic paint. I love acrylic paint by Lukas Cryl. I discovered it years ago when my kids were tiny and I was REALLY on a budget. This stuff is gorgeous and lasts forever. I've been recommending it to my students ever since. I wanted an edgey look, so instead of using a paint brush- I used the edge of an old credit card to spread the paint around. Looks cool, right? If you prefer using a paint brush, that's cool. Use whatever you have on hand. If you're looking for a new acrylic set of brushes, this is a great one. 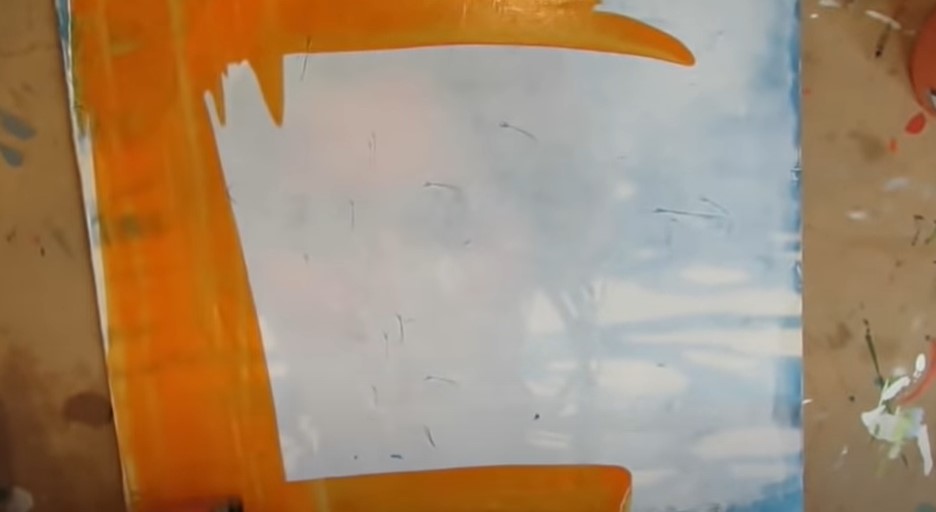
Another cool element to upcycle in your mixed media art for collage is phone book pages or thrift shop books! I always look for the books that are on their last legs. The paper is thin and perfect for mixed media collage.
For the fox, I ripped up a page from an old phone book. Does anyone even get these anymore?! ? 
Lots of people use mod podge to adhere collage pieces to their art journal pages and canvases, but I actually use matte medium. Why? It's designed to work with acrylic paint, and it actually has secret adhesive properties! I paint a thin layer on the bottom of my collage pieces, and another right on top.

Napkins and tissue paper are also excellent for mixed media collage. For this project, I had an adorable, floral napkin I was dying to incorporate. I peeled the napkin backing from the pattern side (this is really important because it makes your collage pieces thinner and easier to control). Then I ripped it into pieces and carefully adhered it to my piece.
If you struggle with getting the wrinkles out of your napkin pieces when you're collaging, this video is for you. It really demos my technique of using TONS of matte medium! I pour it on so there's a lot under my napkin pieces, and then coat them on top as well. If you think you're using too much matte medium, add more :) 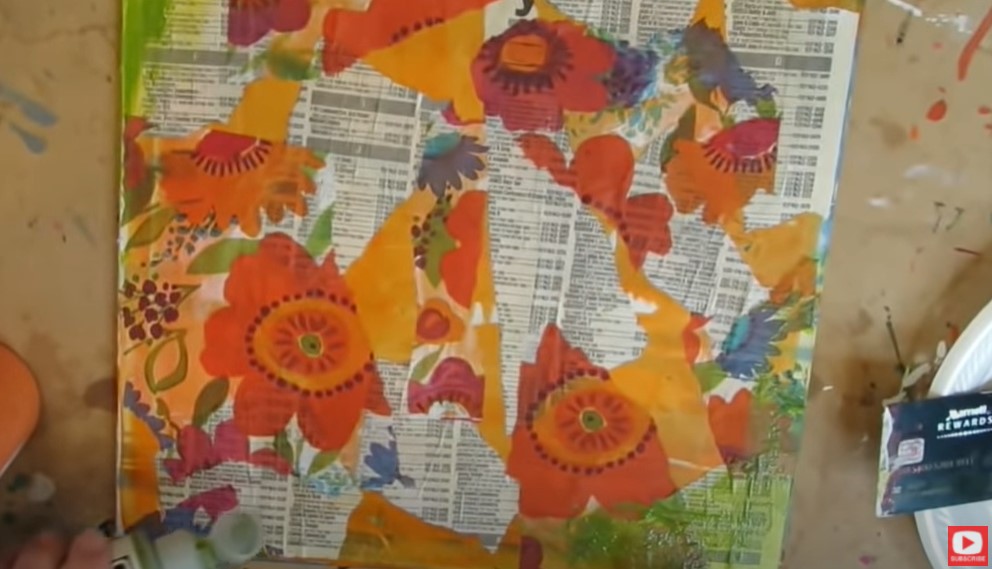
Next start adding in some acrylics that tie in with the color scheme from your napkin. I did a very thin layer and used my finger to spread it into the corners to kind of tie things together.
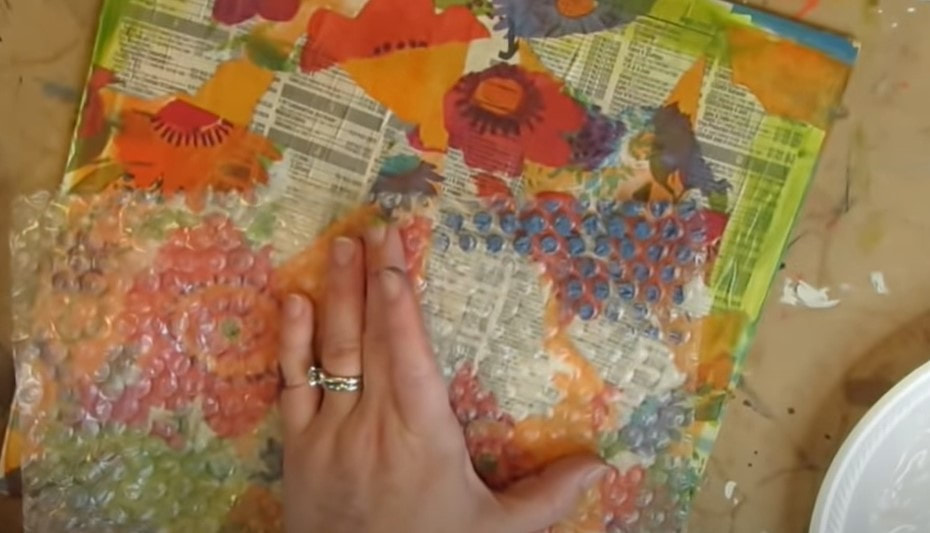
My next step was to add a bit of texture. I love the look of polka dots, and I've found that painting a bit of acrylics over a corner of bubble wrap looks AMAZING in the backgrounds of my mixed media portraits! I've been doing this trick for years, and it costs nothing! Win-win!!
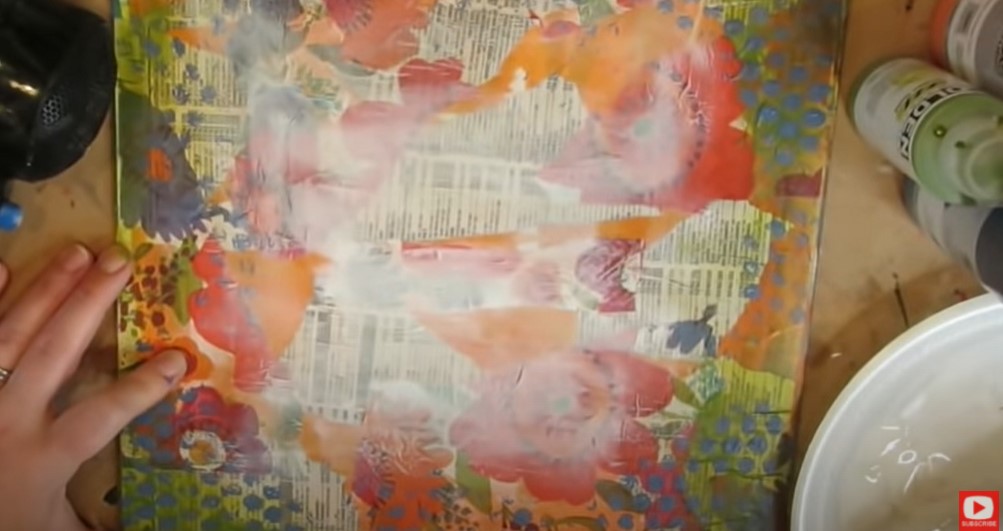
After I hit my layers up with my hair dryer, it's time to start making room for our adorable fox! To knock my background back a bit, I add a super thin layer of gesso all over in the middle of my piece. I used an old credit card here too, to keep that edgey look.
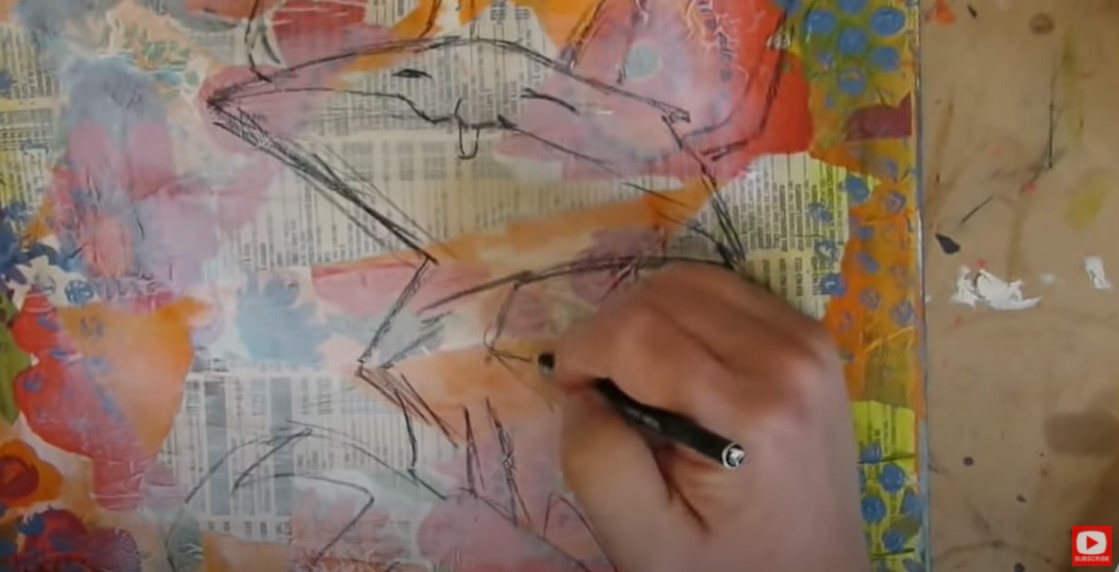
Next, I penciled in my fox outline. I used a black stabillo all pencil because I love how watersoluble it is. It smears when you add something wet to it from water to gesso. Some of my students don't like the unpredictability of the stabilo like I do. If you're one of these people, just use a pencil. When you like the way your drawing looks, start painting again with your acrylics.
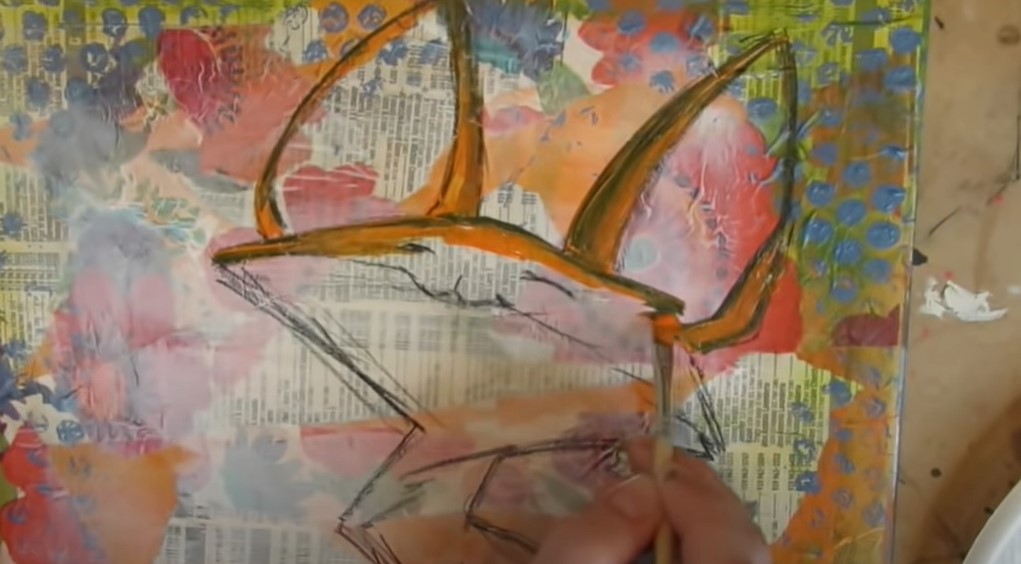
When it was time to start adding in that fluffy white fur, I used more white gesso instead of white acrylic paint. I tend to do this a lot in my mixed media work because I love how the collage layers will peek through gesso.
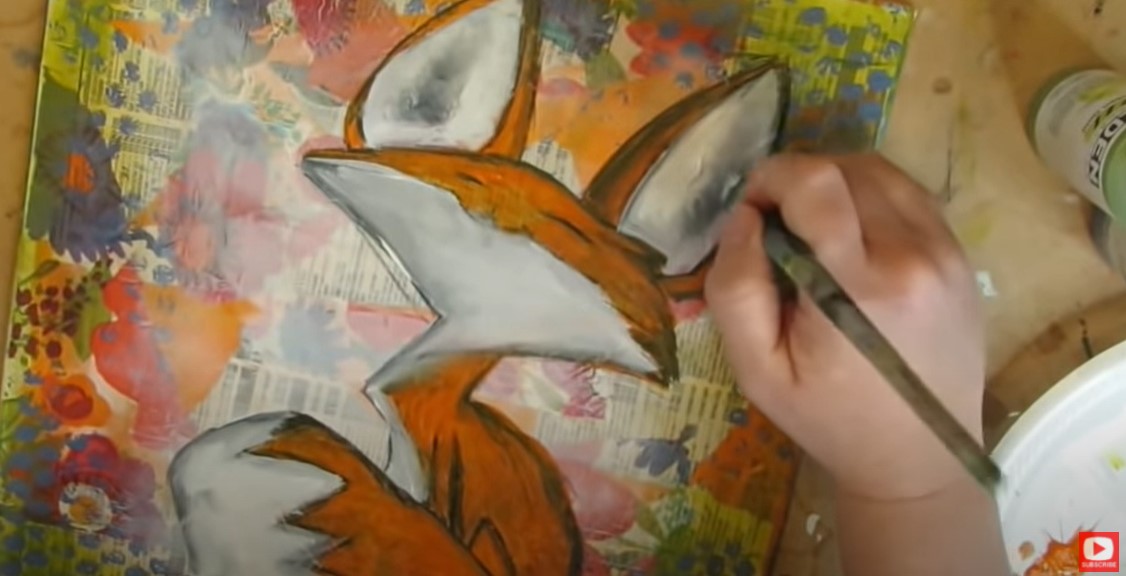
As you'll see in the video, my stabilo lines activated here and there when the gesso hit them. I love how that softened the fox's edges and helped add shading to my little guy without even trying!
Once I felt happy with my painting layer, I sealed it all in with a layer of matte mod podge. Be prepared because that stabilo can activate again when your mod podge hits it. 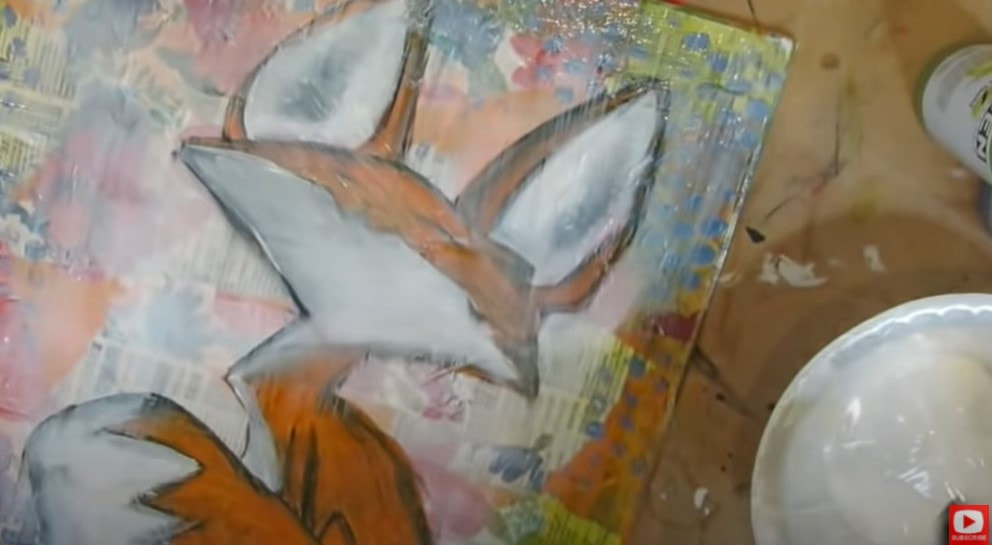
Let this dry completely. Just walk away and do something else for a while. Or if you're impatient like me... hit it with your hair dryer or heat gun again.
When the surface is slick and dry, it's time to "paint" with our pitt pens! I freaking LOVE this step. It's like ice skating when these babies hit your canvas! If you're following along with your Hamburger Cheatsheet, this is Layer #5. 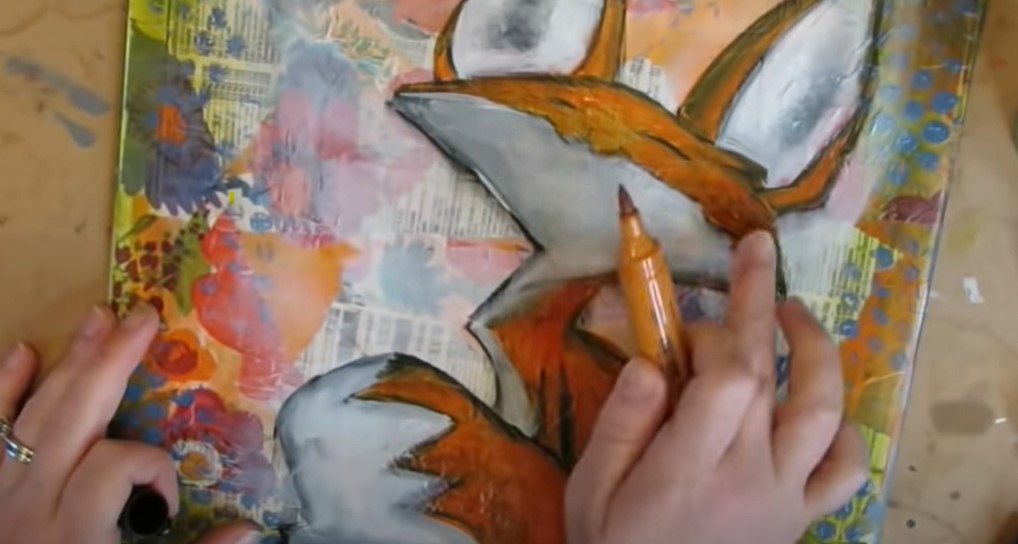
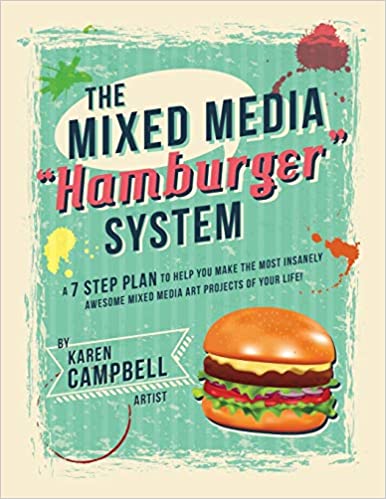
If you're loving the cheatsheet, this actually inspired not only the FREE 9-Part Series on YouTube, but a book by the same name as well. If you love the feel of a book in your hand, it's available on Amazon.
Once you're done "painting" and doodling with your pitt pens, it's time to add a cute quote. I love using stamps for quotes because I don't love my handwriting. Feel free to do either, or no quote! This is YOUR art.
Next to the last step is to pop in some highlights with a white paint pen. I love this simple set of three in varied nibs from Posca. I also love my Sharpie White Poster Paint Pen.

I love the look of a bold black outline, so you'll often see this in my work. I also love using a stamp pad and adding the look of black, distressed edging all the way around my canvas. Make sure you click over to the video to see exactly how it's done!
Just a quick heads up, when you do click over to this fun mixed media fox video, this was shot BEFORE I had even named my magical mixed media layering process, so you won't hear me talk about the burger layers in this video. You'll just see them in action, set to music!
Wanna learn TEN ways to save money with your art supplies? Check out this video. It explains how the layers in this very project can help you from buying out your local craft store :) Thanks for hanging out with me today! ❤️ CHECK OUT ALL MY ONLINE ART CLASSES & Art Clubs ❤️ CHECK OUT ALL my art books ❤️ MY FAVORITE ART SUPPLIES on AMAZON ❤️ MY BELOVED FACEBOOK GROUP FUN & EASY Male Fashion Illustration Sketches like Christopher Hart! [Perfect for Beginners]12/4/2022
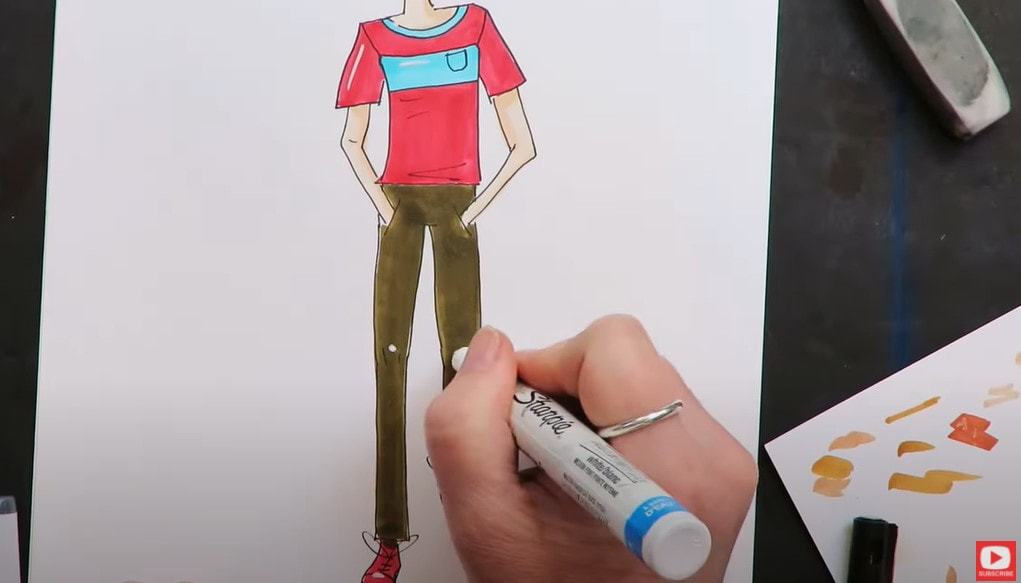
Feel like adding some MALE fashion illustration sketches to your sketchbook? I hear ya! I LOVE drawing female faces & fashions. But every once in a while- I like to mix things up and draw a dude.
Today we're sketching an EASY fashion illustration figure in pencil, and coloring him in with alcohol markers. He's simple enough to do even if you've never tried fashion figure sketching before. Grab a pencil, some markers & come draw with me! 
If you're new to drawing and coloring with alcohol markers, or have a brand new set of markers, make sure you grab my FREE Swatch Sheet so you can swatch your markers out before we get to the coloring portion of today's project. Simply click on the button below, and I'll send it straight to your email!

Before we continue, super quick announcement: All product links are Affiliate. I may earn a small commission if you choose to order through these links but by law there is never any additional cost to the consumer for doing so. I thank you for your support.
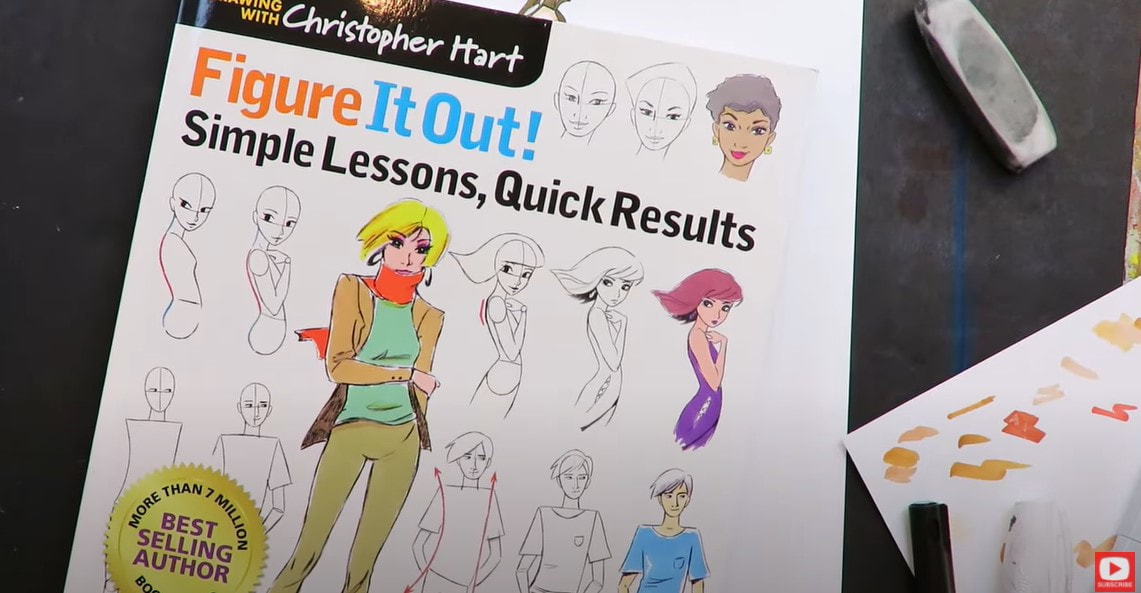
I can't wait to show you a flip through of the fashion sketching book that inspired today's video, Figure it Out! Simple Lessons, Quick Results by Christopher Hart. It's literally filled with lessons & drawing references that will keep you drawing for days.
A couple of weeks ago I did a female fashion sketch tutorial inspired by another one of Christopher Hart's books (I have ELEVEN of them because I LOVE him that much!). SO many people in my Facebook group were drawing along with me and I just loved it, so decided I had to do another one!
There are so many ways to draw the figure. I'm actually writing a new book right now about how to draw figures using my own Quadrant Method (check this video out if you want to see how the Quadrant Method works for figure drawing).
As I said in my previous Christopher Hart project video - I LOVE his instruction. It's clear, concise, and simple to follow.
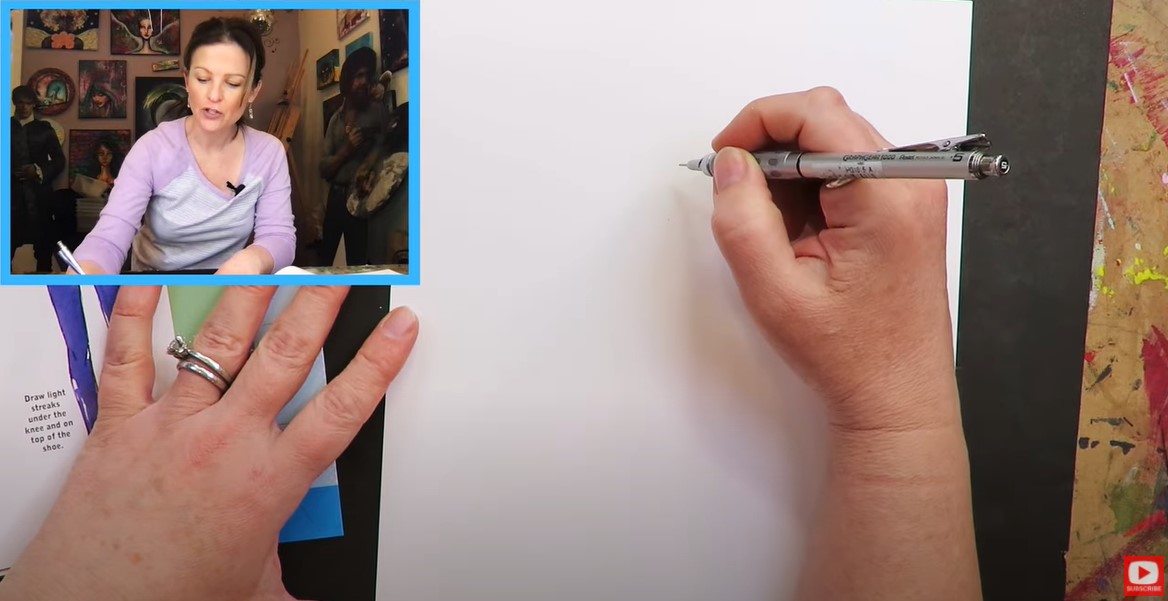
I'm using a mechanical pencil to sketch today's male fashion figure. I love the Graphgear Set by Pentel that I'm using in the video because it's weighted and helps me feel like I've got better control. 
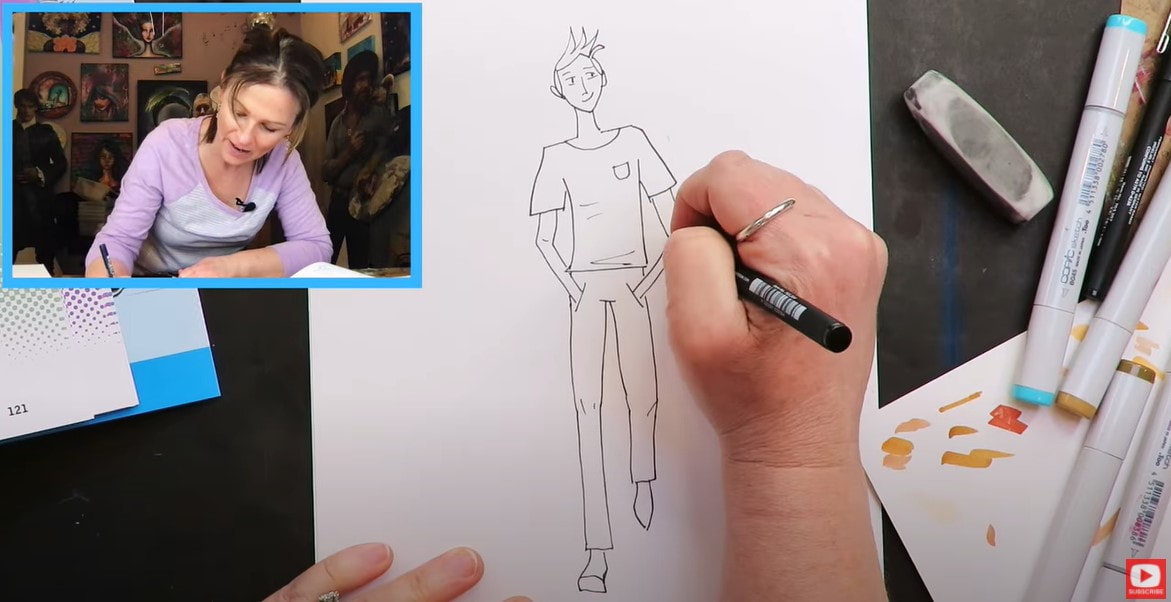
This particular drawing prompt from Christopher Hart shows the head tilted just a bit, as well as the shoulders. Since we're drawing a guy- the shoulders are fairly squared off and angular.
Our dude has a bit of a swagger in his step, which makes his torso curve. We're also drawing one leg "shorter" than the other to indicate he's in motion, mid-step. 
You'll notice the joints in fashion illustration are initially sketched in as balls or circles. These guidelines will get erased when the drawing is finished, leaving a gentle curve behind.
Fun fact about fashion figure sketching - the elbows of your figure should always end up at the waist of your model, so keep that guideline in mind as you're drawing. I love that this illustration has the guy's hands in his pockets! Makes things SO much easier - no fingers to worry about. If you are someone who wants to learn how to draw hands and fingers realistically, I've got a course over at Awesome Art School just for you, and a book of the same hand drawing projects on Amazon. 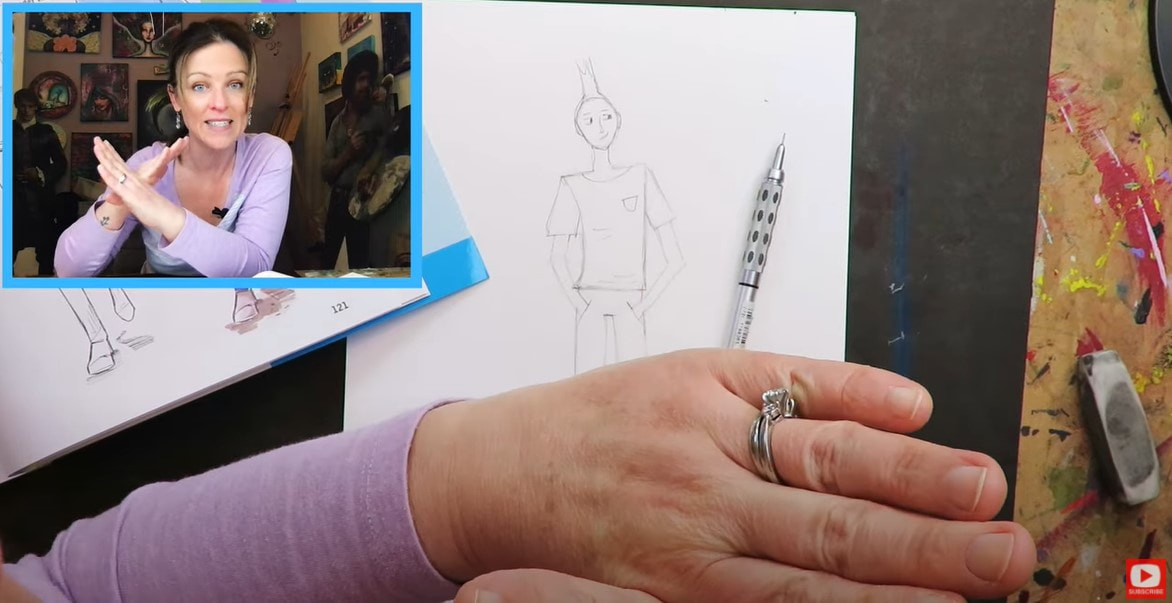
Once you've got the arms of today's guy sketched in, and have a little detail added to the pants and shirt, it's time to get rid of some of your guidelines.
I'm using my favorite vanish eraser. It's super gentle on your paper and really lifts the graphite quickly. They sell these at Jerry's Artarama for $2! If you don't have a Jerry's near you, you can also pick them up on Amazon at that link above. 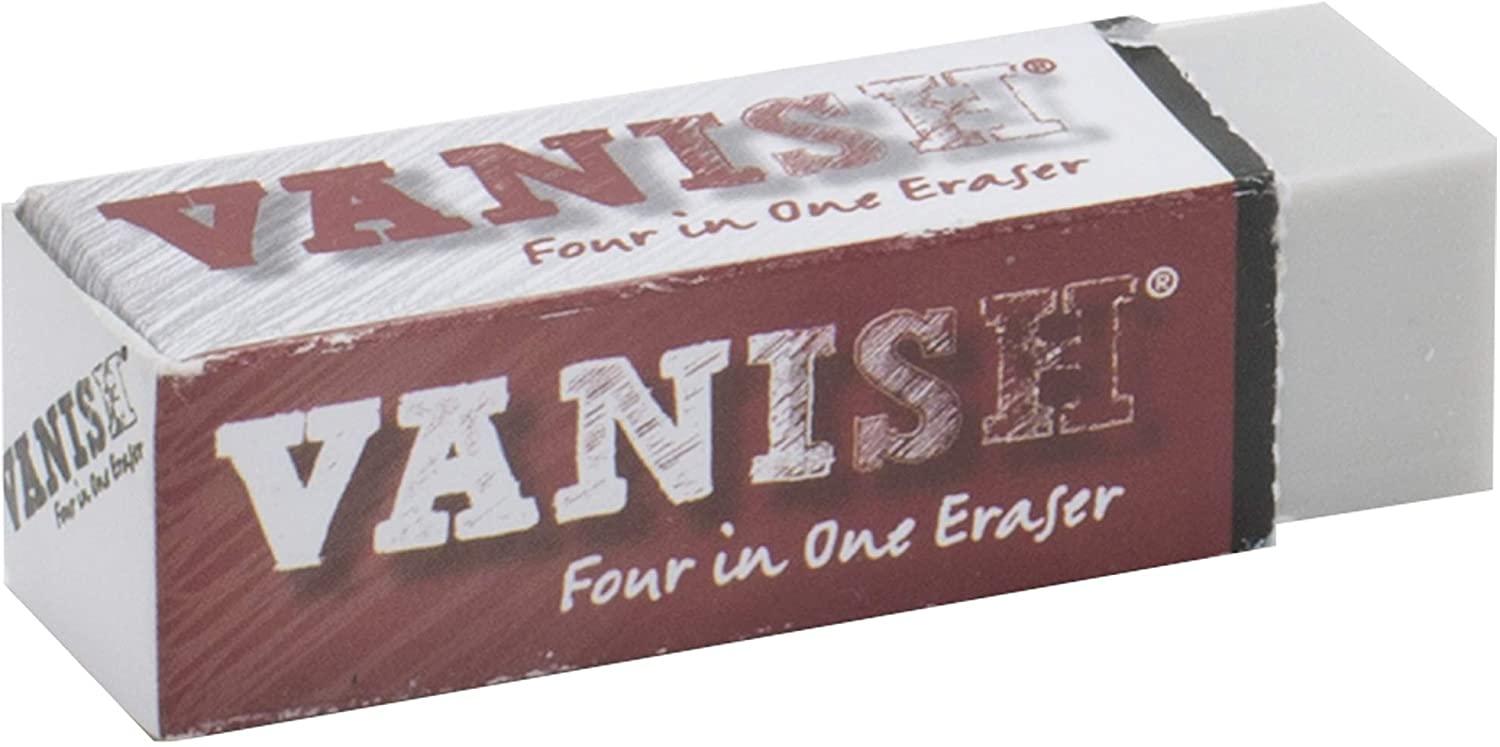
Super important tip if you're planning on using alcohol markers (Copics, Ohuhus, sharpies, etc.) to color your dude in...
You'll want to outline first in a fineliner, then erase all remaining graphite because if you color OVER graphite with your alcohol markers, the underlying graphite will smear. It can also really wreck/stain your lighter marker shades like yellows, light skin tones or pastels. You also need to really make sure you pay close attention to what your fineliners are made of. Alcohol markers blend beautifully with other alcohol markers. But... if you outline in sharpies (this is ALSO an alcohol marker)- you're gonna get smearing or "bleeding" because the fineliner is gonna try to blend with the alcohol markers you're shading with. Do yourself a favor and use a fineliner that's a water based or pigment based. This will ensure NO blending takes place where you don't want it. I love this set by Molotow. It's a great value (11 fineliners in a variety of nib sizes for around $28). 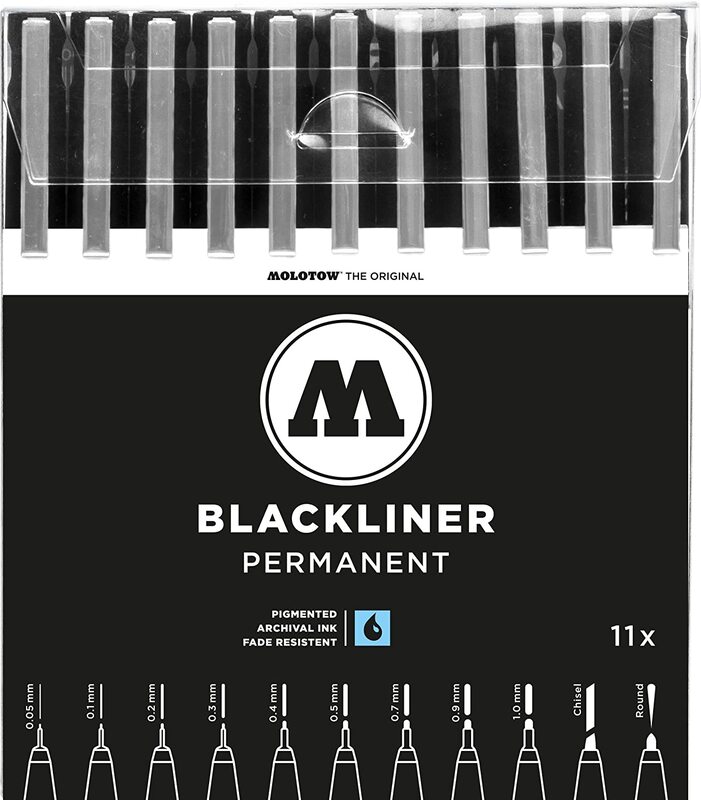
After your finelining is done, take another pass over the whole drawing with your eraser to make extra sure there is no remaining graphite.
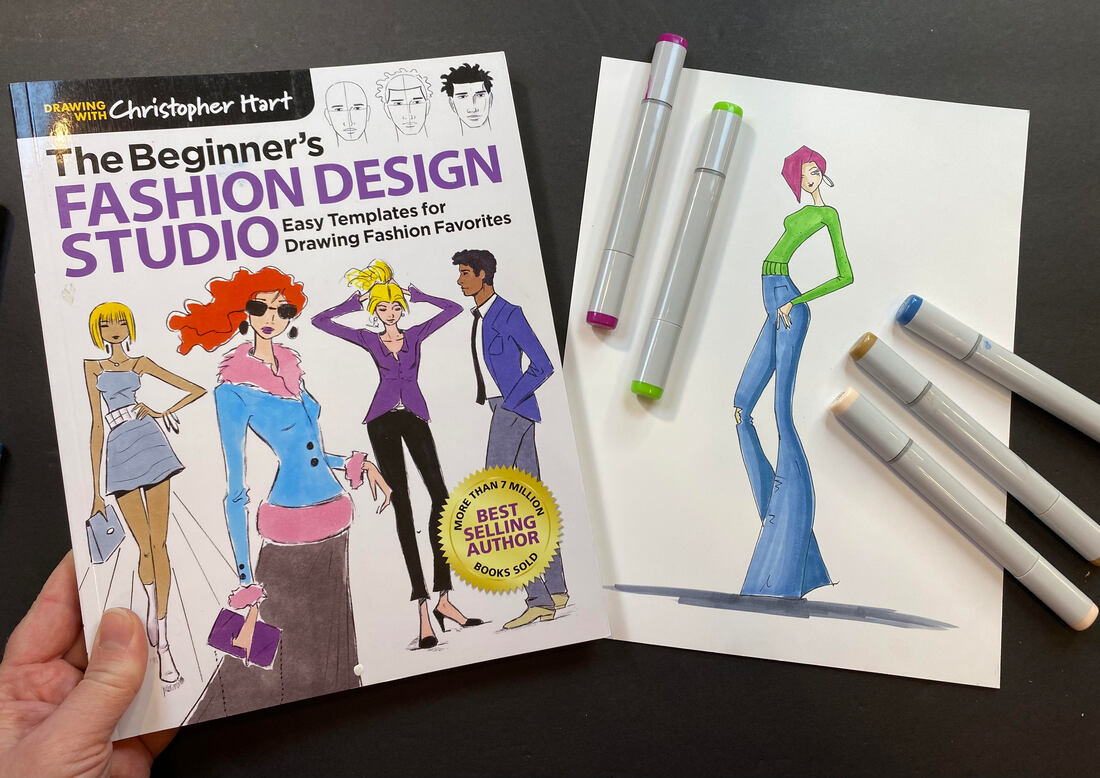
You'll notice just before I grabbed my fineliner, I decided I wasn't as in love with the mohawk I'd drawn in for my dude's hair as I thought I would be. My How to Draw Fun Fab Fellas drawing book was on my art table, so I decided to flip through it for a little men's hairstyle inspiration.
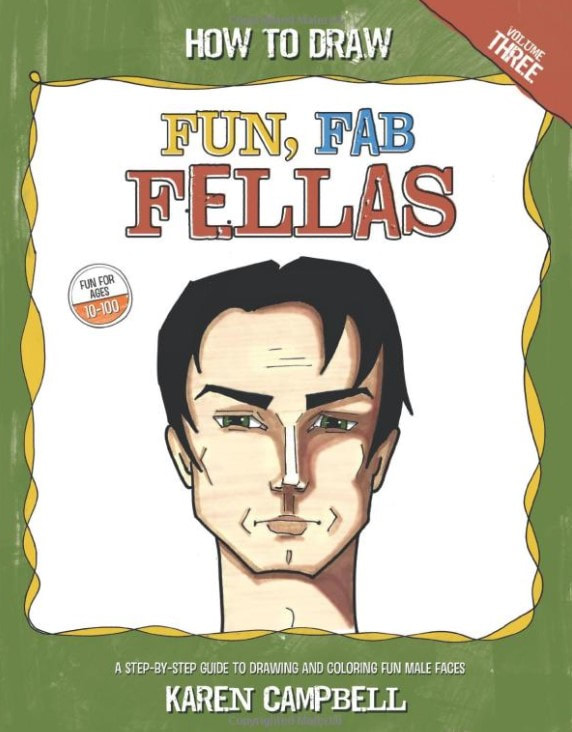
This book was part of my original How to Draw Fun Fab Faces trilogy, and came about because I've got three sons. They used to joke about how I only drew girls, so this book was kinda for them (and anyone out there who loves drawing faces or wants to learn how to draw a male face).
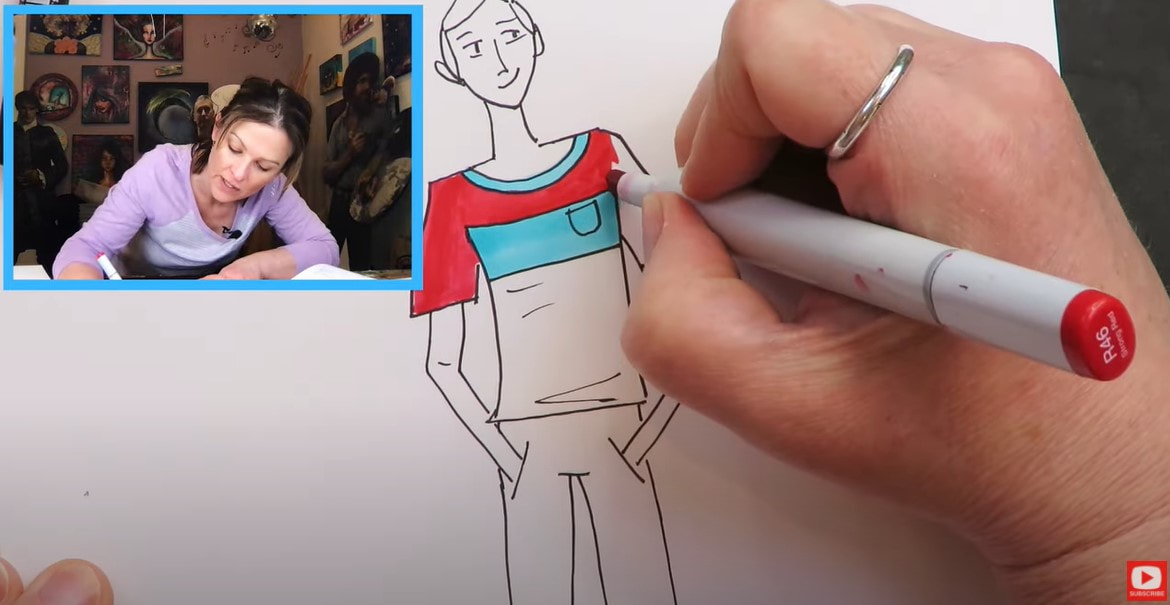
For coloring with alcohol markers (or really any art supply), I recommend you use at least 2 shades of the same color so you can show a little dimension in your shading. It just makes your drawings look so much more sophisticated.
If you don't have two shades of a color available - just use the same color and add another layer to darken parts of your drawing and indicate shadows. That's what I'm doing today. If you've been following me for a while, you know I'm in LOVE with my copic markers! But they cost an arm and a leg to collect (trust me- I've been adding to my collection for YEARS!). Usually I tell my students to purchase a set of Ohuhu alcohol markers because they're much cheaper and still great quality. You can get this giant set of 120 shades for around $99. I know $99 for markers still sounds kinda high - but if you want to play with the rainbow and not sacrifice quality, this is your brand. 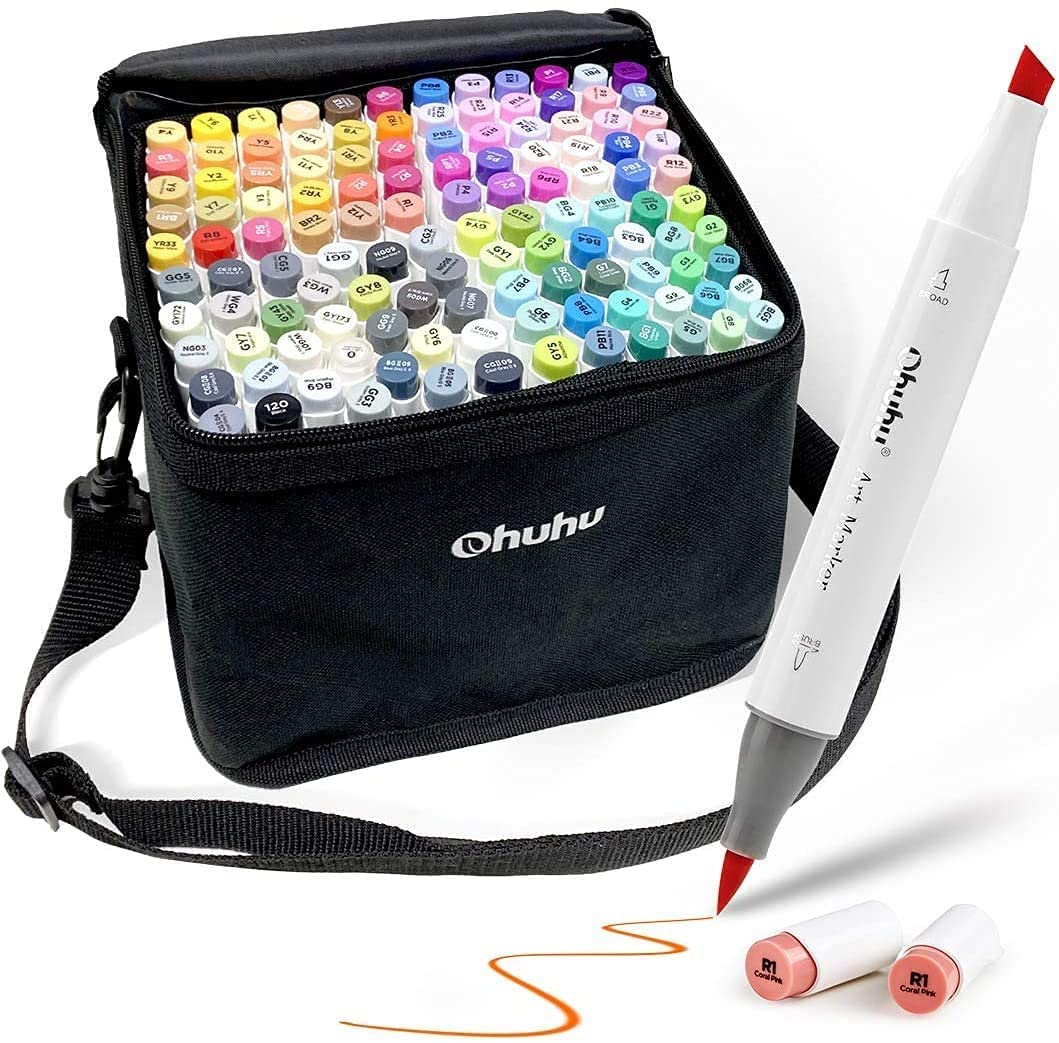
They have an excellent skin tone set too! Just for comparison, this Ohuhu skin tone set comes with 24 markers and runs around $30 on Amazon. The copic marker skin tone set (while gorgeous & top of the line), only comes with 6 markers and costs around $45.
If you're new to working with alcohol markers, watch this video - it's everything you need to know to get started. You can totally mix and match your alcohol marker brands too. So if you feel like splurging on a smaller set of copics and grabbing the Ohuhu skin tone set - they work beautifully together. I work with both brands interchangeably all the time! Can you tell I've mixed brands below? 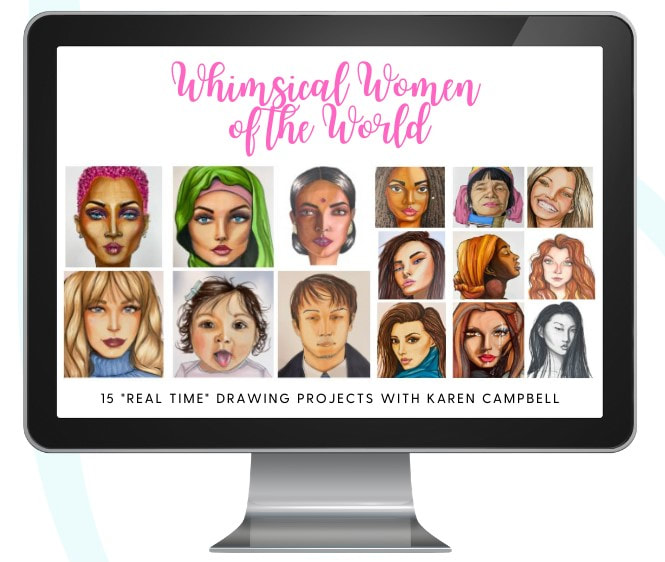
Didn't think so ;) Once you've finished coloring today's adorable fashion dude, don't forget to add some white highlights at the end. This is one of my absolute favorite parts of my projects, and really takes your art to the next level.
I had a white poster paint sharpie nearby, so I simply grabbed that to add my highlights in. You could also use a white posca pen here. They're interchangeable too, and both work really well on top of alcohol markers.
Make sure you stick with me until the end of today's video for a FULL flip through of Christopher Hart's book, Figure It Out! Simple Lessons, Quick Results. You're gonna love it! Thanks for hanging out with me today! ❤️ CHECK OUT ALL MY ONLINE ART CLASSES & Art Clubs ❤️ CHECK OUT ALL my art books ❤️ MY FAVORITE ART SUPPLIES on AMAZON ❤️ MY BELOVED FACEBOOK GROUP |
Karen CampbellFounder of Awesome Art School. Mixed Media Artist. Author of 19 Instructional Art Books! 
Whose work has appeared in...
   
 Archives
July 2024
Categories
All
|
 RSS Feed

"Karen is flipping hilarious and she's very real...I like the way she teaches in a way that really gives you confidence, whether you're a beginner or advanced there's always something new to learn!"
- Elizabeth W. |
What Fans Are SayingKaren, you are absolutely fabulous! You make me feel like I can draw anything. I have recently retired and finally have the time to do some of the art that I have loved since I was in school. I am really at the beginning of my art journey and I hope to learn as much as I can. Thank you for all you do. |
Contact ME |