KAREN CAMPBELL, ARTIST
  • HOME
    • About Me
    • Courses
    • Add your art to Instagram!
    • Fan Artwork
    • Retreats
    • What Students Say...
  • Drawing Club
    • See ALL the Projects!!
  • MIXED MEDIA SOCIETY
    • See ALL the Projects!!
  • CELTIC COLLECTIVE
  • Books
  • Blog

blog

Let's Get Your Creative Juices Flowing!!!

How to Make Your WATERCOLOR MARKERS BEHAVE for Mixed Media Projects!

29/8/2022

0 Comments

 
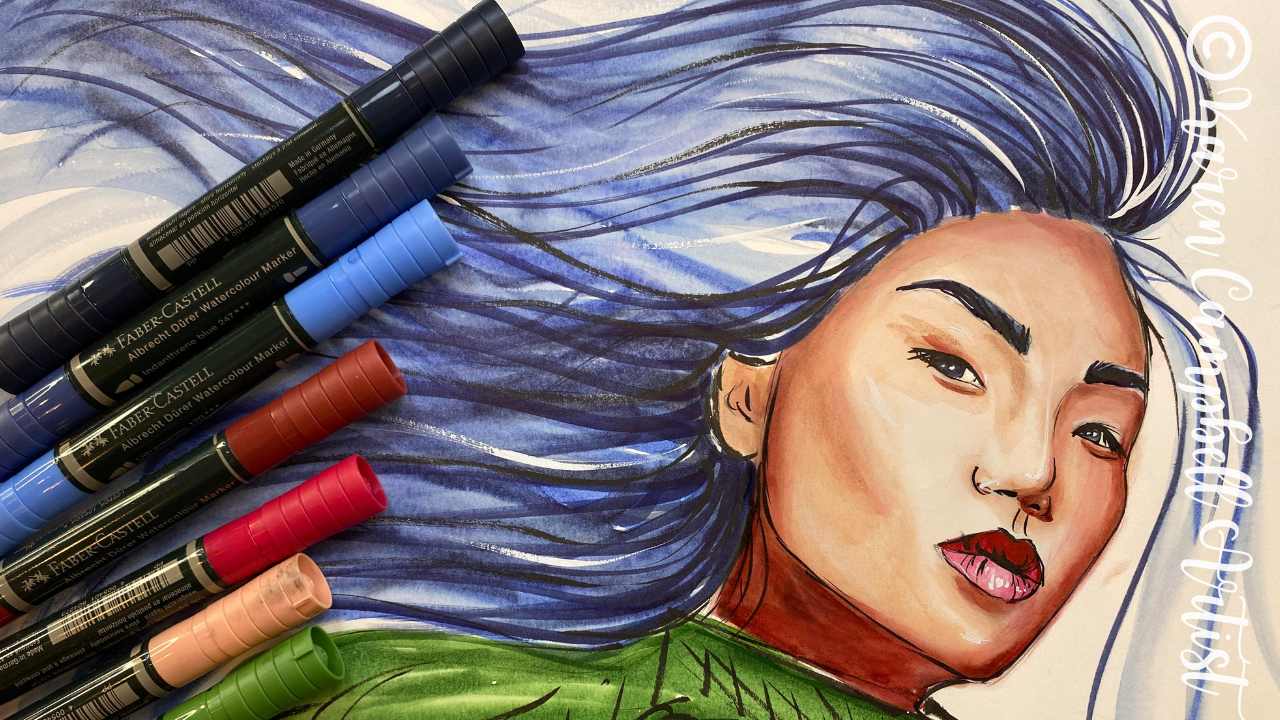
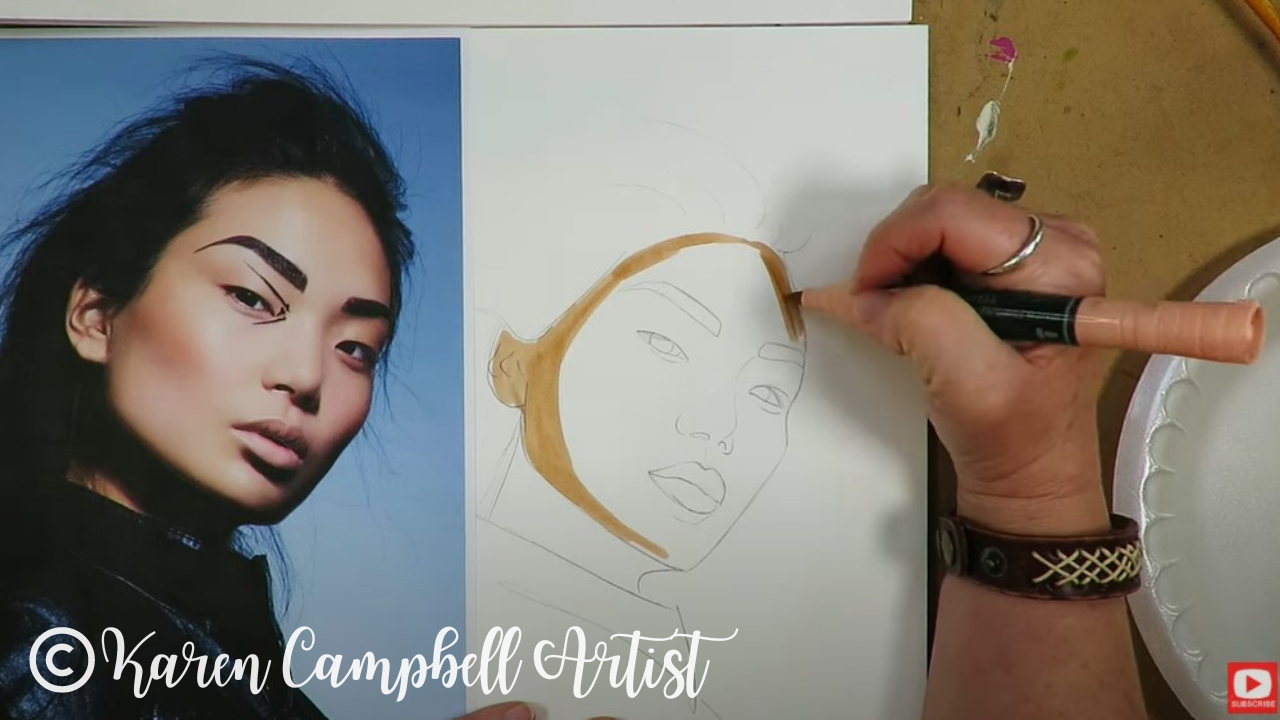
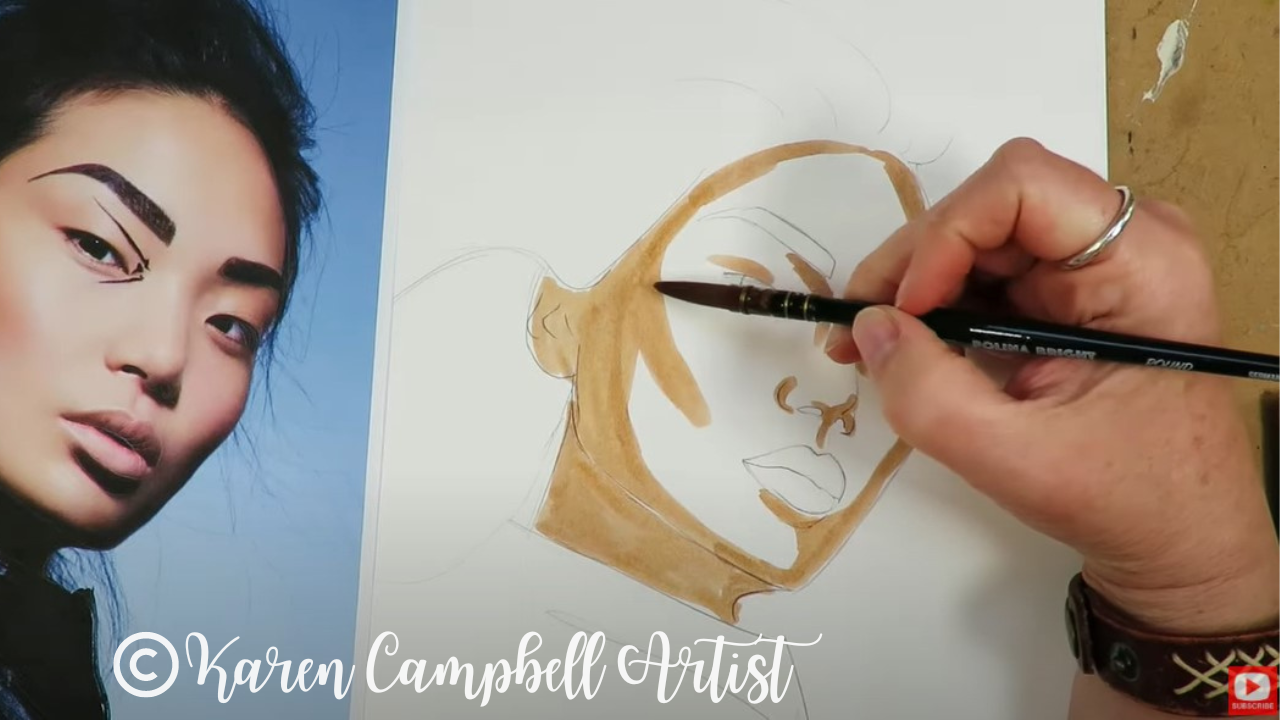
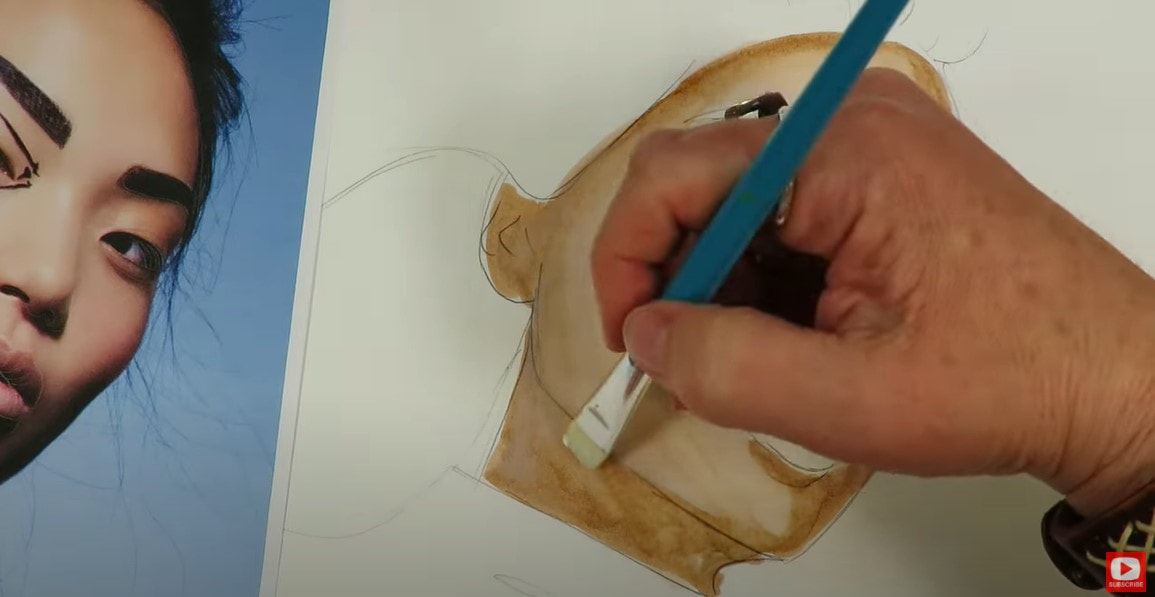
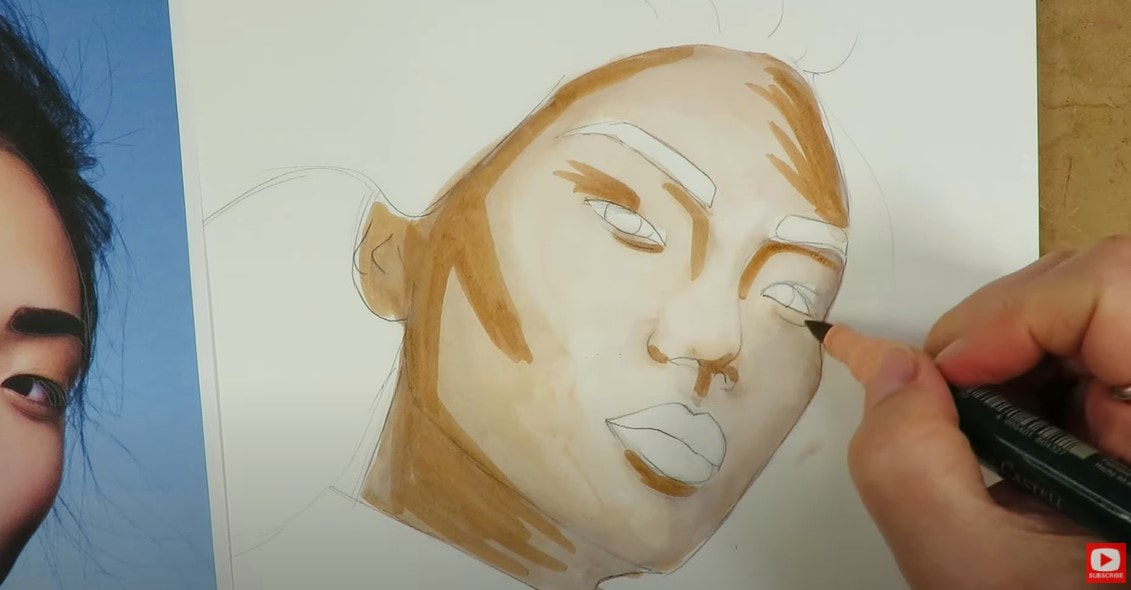
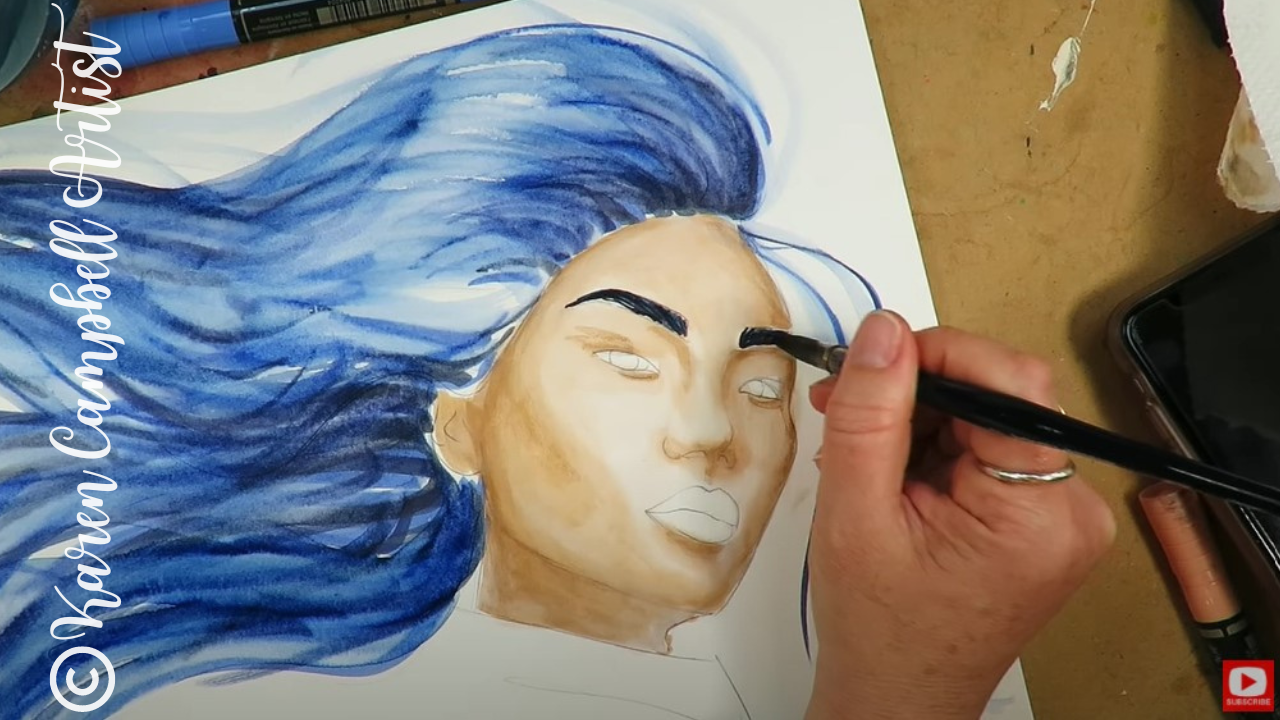
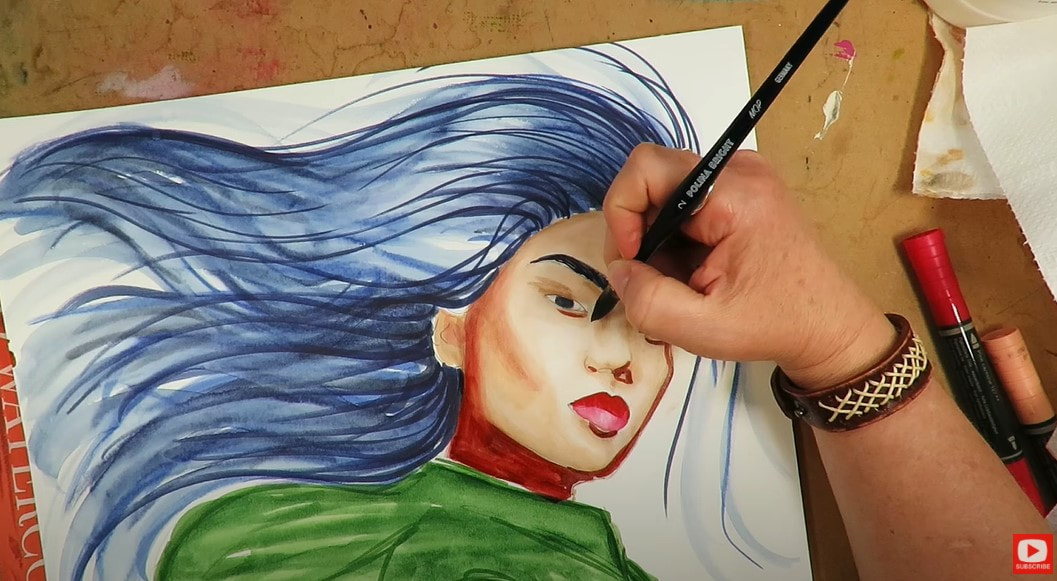
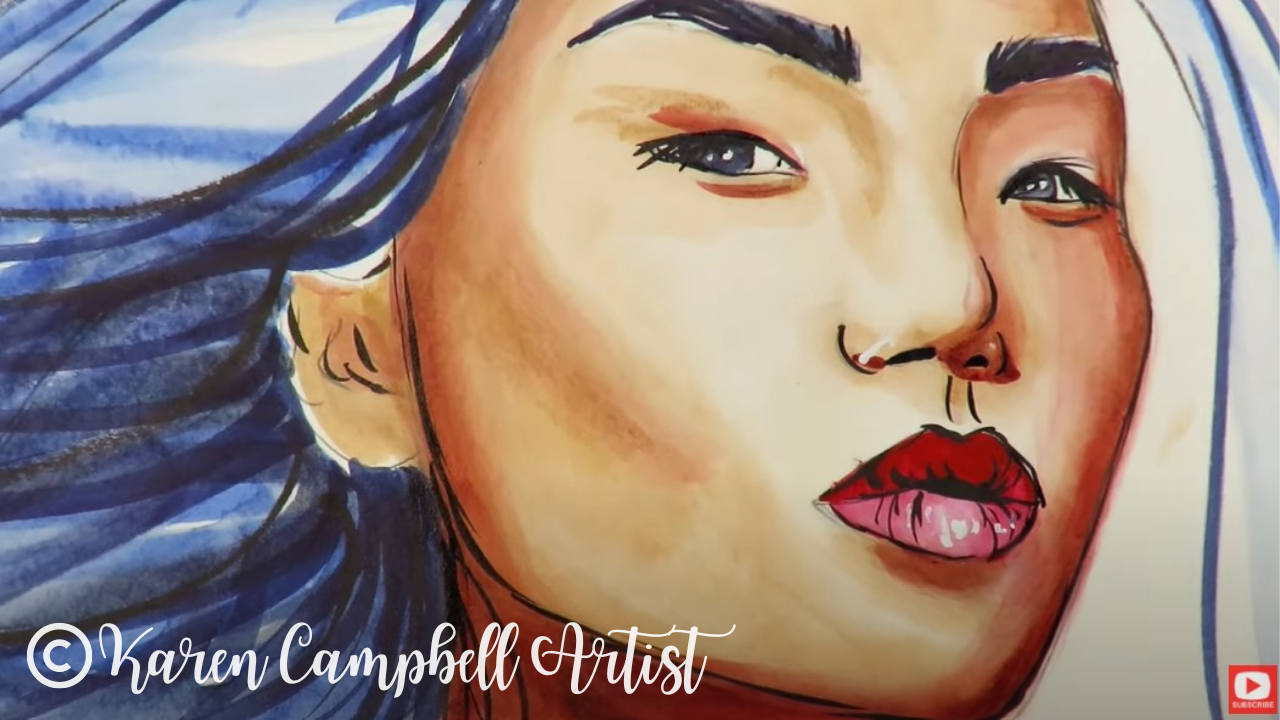
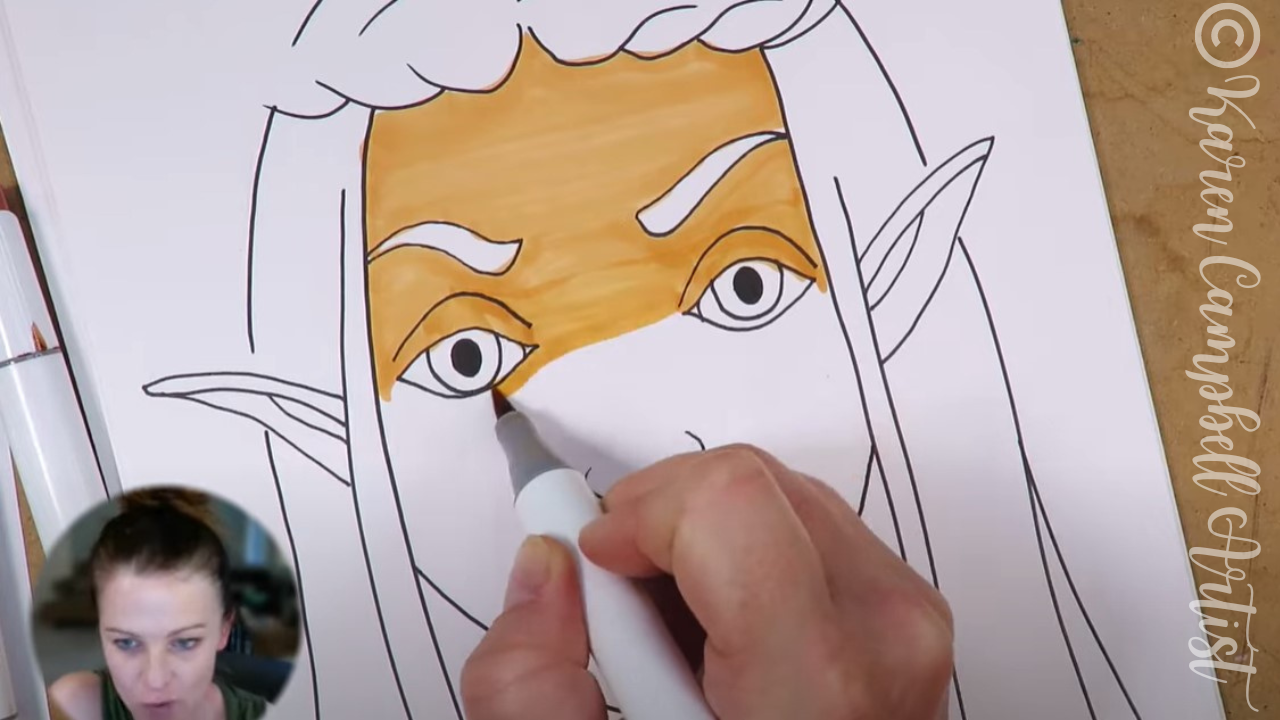
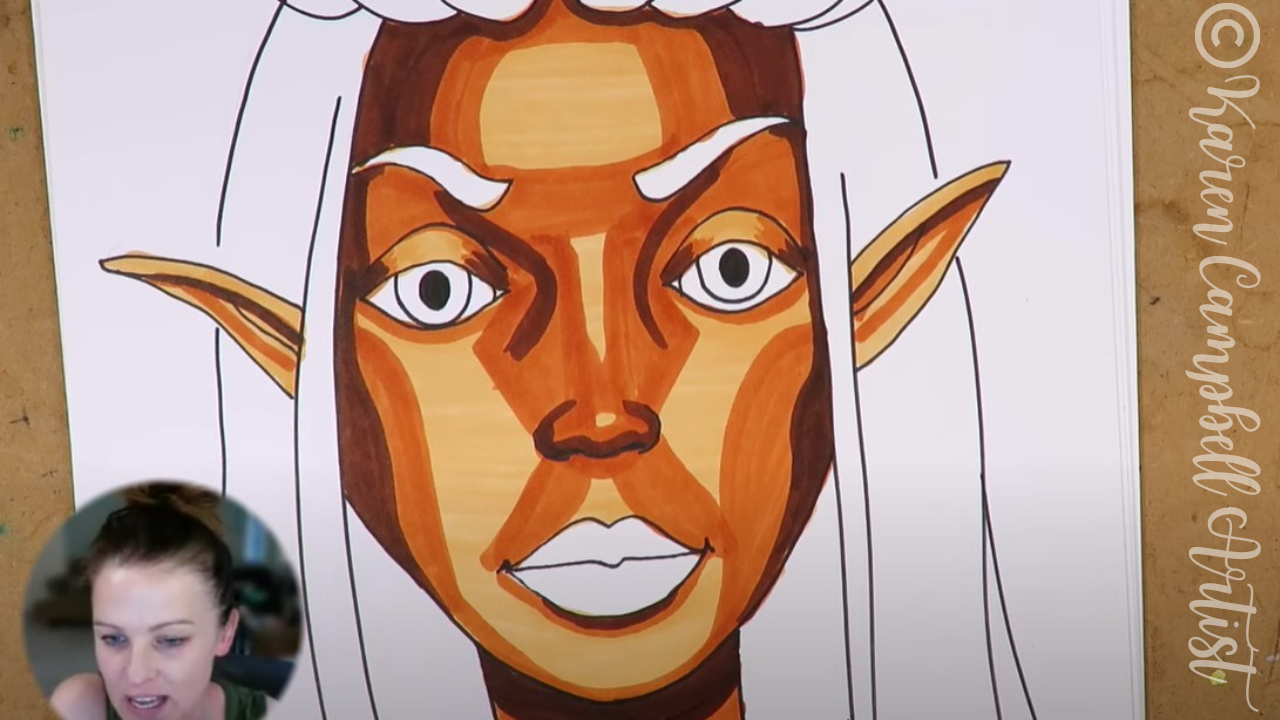
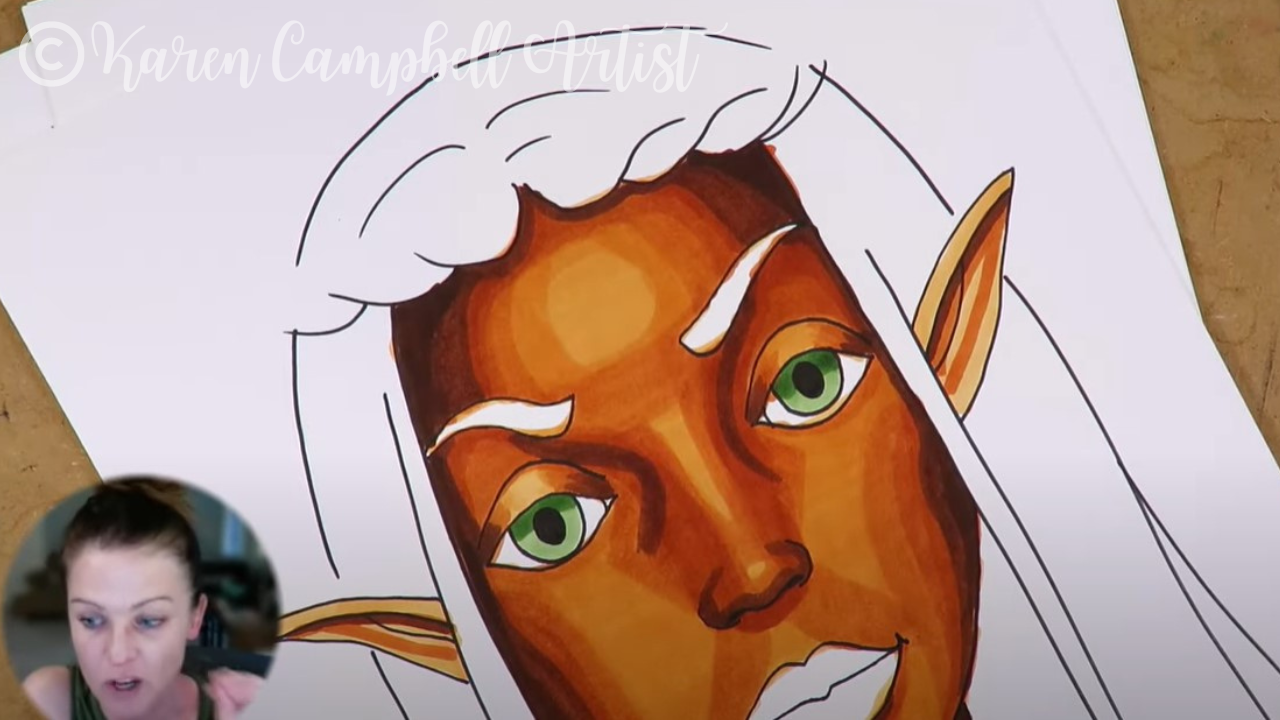
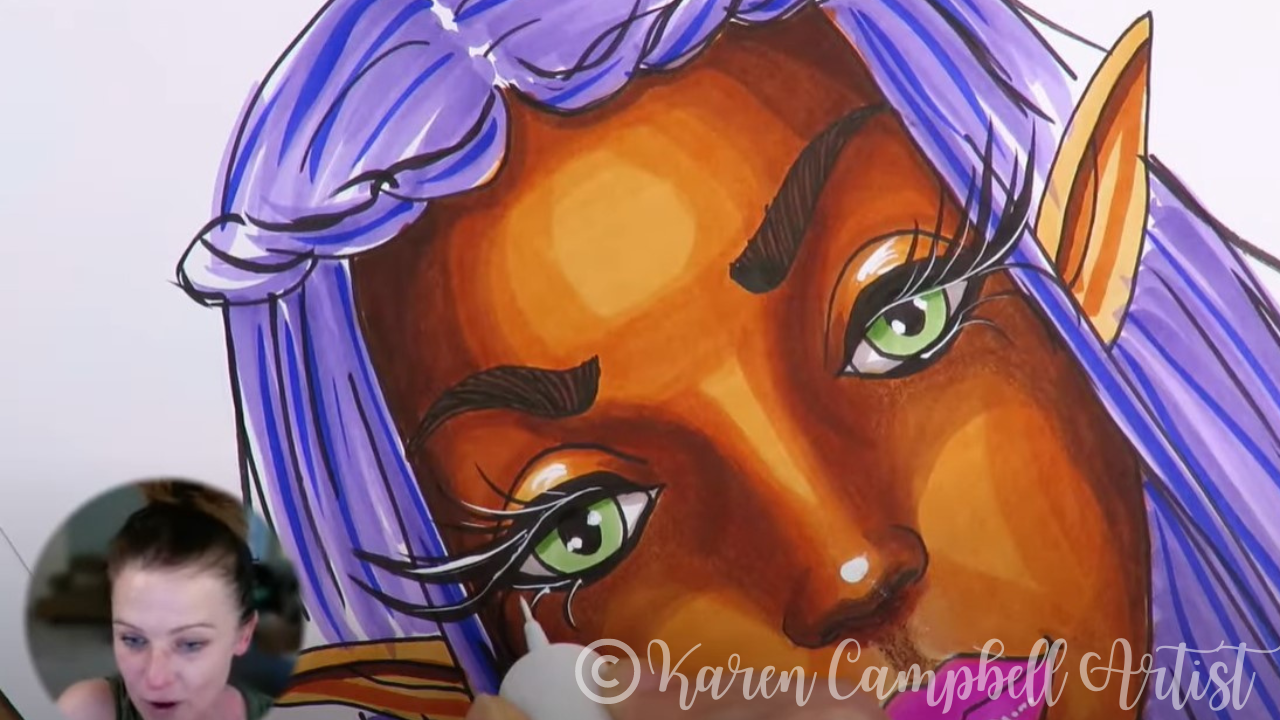
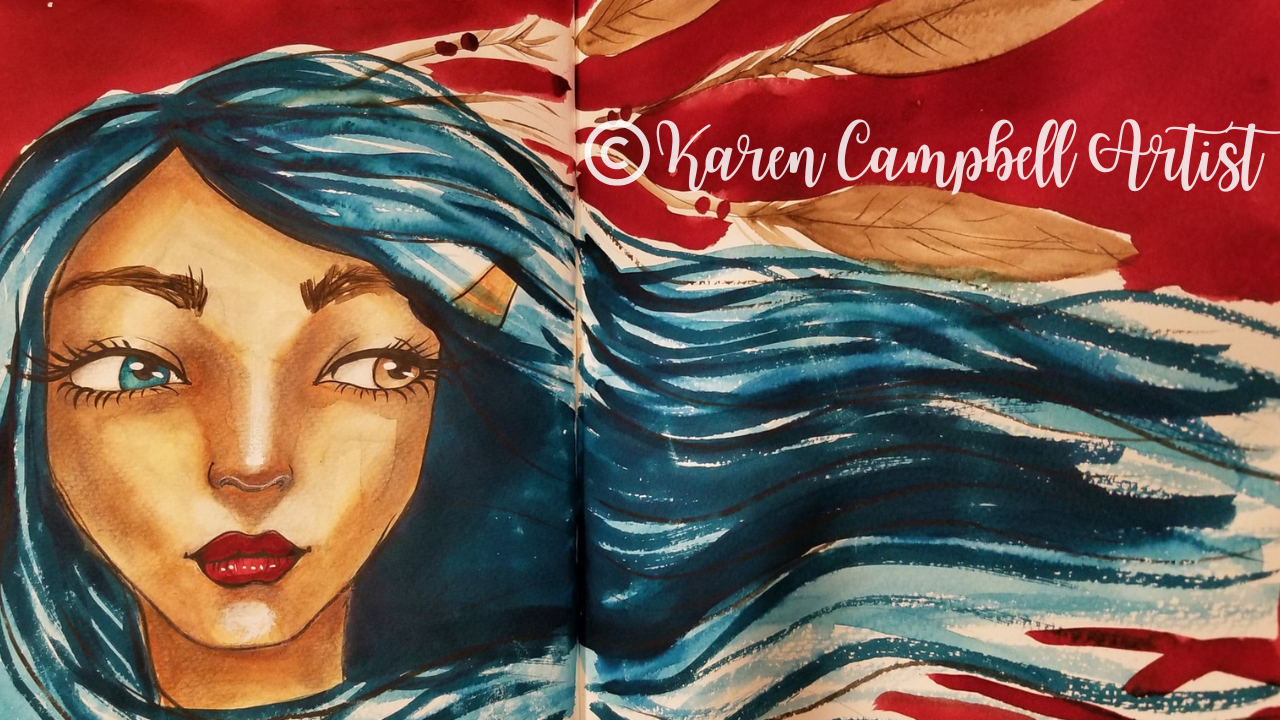
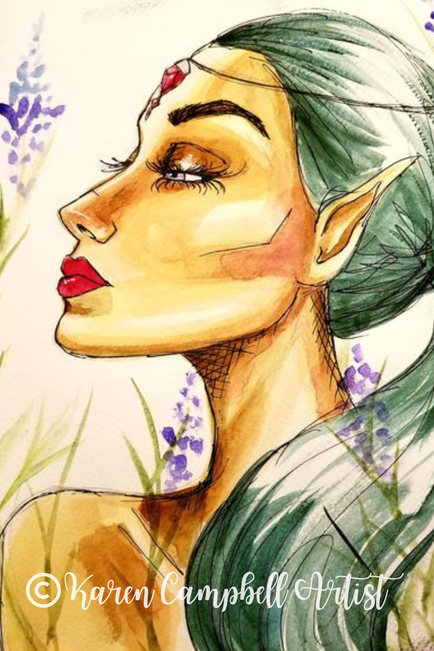
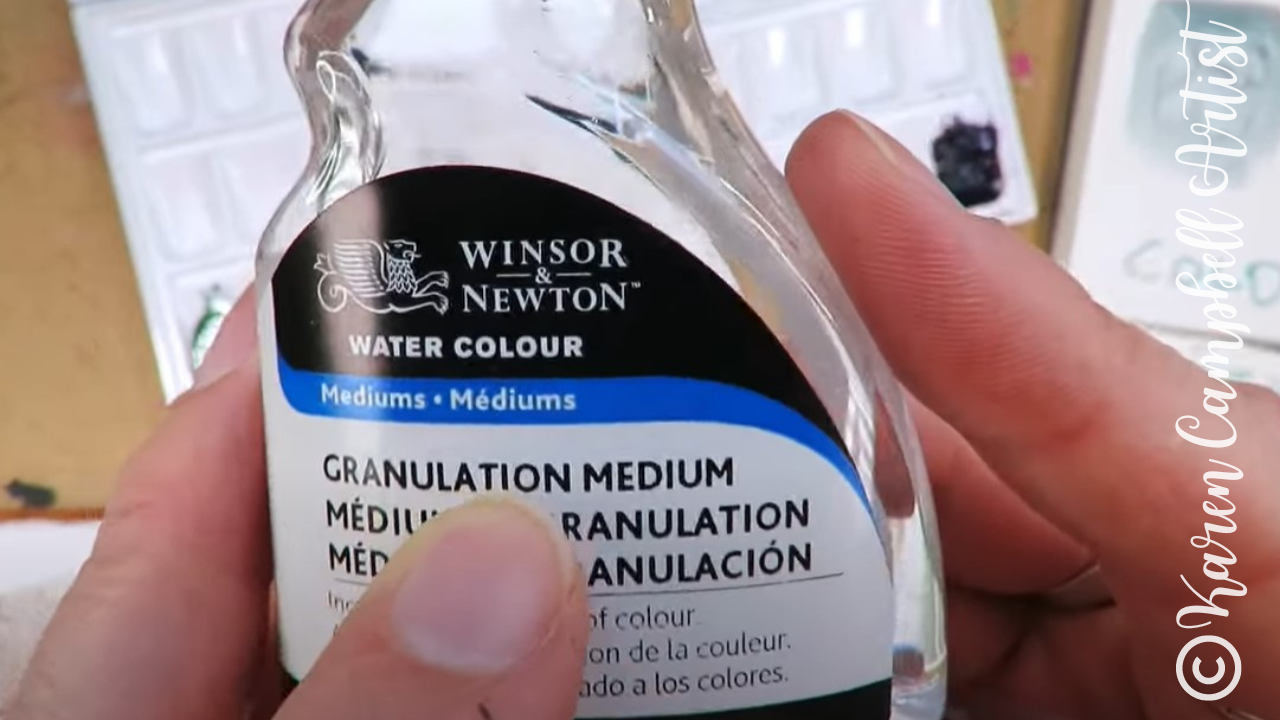
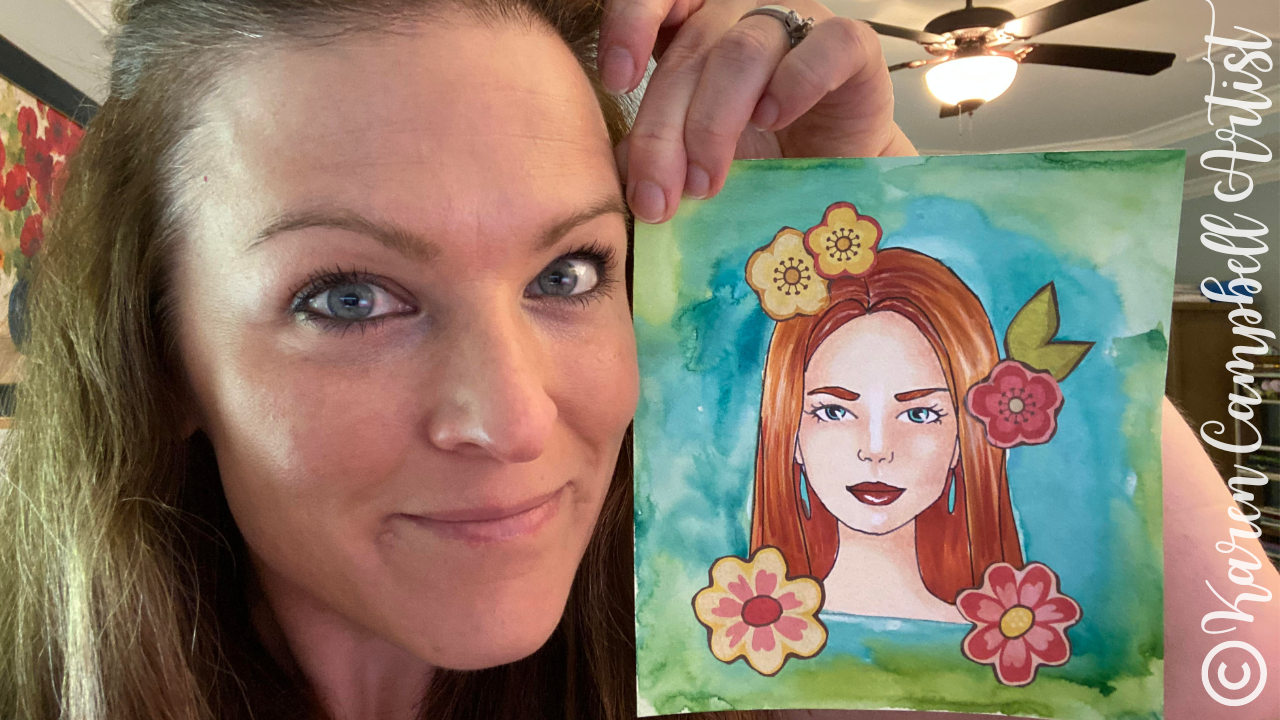
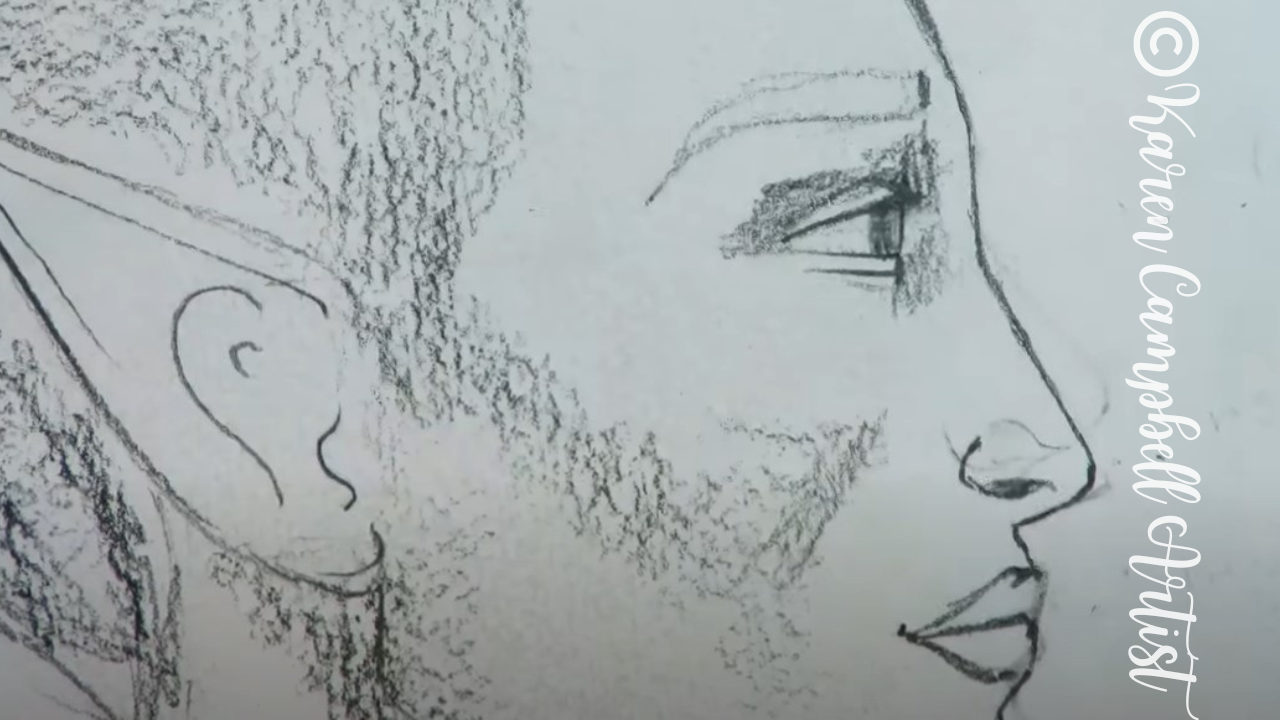
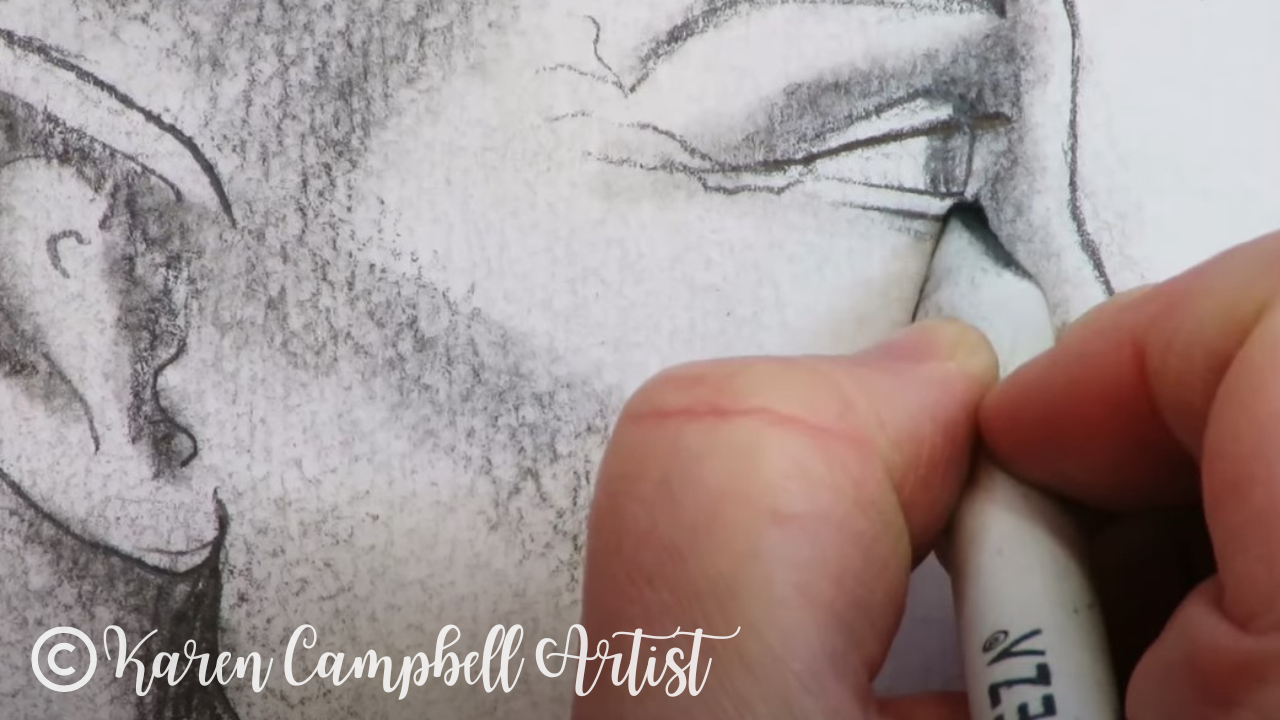
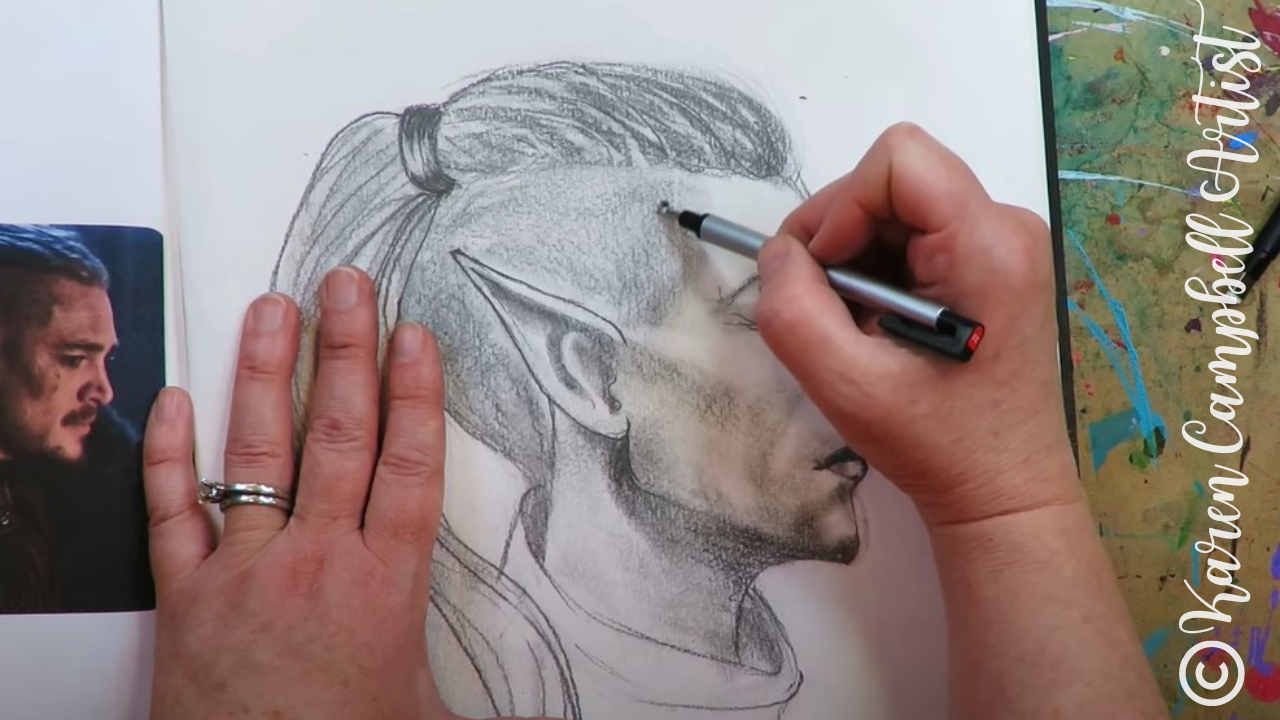
​​Today's mixed media art tutorial might just blow your mind if you're a beginner. Not only will I show you how to use Faber Castell skin tone watercolor markers to shade a mixed media face, but you'll learn 3 UNIQUE WAYS to melt, blend and freeze the pigment from your watercolor markers so they BEHAVE in YOUR OWN gorgeous mixed media projects at home! 
Picture
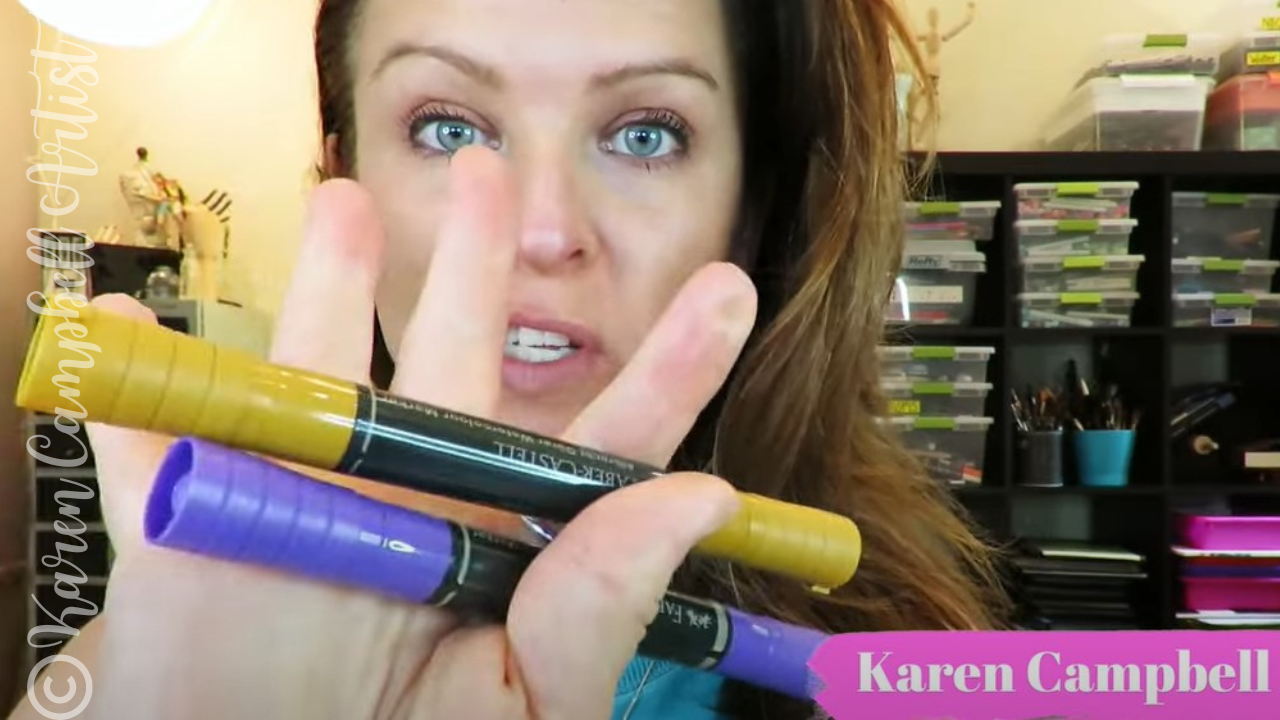
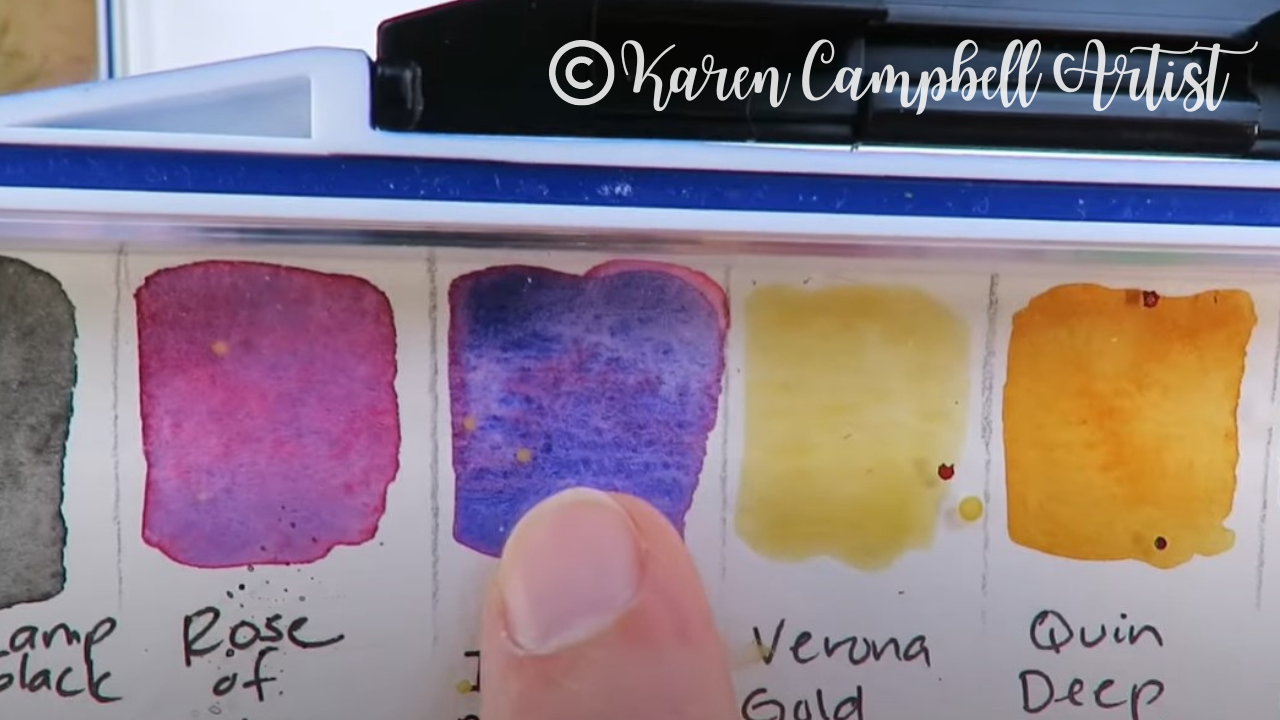
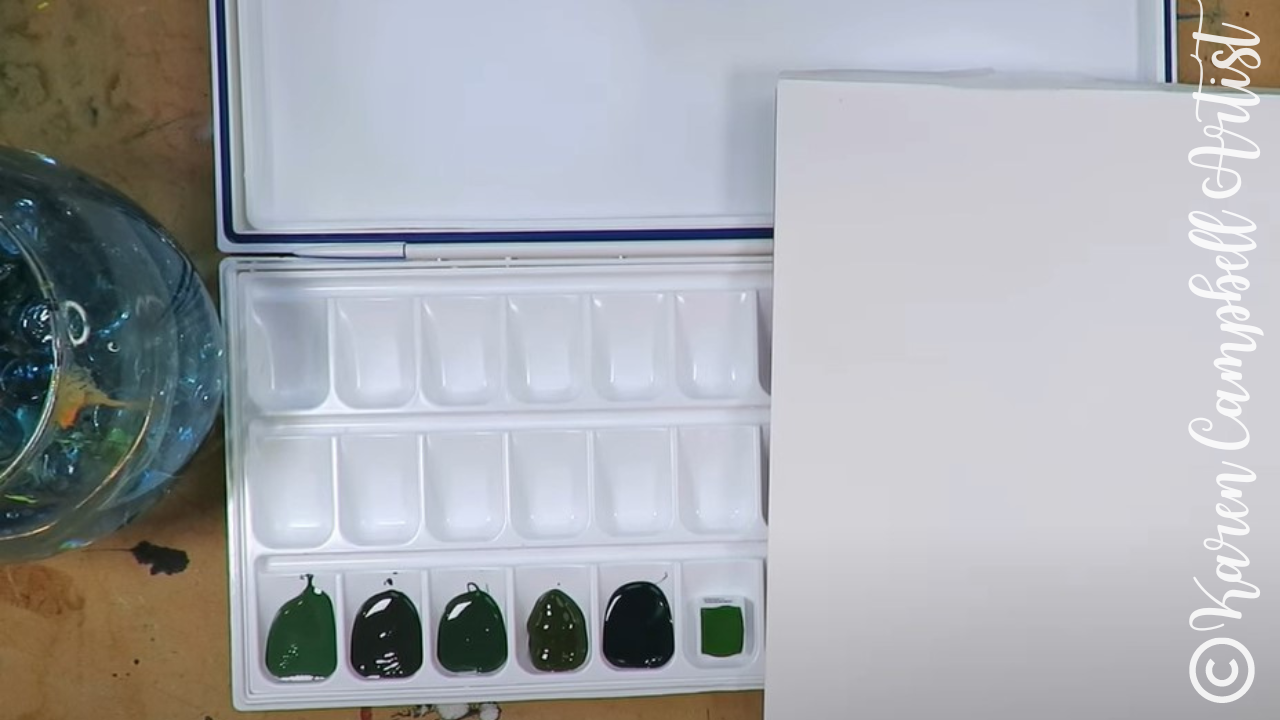
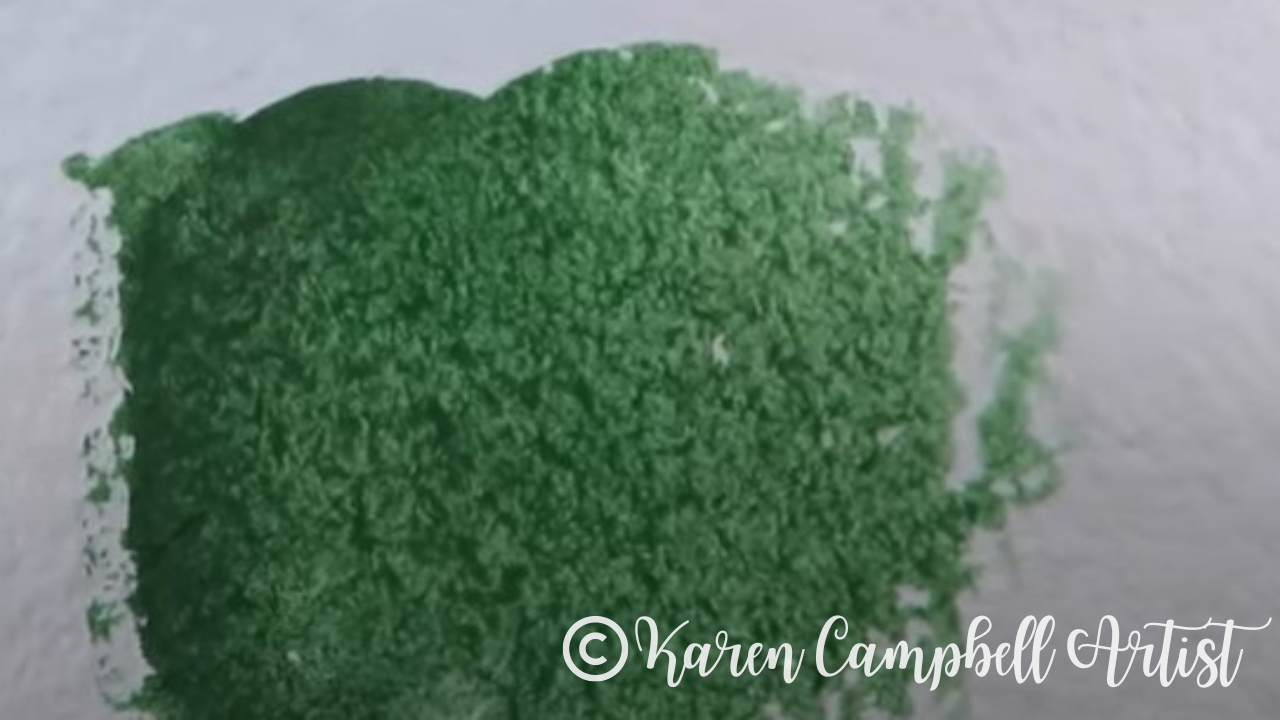
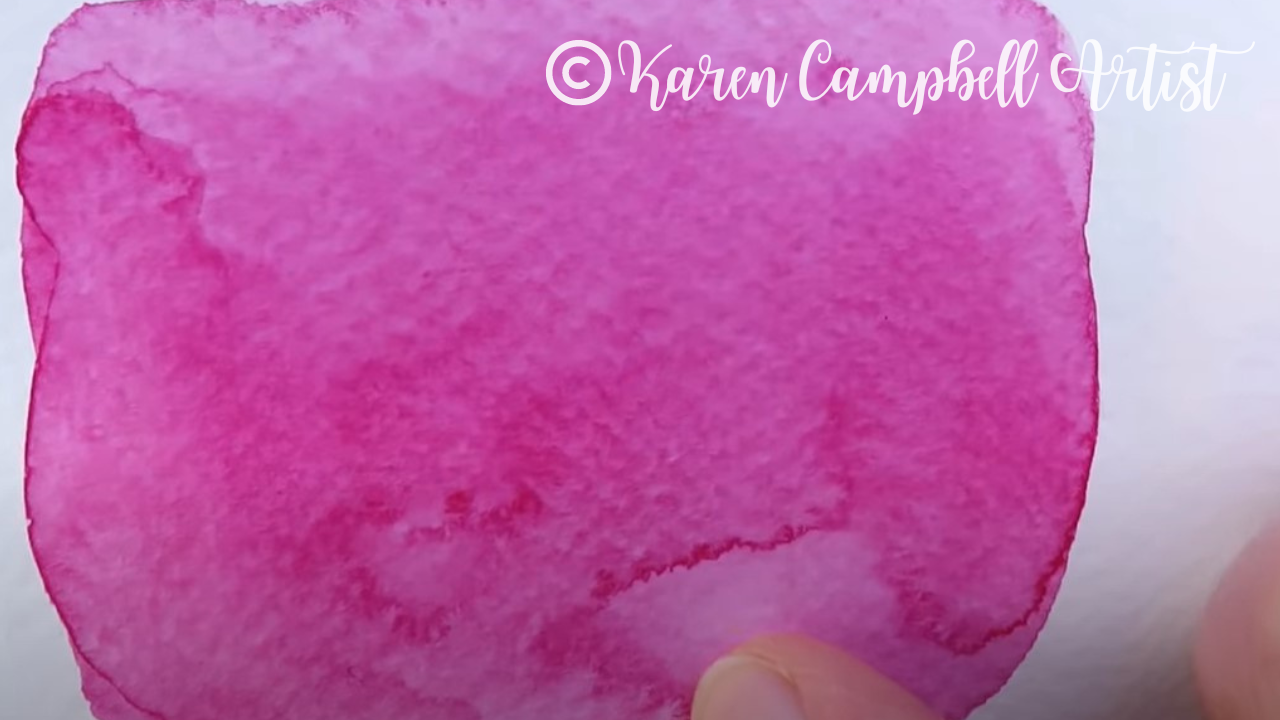
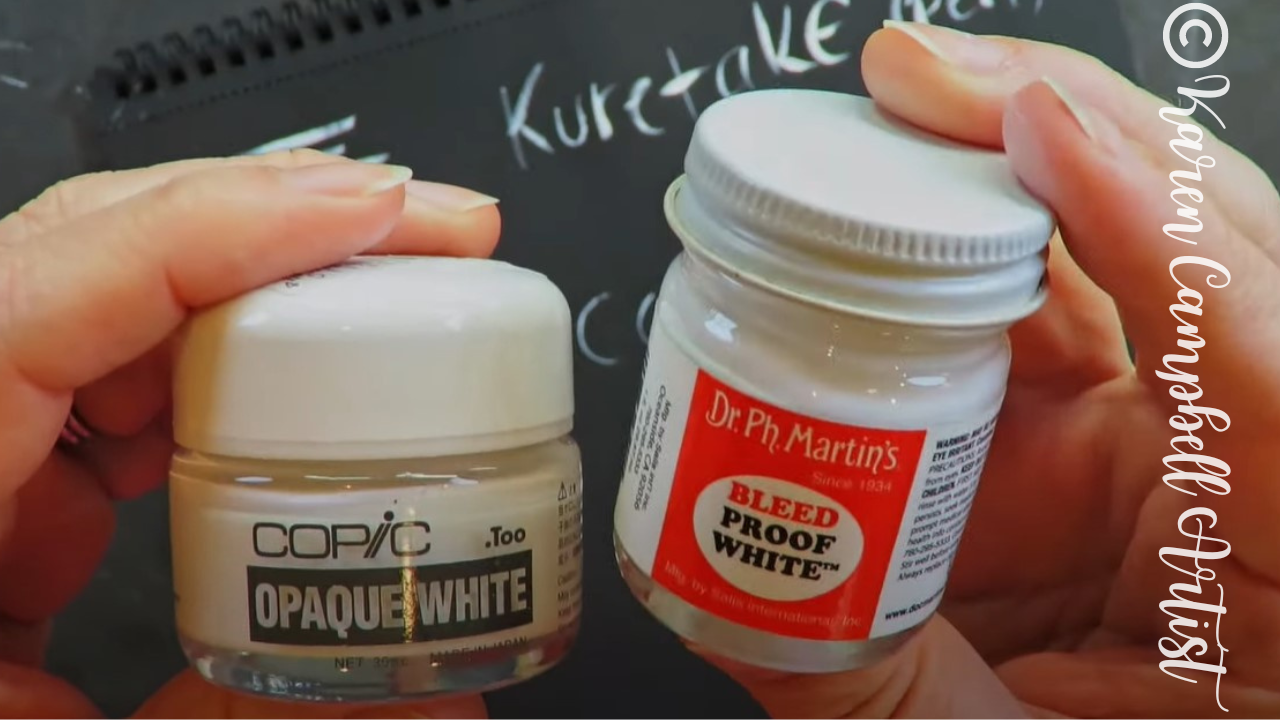
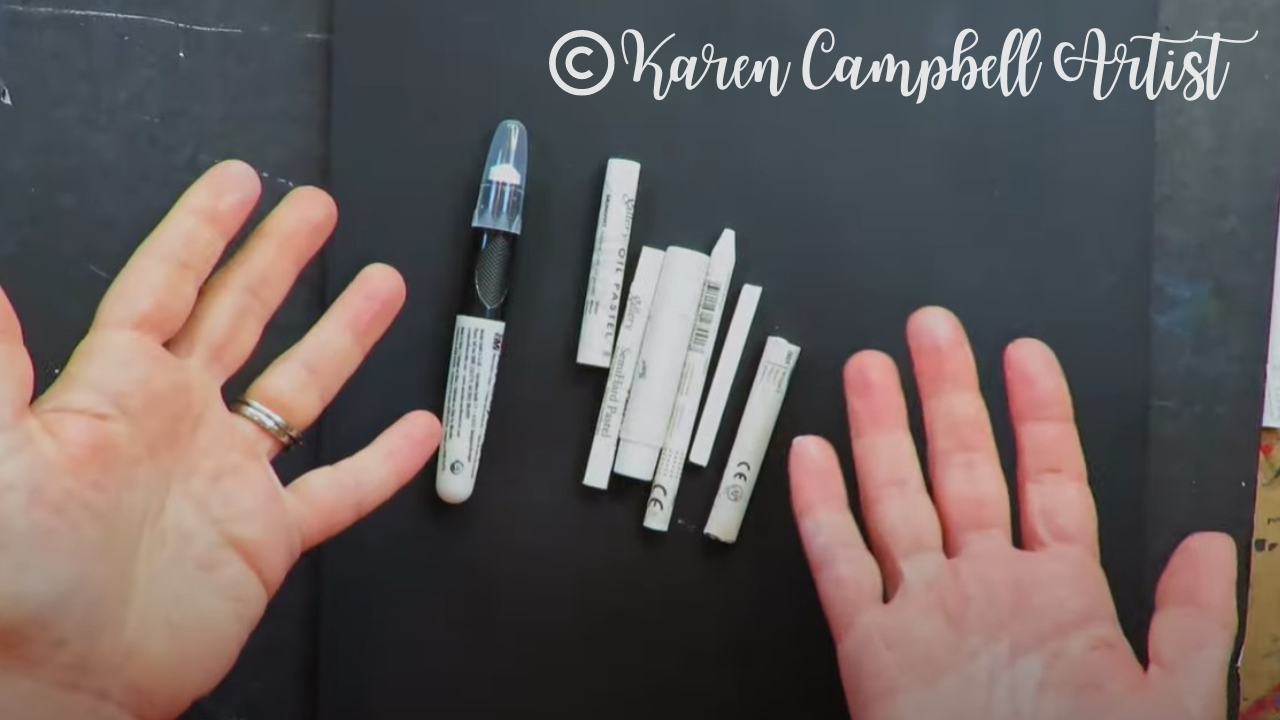
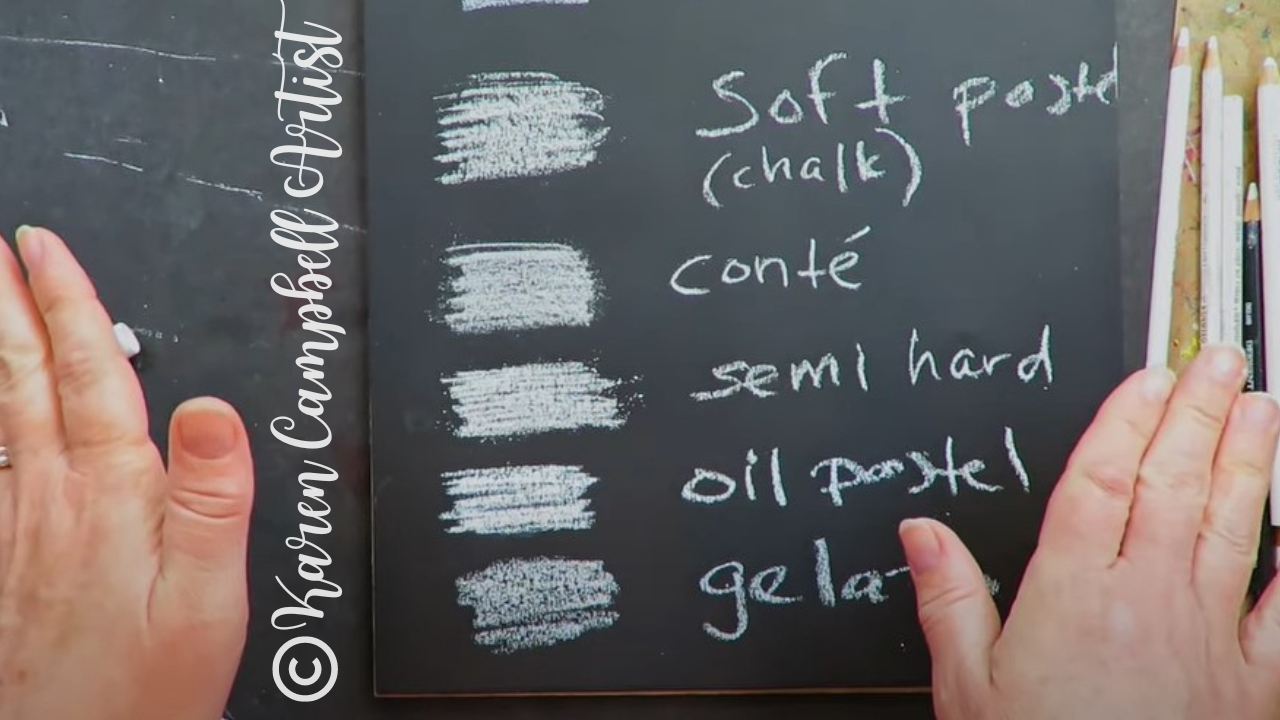
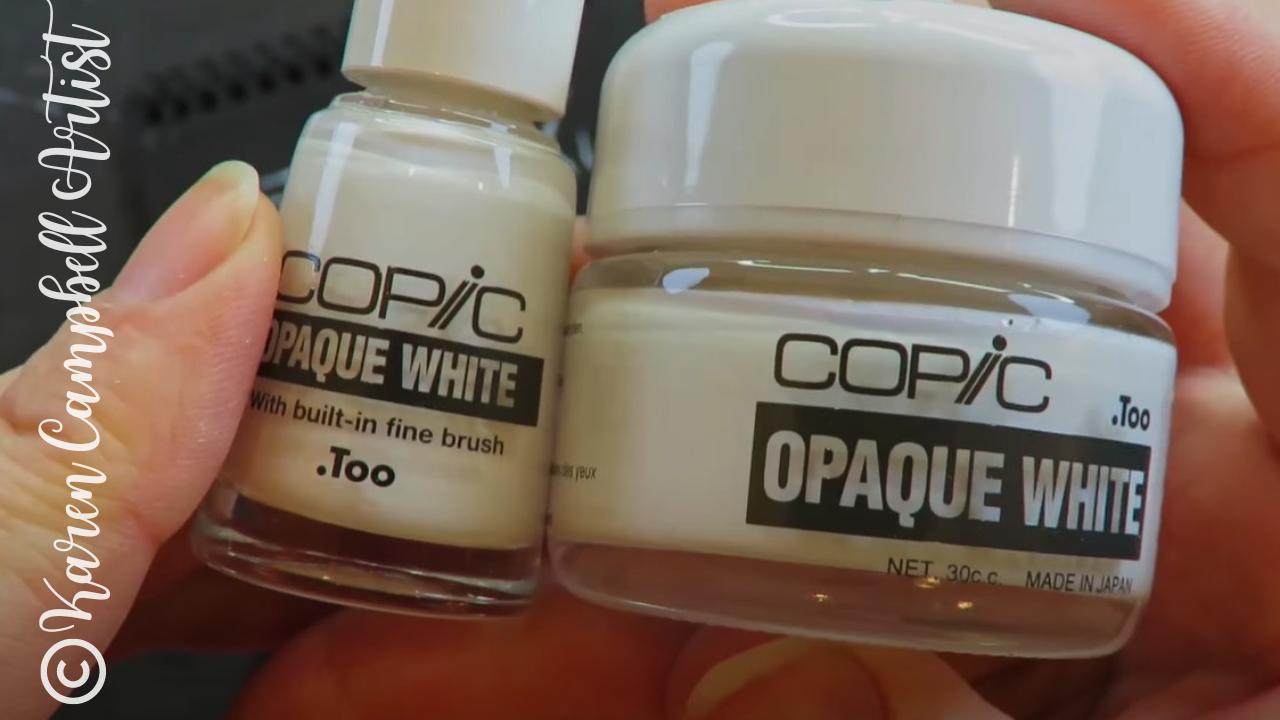
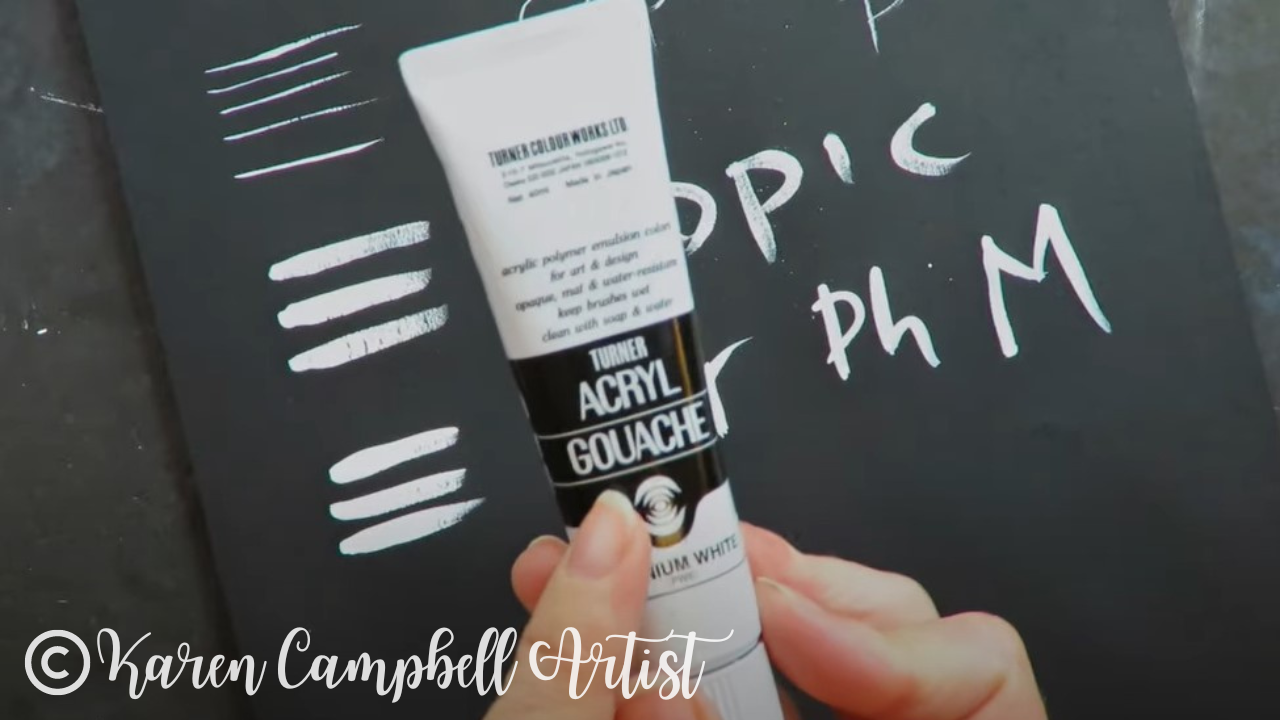
Got a new set of watercolor markers, colored pencils, pens or watercolors? It's SO important to SWATCH your new colors so you know what to expect when each color hits your page! 

I've made this process MORE FUN for you by creating a FREE Swatchsheet! Simply click the button below, and I'll send it straight to your inbox. ​
Picture
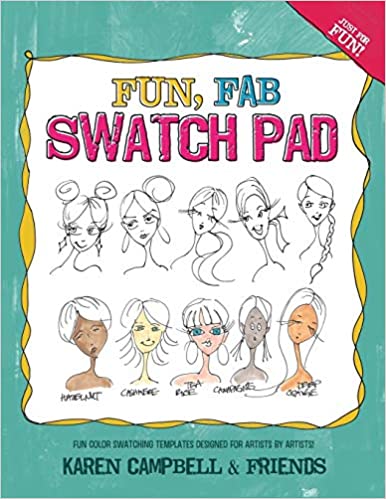
​LOVE swatching, and can't get enough?! Check out the book I created with my Facebook Group called The Fun Fab Swatch Pad. These playful pages will keep you swatching for days!
Picture
Before we continue, super quick announcement: All product links are Affiliate. I may earn a small commission if you choose to order through these links but by law there is never any additional cost to the consumer for doing so. I thank you for your support.
Picture


​How to Use Watercolor Markers
to Shade a Mixed Media Face

I love using watercolor markers in my mixed media projects because I feel like I've got the control of a marker and the magic of watercolors in ONE art supply!

A couple of weeks ago I tried Faber Castell Watercolor markers for the first time and tested them against my Winsor Newtons. I was thrilled to discover the Faber Castell set has SO many colors, including SKIN TONES! I can't wait to try these out today... 
Picture
To get the face shading of this project started, I studied my drawing reference to see where the darkest shadows sit naturally on the model's face. Then I strategically laid down brush strokes of color on my drawing to replicate what I saw. It's that easy!


​How to Activate ​Watercolor Markers With Water

Typically when I activate my watercolor markers (or any water soluble marker, pencil or pen) with water, I simply wet a watercolor brush (these are my favorites, by Polina Bright), and run the brush over the lines where I want to create watercolor effects. 
Picture
After I dipped my watercolor brush in water today, I pulled it through the skin tone brush strokes and pushed it around my portrait's face to create lighter skin tones throughout. 
Picture
As you'll see in the video, the downside of working with watercolor markers is streakiness. Even if you try to blend streaks out with water, they never totally come out. When this happens to me, I usually reach for another art supply in my stash, like gesso.


When to Activate Watercolor Markers
With Gesso & Matte Medium

In case you're new to gesso,  white gesso has a translucency to it that will allow an underlayer of a mixed media project (like collage or today's shading with watercolor markers) to peak through. White gesso also has just enough opacity to hide something in an underlayer that you're not crazy about (like today's streakiness). 

White gesso is one of MY TRICKS that I use to make watercolor markers behave for my mixed media projects! 
Picture
As you can see in the above pic, I dipped a different paintbrush into some white gesso to even out my underlayer of face shading. I changed my brush because gesso will RUIN your expensive watercolor brushes. Trust me!

HOT TIP: Whenever you work with gesso, make sure to use a cheap, stiff brush,like these.
Picture
Once my gesso layer was fully dry, I added a second layer of shading with my skin tone watercolor marker. This needed some blending too, but I wanted it to remain dark, so reached for my clear matte medium instead of more white gesso.
I almost always use matte medium as my "glue" for mixed media collage. Today, I'm using its adhesive properties to "freeze" my underlayers in place and to lightly blend my last layer of face shading. Cool right? 

Using gesso and/or matte medium with other watercolor markers, watercolor pencils and watercolor pens can totally HELP YOU whenever these water-soluble art supplies aren't cooperating for you just by adding water! 


​How to Draw Hair with Watercolor Markers

If you're not sure how to draw hair with watercolor markers, make sure you click over to the video to see this in action. When I'm drawing hairstyles, I typically draw in a couple of pencil lines to guide the general outlline of where I wanted the hair to sit on my paper. If I'm shading in color, like today, I usually choose three different shades of the same color to create dimension with a light, medium and dark. 
Picture
I activated the hair brush strokes with water to indicate volume and blend the shades together. Once this layer was dry, I added a few more brush strokes for definition and started shading the facial features.
Picture


​Hot Press vs Cold Press Watercolor Paper
for Mixed Media Projects

Today's mixed media project is on hot-press watercolor paper. This paper is really smooth and can be quite beautiful for portraits. If you plan to do lots of layering (or collage), cold press watercolor paper is your best choice because it's kind of like working on canvas.
Picture
​You can throw whatever you want at cold press paper, and it's gonna survive. Hot press is a bit more delicate. If you're not careful or get a little too aggressive with your paintbrush - you can work a hole into the paper. Learn more about mixed media paper for beginners in this video. 
I hope you enjoyed today's project, and feel empowered to know you can use MORE THAN JUST WATER to get results you LOVE from your water soluble art supplies!

Remember, all mixed media projects are kind of a big experiment.  They're free-flowing. Sometimes things go well, sometimes they don't! Don't freak out. 

​Keep going, try to chill out, and enjoy the process!
​Thanks for hanging out with me today! 
​ 
​
❤️ CHECK OUT ALL my art books on AMAZON
❤️ MY FAVORITE ART SUPPLIES on AMAZON
❤️ MY BELOVED FACEBOOK GROUP  
❤️ FOLLOW ME ON INSTAGRAM
0 Comments

SCARED of DARK Skin Tone Markers for Face Shading? Help is Here!

22/8/2022

0 Comments

 
SCARED of your DARK skin tone markers? You are NOT alone! The process for shading faces with dark skin is EXACTLY the same as shading faces with light skin tone markers. Press play to CONQUER these fears once and for all and to see my BEST alcohol marker blending tips in action. Playing along with my #50FunFabFairies drawing challenge? Today's FAIRY face drawing and shading tutorial is lesson 8!
Picture
​Want easy access to today's lesson and even MORE fairy drawing ideas? Join my FREE #50FunFabFairies drawing challenge over at Awesome Art School!

​Simply click the button below to receive instant access to ALL the fairy reference images for each drawing prompt (including today's elf ears drawing reference!), plus info on supplies, cheatsheets, and more!
Picture
​Wanna become a better artist? Do today's lesson (and every lesson of the challenge) five times, making a few creative alterations of your choice, and watch your skills soar as you practice fairy eyes drawing, fairy and elf ears drawing AND fairy hair drawing 50 different ways!
Picture
​Before we continue, super quick announcement: All product links are Affiliate. I may earn a small commission if you choose to order through these links but by law there is never any additional cost to the consumer for doing so. I thank you for your support.
Picture


​How to Draw a Fairy Face

To get today's drawing started, I simply draw an oval and sketch in my face drawing guidelines. Not sure what face drawing guidelines are? Check out lesson one of the #50FunFabFairies drawing challenge, and my face drawing guidelines are waiting for you in the FREE #50FunFabFairies classroom over at Awesome Art School!
HOT TIP: Grab a piece of bristol or my favorite cardstock (cheaper and works exactly the same!), to complete this project. This paper is smooth, non-porous, and will help your markers blend more easily!
Picture
This week I'm using an ellipse template (above), to sketch in my eye drawing guidelines. You can TOTALLY do this at home too - it's a little time saver, and a simple trick to help you draw eyes evenly if you're just learning how to draw eyes for beginners. 
Picture
Next I pencil in the fairy ears and facial features. I'm basically creating a "mashup," because I'm using two face drawing references today - one for the fairy ears, and one for the facial features and shading. Both images are with today's lesson in my FREE #50FunFabFairies classroom. 

Combining various aspects of different reference photos in this way is an awesome way to create your very own, original art. This is excellent advice as well if you're someone who is insecure about looking for copyright-free images. ​
Picture
I'm an outliner and love this look in the faces I draw, so once I've finished sketching in my fairy face, I outline the whole drawing with a few of my favorite fineliners by Molotow. I use a thicker nib for outlining the hair, and a smaller nib for outlining facial features. 

Next, I erase all the graphite with my vanish eraser. This is a really important step if you're going to shade a face with alcohol markers because they will pick up any remaining graphite on your page and smear it around if you're not careful. 
Picture


​How to Select Skin Tone Markers for Face Shading​

Typically my students tell me the most intimidating part of shading faces with alcohol markers is getting started and selecting your skin tone marker shades. I always recommend to use at least three so you have a light, medium and dark that go well together. 

I have TONS of references to help you with color selection. Inside the FREE #50FunFabFairies classroom, you'll get access to my Skin Tone Markers Guide (shows you the best skin tone marker combos for across THREE alcohol marker brands), along with the exact colors I'm using today from my Ohuhu Skin Tone Markers (Set of 24).  

In addition, I recently published a book ALL about shading faces with alcohol markers and how to choose which skin tone markers will go well together.  
Picture
You can shade a face from light to dark, or dark to light- it's totally up to you. Lots of my students prefer shading light to dark - especially if they're intimidated by working with darker skin tone markers because it can feel like you've got a bit more control.
As you'll see in the video, the contrast between my initial three marker shades for today's project was just too great. This is OK and TOTALLY fixable. It's actually great for you to see this happen to me so you can watch how I troubleshoot.

If this happens to you at home, and the jump between shades 1 & 2 is too great, find a happy medium shade of a "1.5" to fill in that gap and help you blend your skin tones. It's really systematic.


​What to Do If You Hate Your Project

If you're new to my world, you may not have heard me talk about "the ugly stage" yet! EVERY project goes through this, especially when you're drawing and shading faces. Here is the perfect example of what I'm talking about below...
Picture
She looks crazy, right?! This is the "ugly stage." It's the point in a project when you're about half-way done, and you look down at your piece and think it's garbage. She looks like an alien, you think you should just quit and move on with your life.

DON'T LISTEN TO THOSE VOICES IN YOUR HEAD! I'm serious. These feelings are SUPER normal and you just have to keep going no matter how ugly your girl is. Do NOT let the "ugly stage" win. Just KEEP GOING.

How do you keep going when you hate your project? In this case - more layers.


​How to Eliminate Streaking
​and Blend With Alcohol Markers

​As you watch the video, you'll see me adding additional layers of shading. Whenever I have streaking or want to ease the transition between two colors, I go back with my lightest skin tone marker to blend what I've already done.

Every time you do this add a new layer of shading in the opposite direction from your original layer. When you do this, you reactivate the previous layers of color, and they begin to blend (and reduce streaking). To create contrast, you can also add tiny bits of a new dark skin tone, as I did when I added a 4th "darkest" skin tone. 
Picture
When I move on to shade the hair, I started off in the same way I did with my skin tone markers. I pulled three shades of the same color in a light, medium and dark. This is how you get dimension in your drawings. 


​Finishing Touches Make ALL the Difference

To pull everything together, and pump up the drama, I'm using my pentel pocket brush to add eyelashes and eye makeup. It works more like a paintbrush than a pen, and I use it in ALL of my eyelash drawings. 

Not sure how to draw eyelashes? I've got a cheatsheet for that too! Head over to my FREE #50FunFabFairies classroom over at Awesome Art School.

As you may notice in the video- the eyes in this drawing were a bit uneven, so I used my pentel pocket brush and switched from eye to eye to even them out with some eye makeup.  She ends up looking really glamorous, which I love! 

Finally, I added highlights with my copic opaque white "nail polish." Love this product! 
Picture
Honestly, this project was one disaster after another to get through. And just when I thought I had about one minute left of adding in highlights, my white paint pen exploded on her chin and I had to try and rework the whole area to fix it!

This kinda stuff happens all the time in art, and you just have to problem solve a little to get back on track. It's ok! Accept the challenge, try another solution and move on! This mindset is REALLY important when it comes to your art, or it will destroy you!

Stay positive and you'll get there. Everything is fixable. 
Want MORE dark-skinned face drawing projects? You might just LOVE my Whimsical Women of the World series over on YouTube. This also turned into an online art class at Awesome Art School, AND a book! Enjoy!! 
Picture
​If you're OBSESSED with fairies and fantasy art like me, you might just LOVE the Celtic Collective over at Awesome Art School that I run with my Scottish bestie, Lucy Brydon. Add your name to the waitlist to be notified when it's open for enrollment. 

You might ALSO enjoy our podcast 1Scot,1 Not. 
We talk about everything under the sun to do with Scotland - whether it's historical, fantasy, whatever. Just a quick warning - we have a blast and are totally ourselves on the podcast, which means there is some drinking and swearing. ​​​

❤️ CHECK OUT ALL my art books on AMAZON
❤️ MY FAVORITE ART SUPPLIES on AMAZON
❤️ MY BELOVED FACEBOOK GROUP  
❤️ FOLLOW ME ON INSTAGRAM
0 Comments

Mixed Media Art Tutorial for Beginners: What Are Granulating Watercolors?

15/8/2022

1 Comment

 
In today's mixed media art tutorial for beginners, I'm introducing you to the world of granulating watercolors! I'll show you what the heck these even are, compare how they perform on three different kinds of watercolor paper, and will reveal how YOU can incorporate their magical effects into your own mixed media projects at home! ​
Picture
WANT 30 FUN Mixed Media Project Ideas with SIMPLE, tried, and true art supply combos that actually WORK WELL together? Click the button below to download my FREE Hot Dog Packet! 
Picture
Each mixed media idea in The Hot Dog Packet reads like a recipe with ONLY 4 art supplies, so it's perfect for mixed media beginners!
Picture
​Before we continue, super quick announcement: All product links are Affiliate. I may earn a small commission if you choose to order through these links but by law there is never any additional cost to the consumer for doing so. I thank you for your support.

Picture
As a mixed media artist, I love ALL the art supplies! But over the last few years, I've really gotten intowatercolor (example below), painting with fountain pen inks (example above), and gouache. There are so many unique effects you can achieve as an artist with all of these products. ​
Picture


​What Are Granulating Watercolors?

As far as watercolors go, I'm really drawn to the shades that granulate. Granulating watercolors are typically made from multiple pigments of color. As soon as your brush hits paper, granulating watercolors will begin to spread and separate into tiny granules of the individual pigments that were used to create that specific watercolor shade. 

Here's a great example. Look closely at the image below. See the two pink and purple swatches by my finger? 
Picture
The pink one is called Rose of Ultramarine and the one under my finger is Imperial Purple. Both are Daniel Smith granulating watercolors. If you look closely at each swatch, you don't just see a flat pink or purple. You can actually see tiny bits of purple in the pink swatch, and tiny bits of pink in the purple swatch. Cool, right?!


Visible ​Granulation
​May Differ from Brand to Brand

If you're new to my world, I have been in LOVE with Daniel Smith watercolors for years. I have some students and close artsy friends who love Schmincke watercolors, so I picked up this Schmincke forest set of "SUPER" granulating watercolors to see how they compare to the effects I typically see from Daniel Smith granulating watercolors. 
Picture
I squeezed a bit of each color into a fresh palette to get my test started. Make sure you watch the video so you can see this in action if you're new to watercolors. I'm using one of my favorite watercolor brushes by Polina Bright for today's demo. They're ALL I use now! 
Picture
Below is a quick shot of an extremely granulating watercolor shade from Daniel Smith called Burnt Tiger's Eye (left). If I compare the visible granulation I see in that swatch with what I see from one of my new "SUPER Granulating" forest greens by Schmincke, I'm not seeing quite as much granulation from Schmincke as I'm used to from Daniel Smith. This isn't a bad thing- just a difference I'm observing today.
Picture


Changing Watercolor Paper
Changes the Effects of Granulating Watercolors

Never underestimate what a difference paper makes in your mixed media art projects. Paper is actually just as important as your paint and paintbrushes.

In the world of watercolor, there are three main kinds of paper: hot press, cold press and rough cut. To learn more about this- check out my recent video on the subject. 

For our test today, I'll show you a quick swatch of the same Schmincke green on each of the three papers. Here's an example of how one of the greens looks on smooth, hot press watercolor paper by Fabriano.  It's a bit hard to see in the photo and video, but in person, you can really see granules of black separating from green here.
Picture
The pic below is of the same shade on cold press (textured watercolor paper). Notice how tiny pools collect in the textured pockets of the paper? In some areas, little "rivers" start to form as the pigments begin to separate and get absorbed by the paper. Off to the right, you can also see bits of black separating and pooling in individual pockets of the paper. I love the way this texture changes everything!  
Picture
Below, is how the same shade of granulating watercolor by Schmincke looks on rough-cut watercolor paper. This type of paper has even deeper pockets in the texture.

No one paper, watercolor shade, or brand is "better" than another here - today we're just noticing the strikingly different effects we can make depending on what supplies we adjust. 
Picture


​How Does Watercolor Granulation Medium Work?

After I compared watercolor papers, I decided to test how a shade of non-granulating watercolor might change after adding watercolor granulation medium by Winsor Newton. 
Picture
I did get some really pretty effects from this, as you can see below. However, the tiny blooms and rivers that developed are all monochromatic. In a true granulating watercolor, you'll see multiple pigments of color begin to separate on your paper. Again, this isn't a "worse" option - just a difference in effects you can achieve.
Picture


​How to Incorporate
Granulating Watercolors Into Your Own Art
​

Not sure how you can incorporate granulating watercolors into your own mixed media art projects?

​Here's an example of how I used granulating watercolors to create a quick background for a face I colored in with copic markers and colored pencil. 
Picture
Granulating watercolors are also awesome for moody skies and forests if you love to do landscapes. If you're new to my world, I'm OBSESSED with fairies and fantasy art. In fact, I have an entire art club over at Awesome Art School dedicated to this genre called The Celtic Collective. 

I think granulating watercolors are AMAZING for fantasy art!

Make sure you click over to today's video to see how I used them to add colorful dimension into a simple set of dragonfly wings.

​Soooo cute! 
Thanks for hanging out with me today!
Wanna learn about ALL my favorite art supplies? Check out this playlist!

​❤️ CHECK OUT ALL my art books on AMAZON
❤️ MY FAVORITE ART SUPPLIES on AMAZON
❤️ MY BELOVED FACEBOOK GROUP  
❤️ FOLLOW ME ON INSTAGRAM
1 Comment

How to Draw ELF EARS in PROFILE on a HOT Male Elf Warrior (#50FunFabFairies Drawing Challenge)

8/8/2022

0 Comments

 
Wanna learn how to draw elf ears in a side profile drawing of a HOT male elf warrior? Heck yeah, ya do! In lesson seven of the #50FunFabFairies drawing challenge, you'll learn how to draw a male face in profile and just how EASY it is to turn him into an elf warrior.

Make sure you bring a blending stump to today's drawing tutorial. I've got TONS of pencil shading and blending tricks up my sleeve to help you shade pencil drawings more quickly & create COOL male fantasy art hair for your own characters! 

​Let's get this party started...
Picture
​Want easy access to today's lesson and even MORE fairy drawing ideas? Join my FREE #50FunFabFairies drawing challenge over at Awesome Art School!

​Simply click the button below to receive instant access to ALL the fairy reference images for each drawing prompt (including today's elf ears drawing reference!), plus info on supplies, cheatsheets, and more!
Picture
​Wanna become a better artist? Do today's lesson (and every lesson of the challenge) five times, making a few creative alterations of your choice, and watch your skills soar as you practice fairy eyes drawing, fairy and elf ears drawing AND fairy hair drawing 50 different ways!
Picture
​Before we continue, super quick announcement: All product links are Affiliate. I may earn a small commission if you choose to order through these links but by law there is never any additional cost to the consumer for doing so. I thank you for your support.
Picture
For today's drawing tutorial I'm working in my favorite 11x14" watercolor sketchbook by Strathmore. The cold press paper has a gorgeous texture to it. Cold press paper is perfect for watercolor and wet mixed media art projects. The texture is also excellent to draw on because it makes shading super easy! 

To get us started on our male elf warrior drawing, we first need to sketch in our profile face drawing guidelines. If you know me- you know I'm a stickler for drawing in my guidelines EVERY time I draw a face. Guidelines aren't just for drawing realistic faces. Your whimsical drawings will have a more sophisticated look to them too, because the facial features will be more proportional. 
Picture
If you're not sure how to do a side profile drawing, you can grab those face drawing guidelines from two of my books (How to Draw MORE Fun Fab Faces and How to Draw & Find Your Style). The book above was on my art table, so I'm using that one in today's lesson. If you've already got this book at home, turn to page 179 to follow along. 
Picture
We're using a face drawing reference of Uhtred of Bebannburg (Alexander  Dreymon) from The Last Kingdom because I love him and this show. Both the reference image (on the left) and my side profile drawing guidelines are in the FREE #50FunFabFairies Drawing Challenge classroom waiting for you over at Awesome Art School so you can draw along with me.​
Picture
I love to start my side profile face drawings off by tracing a circle. Some people prefer to freehand this, but I figure why bother wasting time trying to recreate the perfect circle? Trace something and move on already. Am I right?! 
Picture
After your circle is sketched in, it's time to mark where your eyes, nose, and mouth will sit. Make sure you click over to watch this while I do it because the placement of these lines is super important. ​
Picture
Not sure how to draw elf ears? Check out how EASY it is in today's step-by-step drawing tutorial. I promise you can totally do this!

As you can see in the pic above, I'm drawing with my favorite pencil. The graphite is super soft and feels similar to a 6B to work with. One Blackwing pencil will replace an entire pencil set because you can get so many different values from it while you're shading faces just by changing the pressure of your pencil as you draw. 
Picture
Now before you judge my quick and dirty shading above, I already know if looks like a scribble scrabble mess at this point, but I promise you - when I start using my blending stump- it's gonna get magical.

Tons of students ask me how, or if I clean my blending stumps. The answer is I DON'T clean them ever, because "the dirtier, the better" is my rule as far as blending stumps go.

However, if you start blending and feel like you're kinda losing control or your drawing is getting too dark- you can absolutely switch to a cleaner blending stump to lighten things up. You can also knock some of the graphite back using an eraser. I love using my vanish eraser for this, but you can also use a kneaded eraser. 
Picture
After I've blended in the first layer of shading throughout, I press my pencil down firmly to add some contrast wherever I see dramatic shadows and details in my face drawing reference image featuring the lovely Mr. Dreymon. 

When you're ready to work on the hair, make sure you click over to watch this in action because I've got a lot of really cool tips to help you if you don't know how to draw male hair. 
Picture
​A great tool to try when you're drawing hairstyles is the Tombow Mono Zero eraser (pictured above). It's basically like a mechanical pencil, in eraser form. It's awesome for carving out highlights when you're shading faces too. 

I hope you enjoyed today's free drawing tutorial on YouTube. If you're drawing along with me in this series, make sure you share a pic of your work in my Facebook Group with the hashtag #50FunFabFairies for a chance to win giveaway prizes on the 1st of the month :) 

​I can't wait to see what YOU create!
​If you're OBSESSED with fairies and fantasy art like me, you might just LOVE the Celtic Collective over at Awesome Art School that I run with my Scottish bestie, Lucy Brydon. Add your name to the waitlist to be notified when it's open for enrollment. 

You might ALSO enjoy our podcast 1Scot,1 Not. 
We talk about everything under the sun to do with Scotland - whether it's historical, fantasy, whatever. Just a quick warning - we have a blast and are totally ourselves on the podcast, which means there is some drinking and swearing. ​​​

❤️ CHECK OUT ALL my art books on AMAZON
❤️ MY FAVORITE ART SUPPLIES on AMAZON
❤️ MY BELOVED FACEBOOK GROUP  
❤️ FOLLOW ME ON INSTAGRAM
0 Comments

The BEST Mixed Media White Pencils, Paint Pens & Inks for Creating Dazzling Highlights!

1/8/2022

1 Comment

 
No mixed media project of mine is complete without adding some dazzling white highlights. As a result, I've developed quite a collection of white pencils, paint pens, and inks over the years.

Today I'm pulling them ALL out to show you which ones I reach for most, and which ones are better off in the trash. Whether you're a mixed media beginner, or a seasoned artist curious about the BEST mixed media art supplies - today's video is for YOU!
Picture
Not sure WHEN to layer your white highlights, or feel like you're struggling with how to layer your mixed media art supplies so you create a MASTERPIECE instead of a hot mess?

You're in the right place! Download my FREE Hamburger System Cheatsheet and learn how to layer your supplies for mixed media success every time!
Picture
Once you've got your cheatsheet, check out my FREE YouTube series breaking down each layer of the Hamburger System in action!
Picture
​Before we continue, super quick announcement: All product links are Affiliate. I may earn a small commission if you choose to order through these links but by law there is never any additional cost to the consumer for doing so. I thank you for your support.
Picture
Adding white highlights to my mixed media projects is one of my FAVORITE things to do when I'm creating. That's probably why I've collected just about every white art supply I can get my hands on!

To get this demo started, I've pulled eight of my favorite white pencils that are not water-soluble. I'm on the hunt for an opaque white that will really make the features in my mixed media drawings pop off the page. 
Picture
Typically if I'm doing a mixed media drawing, I tend to reach for my white china markers because I'm creating something like this on tan toned paper...
Picture
I LOVE my white china marker, but have never actually tested it in a  side-by-side product comparison like this, so it will be interesting to see how it performs. ​
Make sure you watch the video to see how each white pencil swatch compares. I was a little surprised by the results from my super soft, white Conte a Paris pastel pencil! ​​​
Picture
Next up, I tested all of the white mixed media art supplies that look like crayons or pastels. If you're familiar with my Hamburger System, you may already know how much I love using Faber Castell gelatos to shade my mixed media portraits over my acrylic paint layer. 

I have tons of students who really love working with pastels, Neocolor Is (non-watersoluble) and Neocolor IIs (water-soluble) - so I included these in my white art supply product comparison as well. 
Picture
To me, the brightness of the oil pastel really stands out when compared to the other supplies in this category. Watch the video to see what YOU think!

Since pastels work well on top of basically anything and don't require a sealer to stay in place, they could work perfectly for you at the end of a hamburger style project when you're ready to add highlights!
Picture
As far as white pens go, I really struggled to get anything substantial out of all the brands I tested. This comparison was a great reminder to me about WHY I typically avoid using white gel pens in my projects! From the uniball gelly roll pens and signos to a Recollections branded pen from Michaels - they all failed. I don't think any of them are worth your money. In fact, I threw a bunch of the ones I tested out while I was recording this video!

Pitt pens and paint pens by Sharpie (water-based) and Posca are ALL definitely worth it.  I use my paint pens for highlights in everything from tone paper drawings to full-blown mixed media hamburger projects. Check out the video to see which one you think might be best for you. 
Picture
When it comes to white ink product comparisons, I really love how both the copic opaque white and Dr. Ph Martin's Bleed Proof White look once dry. You almost can't tell them apart.    

Copic opaque white comes in two different containers. One has a built-in applicator brush and works a lot like nail polish (- great for teeny tiny details). The other is a little jar that you simply dip a paintbrush into.
Picture
Dr. Ph Martin's Bleed Proof White is about half the price of a copic opaque white (jar), plus goes on easier with better coverage than the copic. I definitely recommend giving it a try. ​
Picture
I recently discovered the wonders of gouache and show you a swatch of an acrylic gouache as well. If you're interested in learning more about what gouache is, and all the different kinds out there on the market today, check out this recent video.

I hope this video helps you decide which white art supplies will work best for you! Thanks so much for hanging out with me today :) 

Wanna learn about ALL my favorite art supplies? Check out this playlist!

​❤️ CHECK OUT ALL my art books on AMAZON
❤️ MY FAVORITE ART SUPPLIES on AMAZON
❤️ MY BELOVED FACEBOOK GROUP  
❤️ FOLLOW ME ON INSTAGRAM
1 Comment

    Karen Campbell

    Founder of Awesome Art School.  Mixed Media Artist.  Author of 18 Instructional Art Books!

    Posting on YouTube every single Wednesday of the year!  

    The Alliance of Independent Authors - Author Member

    Archives

    January 2023
    December 2022
    November 2022
    October 2022
    September 2022
    August 2022
    July 2022
    June 2022
    May 2022
    April 2022
    March 2022
    February 2022
    January 2022
    December 2021
    November 2021
    October 2021
    September 2021
    August 2021
    July 2021
    June 2021
    May 2021
    April 2021
    March 2021
    February 2021
    January 2021
    December 2020
    November 2020
    October 2020
    September 2020
    August 2020
    July 2020
    June 2020
    May 2020
    April 2020
    March 2020
    February 2020
    January 2020
    December 2019
    November 2019
    October 2019
    September 2019
    July 2019
    June 2019
    May 2019
    April 2019
    March 2019
    February 2019
    January 2019
    December 2018
    November 2018

    Categories

    All
    #50FunFabFairies Drawing Challenge
    5 Minute Drawing Practice
    Acrylic Brushes
    Acrylic Painting Basics
    Acrylic Painting For Beginners
    Acrylic Painting On Canvas
    Acrylic Painting Supplies
    Acrylic Painting Tutorial
    Acrylic Paint Types
    Alcohol Ink Painting
    Alcohol Ink Tutorial
    Alcohol Marker Art
    Alcohol Marker Blending
    Alcohol Marker Brands
    Alcohol Marker Drawing
    Alcohol Markers By ArtBeek
    Alcohol Markers Tutorial
    Altered Book
    Altered Book Art Journal
    Art Book Reviews
    Art Deco
    Art Deco Drawing
    Art Deco Style
    Art For Beginners
    Art Heals
    Artist Collaboration
    Art Journal
    Art Journal For Beginners
    Art Journal Ideas
    Art Journal Inspiration
    Art Journal Page
    Art Journal Techniques
    Art Studio Makeover
    Art Supplies
    Art Supply Demos
    Art Supply Reviews
    Art Supply Storage
    Asian Eye Drawing
    Beginners
    Behind The Scenes
    Blackwing Pencils
    Brush Pens
    Canvas Painting
    Cartoon Cat Drawings
    Cat Art
    Charcoal Drawing
    Charcoal Portrait
    Christmas Watercolor Ideas
    Collage
    Collage Ideas
    Collage Techniques
    Collage Tutorial
    Colored Pencils
    Copic Marker Alternative
    Copic Marker Art
    Copic Marker Drawing
    Copic Marker Tutorial
    Copic Skin Tones
    Copic Vs Ohuhu Alcohol Markers
    Craft Gem Projects
    Daniel Smith
    Daniel Smith Watercolor Palette
    Daniel Smith Watercolors
    Dip Pens
    Drawing
    Drawing A Baby Face
    Drawing Books On Amazon
    Drawing Cats
    Drawing Challenge
    Drawing Eyelashes
    Drawing Eyes In Pencil
    Drawing Faces
    Drawing Faces For Beginners
    Drawing Facial Features
    Drawing Female Hairstyles
    Drawing For Beginners
    Drawing Hairstyles
    Drawing Necks Realistically
    Drawing Pencils
    Drawing Tutorial
    Ear Drawing Practice
    Easy Acrylic Painting
    Easy Drawings For Beginners
    Easy Mixed Media Projects
    Easy Owl Painting
    EASY Watercolor Tutorial
    Ecoline Brush Pens
    Eyelashes Drawing
    Faber Castell Gelatos
    Faber Castell Watercolor Markers
    Face Chart Inspired Drawing Tutorial
    Face Drawing
    Face Drawing Practice
    Face Drawing Tutorial
    Face Shading
    Face Shape Drawing
    Face Sketch
    Fantasy Art Drawing
    Fantasy Art Drawing Projects
    Fantasy Art Painting Projects
    Fashion Face Drawing Tutorial
    Fashion Figure Drawing
    Fashion Illustration For Beginners
    Fineliner Tips
    Flip Throughs Of MY BOOKS
    Fountain Pen Ink
    Fountain Pen Ink Painting
    Free Art Lesson
    FREE Drawing Lesson
    Free Lesson
    FREE Watercolor Lesson
    Full Length Drawing Tutorial
    Full Length Face Drawing Tutorial
    Full Length Mixed Media Projects
    Fun Fab Drawing Club
    Fun Fab Fairies
    Gesso Brush
    Glass Dip Pens
    Gouache Meaning
    Graphite Transfer Paper
    Halloween Face Drawing Tutorial
    Halloween Projects
    Hamburger
    Hot Dog System
    How To Art Journal
    How To Choose Face Drawing References
    How To Color A Baby Face In Copic Markers
    How To Create A Watercolor Palette
    How To Draw
    How To Draw A 3/4 View Face
    How To Draw A Baby's Face
    How To Draw A Face
    How To Draw A Fairy
    How To Draw A Fairy Face
    How To Draw A Male Face
    How To Draw And Shade A Face In Copic Markers
    How To Draw And Shade A Whimsical African American Face
    How To Draw Art Deco Style
    How To Draw Asian Eyes
    How To Draw A Smile With Teeth
    How To Draw Bangs
    How To Draw Cartoon Cats
    How To Draw Dreadlocks
    How To Draw Ears
    How To Draw Expressions
    How To Draw Eyebrows
    How To Draw Eyelashes
    How To Draw Eyes Realistically
    How To Draw Fairy Ears
    How To Draw Figures
    How To Draw Freckles
    How To Draw Hair
    How To Draw Lips
    How To Draw Lips Realistically
    How To Draw Noses Realistically
    How To Draw Realistic Ears
    How To Draw Teeth
    How To Draw Wrinkles
    How To Paint Eyelashes
    How To Shade
    How To Shade DARK Skin Tones With Alcohol Markers
    How To Shade Faces With Alcohol Markers
    How To Sketch A 3 Quarter Portrait
    How To Sketch A Face
    How To Transfer A Drawing
    LARGE Canvas Painting Technique
    Magical Mashup
    Marker Tips
    Martini Glass Drawing
    Mermaid
    Mixed Media
    Mixed Media Art
    Mixed Media Art Ideas
    Mixed Media Art Journal
    Mixed Media Art Journaling
    Mixed Media Art Supplies
    Mixed Media Art Techniques
    Mixed Media Art Tutorials
    Mixed Media Backgrounds
    Mixed Media Brushes
    Mixed Media Canvas
    Mixed Media Challenge
    Mixed Media Collage
    Mixed Media Collage Background
    Mixed Media Drawing
    Mixed Media Eyes
    Mixed Media Faces
    Mixed Media Girls
    Mixed Media Hamburger
    Mixed Media Hot Dog System
    Mixed Media Ideas
    Mixed Media Paintbrushes
    Mixed Media Painting
    Mixed Media Portraits
    Mixed Media Project
    Mixed Media Society
    Mixed Media Techniques
    Mixed Media Tutorial
    Mixed Media Tutorials
    Mixed Media Watercolor
    Mixed Media YouTube
    Monochromatic Drawing
    My Favorite Art Supplies
    My Favorite Watercolors
    New Book!
    No Draw Mixed Media Art Project
    Noodler's Ink
    Nose Drawing Practice
    Ohuhu Alcohol Markers
    Old Book Crafts
    Owl Painting
    Paint Brush Types
    Painting On Canvas
    Painting With Ink
    Paint Markers
    Palette Knife Painting
    Pan Pastels
    Paper Napkin Art Journal Background
    Pencil Drawing Tutorial
    Portrait Drawing
    Portrait Drawing Tutorial
    Posca Alternatives
    Posca Paint Pens
    Profile Drawing
    Quadrant Method
    Reference Drawing
    SEE INSIDE MY Art Books!
    Shading Faces
    Sheet Music Art
    Side Profile Drawing
    Side View Drawing
    Silver Black Velvet Brushes
    Sketching Tutorial
    Skull Watercolor Tutorial
    Spray Paint On Canvas Idea
    Stabilo All Pencil Projects
    Stenciling & Stamping Techniques
    Three Quarter View Face
    Time Lapse Drawing Video
    Tissue Paper Art Journal Background
    Tombow Brush Pens
    Tombow Mono Zero Eraser
    Toned Paper Drawing
    Travel Art Supplies
    Upcycled Art
    Upcycle Old Books
    Value Scale Drawing
    Vintage Book Pages
    Watercolor
    Watercolor And Colored Pencil
    Watercolor Brushes
    Watercolor Fairy
    Watercolor Markers
    Watercolor Marker Tips
    Watercolor Marker Tricks For Mixed Media
    Watercolor Portrait
    Watercolors
    Watercolor Sets I Love
    Watercolor Supplies
    Watercolor Tutorial
    WatercolPainting Techniques
    Watersoluble Art Supply Tricks
    Water Soluble Markers
    Water Soluble Pencils
    What Is Mixed Media Art?
    Whimsical-christmas-tree
    Whimsical Face Drawing Tutorial
    Whimsical-face-drawing-tutorial
    Whimsical Women Of The World World Portrait Drawing Series
    YouTube Drawing Channel
    Youtube-giveaway
    Youtube-video
    Youtube-video

    RSS Feed

Picture
"Karen is flipping hilarious and she's very real...I like the way she teaches in a way that really gives you confidence, whether you're a beginner or advanced there's always something new to learn!"

- Elizabeth W.

What Fans Are Saying

Karen, you are absolutely fabulous! You make me feel like I can draw anything. I have recently retired and finally have the time to do some of the art that I have loved since I was in school. I am really at the beginning of my art journey and I hope to learn as much as I can. Thank you for all you do.

​-Jill Y.

I ordered your Fun Fab Faces book and loved it! I was having a little trouble getting the noses I wanted and now it's easy! Also, I love how you stressed how important having the three tones in your drawing is. Thanks a bunch!

-Donna L.

Thank you Karen! I never though I could do faces. You broke it down so it was understandable! And I love your book! I got it yesterday! Can't wait to start practicing! It's so much fun!!!!!

​-Debbie M.

Thank you for the encouragement to get back into my drawing and painting. After being away for 35 years.  THANK YOU.

- Teresa S.

Contact Us

  • HOME
    • About Me
    • Courses
    • Add your art to Instagram!
    • Fan Artwork
    • Retreats
    • What Students Say...
  • Drawing Club
    • See ALL the Projects!!
  • MIXED MEDIA SOCIETY
    • See ALL the Projects!!
  • CELTIC COLLECTIVE
  • Books
  • Blog