blog
Let's Get Your Creative Juices Flowing!!!
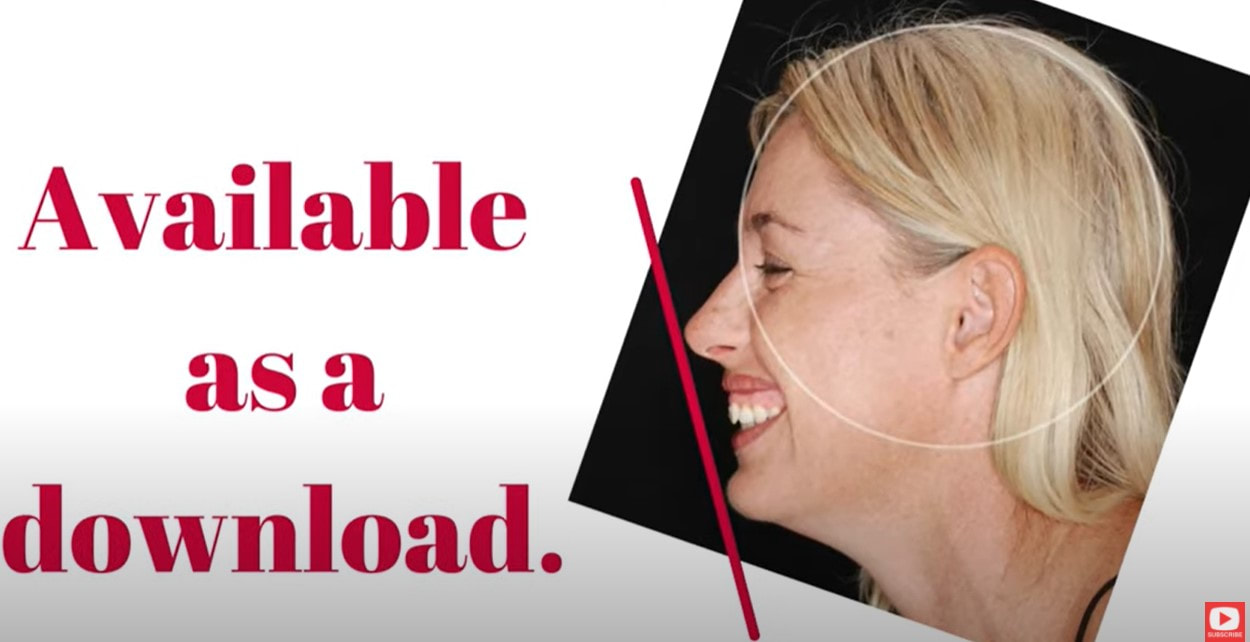
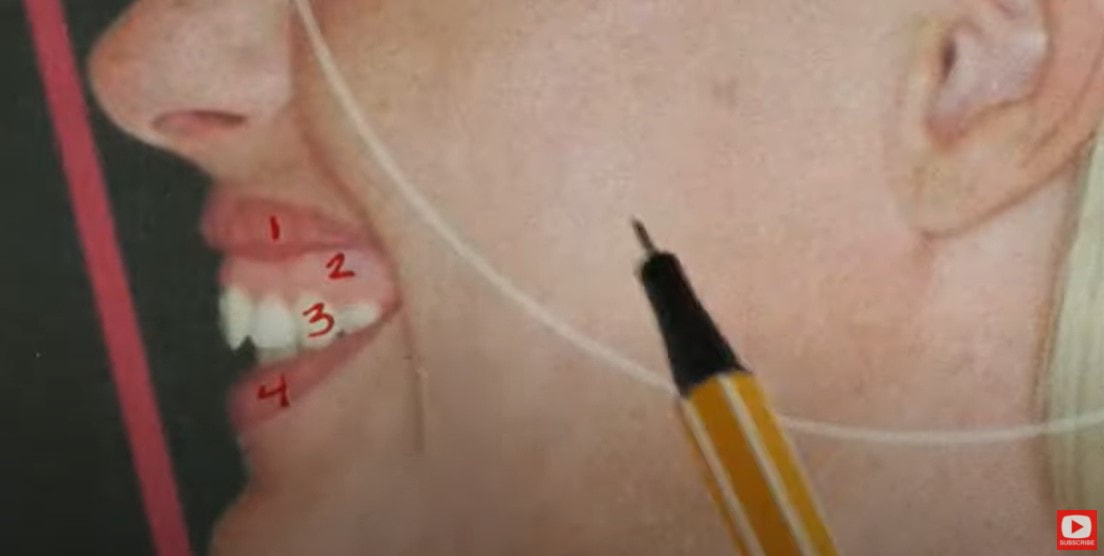
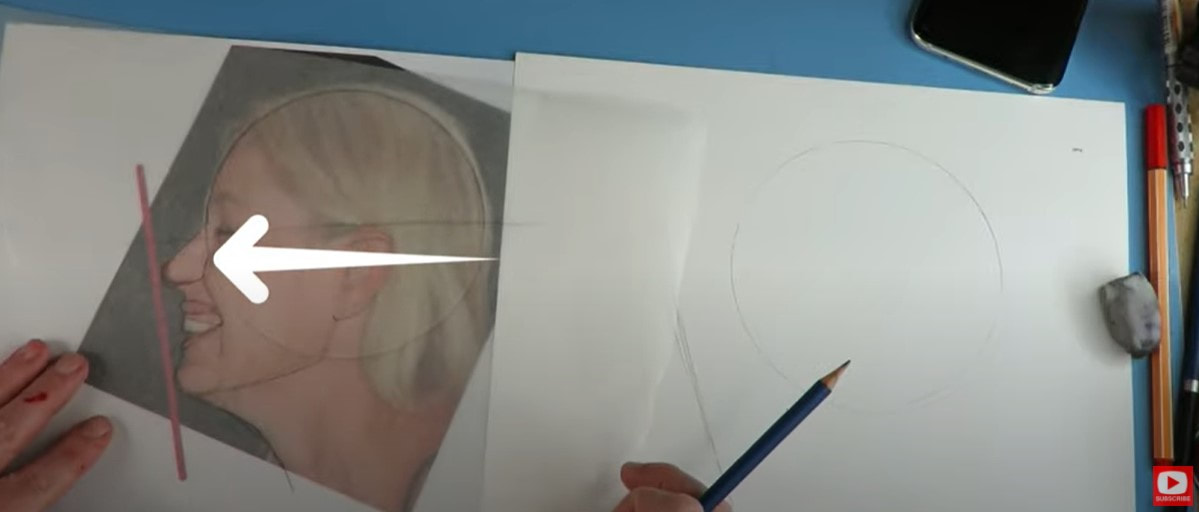
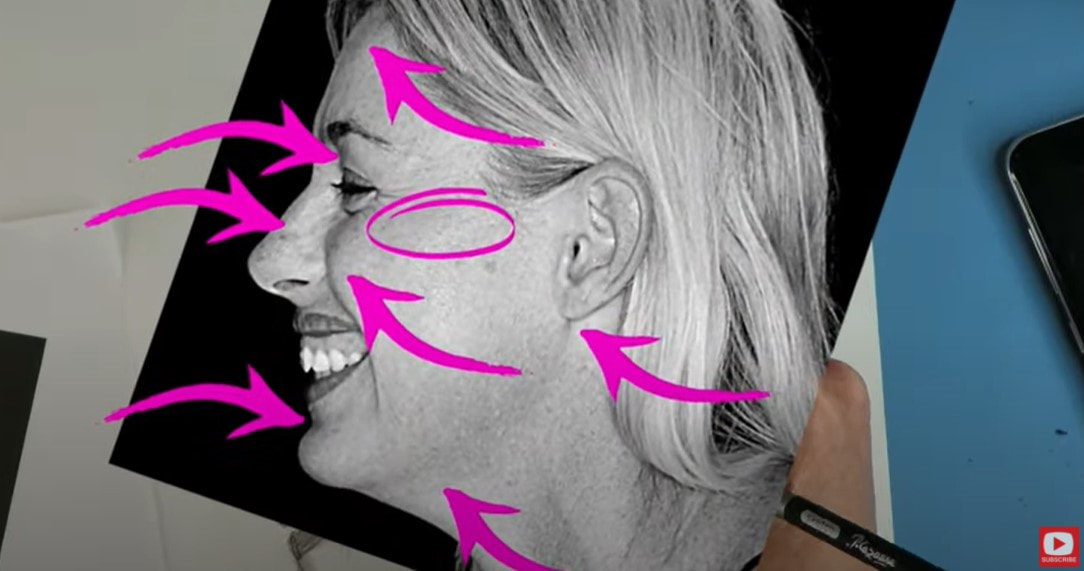
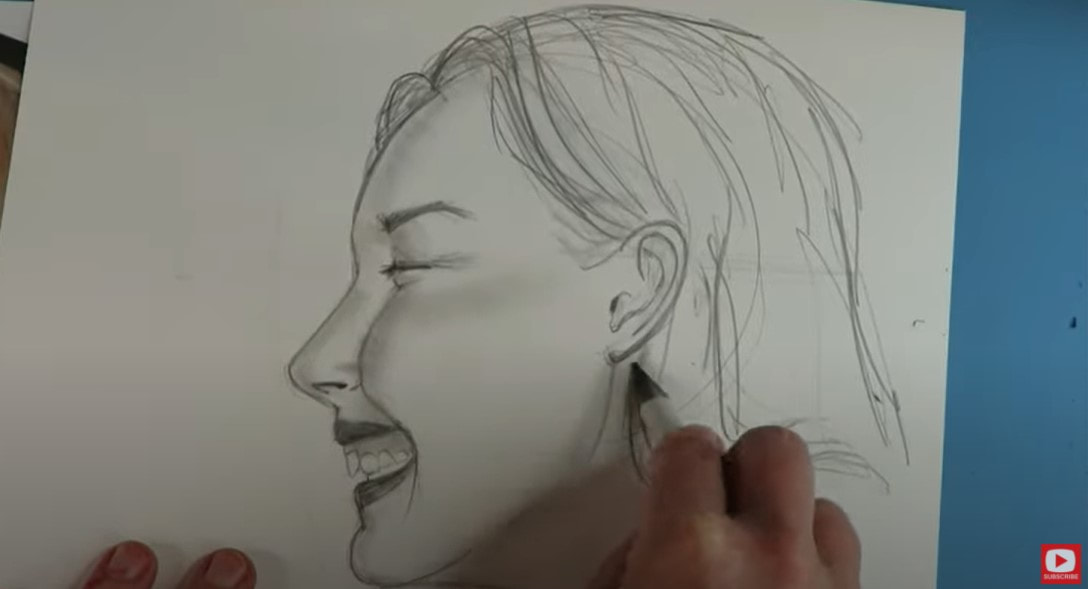
While we've been working through how to draw profiles this month on my drawing channel, I've shared with you what a STRUGGLE I used to have with these!! I hope they're getting easier FOR YOU with all the tips and resources I've been sharing to help you figure this out FASTER than I did ;) When you are comfortable with profile face drawing, shading, and adding in a FUN assortment of hairstyles, you can try jazzing up your sketchbook by adding some EXPRESSIONS. Using a photo for inspiration (reference drawing) will make this process SO much easier than dreaming up an expression from scratch! A photographic reference has tons of information we can try to replicate in our drawings from angles to shading to make our drawings look SO much better!! And... if you haven't done this before, as always, I've GOT YOU! And... I'm gonna teach you to do this step by step in today's drawing tutorial! To get started, you're gonna need a sheet of trace paper, a sheet of drawing paper, a pencil, eraser, and the reference photo for today's project (just request that in the comments of today's video if you'd like a copy!). The first step today is to is to sketch a circle, followed by our profile drawing guidelines. Not sure what these are or how to do it? Go ahead and start this Profile Drawing Series from the beginning and work your way up to the expressions video! Next, we need to replicate the angle of this reference photo's nose to chin (follow that red line I've drawn up above!) to get the drawing proportions of the face just right. As you'll see in the drawing video, I also want you to pay special attention to the black, negative space around this woman's profile in the background. That gives us TONS of info for our drawing so we can make it match the reference photo accurately (even if you're not doing a realistic drawing!). In the photo above, you'll see I actually took the time to NUMBER the parts of the mouth on the reference photo that I needed to include in my own drawing to accurately replicate this profile expression. This is a SUPER HELPFUL tip that can make all the difference to help you break a drawing down step by step. One of the biggest challenges in drawing more realistic faces is remembering to include all the components from your reference photo in your own drawing. Another huge tip when you're using a reference photo like this, is to lay a sheet of trace paper on top of your reference to physically trace some major guidelines for yourself. Then you can lay the trace paper you've drawn on over your own drawing to double check angles. It will help you see if something needs to be adjusted before moving forward with your drawing. When I'm doing a drawing in graphite, I often will print my reference photo in black and white (see below!), because it TOTALLY helps me see where I need to throw in shading when I've finished my sketch. This makes is SO MUCH EASIER to find the shadows and replicate them in grayscale, like I did below... See how the shadows are easier to spot now? I pointed out a million spots to get ya started on your shading!! Blending out some of the graphite in your shading with a blending stump (that's what is in my hand in the pic below), will also soften your shading and turn your piece into a more 3 dimensional drawing that looks more realistic! Don't stress if you don't have a blending stump. Tons of artists will use a finger! You can also use a q tip, or even a tissue as well. If you DO have a blending stump - let it get dirty!!! The dirtier the better ;) I hope you enjoy today's drawing project and mini lesson!! Have FUN with it!!! Stay tuned for next Monday's profile episode- we'll be putting everything we've learned into action and using copic markers to SHADE a PROFILE in COLOR!! See ya then!!
1 Comment
|
Karen CampbellFounder of Awesome Art School. Mixed Media Artist. Author of 15 Instructional Art Books! Archives
February 2021
Categories
All
|
What Fans Are SayingKaren, you are absolutely fabulous! You make me feel like I can draw anything. I have recently retired and finally have the time to do some of the art that I have loved since I was in school. I am really at the beginning of my art journey and I hope to learn as much as I can. Thank you for all you do. |
Contact Us |