|
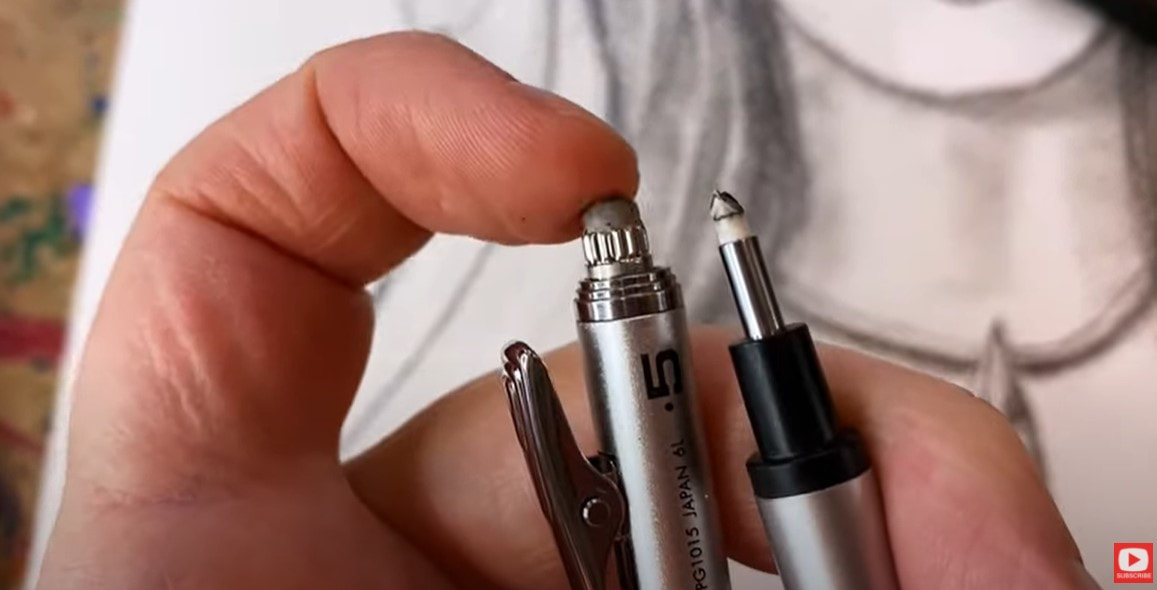
The Tombow mono zero eraser is an ESSENTIAL drawing supply in my studio. If you've never used it before - the mono eraser is built like a mechanical pencil, but filled with a long, skinny eraser instead of graphite.
In today's drawing supply demo, I'll show you why the Tombow mono eraser is a MUST HAVE in my studio + the QUICK & EASY ways I use it to add dimension when I'm shading faces in graphite. If you're just learning how to draw faces, or curious about what the mono zero eraser can do for you - today's video is a MUST SEE!!
Before we continue, super quick announcement: All product links are Affiliate. I may earn a small commission if you choose to order through these links but by law there is never any additional cost to the consumer for doing so. I thank you for your support.
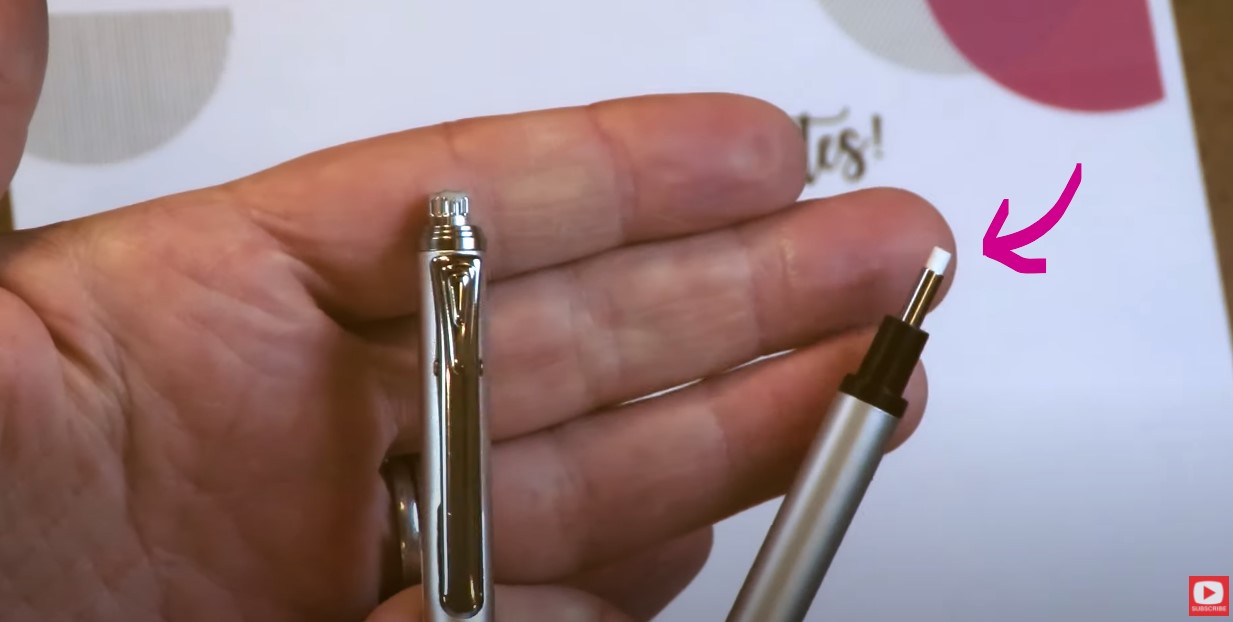
The mono eraser is one of my MOST FAVORITE drawing tools on the planet! As you can see, the mono eraser (right) is WAY smaller (less than half the size!) of the eraser on my pentel mechanical pencil.
The mono's tiny eraser nib enables me to chisel highlights into my drawings after I've already done some shading.
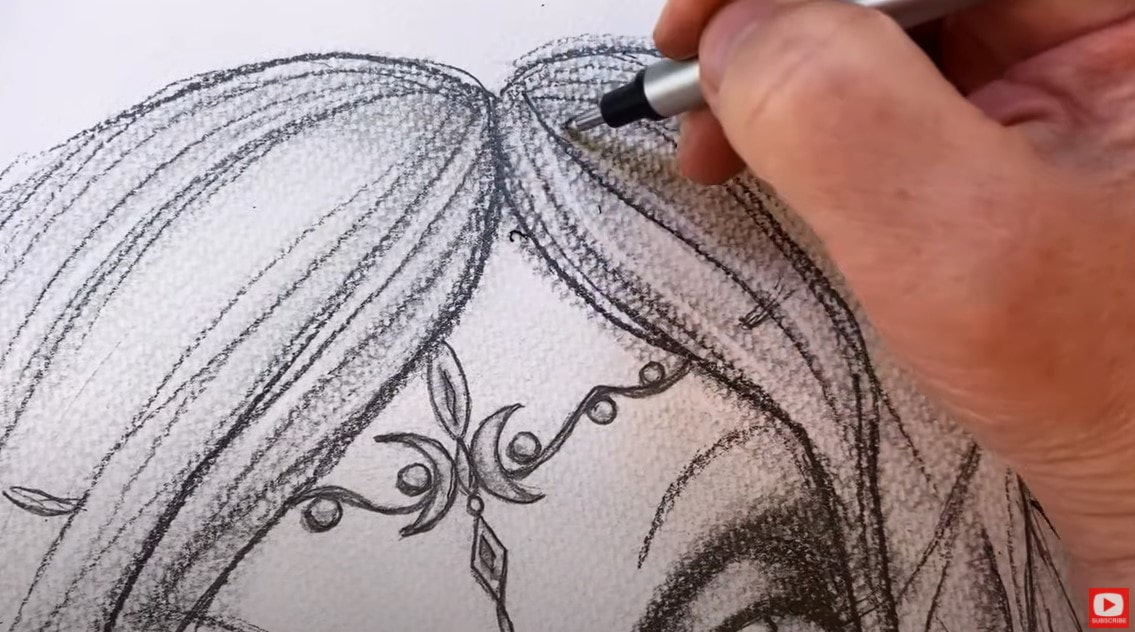
I've nearly finished a Fairy Witch graphite drawing project for The Celtic Collective, and just need to add in some highlights. I thought you might like to watch how I do this using the mono eraser. Interested in learning MORE about the Celtic Collective? Add your name to the waitlist here to be notified the next time we're open for enrollment!
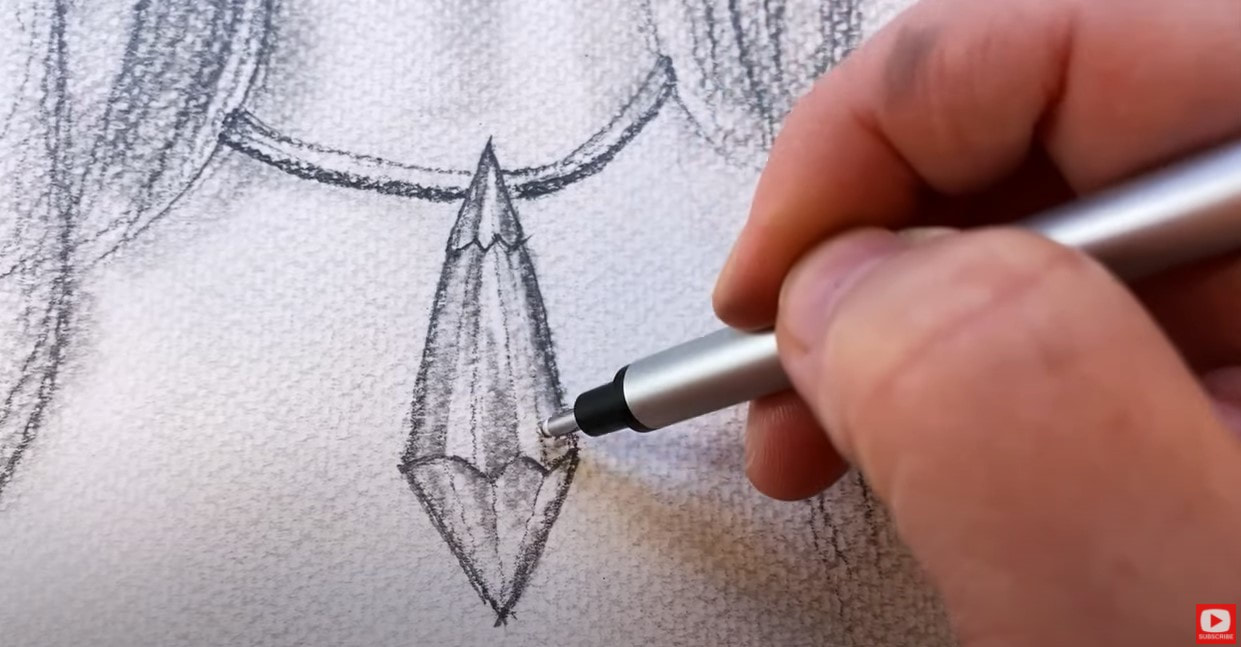
The crystal necklace around this girl's neck is definitely an area where I need to add some thin reflections. I use my mono eraser in a similar way to my drawing pencils and tend to just "draw in" highlights wherever I want them to go.
It's literally like sculpting - I carve the highlights OUT of previously shaded sections to remove some of the graphite and add dimension by revealing newly "drawn" white highlights.
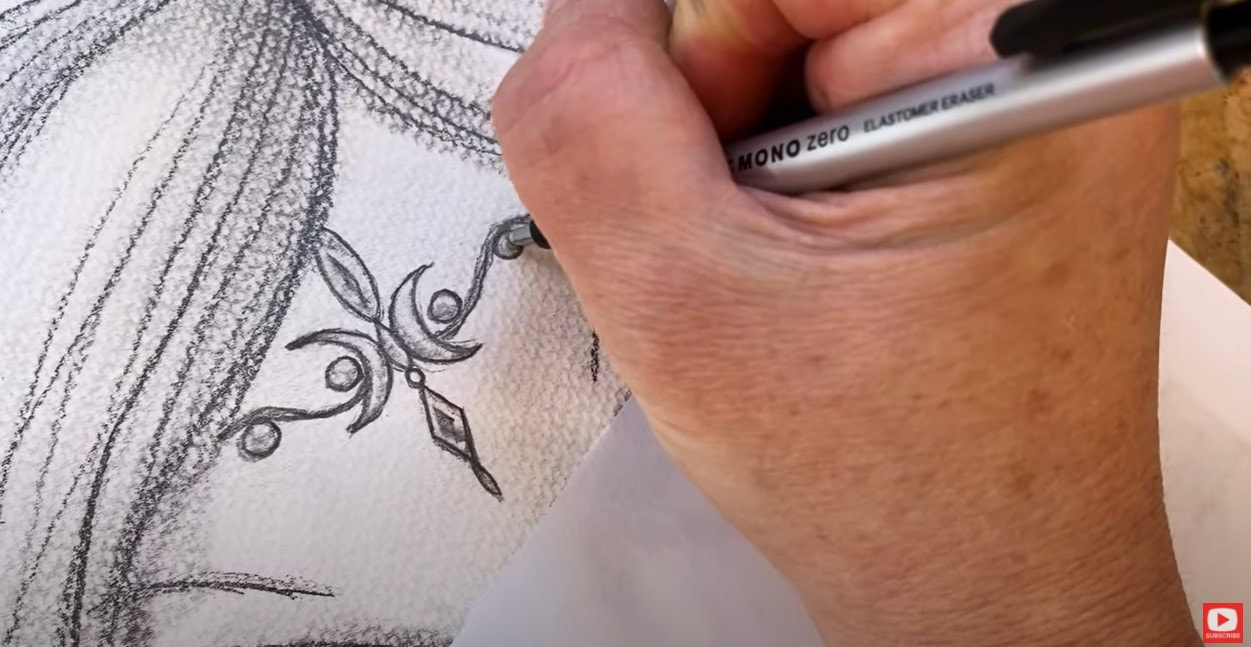
Another way I like to use the mono eraser is for cleaning up my edges. In the photo above, I ran the tiny eraser nib along the darker outlines of this piece of jewelry to remove sketchy lines, smudges, etc.
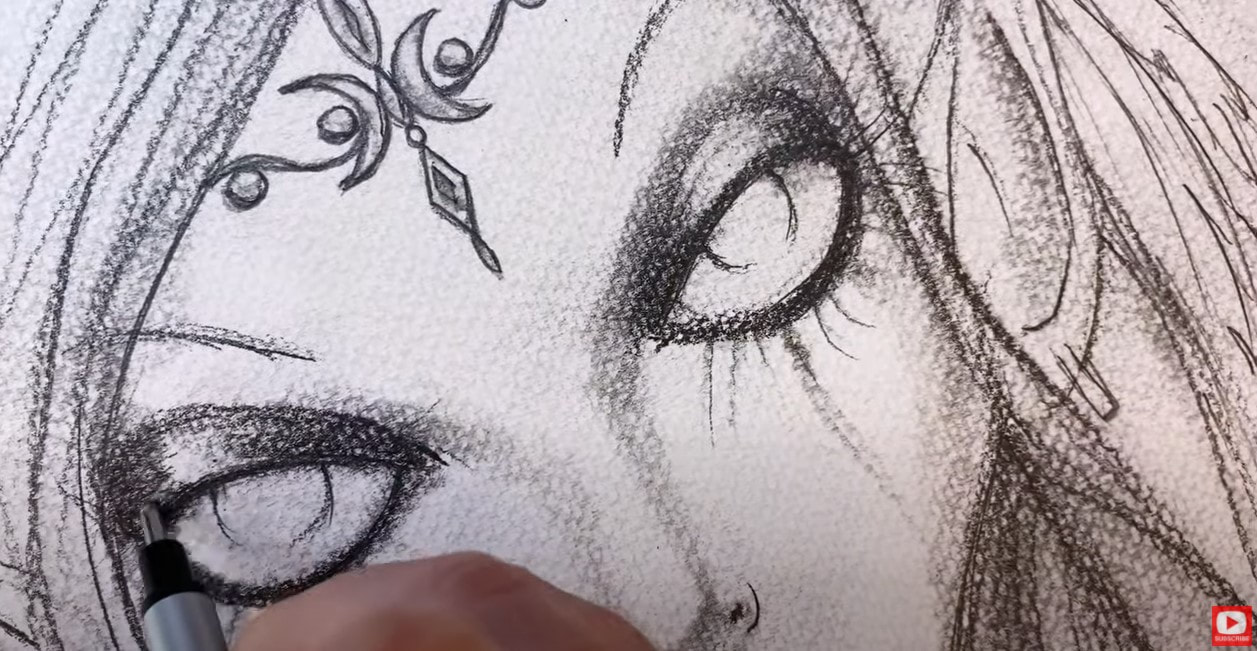
I LOVE adding drama to the center of the upper eyelids when I'm shading faces. My Tombow mono zero eraser is perfect for blending out highlights here to help the eye look more bulbous and realistic.
Do you love drawing and shading faces too? Or maybe you're just learning how to draw faces? You NEED my FREE whimsical face drawing guidelines. They're super easy to follow, and will help you draw proportional facial features every time. Simply click the button below to request your free guidelines cheatsheet, and I'll email it right over!
If you're just getting starting with learning how to draw faces, I've got a quick playlist of face drawing tutorials for you to practice with, that is perfect for beginners! It's FREE on YouTube, and is the perfect way for you to start playing with the whimsical face drawing guidelines.
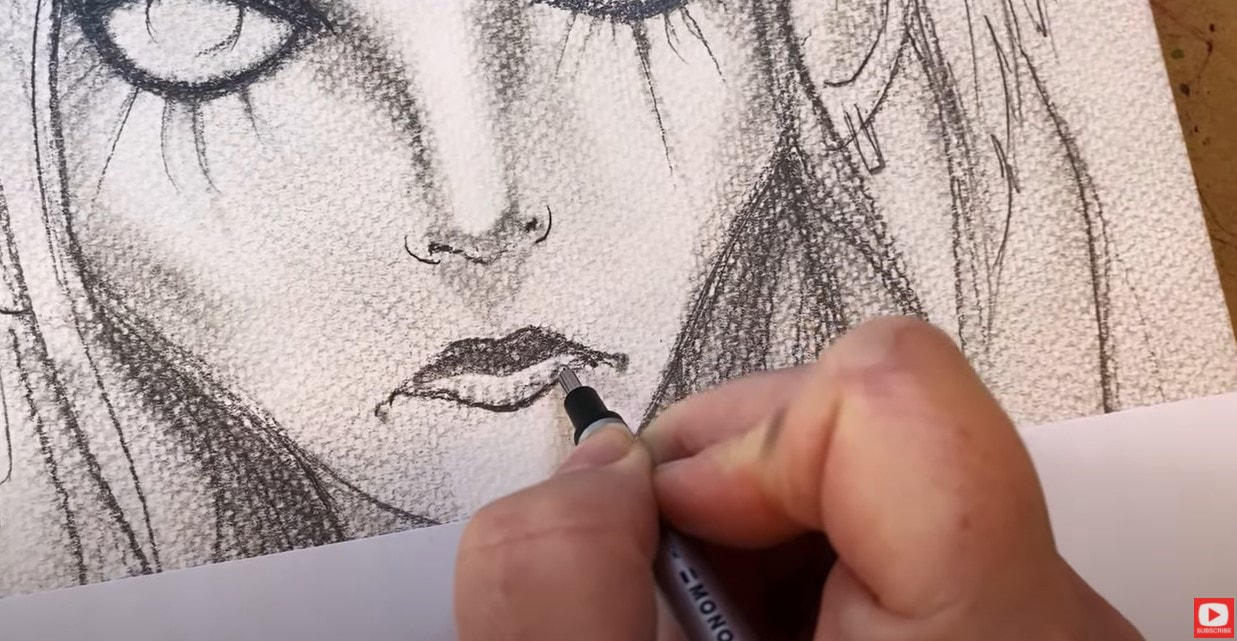
If you know me and my work at all, you KNOW I'm not a huge fan of detail work. LOL! But the Tombow mono zero eraser has helped me add another layer of dimension to my work and I kinda love doing it!!
Whenever I'm drawing hairstyles in pencil, I also love using my mono zero eraser to create the illusion of individual strands of hair within my drawing. CLICK OVER to the video to see this technique in action.
Thanks for hanging out with me today! ❤️ CHECK OUT ALL my art books on AMAZON ❤️ MY FAVORITE ART SUPPLIES on AMAZON ❤️ MY BELOVED FACEBOOK GROUP ❤️ FOLLOW ME ON INSTAGRAM
0 Comments
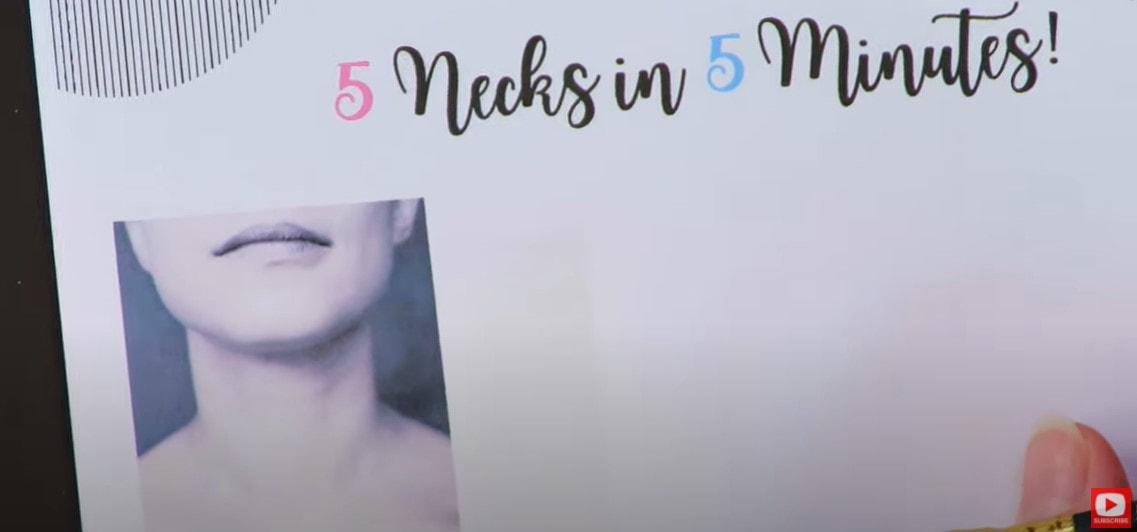
Wanna practice drawing necks realistically in JUST 5 minutes?! LET'S DO IT!! In today's step by step drawing lesson, we're going to be drawing 5 female necks in real time, directly onto my FREE drawing worksheets. If you need help with how to draw necks, have always wanted to learn how to draw a face, are struggling with how to work drawing practice into your daily life, or need to add MORE FUN into your art practice, THIS SERIES IS FOR YOU!!
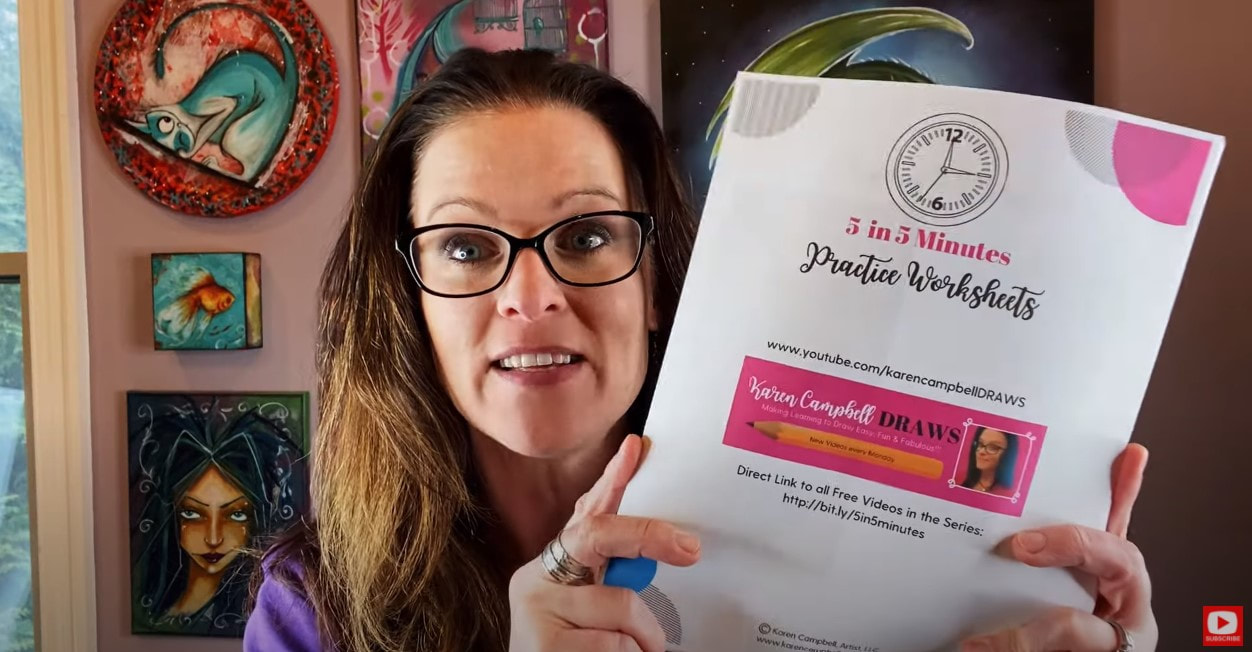
I'd love for you to draw right along with me! Simply click the button below to grab my FREE 5 in 5 Facial Features Drawing Packet, and I'll send it straight to your email inbox.
Today's video is a follow up to a facial features drawing series I did a couple of months ago because I'm getting a lot of requests for how to draw necks and eyebrows!
If you're just discovering this series on how to draw facial features, the whole point of this thing, is just to get us practicing our drawing skills. We're not making it our "life's work," it's just a little drawing exercise, and we're only going to spend about 5 minutes working with each neck drawing reference photo, then we're moving on.
You'll see a stop watch going in the bottom of my screen. It's not here to stress you out. It's just to remind ME not to spend more than 5 minutes with any one reference image. Before we continue, super quick announcement: All product links are Affiliate. I may earn a small commission if you choose to order through these links but by law there is never any additional cost to the consumer for doing so. I thank you for your support!
When we're working on these drawing worksheets, there are three things I encourage you to focus on one at a time, when looking at each neck drawing reference image:
1. Shape 2. Value 3. Details For my supplies today- I'm just using my favorite Blackwing pencil - it's like a soft 4B, and super smooth to work with. You're also gonna need a blending stump, an eraser (I love my vanish eraser and the tombow mono eraser).
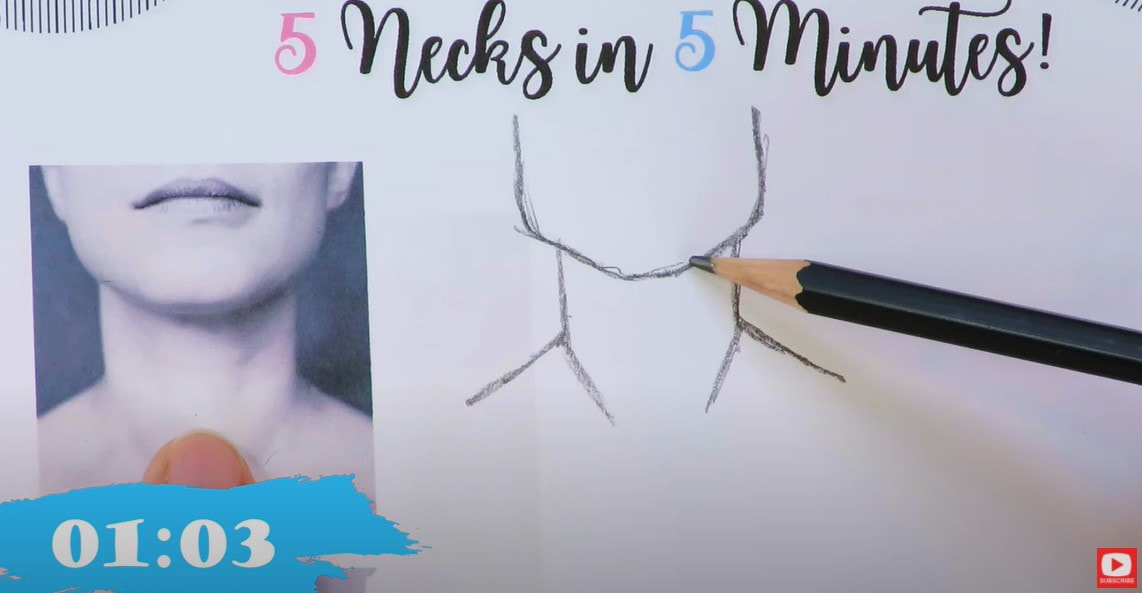
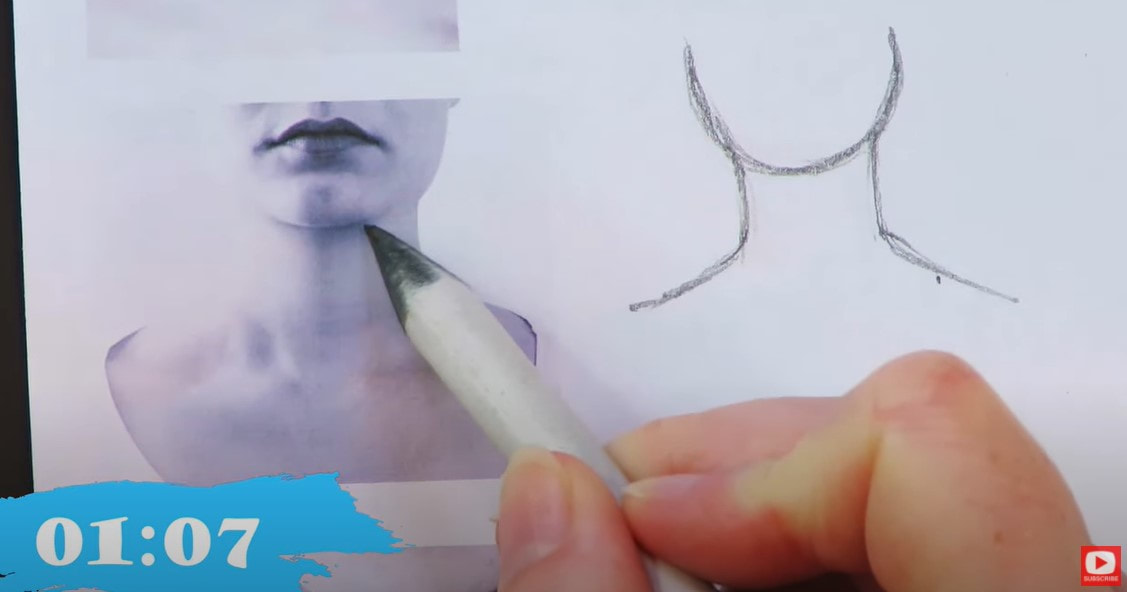
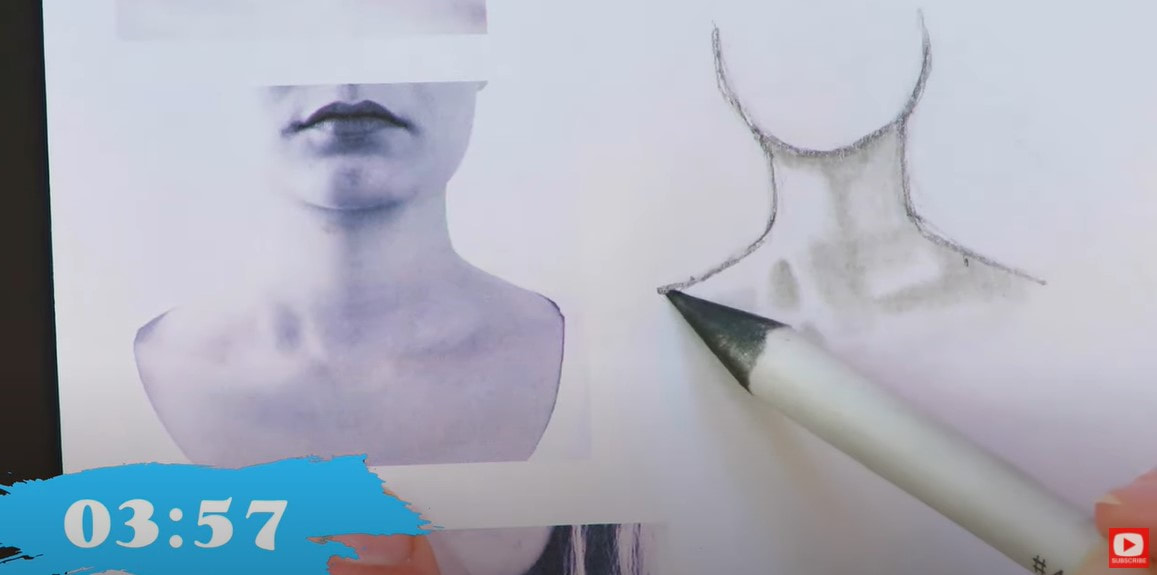
In each neck drawing reference photo, I left in the jawline visible so we can look at how thick the neck is, and where it begins in relation to the head.
I started drawing the jawline on my first reference image with the chin, then added in the angles I saw in the model's face shape.
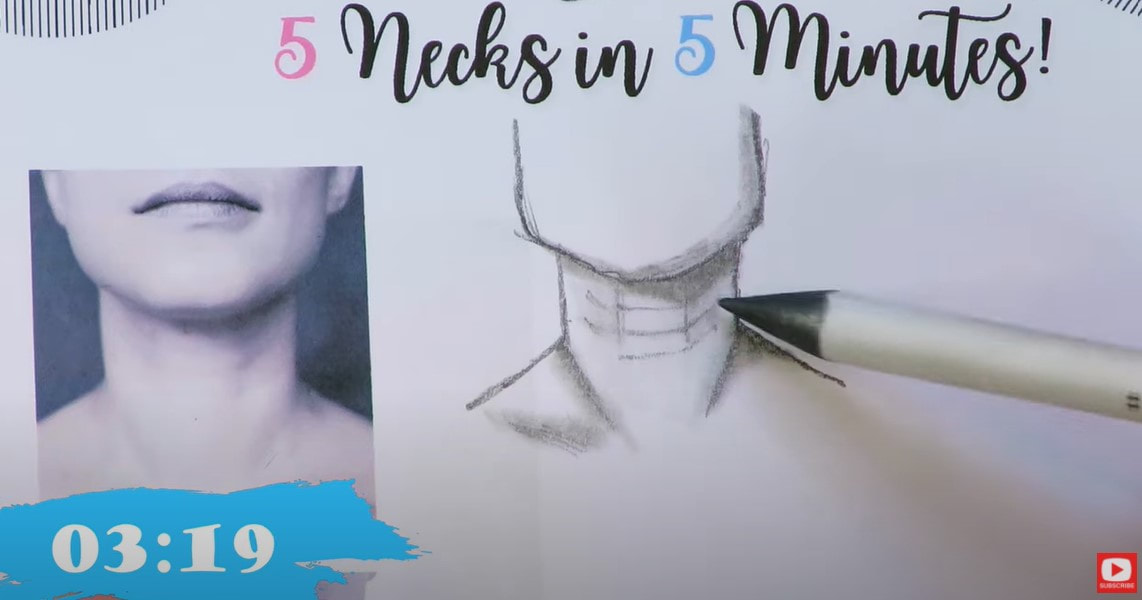
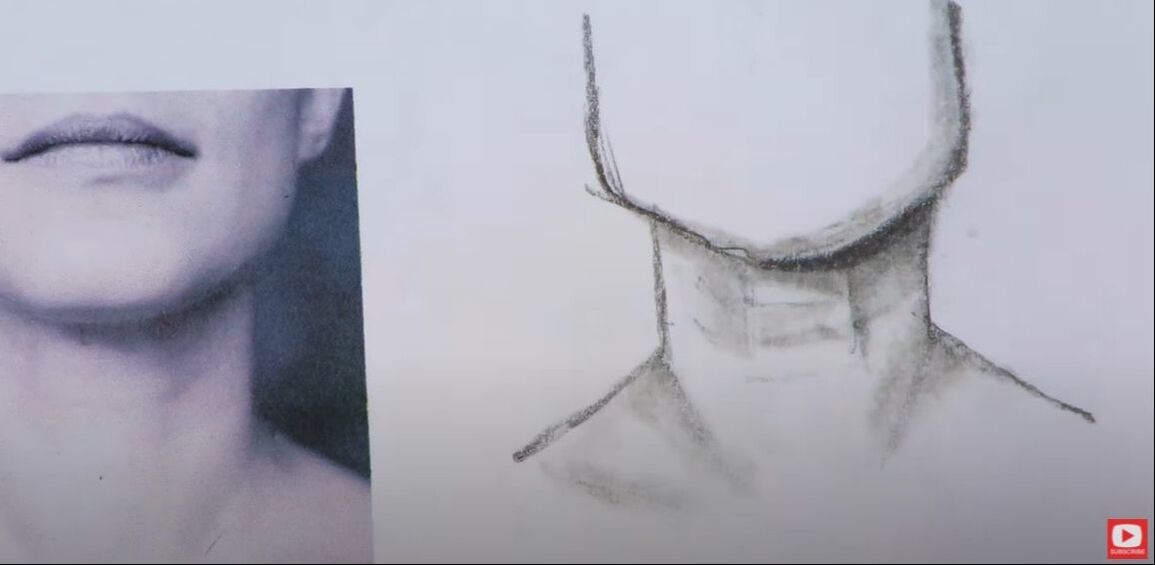
Once the angles were penciled in, I took a minute to study the reference for any other lines that felt like they need to be drawn in (see below). Then I grabbed my blending stump to begin dragging some graphite around to help indicate the shadows I saw in the model's neck.
Make sure you download your 5 in 5 Drawing Packet so you can practice right on the drawing worksheets with me. Then click over to the video so we can do this quick drawing practice together in real time (no timelapse).
While doing this drawing practice, I realized necks are really WAY more about shading than drawing!
If you're someone who's been afraid to try drawing a face realistically, or if you've been afraid to try adding a little bit of shading to your drawings - this is the PERFECT drawing exercise for you! Plus it's quick - something I always love!!
If you need to knock back any areas of your shading because they've gotten too dark, use your eraser to "pounce" and lift a little graphite off the page. Click over to the video to see this drawing technique. Keep checking your reference image to compare the lightest and darkest areas on the model's neck with your own drawing.
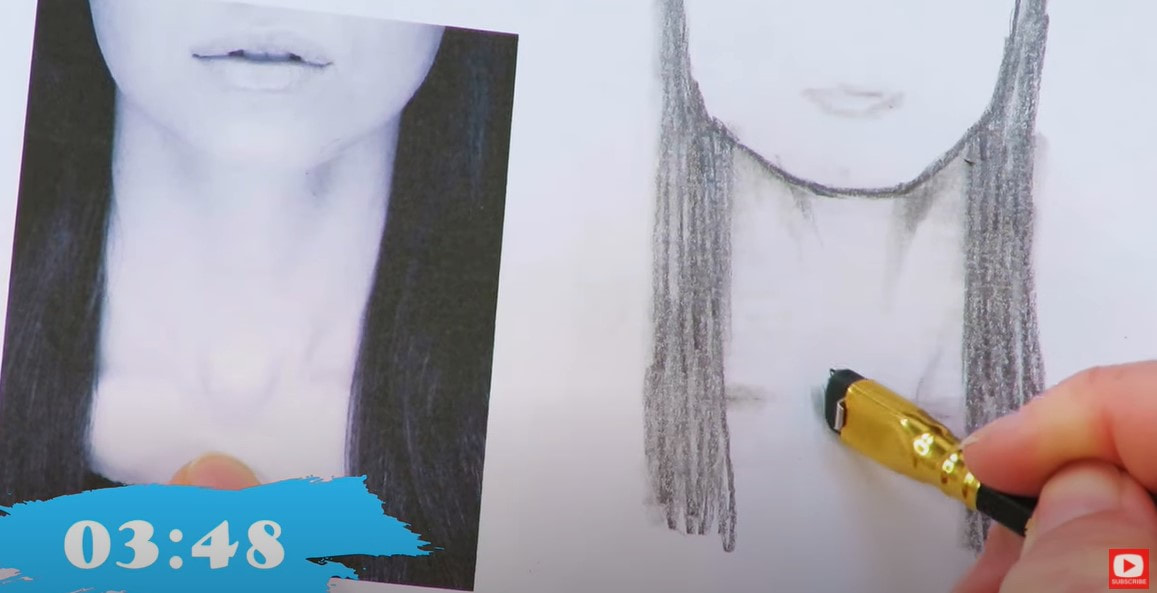
Our next reference image has a more rounded face shape than our first model, and a wider neck.
My hope in today's free drawing lesson is that you can sharpen your observational skills, and let go of any fears you have about not having an anatomy background for drawing.
You don't need it for the kind of drawing we're doing! This is just some light practice, and the anatomy can be indicated with your shading.
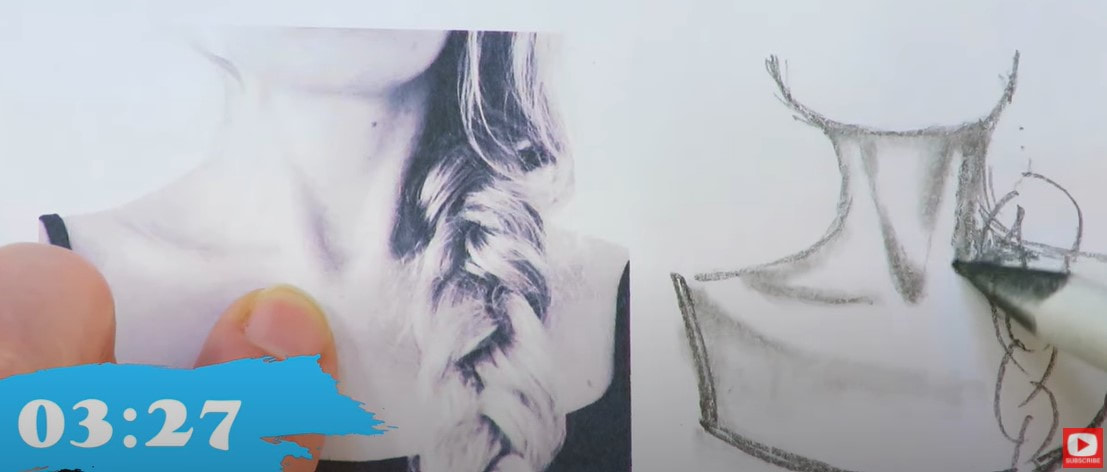
Our third reference image has some super dramatic shading for us to work on in the neck and collarbone. If you want to add in her braid- feel free, but don't stress about it. Today's practice is just about focusing on the neck.
Did you grab yourFREE 5 in 5 Drawing Practice packet and print it out yet? I hope so!!
As I always say, "You'll NEVER get worse with more practice." So print that sucker out, and let's get to work! If you're enjoying today's episode, make sure you check out the entire series on my YouTube drawing channel, because I teach you how to draw and shade eyes, eyebrows, noses, lips, hair, face shapes & more! Plus, each facial feature has 2 pages of black and white face drawing reference images to study and capture in your own drawing practice - right on the same pages. Our fourth neck drawing reference is SUPER subtle, and will help you sharpen your observational skills as we zero in on the highlights and shadows in this image together.
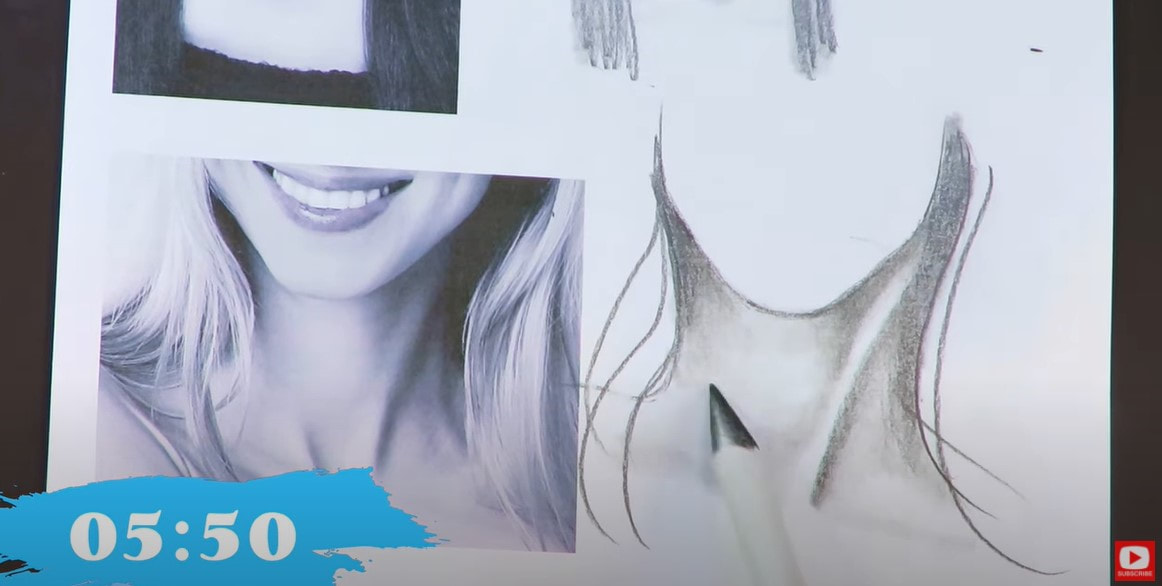
Our last drawing reference (below) for today has a super unique shape and lots of beautiful values for us to concentrate on replicating in our own drawing.
Make sure you grab my 5 in 5 Practice Packet so YOU can sharpen your drawing skills right along with me.
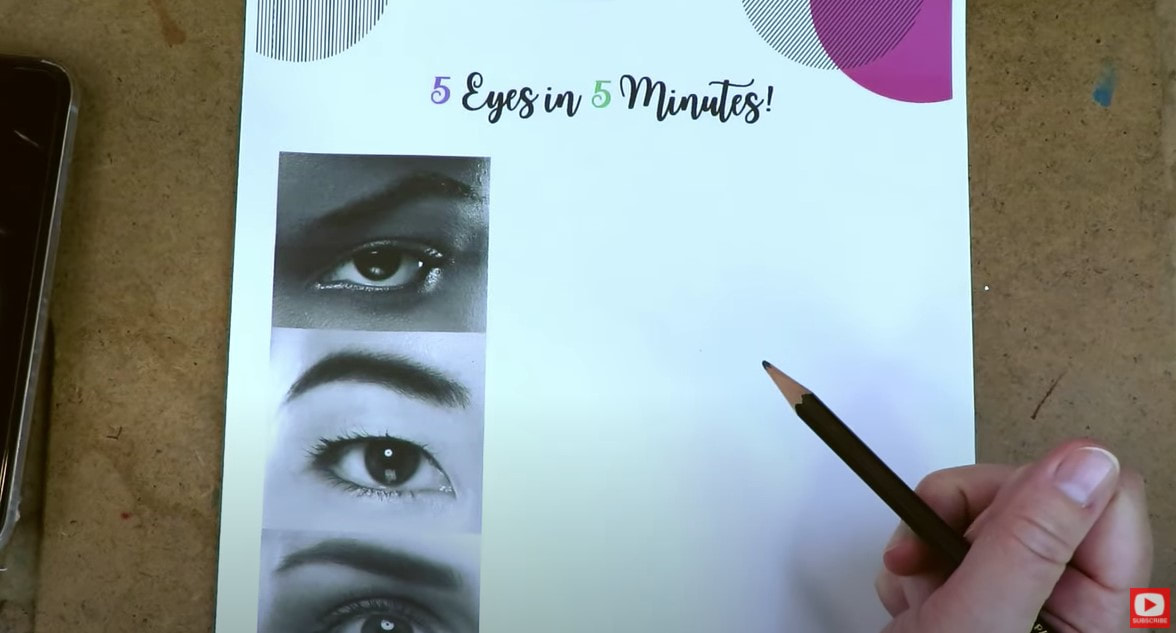
Thanks for hanging out with me today! Interested in learning about how to create a mixed media portrait, but missed my Mixed Media Art Deco Workshop last week? Don't worry! You can STILL sign up and do this at your own pace - any time you want!! No art experience is needed for this super FUN online art class - I'll teach you everything you need to know, and we'll go step by step, together. HOW to DRAW EYES REALISTICALLY in Just 5 MINUTES! (#DrawingFacialFeatures with Karen Campbell)15/2/2021 Want me to teach you how to draw eyes realistically in just 5 minutes?! LET'S DO IT!! We're drawing facial features right now on my YouTube drawing channel and spending about 5 minutes drawing each reference image. If you've always wanted to learn how to draw a face, have been struggling to work drawing practice into your daily life, or need to add MORE FUN into your art practice, THIS SERIES IS FOR YOU!! We're in week three of the 5 in 5 Drawing Facial Features series, and focusing on how to draw eyes - everyone's favorite! Make sure you download my 20-page drawing practice packet so you can draw right along with me. It's got all the drawing reference images in it and is yours FREE. Simply click the button below, and I'll send it straight to your inbox! Even though I'm on week three of the series, don't feel like you're behind if you are just discovering this. These drawing exercises are for YOU to do on your own time, at your own pace. There is no schedule, ok? I thought this packet might help us to "get out of our own heads" about how much time we need to set aside each week to actually DO an art project. That's one of the main reasons I'm trying to only spend about 5 minutes per eye drawing. I also know perfectionism is a big thing we all grapple with at times, especially when it comes to drawing. I'm hoping this will help! If you missed the first episode - I talked a lot about mindset shift, so make sure you check that out if it's something you struggle with.  Let's get to it!! We've got five gorgeous eyes to focus on today. As we work on each eye drawing picture provided, I mainly want you to think about three things:
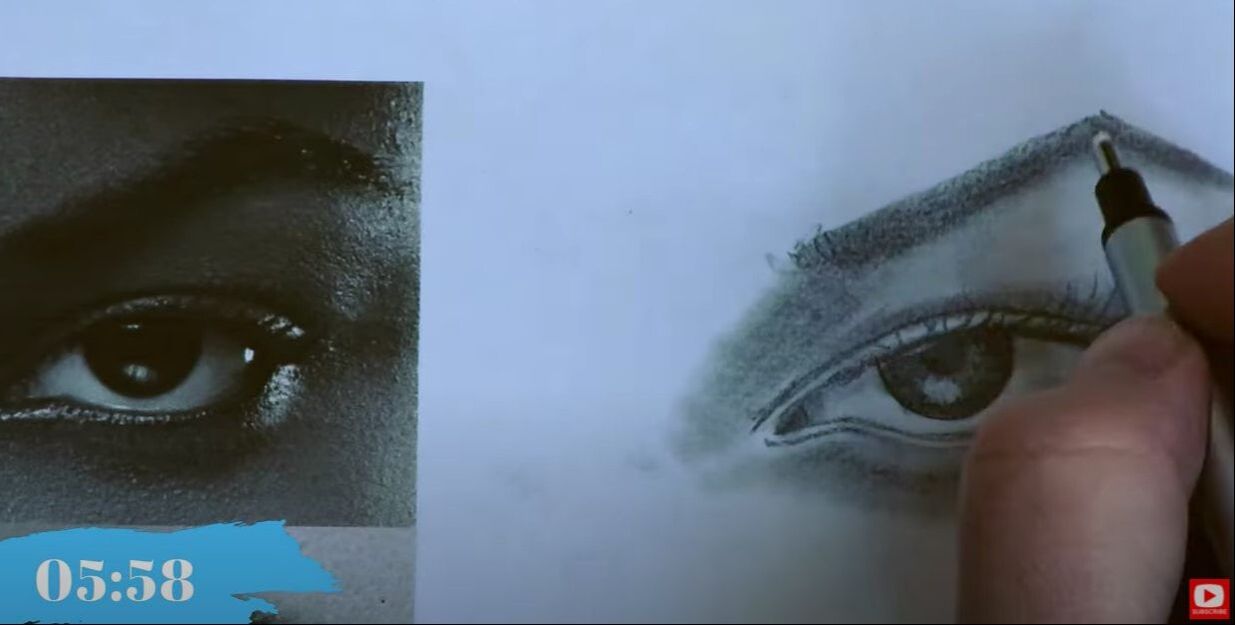
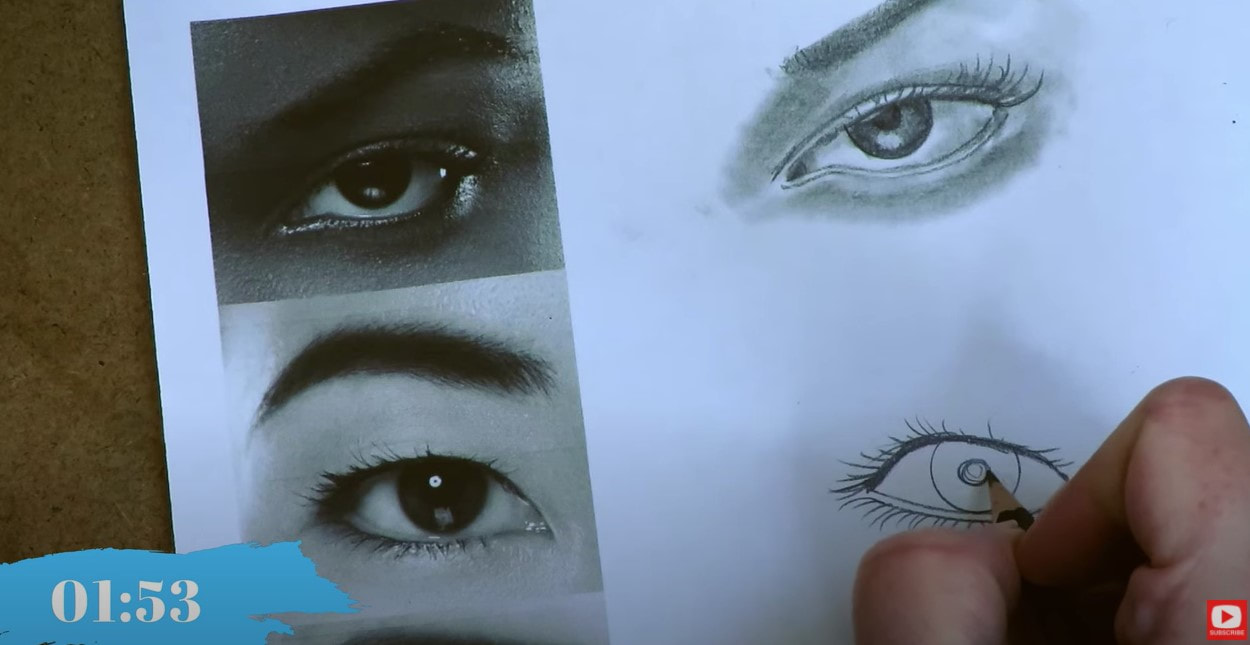
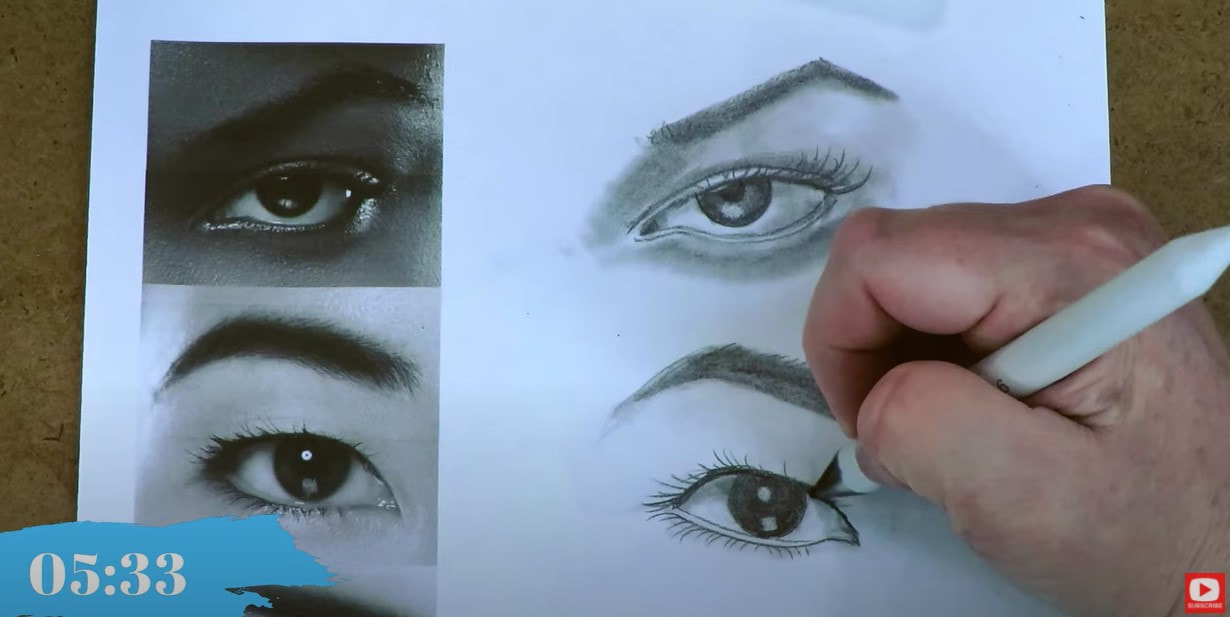
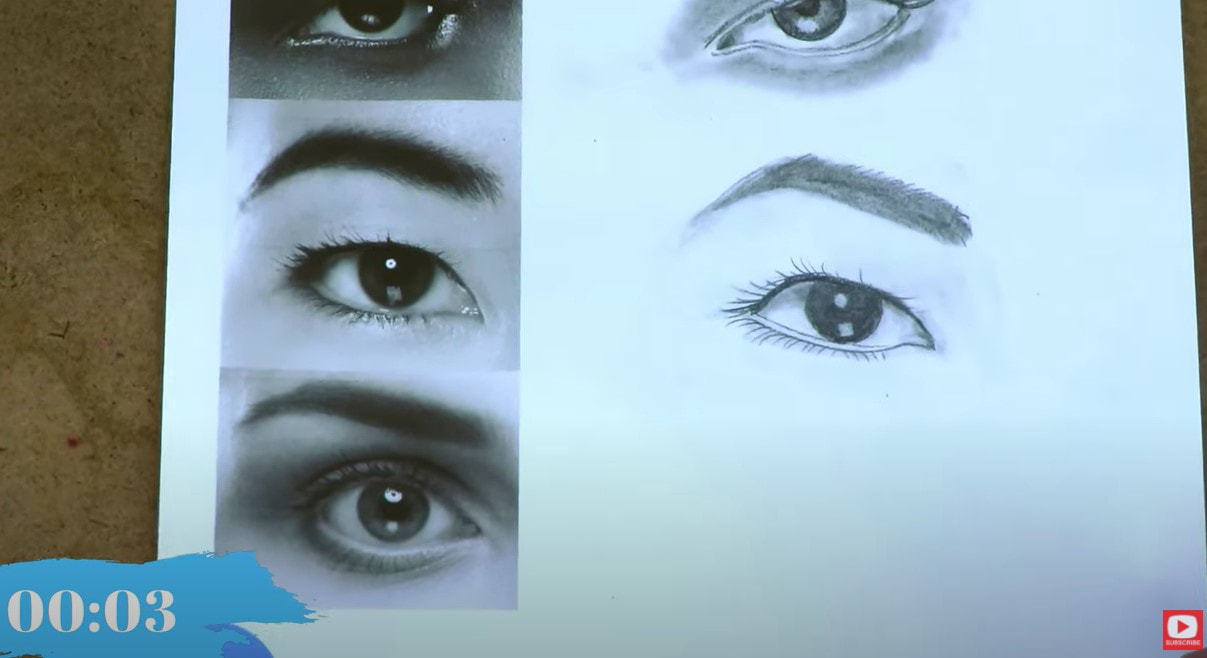
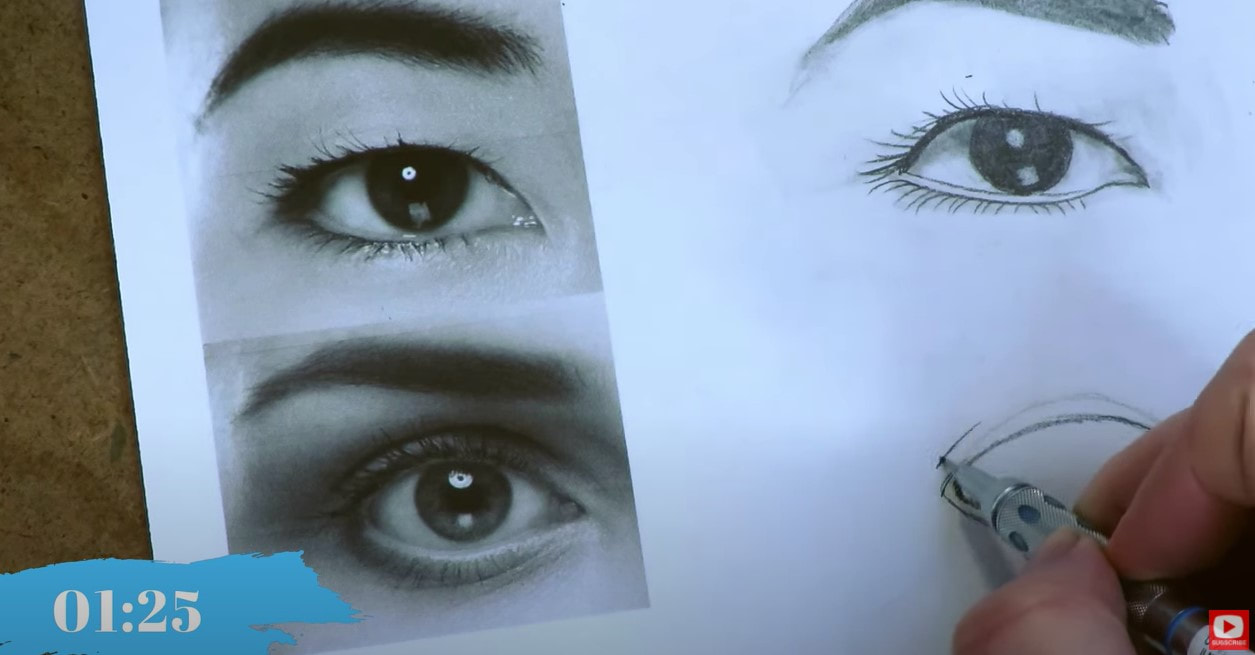
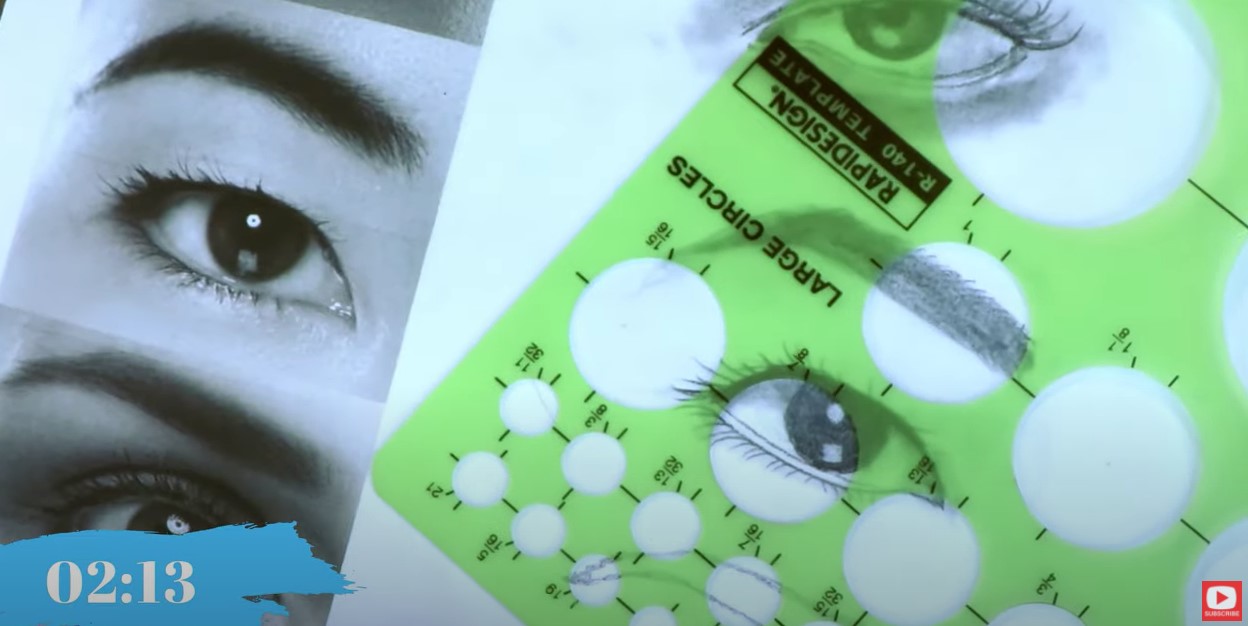
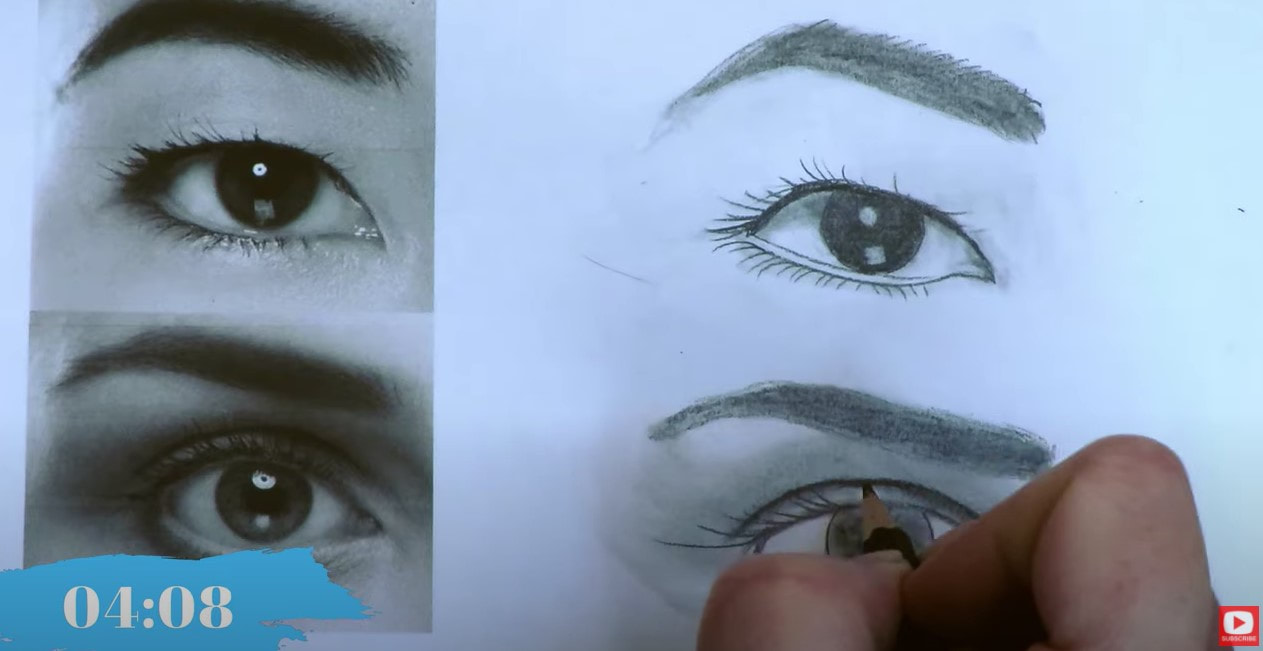
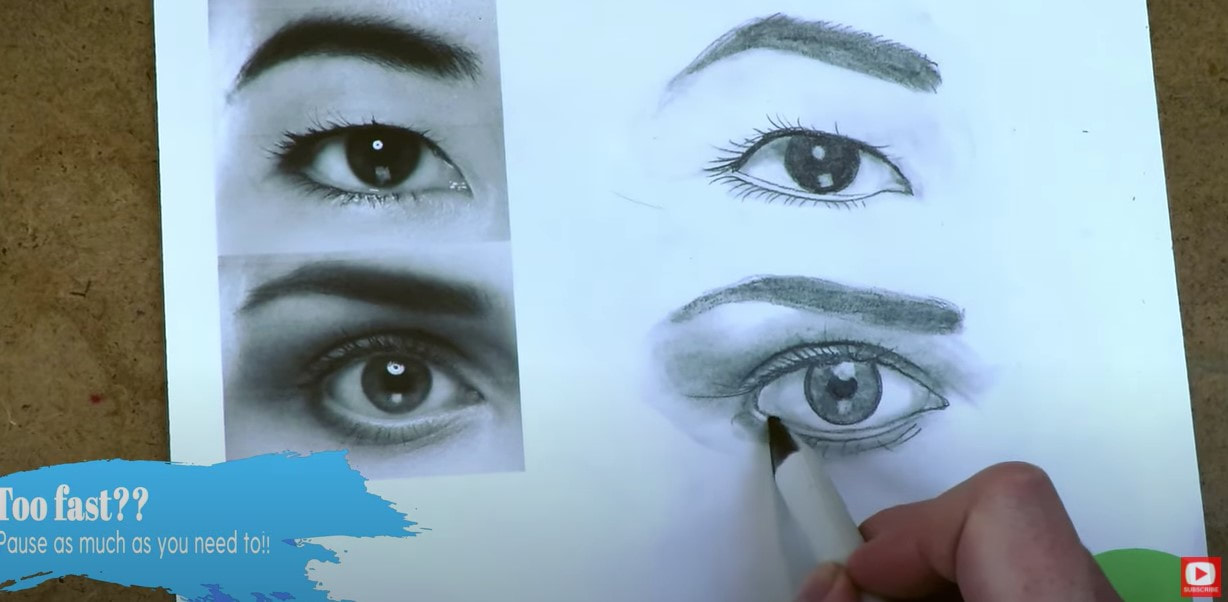
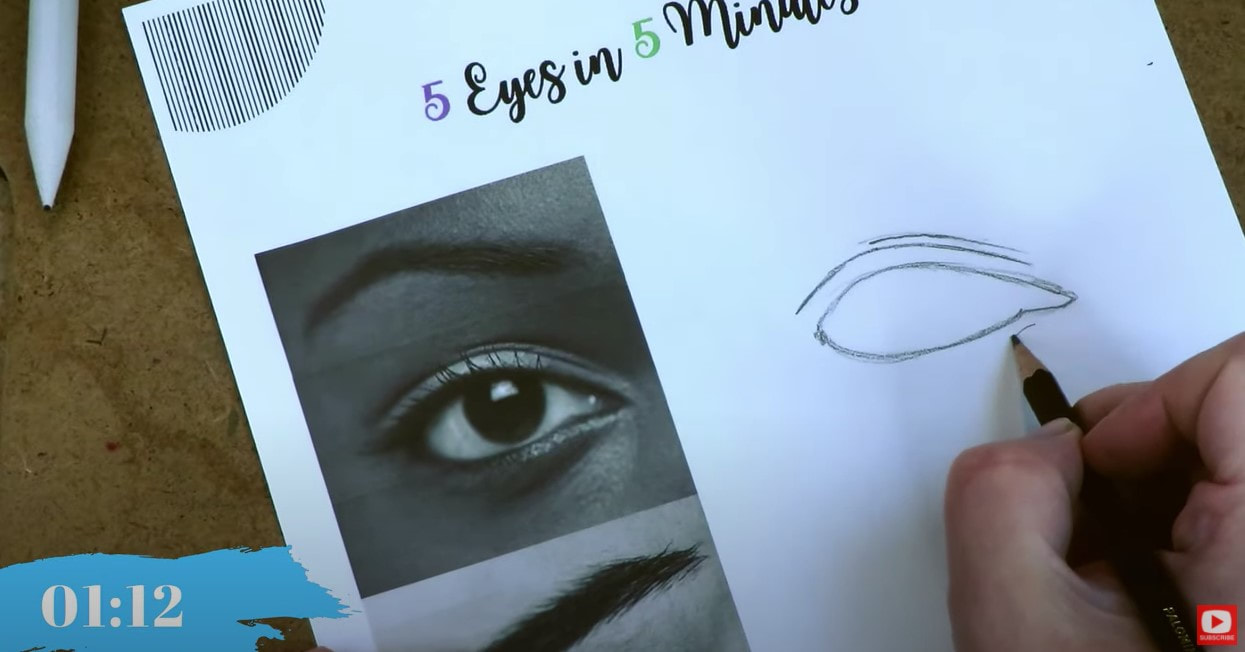
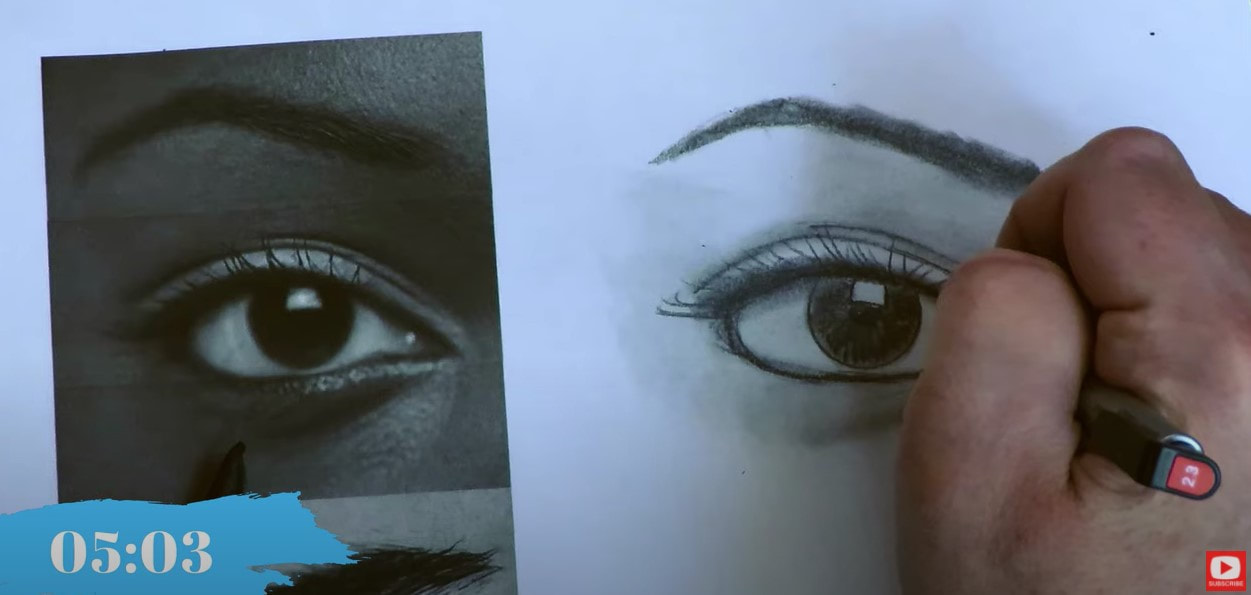
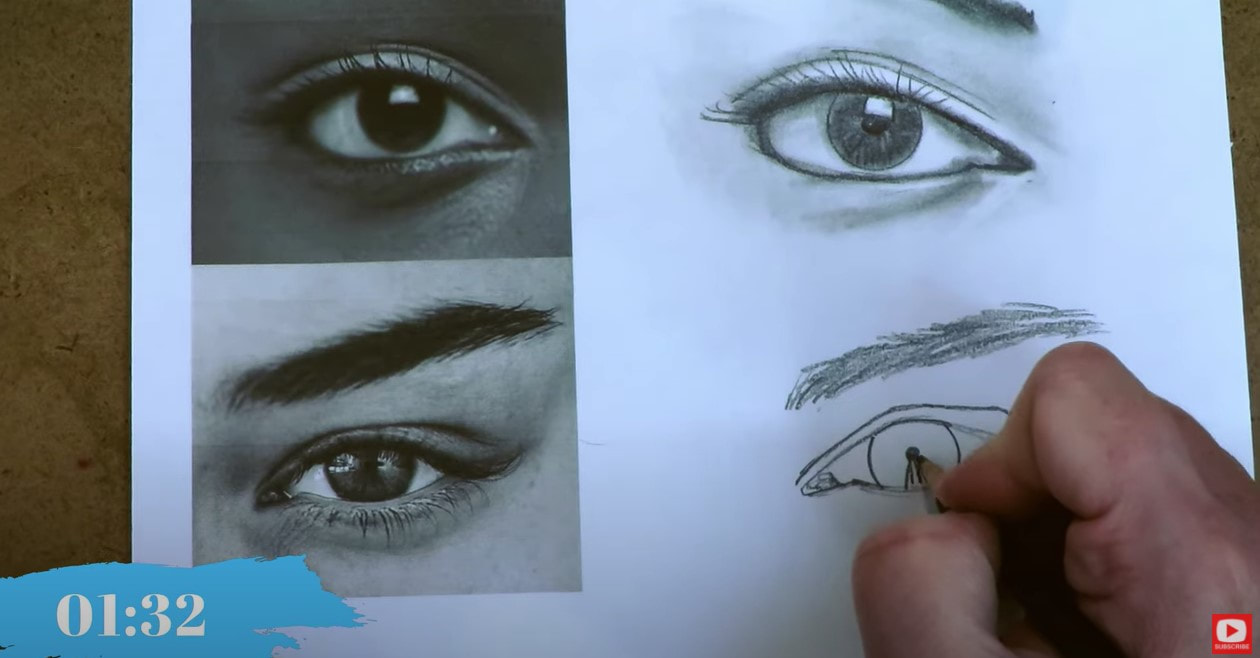
Before we continue, super quick announcement! All product links noted below are Affiliate. I may earn a small commission if you choose to order through these links, but by law there is never any additional cost to the consumer for doing so. I only reccommend products I actually use and love. Thank you for your support! We're doing all of drawing practice in pencil, so grab your favorite and make sure you have a good eraser. If you have a blending stump - get your dirtiest one ready! If you don't have one- no problem, use your finger or a q-tip to help you with blending. If you are interested in some fancier drawing tools - I'm using my favorite Blackwing pencil, vanish eraser, and Tombow Mono Eraser (that's the one that looks like a mechanical pencil, but is an eraser!). This thing is seriously magical for chiseling out teensy highlights!!! This week I also busted out my mechanical pencil because there really are some fine lines when you're drawing eyes and I feel like a thinner lead can really help with replicating that detail. 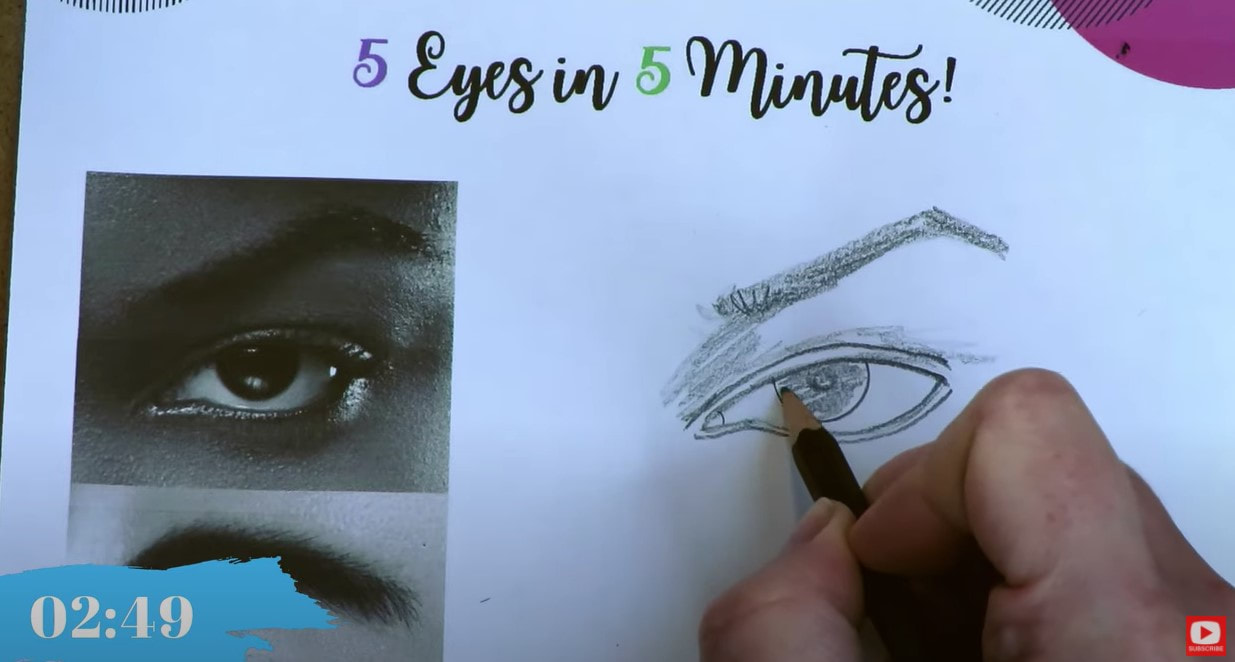 I spend the bulk of my time on each eye trying to get the SHAPE right so it looks like the photo. It really helps to have a black and white image when you're drawing in pencil. And I gotta say, I really love working directly in the packet because I'm drawing right next to each reference. My goal was to spend roughly 5 minutes on drawing each reference image. This one took right around 6, so not bad - especially considering I threw an eyebrow into the drawing as well! Look ot this gorgeous second prompt! I'm trying to challenge us by using a variety of references from different ethnicities, AND I've switched things up so some of the references are the right eye, and some are the left. Aren't her lashes just stunning?? If you are interested in learning how to draw Asian eyes, I have two different tutorials you can check out from my last series that spend a little more time on this specifically. I've got one in greyscale of an Asian woman, and one of an Asian male, in color. Isn't this one pretty?! I JUST LOVE how each eye is so unique. As we move on to the third reference, you'll see her eye has a much different shape than the other two. When you're studying a reference photo, and things feel overwhelming, try to look for shapes you can copy in your drawing. For example, I always find it helps me to look at the tear duct of an eye as its own shape. In our third eye in today's worksheet, there is a very pronounced tear duct, as well as a pronounced wet line under her eye (this is where I felt the need for the mechanical pencil to jump in!). If you haven't seen me do this before, I totally help myself out and use a circle template when it comes to the iris, and sometimes even will use it for the pupil! I have no shame in using a template here, and neither should YOU!! It's just a little cheat to save time and get over that perfectionism trap we can all fall into when trying to draw a "perfect" circle. Can you spend time drawing each iris from scratch? Of COURSE you can! But that's not what this exercise is about. We're doing quick and easy practice. My circle template is a tool that helps me achieve that goal, so I encourage you to use one if it helps you too!! When it comes to the eyelashes - I LOVE adding eye makeup drama here. I know eyelashes can really be tough to draw for all of us at times, so I've got a cheatsheet with all my tips on eyelashes drawing. You can grab that here if you haven't already! Don't forget to kinda zoom out and hold your drawing out from a distance to compare it to the reference every so often. This will help you find little tweaks you can make to get your drawing to look more like the reference. When I did that with the above image, I noticed I needed a bit more shadow under the lower lid, so popped that in with my blending stump. lf you've never done drawing like this before, please don't be intimidated, and come try this with me. Beginners are ALWAYS welcome, and this is an amazing exercise to work on together. I LOVE the highlight on the iris in our 4th photo!! It's like a perfect little window!! The lashes on our last reference photo are AMAZING!! They're also downturned a smidge. Gorgeous right? Make sure you're watching the video so I can show you exactly how I sweep in with my pencil to capture what I see in these unique eyelashes. In case you need my 5 in 5 Practice Packet link one more time - here ya go - cick the button below and I'll send it straight to your inbox!! Good luck with today's eye drawing tutorial over on my YouTube drawing channel! I can't wait to see your work!! Please share it with me!
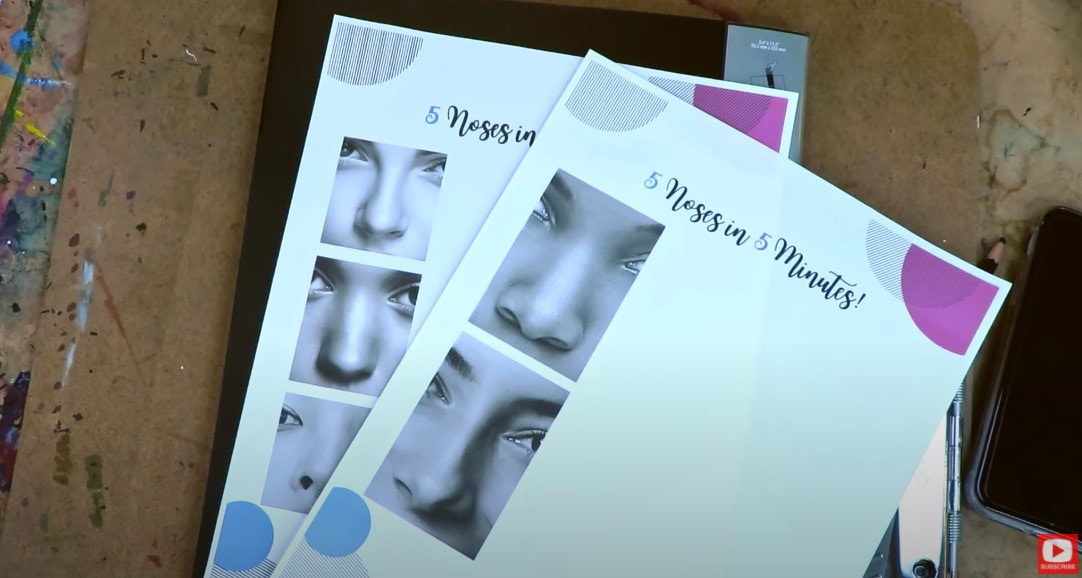
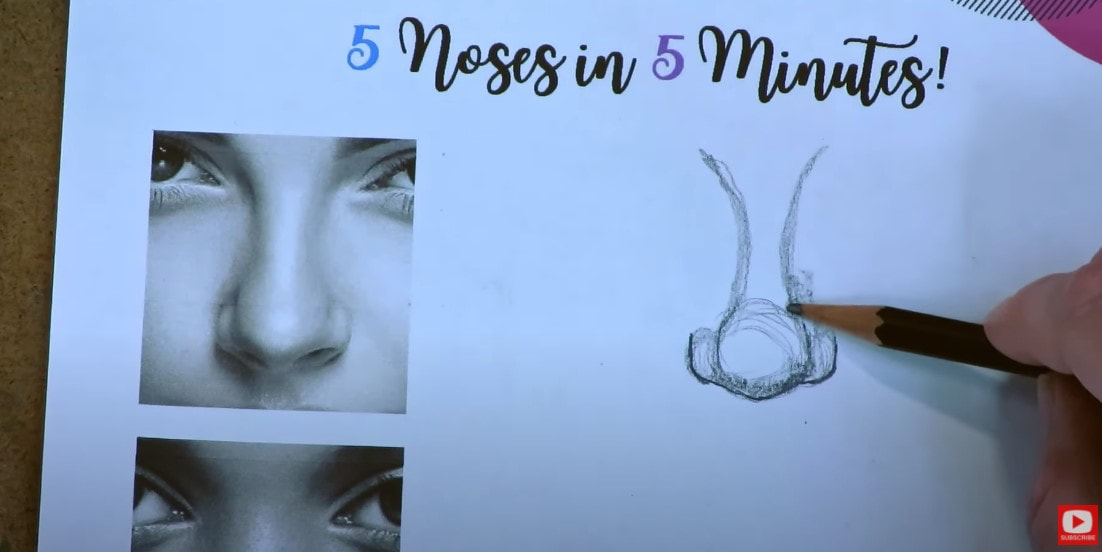
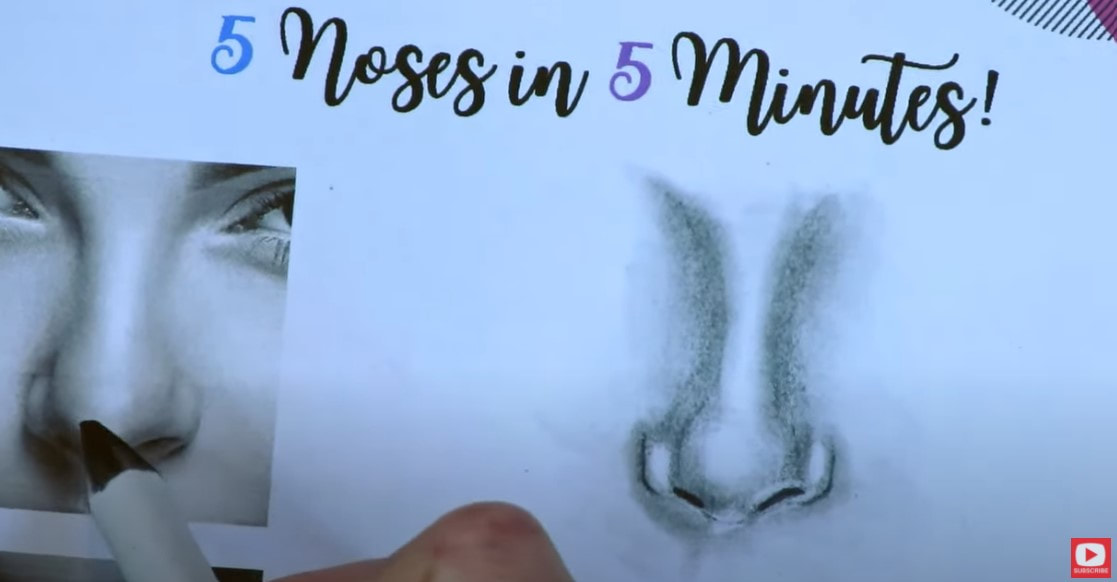
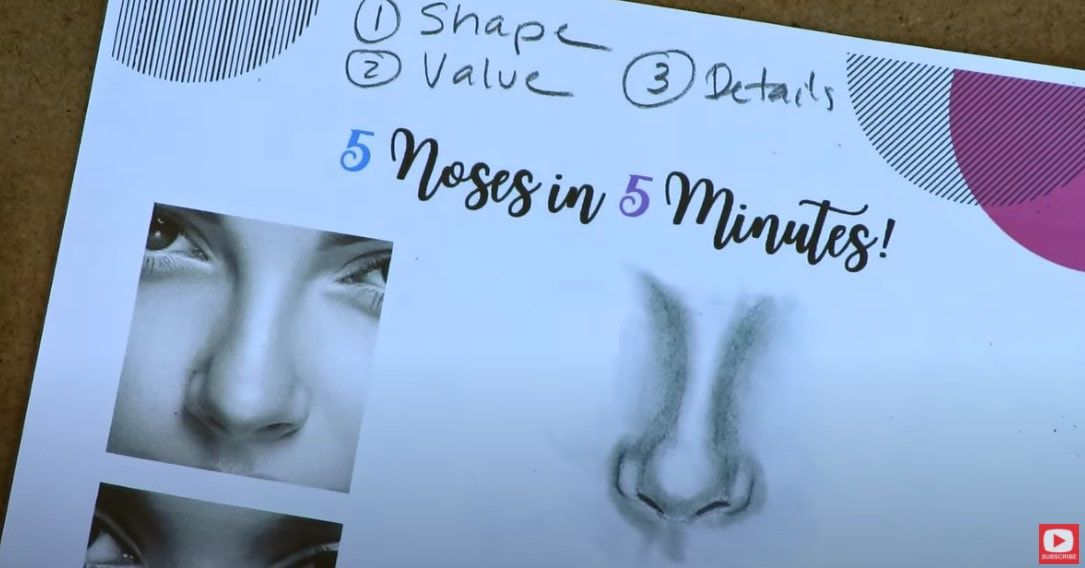
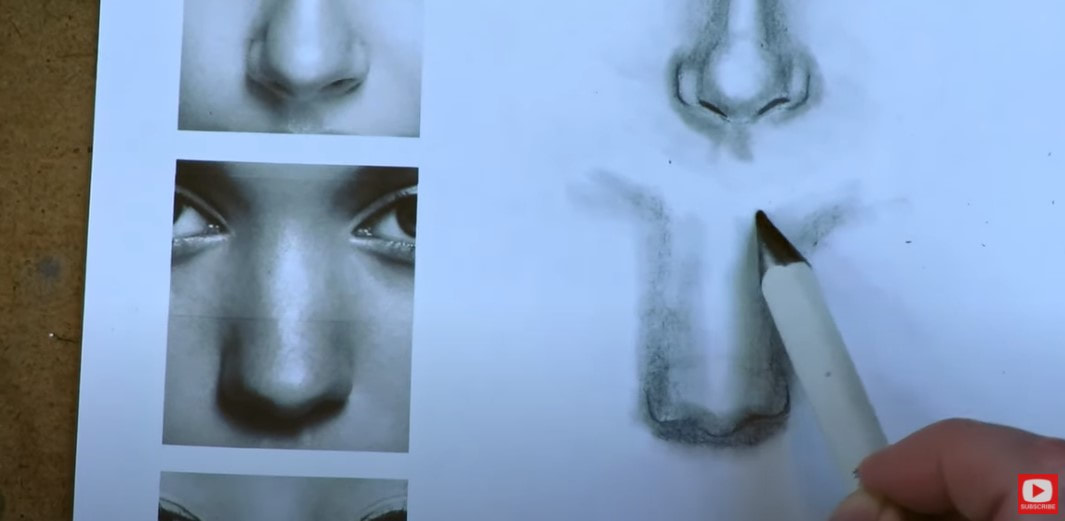
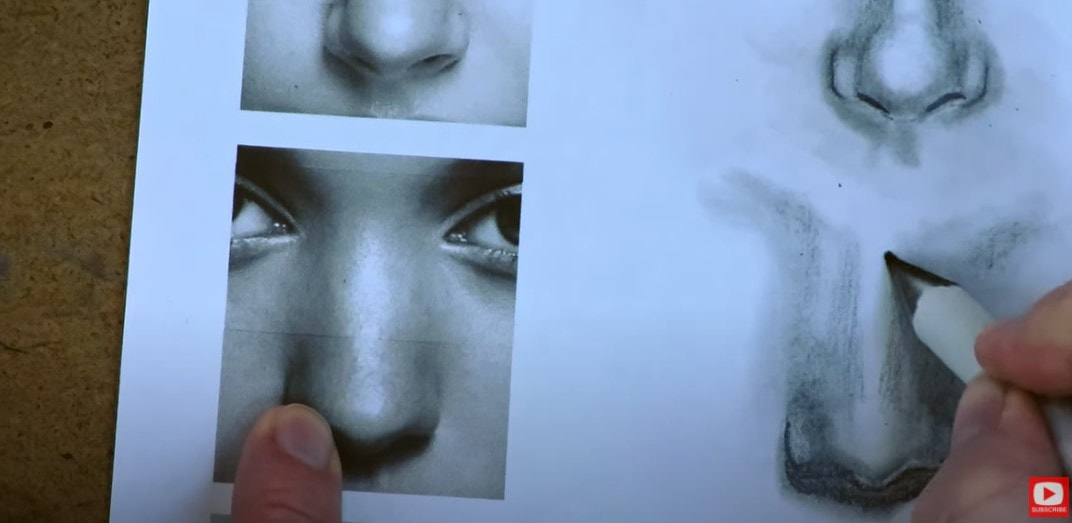
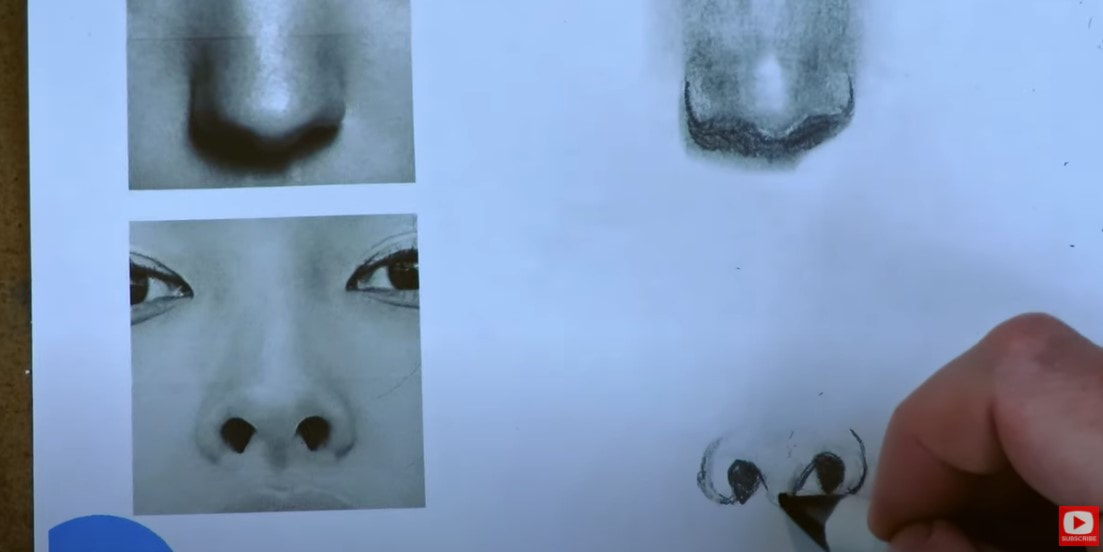
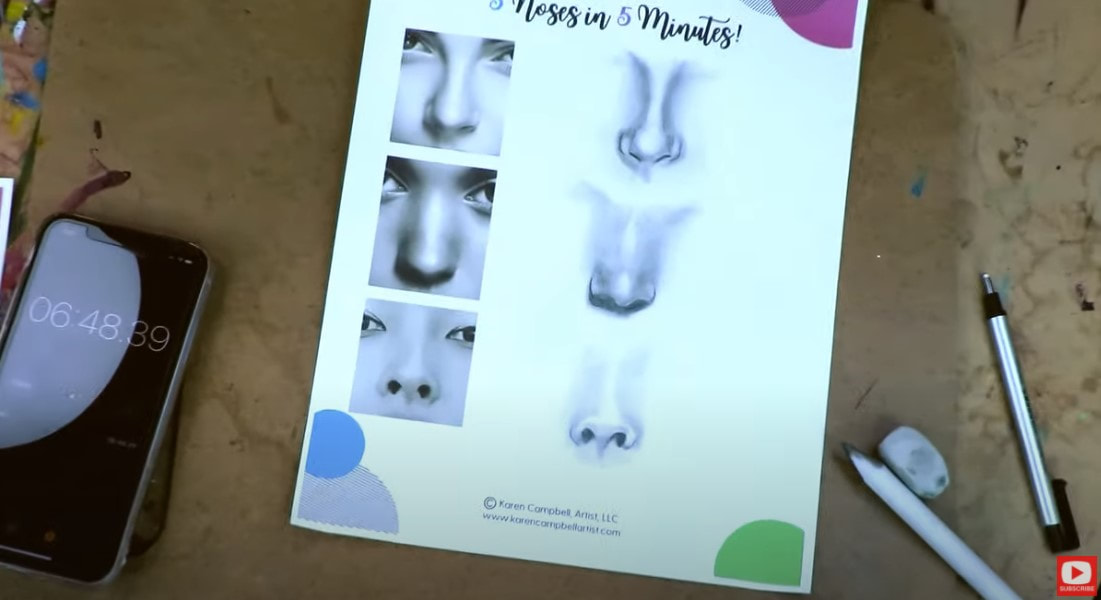
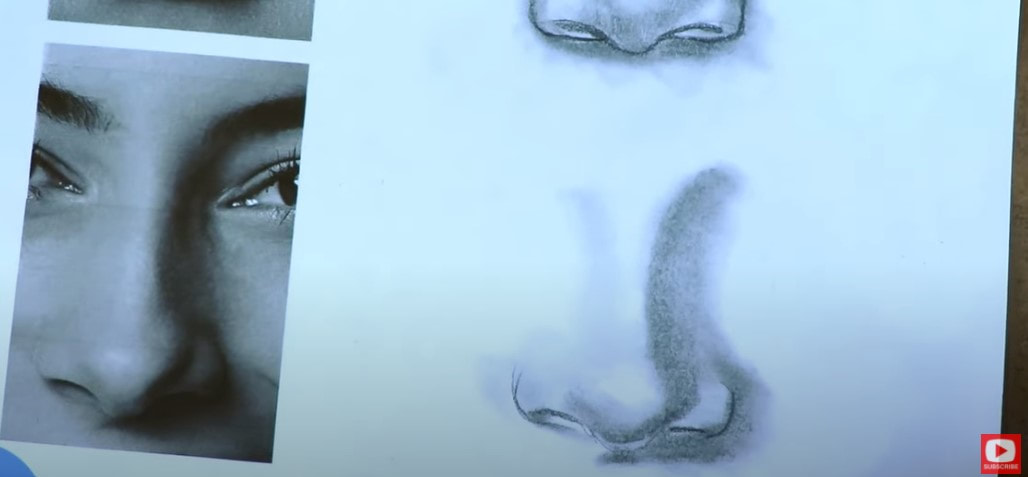
Thanks SO much for hanging out with me today!! I'll see you back here NEXT Monday for our next facial feature... Have a wonderful week!!! ❤️ Want FREE, immediate access to my Fun Fab Drawing Club and/or Mixed Media Society plus discounts on all my art books, sneak peek at YouTube videos and new book content, behind-the-scenes fun and MORE? Join me over on Patreon today and get HUGE PERKS in return for a small monthly donation. ❤️ CHECK OUT ALL my art books on AMAZON (available in both Kindle and Paperback) ❤️ SIGNED COPIES of my art books on ETSY ❤️ MY FAVORITE ART SUPPLIES on AMAZON ❤️ MY BELOVED FACEBOOK GROUP ❤️ FOLLOW ME ON INSTAGRAM ❤️ FOLLOW ME ON FACEBOOK HOW to DRAW NOSES REALISTICALLY in Just 5 MINUTES! (#DrawingFacialFeatures with Karen Campbell)8/2/2021 Want me to teach you how to draw noses realistically in just 5 minutes?! LET'S DO IT!! Last week I started a new series on my drawing YouTube channel ALL about drawing facial features! Each week we're going to focus on a different facial feature, and will draw it five different times (from reference images provided), and will ONLY spend five minutes on each drawing! Sounds FUN right?! If you've always wanted to learn how to draw a face or how to shade a face, have been struggling to work drawing practice into your daily life, or need to add MORE FUN into your art practice, THIS SERIES IS FOR YOU!! Last week I showed you how to draw lips realistically, and this week we're gonna tackle how to draw realistic noses!!! The only supplies you need are a pencil, an eraser, and my FREE 5 in 5 Practice Packet. If you haven't downloaded your packet yet, CLICK the BUTTON below and I'll send it straight to your inbox. Simply print it out, grab a pencil and click over to today's video on my YouTube Drawing Channel. If you missed last week's video on how to draw lips realistically, make sure to check that out, and draw along with me at your own pace on pages one and two of your packet. Feel free to go out of order and skip around. This is FOR YOU, and no one else. I've got 5 nose drawing references for us to work on today, so if you're drawing along with me (and I hope you do!!) flip to those two pages and let's get started! The goal is to spend about 5 minutes total on drawing exactly what you see in the reference image photo. You can draw right into your packet in the empty white space next to each photo. While we're doing these drawing exercises, I mainly want you to focus on three things:
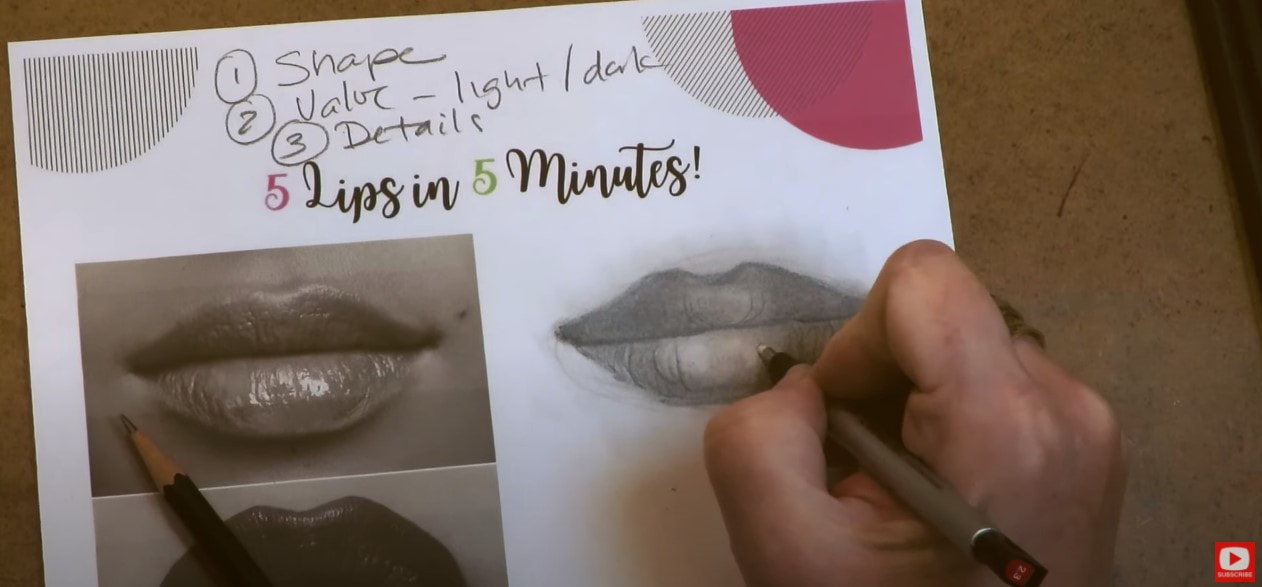
Before we continue, super quick announcement! All product links noted below are Affiliate. I may earn a small commission if you choose to order through these links, but by law there is never any additional cost to the consumer for doing so. I only reccommend products I actually use and love. Thank you for your support! I'm working with my favorite Blackwing pencil again today. I love these because the graphite is SO soft. They are a luxury if you buy them individually, but around $2/each if you buy them in bulk. I feel like the lead is equivalent to a 4B, so I suggest working with that if you have it. If you don't - you can use a straight up #2 school pencil. I'm not kidding! Whatever gets the job done and has you drawing is what is most important!! As you'll see in the video, I do pull out my phone to time myself for each drawing. You totally don't have to do that!! I'm just doing this to keep myself focused because I could spend an hour working on ONE nose drawing, and that's not what this kind of drawing practice is about. What we're interested in right now is just spending time on something that is QUICK and EASY! I spend the bulk of my 5ish minutes observing my reference photo and trying to replicate what I see next to it in pencil. Once I'm happy with the gist of my nose outline drawing, I use the side of my pencil to get some graphite down and drag that around with a blending stump to add some shading. If you don't have a blending stump, don't worry about it! You can use your finger or a q-tip! If you DO have a blending stump, you WANT it to be dirty. In fact, the dirtier, the better! After I get the darkest part of my drawing done (nostrils), I pull out my Tombow Mono Eraser (I LOVE this thing)! If you haven't used one of these before, it's basically a mechanical eraser, like a mechanical pencil! It has this SUPER teeny tip that is awesome for carving out detail highlights. After you're done with your first nose drawing, make sure you hold your paper back a little to get some perspective. Compare your work to the reference to see if there are tweaks you want to make. If you're happy, move on to reference image number two! If you see something you could have done better, try to keep that in mind as you move on to the second image, and definitely don't beat yourself up about it! I'm finding as I do these drawing exercises with you that my first drawing is really a warm up, and I often get better the further into the packet I get!! The second nose has a really has a unique shape, doesn't it? That's exactly why I chose it! I really hunted around to try and find a wide variety of nose reference photos for you, so I HOPE you're drawing along with me while you watch my YouTube drawing tutorial, because this is ALL in "real time" with no timelapsing to help you make the MOST of your drawing practice! When I sit back and look at my drawing from a distance, I see that I really could have made the center highlight a bit more pronounced, so I make a few adjustments. Drawing has SO much to do with observational skills, so really take your time when studying each reference image. If you're just learning how to draw faces, or anything for that matter - your observational skills will develop and improve over time with practice. These little exercises are PERFECT to help you fine tune the way you look at images. Plus- if you watch my YouTube drawing lessons, you KNOW I'm all about pointing these little nuances out to help you along!! This third nose is super random, and not like ANY nose I've ever drawn before, but it gives me a great opportunity to teach you how to draw a nose from an angle. It's kind of an upturned nose. As you can see in the image above, really the ONLY drawing that goes into a nose is at the base, where the nostrils are. The rest is basically ALL shading and highlights!! Crazy, right?! If you've been away from drawing for a while, or get caught in a mindset of thinking you don't have enough time for drawing practice - I HEAR you!! SO many people have shared this concern with me, and it's one of the reasons I created this 5 in 5 Practice Packet! What I'm challenging each of us to do is to only carve out 5 minutes of time to work on each reference photo in the drawing packet. That can help us slowly shift our mindsets into thinking of our art practice in a different way. We don't have to set aside TONS of time for drawing practice. Just a few minutes a day is SOMETHING, and it's time you're carving out just for yourself. You're WORTH IT! Now my last nose of the day was actually my favorite of all five and I did that one the fastest! See... there's something to that whole idea of PRACTICE and not needing to spend ALL DAY on it either!! In case you need that link for the 5 in 5 Practice Packet one more time, here ya go - click the button below and I'll send it straight to your inbox! Good luck with today's fun nose drawing practice!! I hope it goes awesome for you. Make sure you click over to my drawing YouTube channel so we can do it TOGETHER!!! See ya there. Thanks SO much for hanging out with me today!! I'll see you back here NEXT Monday for our next facial feature... Have a wonderful week!!! ❤️ Want FREE, immediate access to my Fun Fab Drawing Club and/or Mixed Media Society plus discounts on all my art books, sneak peek at YouTube videos and new book content, behind-the-scenes fun and MORE? Join me over on Patreon today and get HUGE PERKS in return for a small monthly donation. ❤️ CHECK OUT ALL my art books on AMAZON (available in both Kindle and Paperback) ❤️ SIGNED COPIES of my art books on ETSY ❤️ MY FAVORITE ART SUPPLIES on AMAZON ❤️ MY BELOVED FACEBOOK GROUP ❤️ FOLLOW ME ON INSTAGRAM ❤️ FOLLOW ME ON FACEBOOK Want me to teach you how to draw lips realistically in just 5 minutes?! LET'S DO IT!! Over the next few weeks on my YouTube drawing channel, we're going to be drawing facial features and spending 5 minutes on each reference image. If you've always wanted to learn how to draw a face, have been struggling to work drawing practice into your daily life, or need to add MORE FUN into your art practice, THIS SERIES IS FOR YOU!! Before we go any farther, you need to download today's FREE 5 in 5 Practice Packet so you can draw and shade along with me in this series. Simply click the button below and I'll send it straight to your email. TONS of people tell me about how they really struggle with not having enough time in their day to get a little art practice in. I get it!! Outside of my art - I'm a mom, I've gotta walk my Maggie a zillion times a day, figure out dinner every stupid day (LOL!). I'm with ya. We all have stuff!! But, if art is something YOU LOVE, and making the time to practice feels overwhelming because you feel like you need to dedicate a super long session of time to it - let's reframe that mindset. You don't need to have super long periods of time set aside to art. You can actually spend a few minutes a day on it if you want to, STILL have fun, and STILL grow as an artist! If you're hoping to get a more regular art practice started, one of my recommendations for that is to actually PUT IT IN YOUR CALENDAR. I know!! Sounds SO easy, right? But if you schedule some time for yourself - just as you would for something like a doctor's appointment - it's WAY more likely to happen. YOU'VE GOT THIS!! AND to help you have something TO DO for each of these little mini practice sessions, I've got a FREE surprise for ya!! I've created a fun (and FREE!!!) Drawing Practice Packet for us to do together! We're gonna spend the next few weeks drawing and shading lips, noses, eyes, face shapes, hairstyles and last but not least...ears!! All in pencil!!! Each week we're gonna study 5 reference photos of the same facial feature. For each reference photo - we're going to ONLY spend 5 minutes or less drawing what we see right next to each facial feature we're studying. You can do all of your drawing practice right inside this packet!! Why only spend only 1 - 5 MINUTES per drawing prompt?! Because another thing a lot of my students struggle with is perfectionism!! YOU know who you are... LOL! All you're gonna need to practice with me is a pencil with an eraser. If you're new to me or my YouTube drawing channel, I'm all about using what you have, and not buying stuff just to buy it (which your wallet is gonna LOVE). Don't get me wrong- my shelves are FULL of fun products to use. But if I share info about a fine art product I enjoy - please don't feel obligated to use it. On the other hand, if you're interested in taking your art to the next level - fine art supplies DO make a difference in your art, so I try to show you my favorite supplies as I discover them to save you both time and money. That way you don't keep collecting a variety of cheap to middle of the road products and overspending on stuff that isn't going to give you the quality you're hoping to find. With that being said -every single one of these drawing exercises can be done in a good old fashioned #2 school pencil if that's all ya got!! And if that's all you've got, you're STILL going to grow as an artist. PROMISE. Ready to download and print your own Practice Packet so we can get started? Simple click the button below and I'll have it sent STRAIGHT to your inbox!! Then meet me over on today's how to draw lips YouTube video and I'll teach you exactly how to draw lips realistically step by step!! Before we continue, super quick announcement! All product links noted below are Affiliate. I may earn a small commission if you choose to order through these links, but by law there is never any additional cost to the consumer for doing so. I only reccommend products I actually use and love. Thank you for your support! Ok! Let's get started... My favorite drawing pencils are by Blackwing. They're stupid expensive if you buy them individually, but are closer to $2/each if you buy them in a pack of 12. To me the splurge is worth it - they are silky smooth and draw like butter!!! They also have this cool eraser on the end of them that is a tiny rectangle (and replaceable!!), which makes it so easy to carve in little highights or to erase angluar mistakes!! If you're in the market for new erasers, I've got two favorites: the vanish eraser (takes care of the bigger mistakes / adjustments) and my Tombow Mono Eraser. THIS is the coolest. It's kind of like a mechanical pencil, but it's a mechanical eraser!! Here you can see the teensy tip of it (below, right) - it's amazing for carving out itty bitty highlights! Additionally, you might want to have a blending stump or two to help you shade a little quicker, and a bit more delicately. Again, you don't have to have these at all - you can totally use your finger without spending a dime!! A q-tip works well for this too! Because we're doing these exercises in pencil, it helps tremendously if the face drawing reference photos are ALSO in black and white instead of color. That's why I chose black and white reference photos! It makes a big difference when you're focusing on face shading techniques or just learning how to shade a face. For each of the drawings we work on together in the Practice Packet, I want you to be thinking of three things:
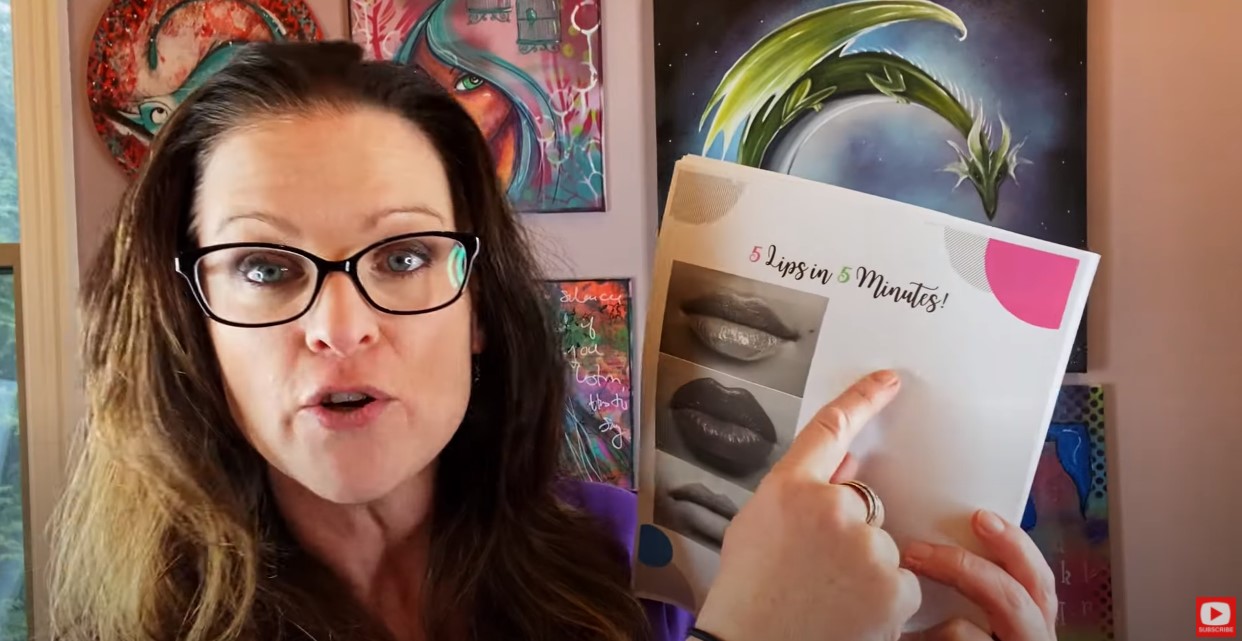
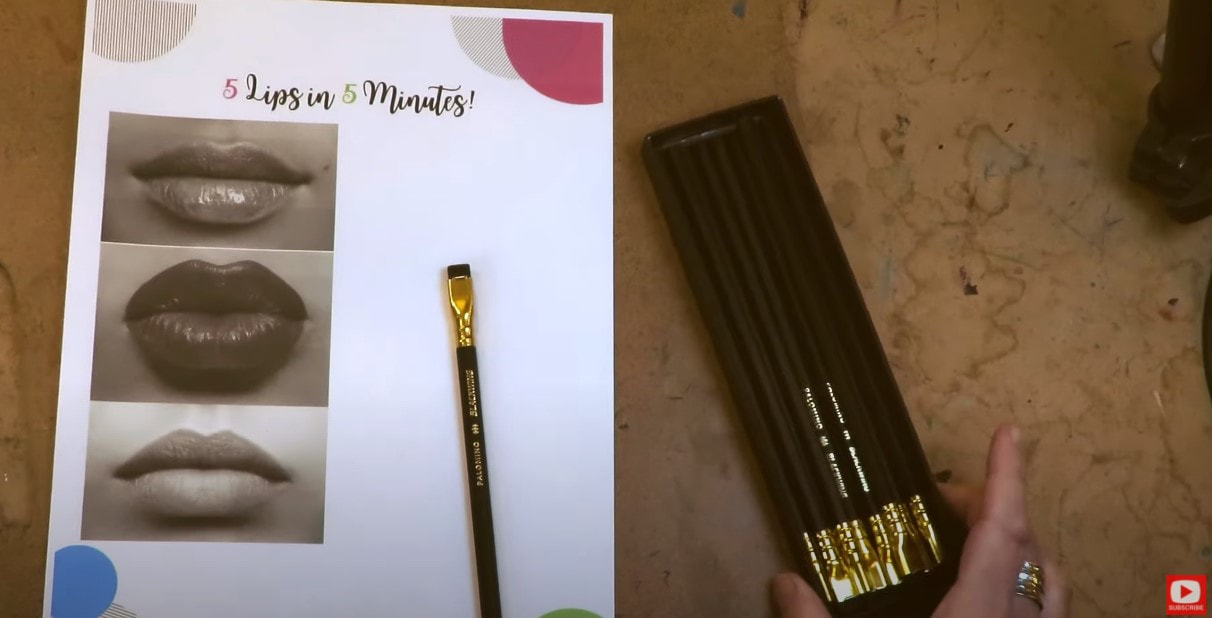
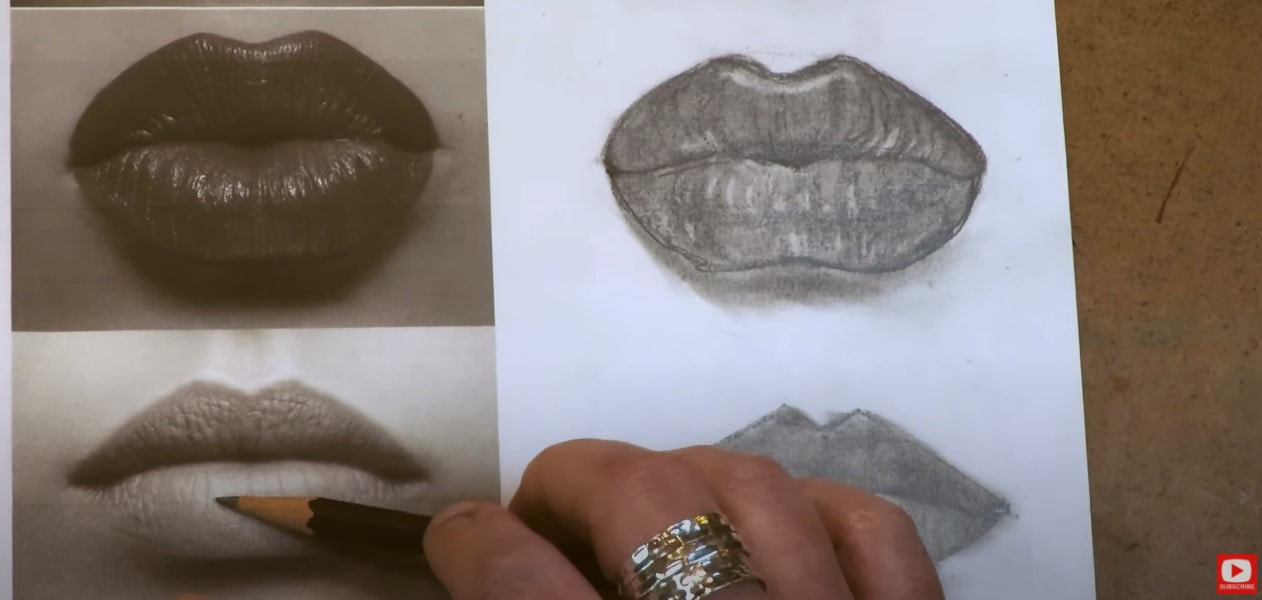
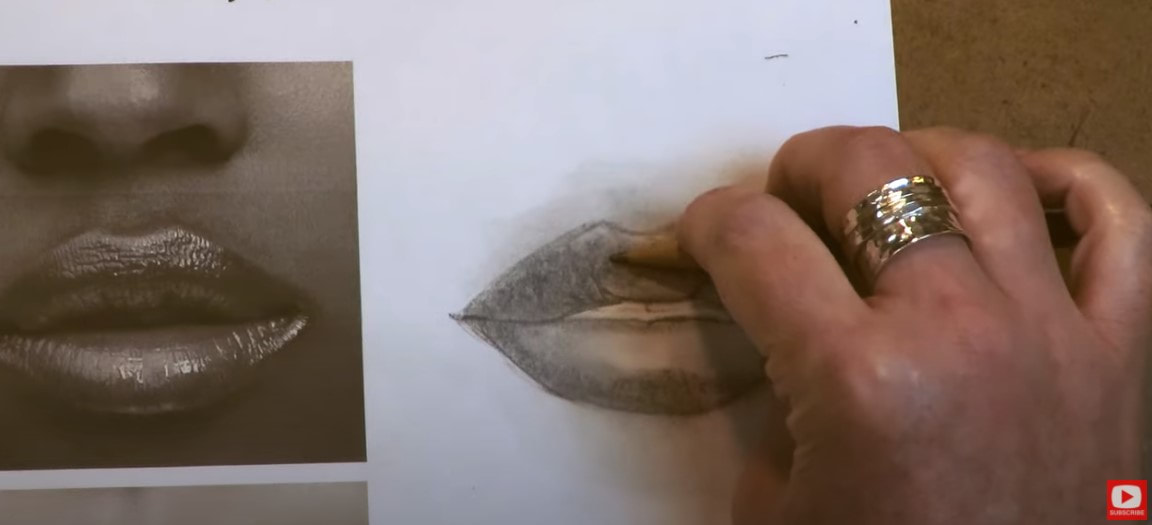
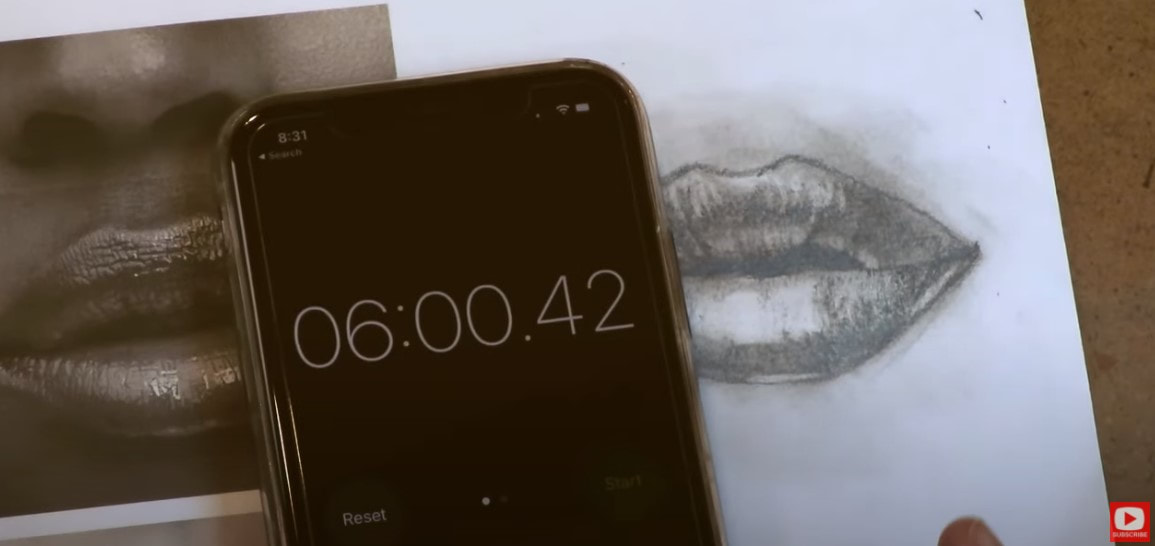
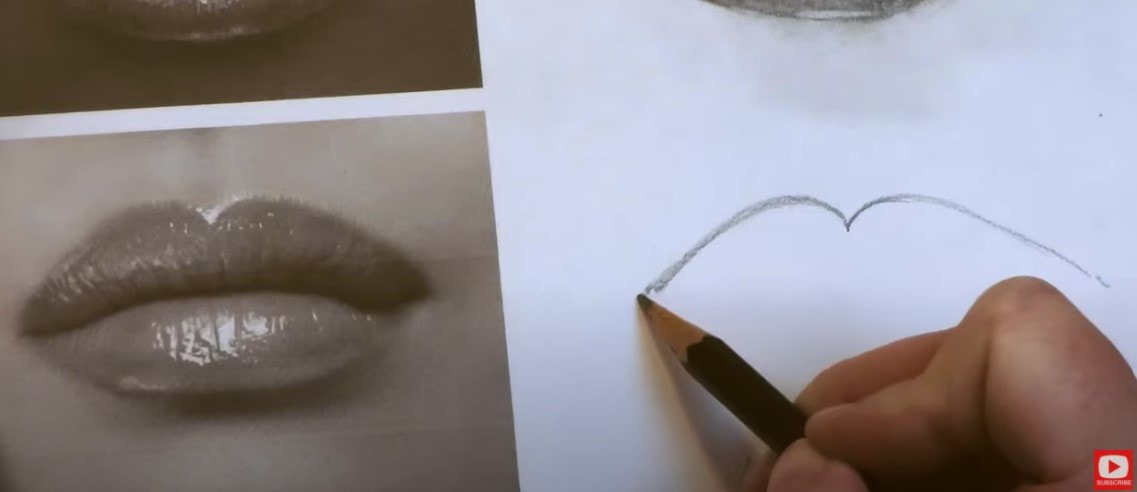
As you can see, I'm doing my sketching and shading directly in my Practice Packet, so no fancy paper is needed either! I hope you're drawing with me right now!! Make sure you click over to the video because this is all being done in REAL TIME, step by step over in my YouTube drawing tutorial so you can draw right along with me. These drawing exercises are SUPER EASY and beginners are totally welcome, so don't worry about it if you've never done this before. There's a first time for everything!! After I get through the first two lip drawing images, I discover I'm spending about 1 minute to get the lips outline drawing in place, then about 3-4 minutes putting some graphite down to shade and blend, plus adding a few more pencil lines or highlights for detail. I'm seriously trying not to care so much (which is HARD, I know)! Just keep telling yourself, this drawing exercise isn't about hyper realism - it's just about showing you how YOU CAN give yourself just a few minutes here or there each day to accomplish something, call it "good enough," and create a little drawing habit for yourself! You can TOTALLY make time for this practice, and it doesn't have to be at home. If you've got a doctor's appointment coming up and you know you're gonna be stuck in the waiting room for a bit - throw this packet and a pencil in your purse and go. It will distract you while you're sitting there, and if drawing makes you happy, it will also help to decrease your stress level. Just a little note for my Fun Fab Drawing Club members - if you're hanging out with me for this facial features drawing series, a lot of the face drawing reference photos I'm using for this series are in your 2021 UPDATED Membership Guide!!! So check the digital eBook version out right here in the classroom, or order yourself a copy over on Amazon if you prefer a physical copy! This guide has GROWN so much from last year and is now a fat 259 pages in its second edition!! NOT a Fun Fab Drawing Club member but interested in learning more? CLICK HERE. NOT a Fun Fab Drawing Club member but WANT to BE?! CLICK HERE to join the waitlist. (Membership enrollment opens twice a year- in the fall and in the spring). If you're interested in grabbing ALL my cheatsheets at once- go ahead and hop over to Awesome Art School, and you'll find them in my YouTube & Cheatsheet Library. So for this last practice image, I did go a little over the "time limit," but that's ok. Go easy on yourself. There's no pressure here. The point of me trying to throw a timer into this exercise for myself, is just to remind me NOT to spend 45 minutes working on that one gorgeous mouth, and getting SO fussy about it that I'm trying to make it perfect. We're doing quick and dirty, and 6 minutes is still quick in my book!! How adorable is this last mouth? The top lip totally has a heart shape to it!! I LOVE it and that's why this mouth made the practice packet! LOL! I'm gonna say it again...you BETTER be drawing with me, and you NEED to click over to this drawing video on YouTube so you can do this with me in real time. Did you download your Drawing Practice Packet yet??? Here's that button if you need it again... Now go check your inbox and come on over to YouTube so we can get started together!! I hope you LOVE doing this as much as I do!! Thanks SO much for hanging out with me for today's lip drawing tutorial!! I'll see you back here NEXT Monday for our next facial feature... Have a wonderful week!!! ❤️ Want FREE, immediate access to my Fun Fab Drawing Club and/or Mixed Media Society plus discounts on all my art books, sneak peek at YouTube videos and new book content, behind-the-scenes fun and MORE? Join me over on Patreon today and get HUGE PERKS in return for a small monthly donation. ❤️ CHECK OUT ALL my art books on AMAZON (available in both Kindle and Paperback) ❤️ SIGNED COPIES of my art books on ETSY ❤️ MY FAVORITE ART SUPPLIES on AMAZON ❤️ MY BELOVED FACEBOOK GROUP ❤️ FOLLOW ME ON INSTAGRAM ❤️ FOLLOW ME ON FACEBOOK |
Karen CampbellFounder of Awesome Art School. Mixed Media Artist. Author of 19 Instructional Art Books! Whose work has appeared in...Archives
July 2024
Categories
All
|
|
"Karen is flipping hilarious and she's very real...I like the way she teaches in a way that really gives you confidence, whether you're a beginner or advanced there's always something new to learn!"
- Elizabeth W. |
What Fans Are SayingKaren, you are absolutely fabulous! You make me feel like I can draw anything. I have recently retired and finally have the time to do some of the art that I have loved since I was in school. I am really at the beginning of my art journey and I hope to learn as much as I can. Thank you for all you do. |
Contact ME |






 RSS Feed
