
|
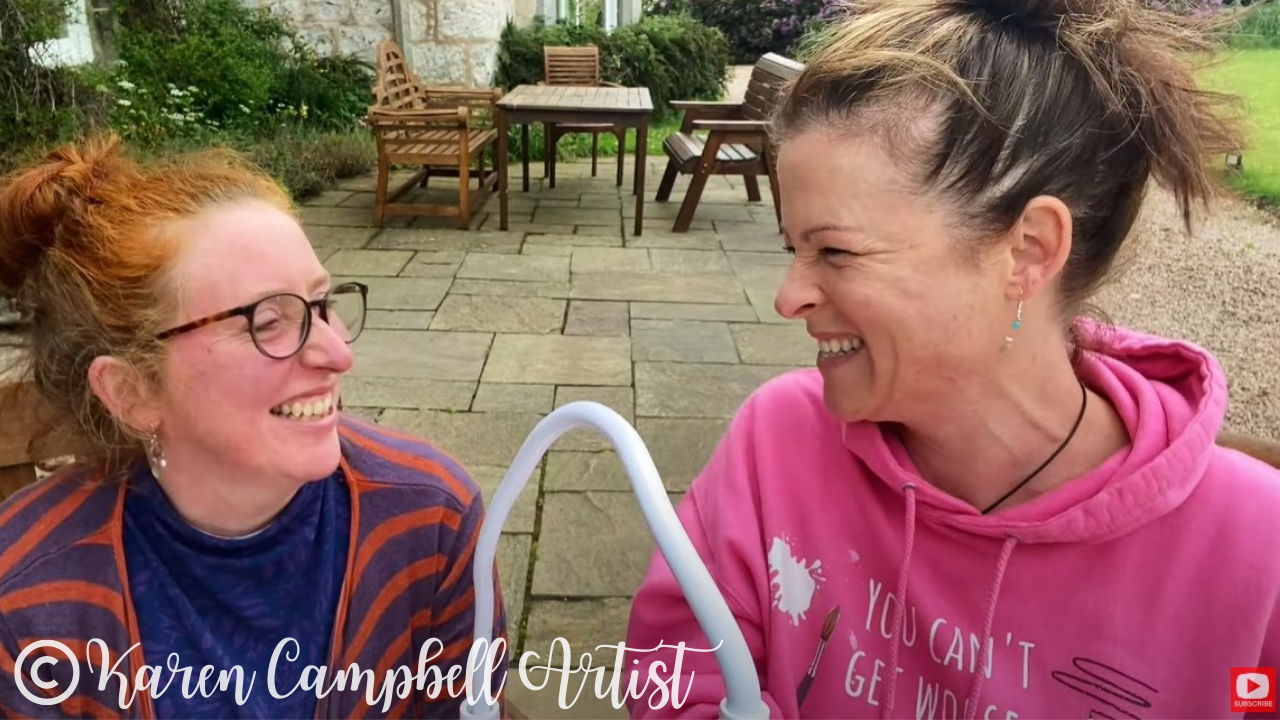
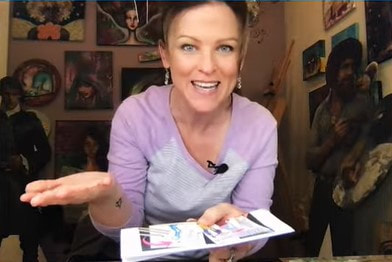
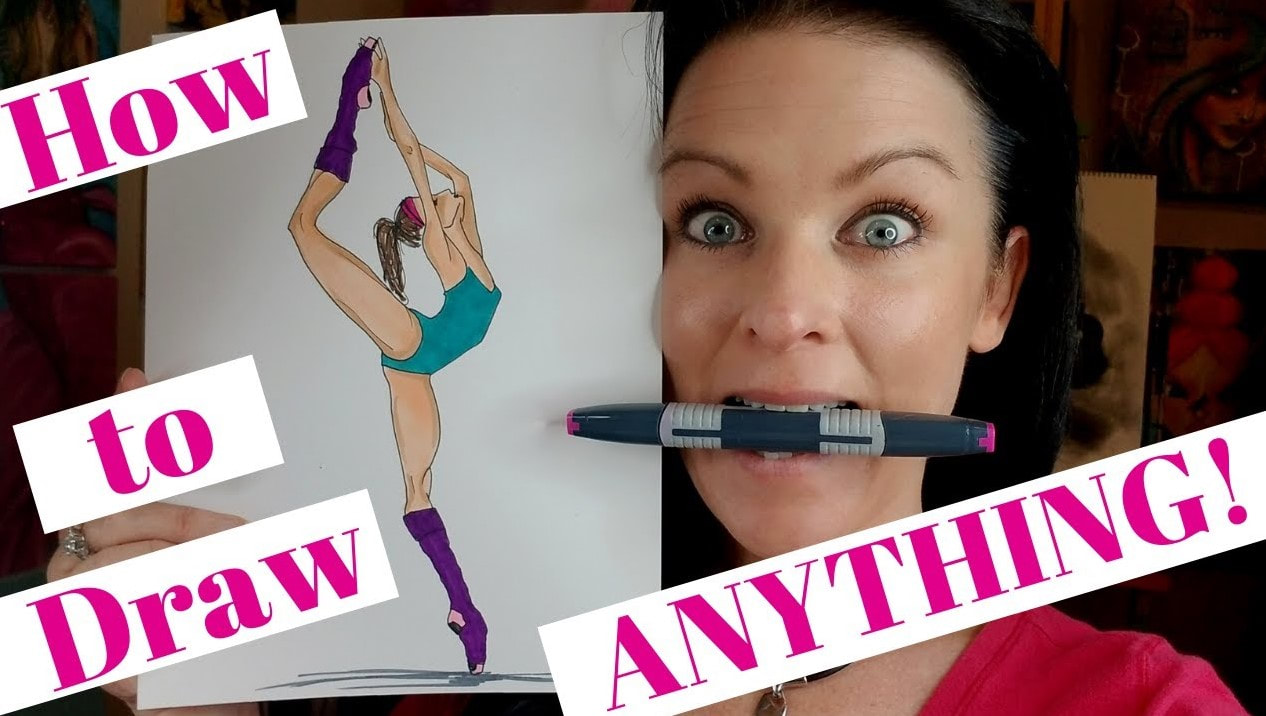
Struggling with eyelash drawing? Let me tell ya, this stresses out SO many of my students. There's nothing worse than going through the entire creation process on a mixed media face in your art journal or on canvas, only to add some eyelashes, and poof.
You're ready to dump the entire project into the trash. DON'T DO IT!! In today's video I'm breaking down ALL my best tips on how to draw eyelashes, sharing my absolute FAVORITE mixed media art supplies for adding stunning lashes, and giving YOU an entire practice sheet just for eyelash drawing:) 
*All product links are affiliate & for U.S. residents only.*
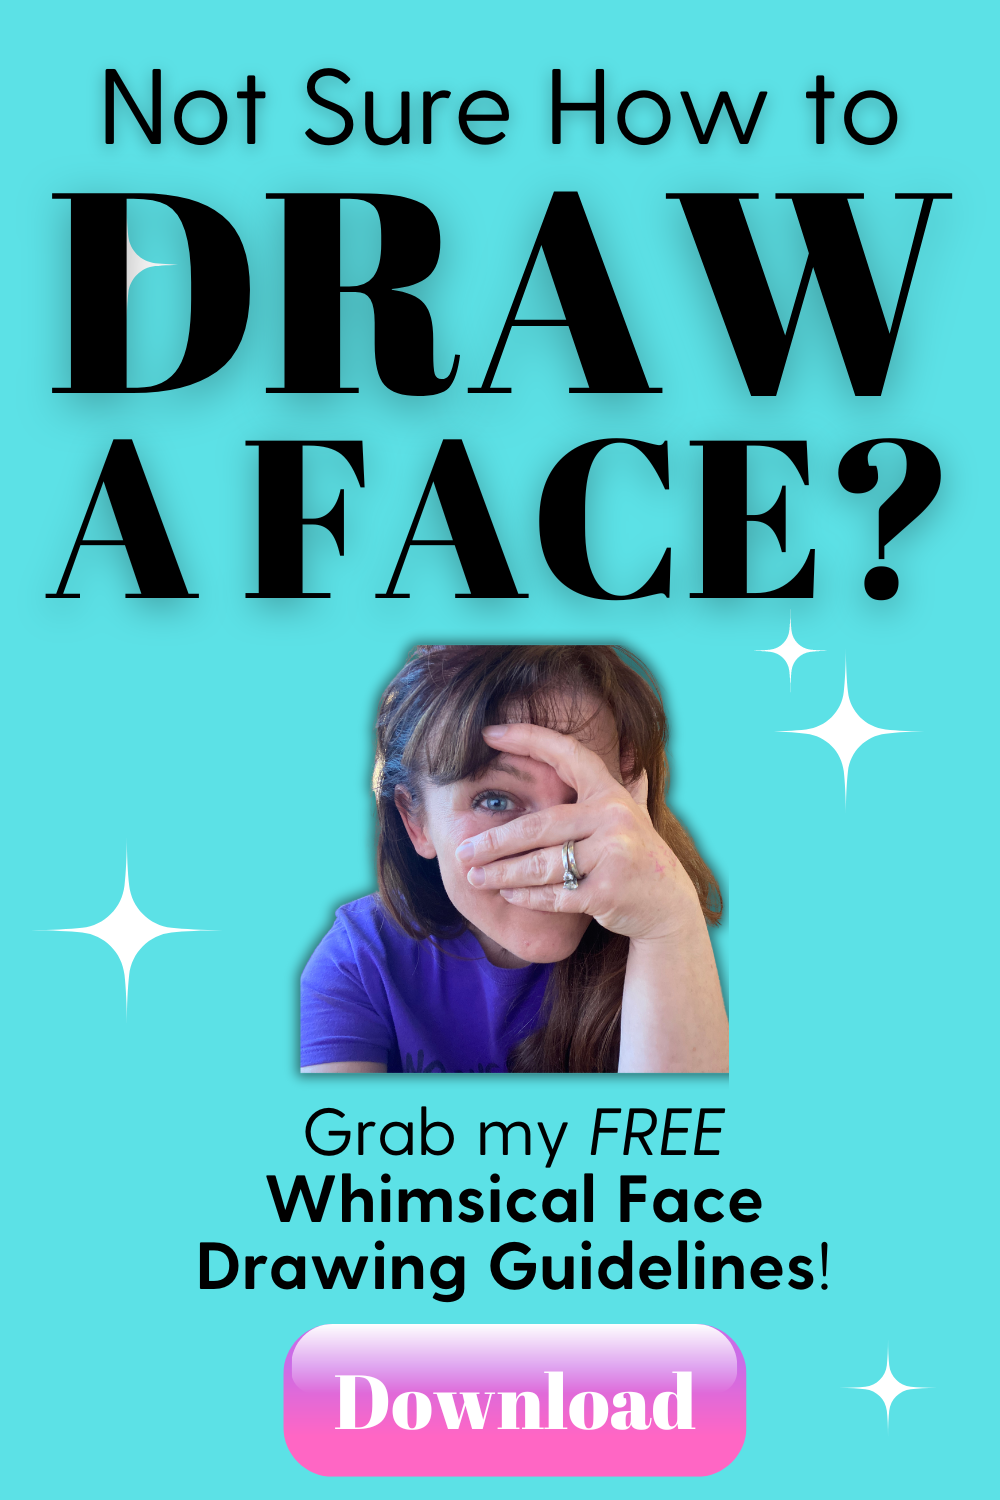
Before we dig into specifics, make sure you download my FREE 5-page PDF with ALL the deets on how to draw AMAZING eyelashes!!
It clearly breaks down the three key elements of eyelash drawing, provides tons of eyelash inspiration, AND even has an entire practice page of empty eyeballs just waiting for you to draw in the missing lashes:) 
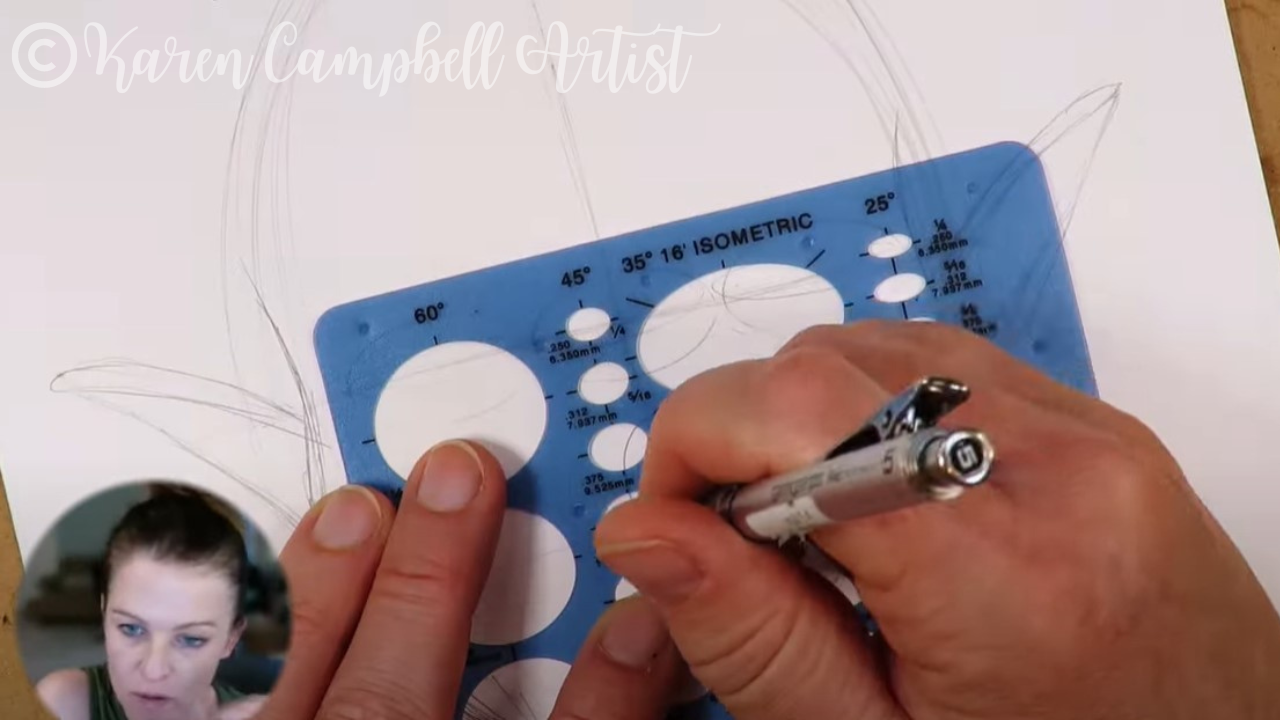
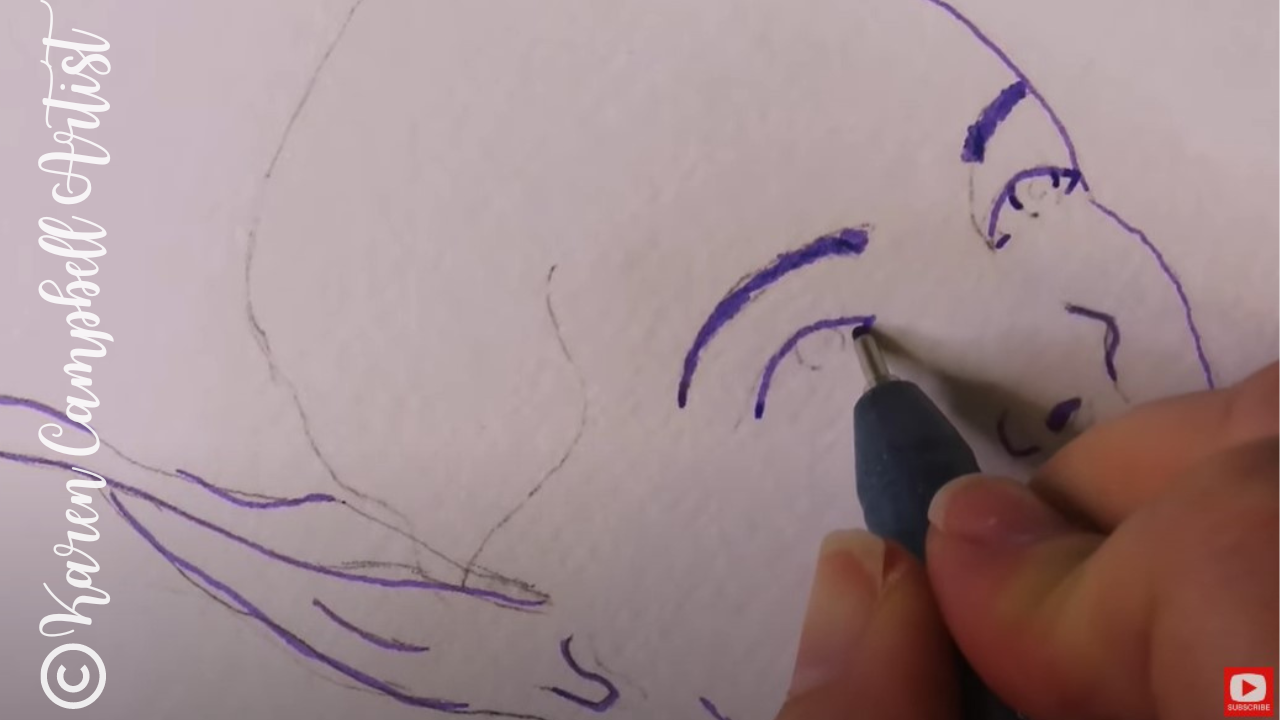
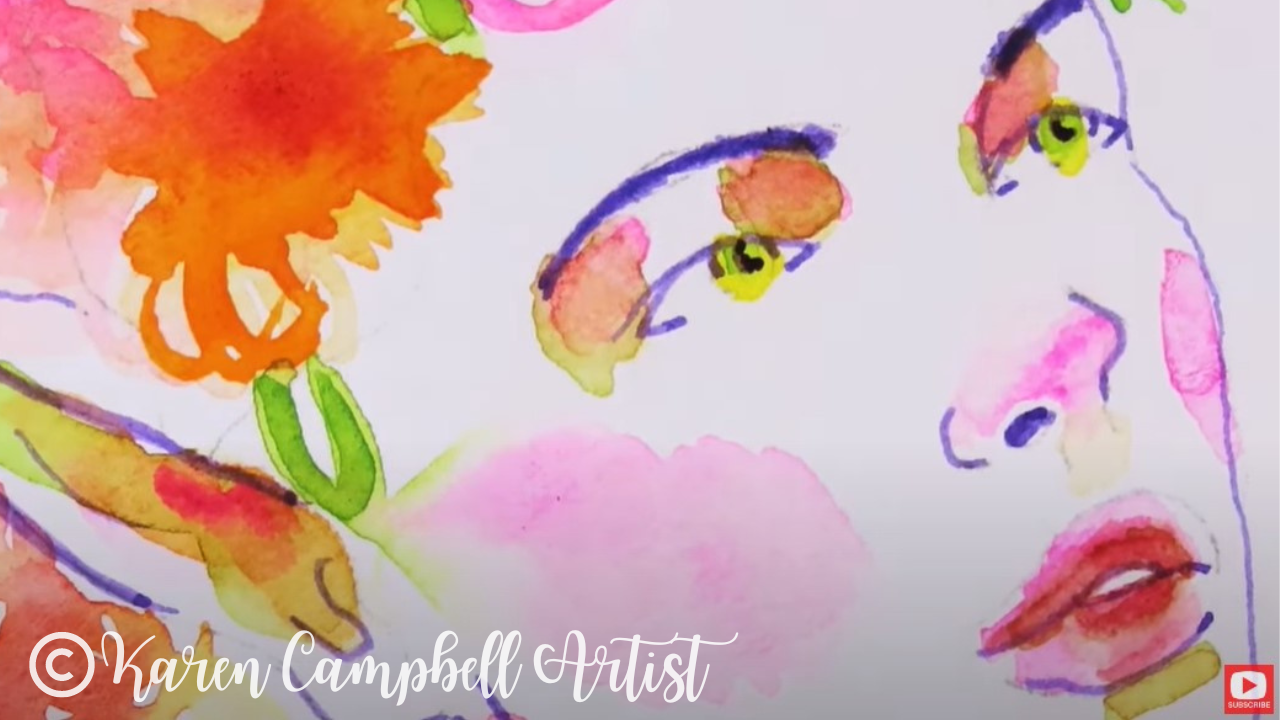
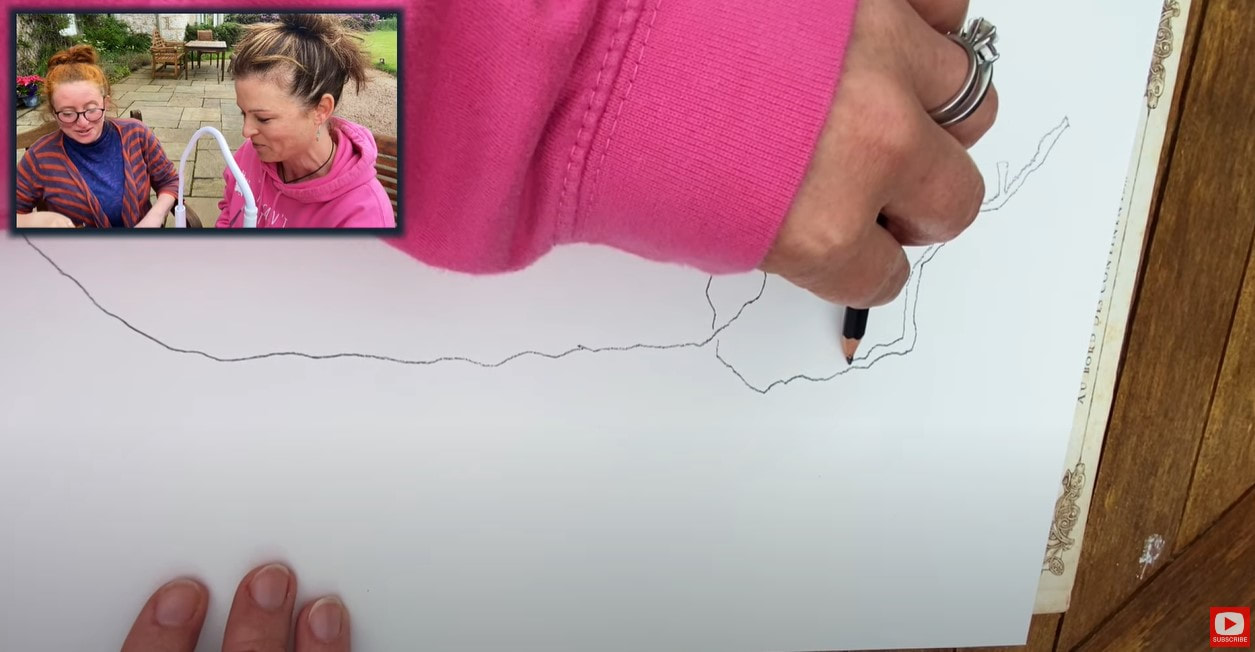
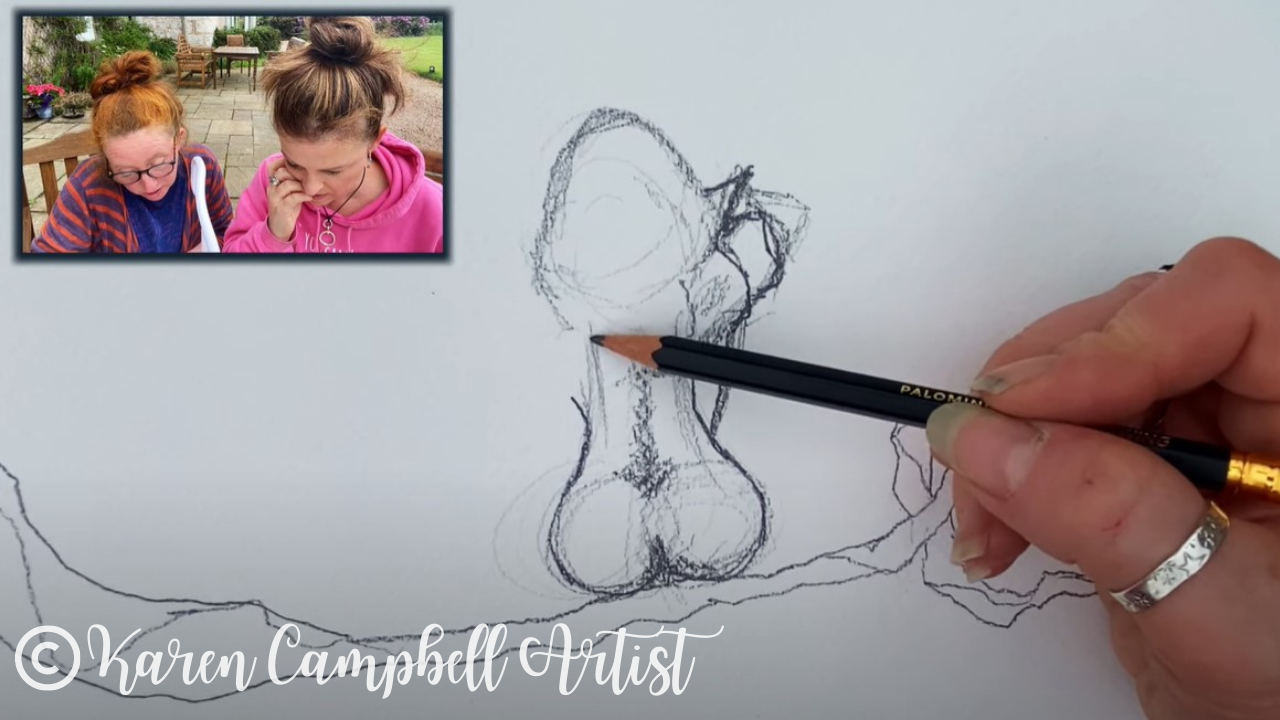
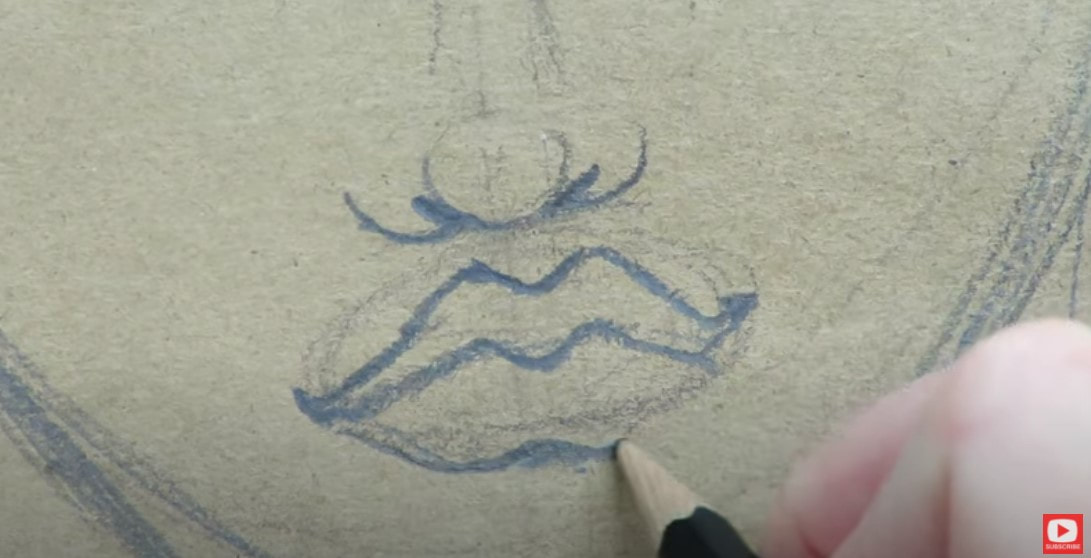
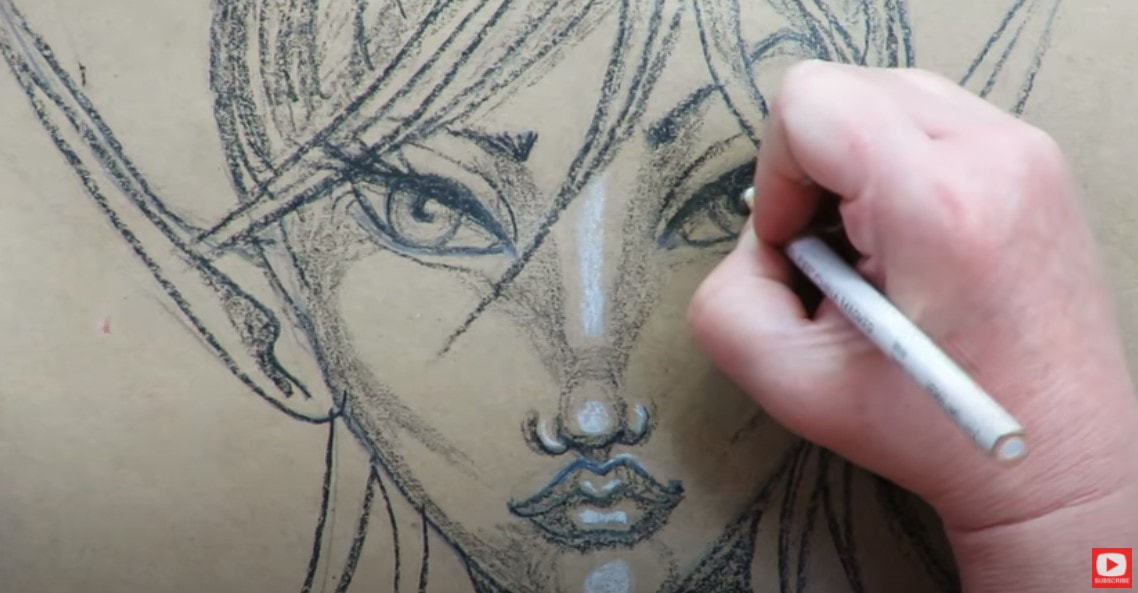
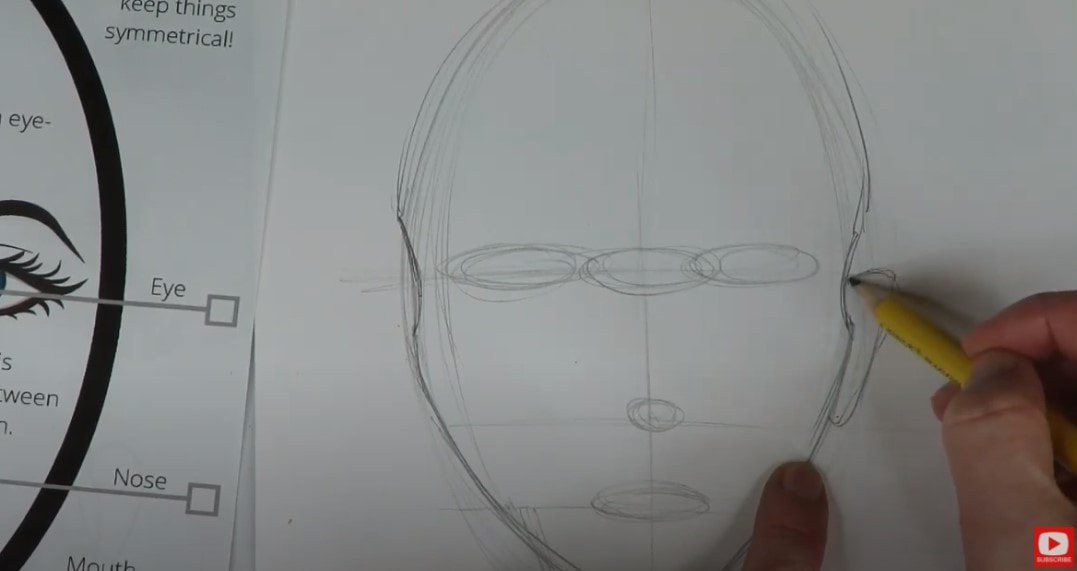
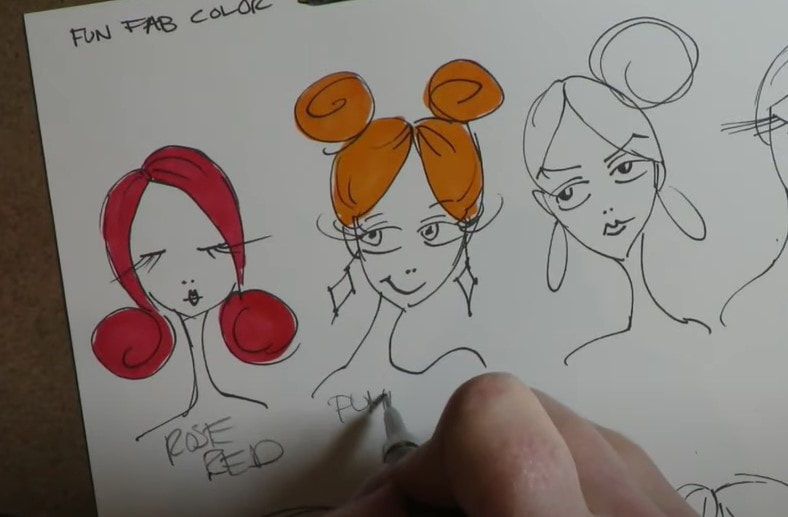
1Pay CLOSE Attention to Directionality
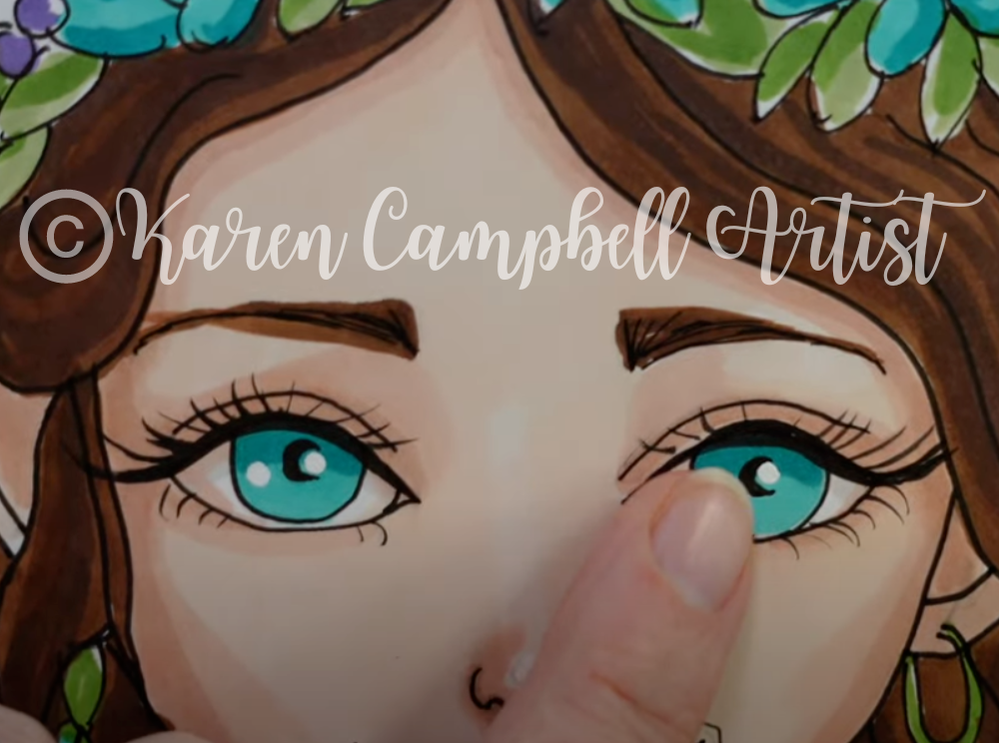
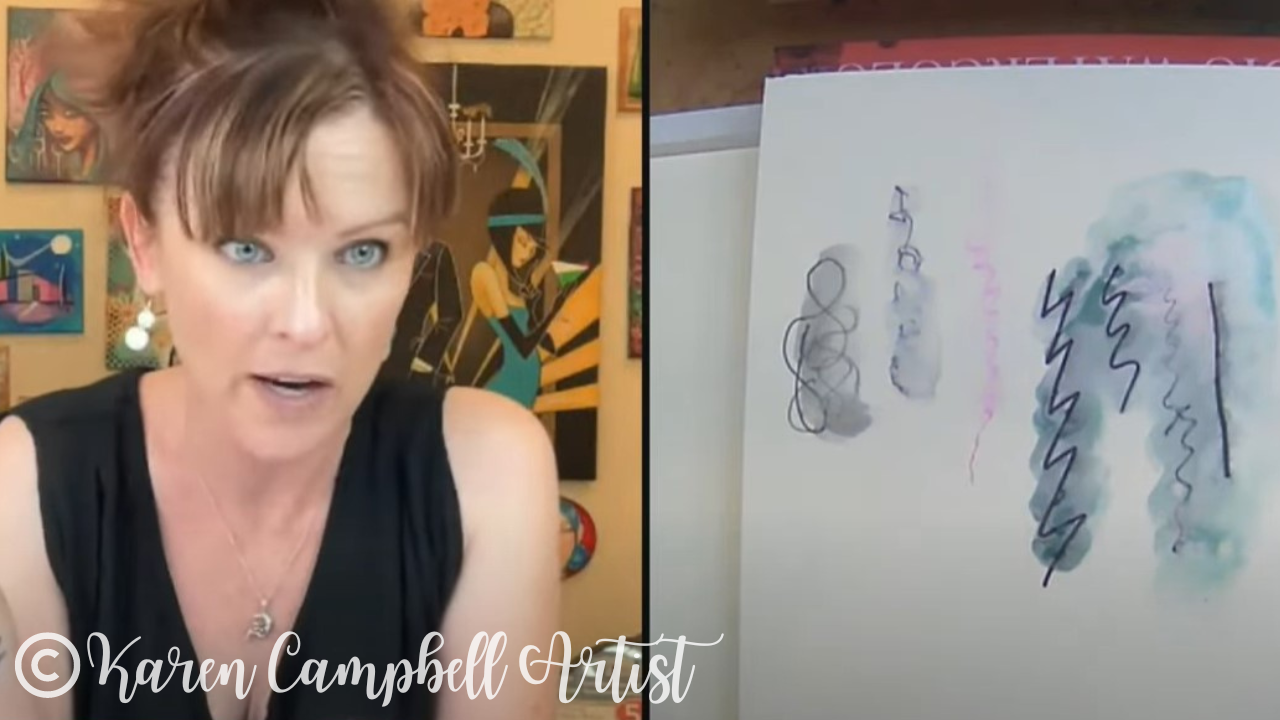
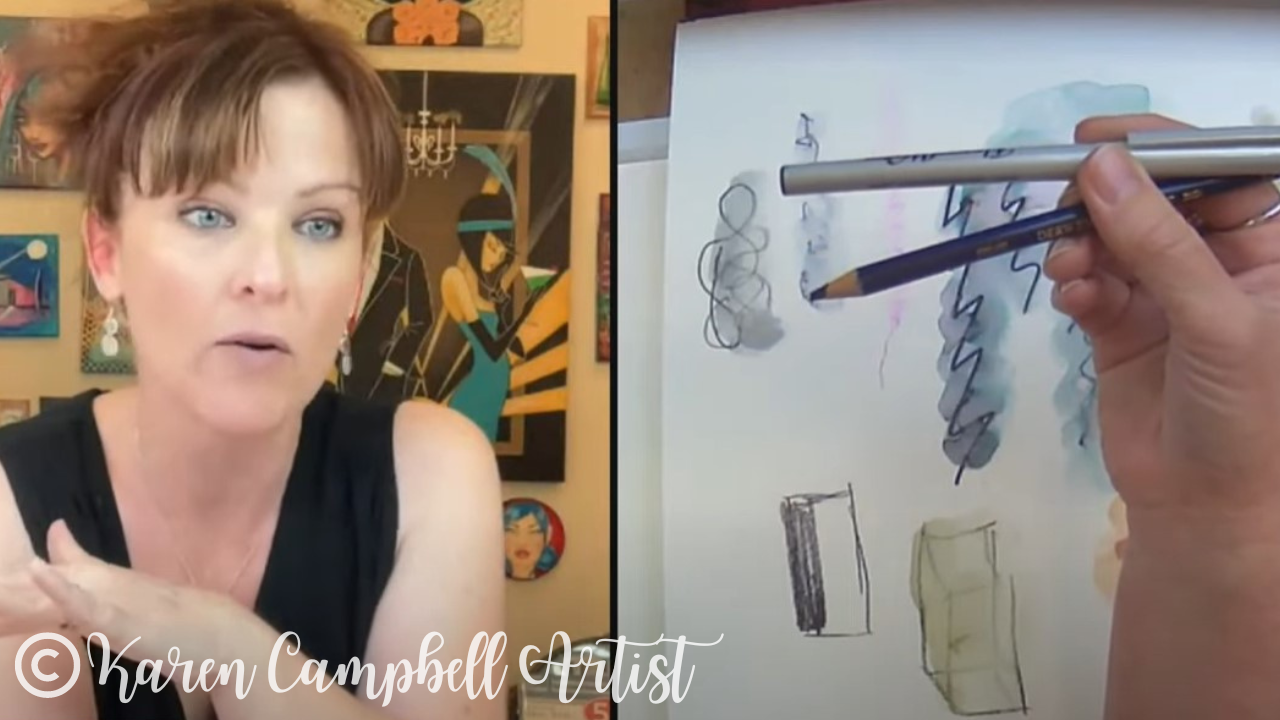
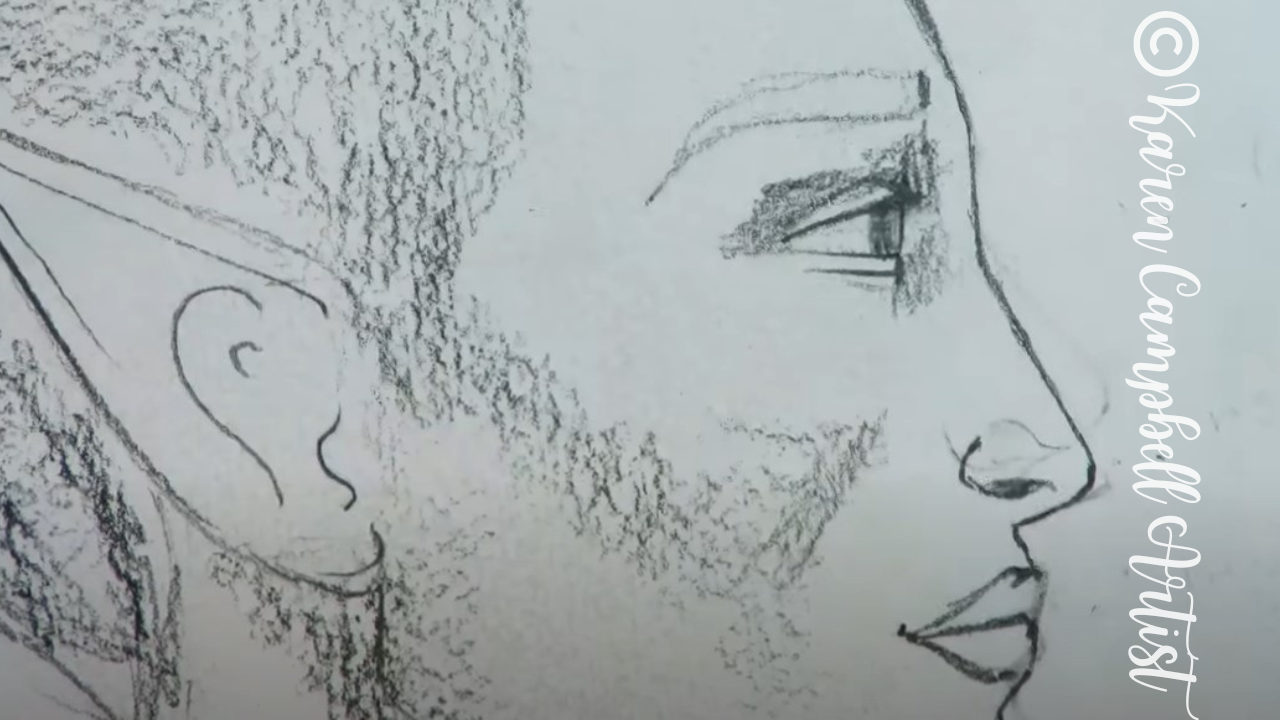
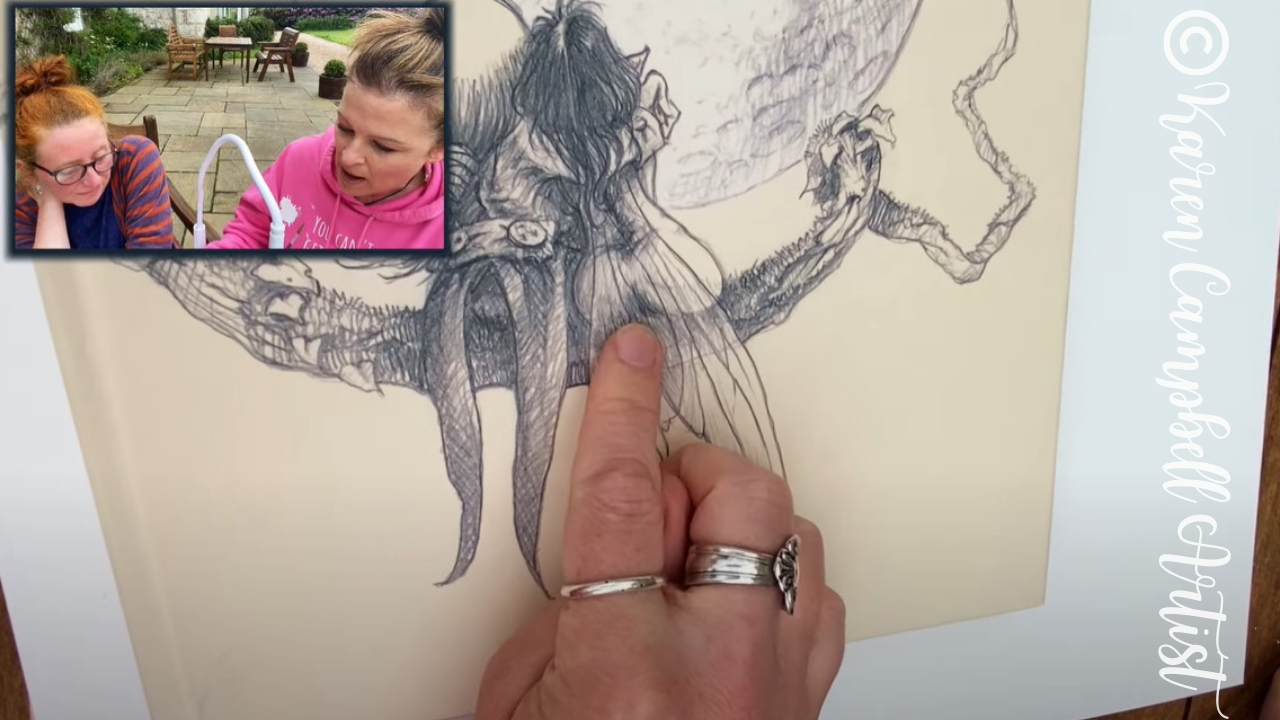
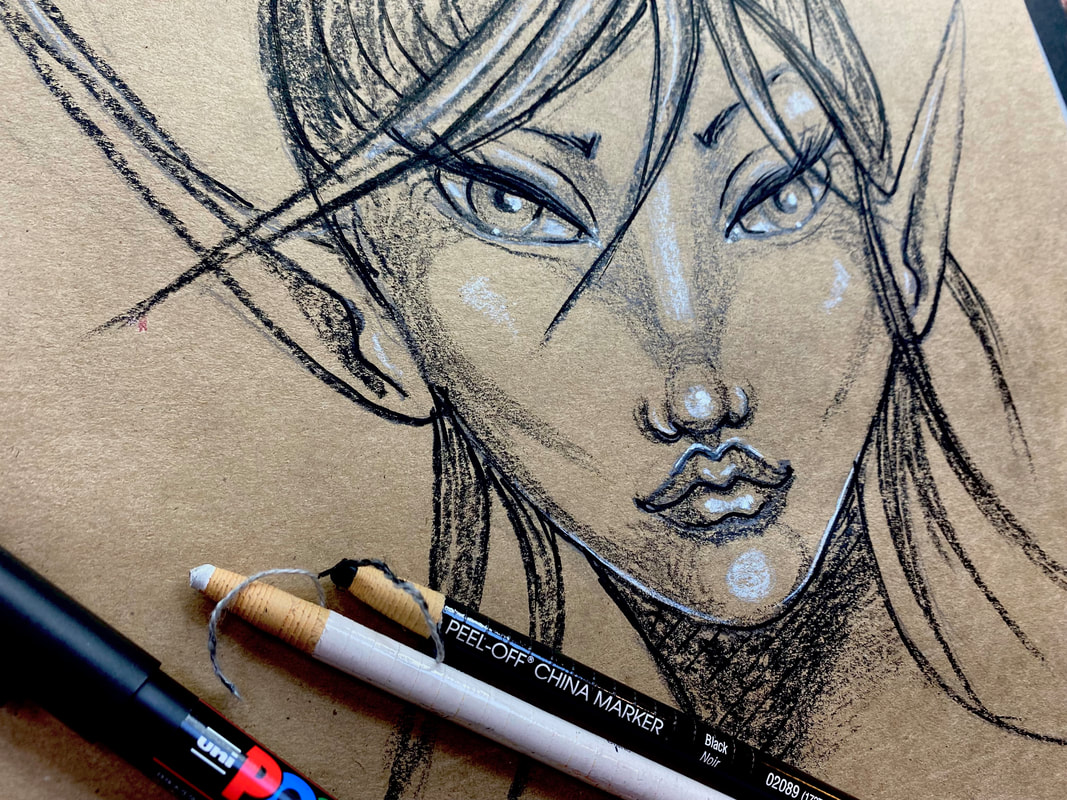
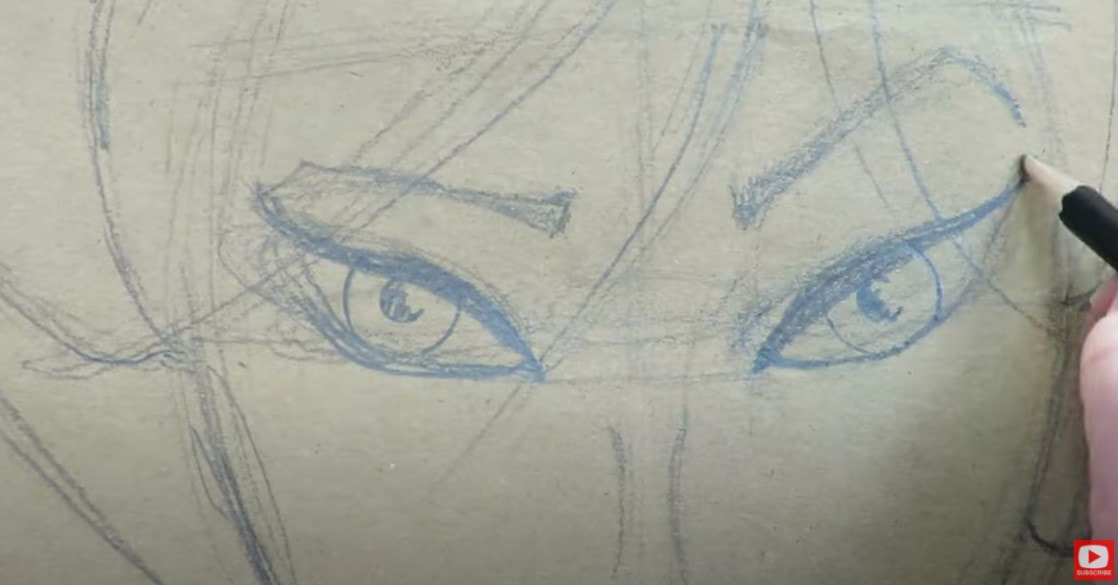
The first thing we need to consider when drawing eyelashes is directionality. Trust me, it's a game-changer. When you take a close look at natural eyes, you'll notice eyelashes don't grow in just one direction – they switch about halfway across the eyeball.
Copying this ONE observation into your mixed media drawings and paintings will immediately take your art to the next level. When I'm drawing eyelashes, it helps me to think of them like parentheses – top and bottom, left to right. 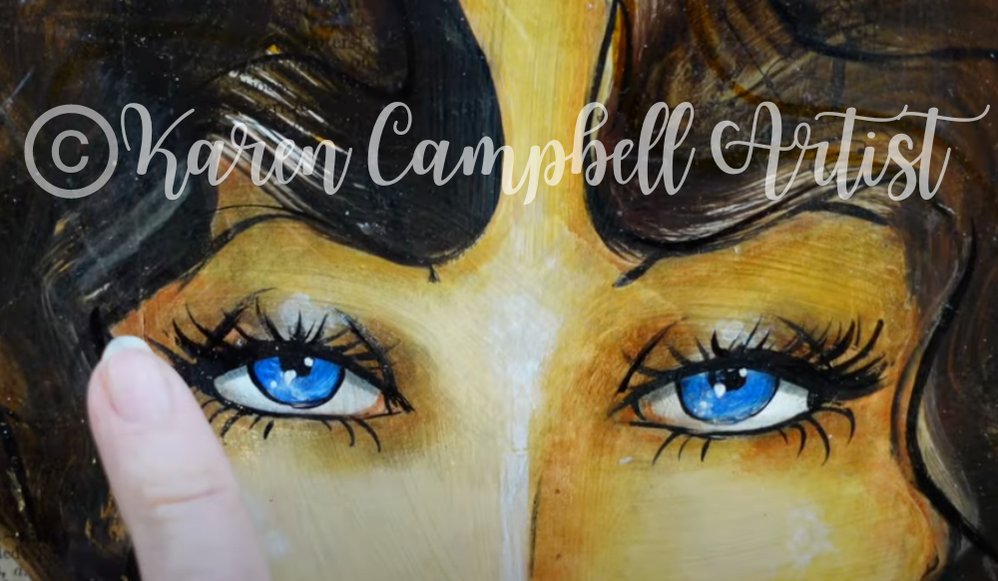
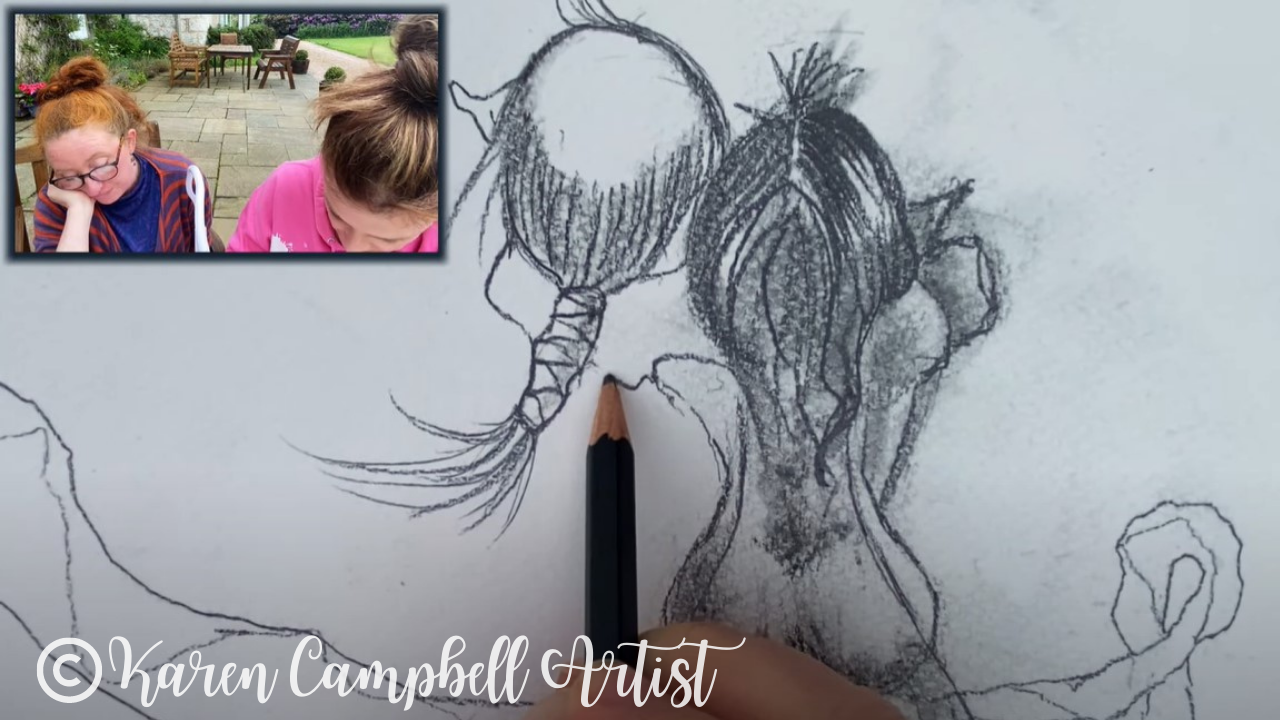
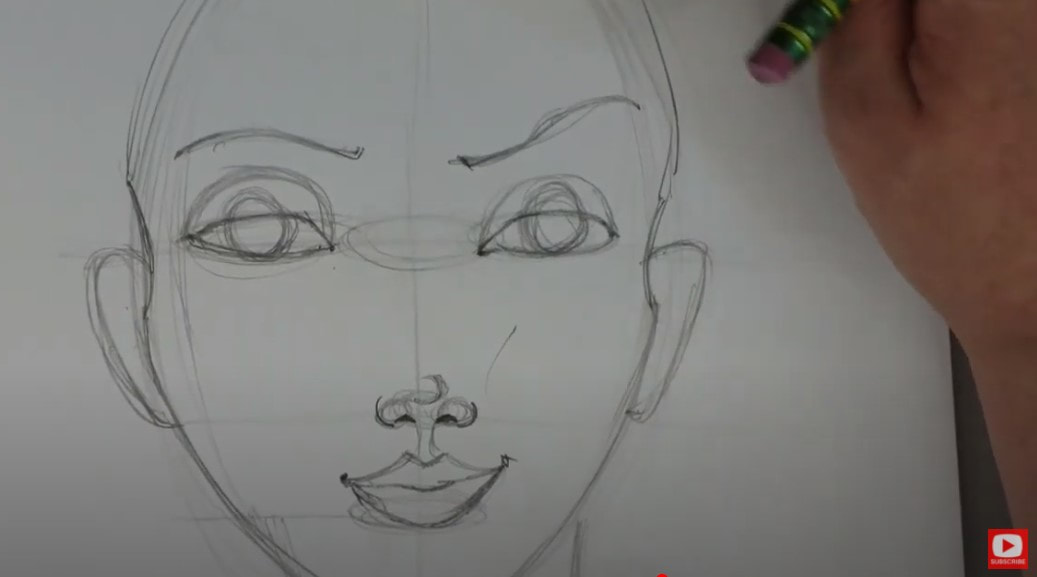
2Vary Your Pressure
Most of the mixed media faces I create on canvas or in my art journals are wearing makeup. I LOVE a dramatic cat eye. To make the whimsical girls you draw and paint look even more realistic, vary the pressure or line weight from your art supplies when drawing eyelashes.
Whether you're using a brush pen or a fine liner, mastering this trick, along with the "flick," (see today's video for the demo!) is essential for achieving that perfect flare. And remember, practice makes perfect! 
3Vary Lash Length Throughout
Another super simple observation from real-life eyeballs is our lashes vary in LENGTH!! Yep, it's true! Look up close at ANY picture of the natural eye, or simply look in the mirror.
Some are long, some are short. Sometimes they even grow in clumps or in multiple rows. When you copy these real-life observations in your art, your mixed media faces will instantly become more sophisticated! 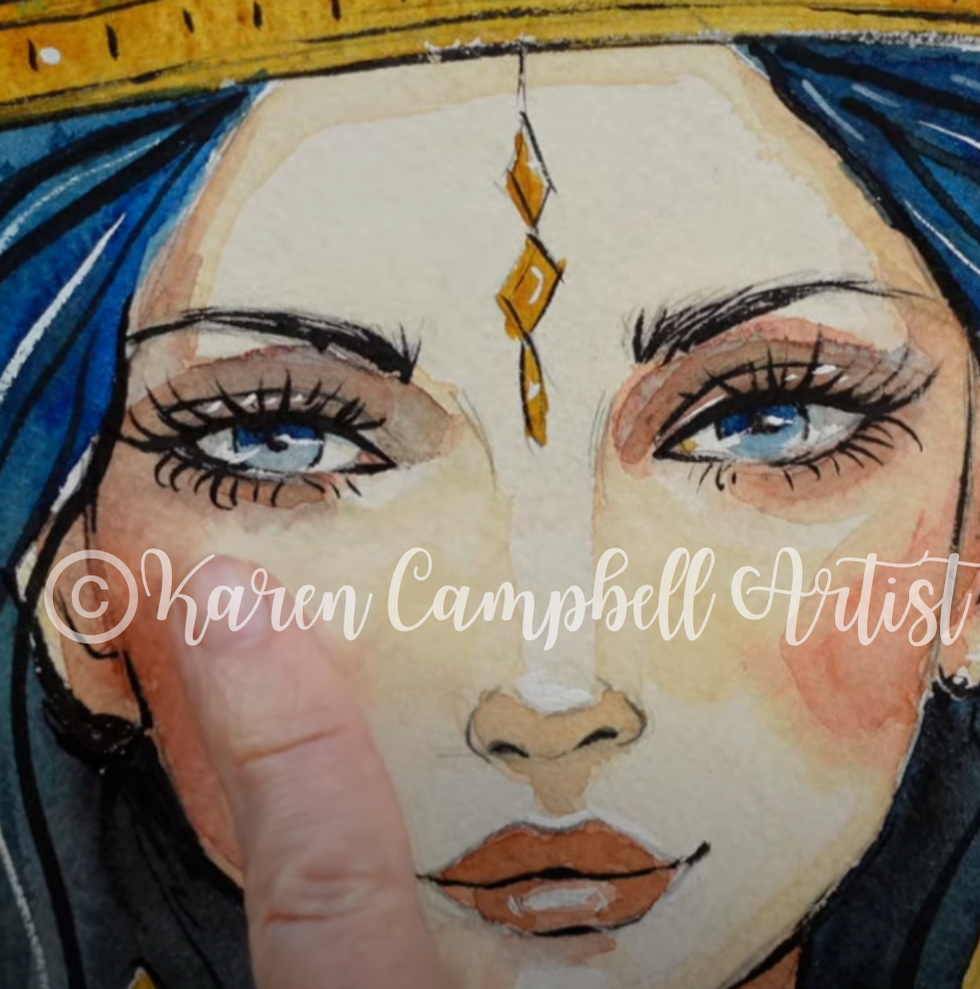
My FAVORITE Brush Pens for Drawing Eyelashes!
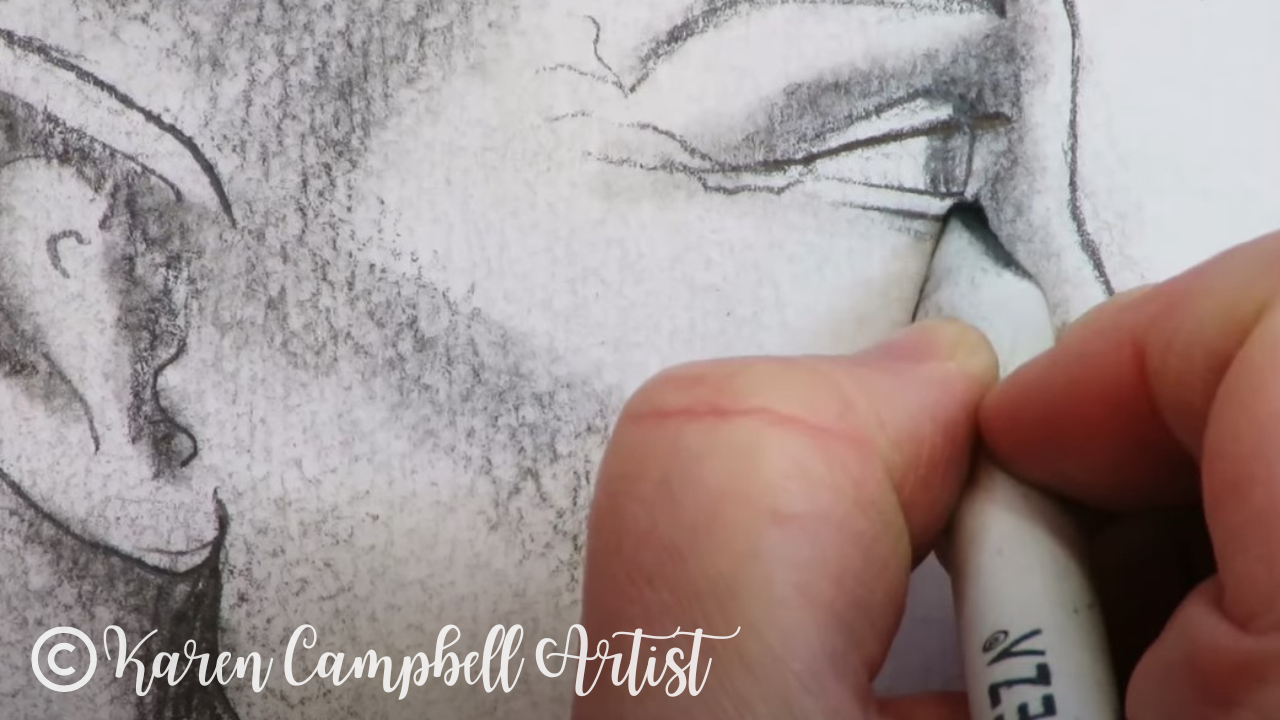
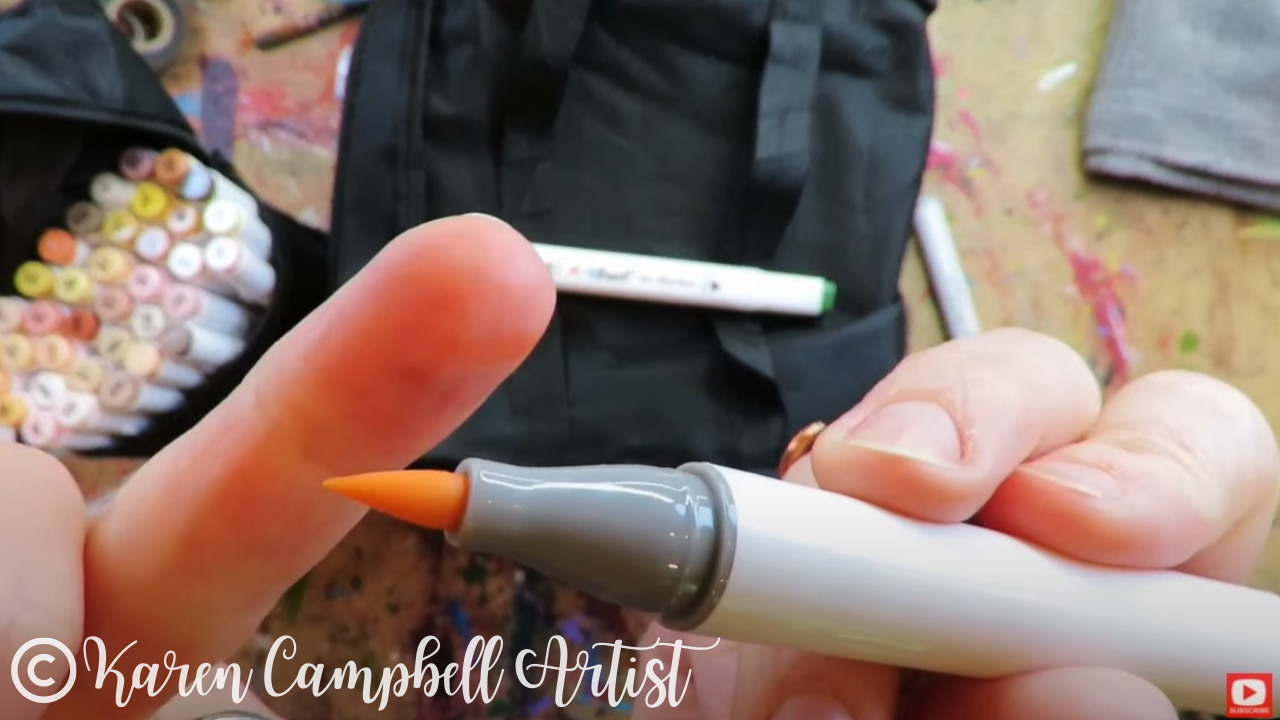
All my favorite pens are from Pentel, but when I discovered the Pentel Pocket Brush Pen, it changed my mixed media faces FOREVER!!
I use this literally all the time for adding eyelashes to the whimsical faces I draw and paint. Instead of a regular marker "nib," this pen and it's "little sister," the sign pen have actual bristles! Both feel very painterly to draw with and help me achieve all three eyelash drawing tips I just shared with you (vary directionality, pressure, and lash length). If you've never used either of these products, they DO take a little getting used to because of the bristles. Play around with them on scrap paper and DEFINITELY print out my cheatsheet from today to get thateyelash drawing practice sheet so you can practice right on the page to perfect your own technique!! LOVE this Video? Share it With a Friend!
If you LOVED today's video, SHARE IT WITH A FRIEND!
It's SO easy!! Either copy and paste this exact video link here: https://youtu.be/IXSgiy16HGc Or if you're on your phone watching on YouTube, hopefully this will help :) 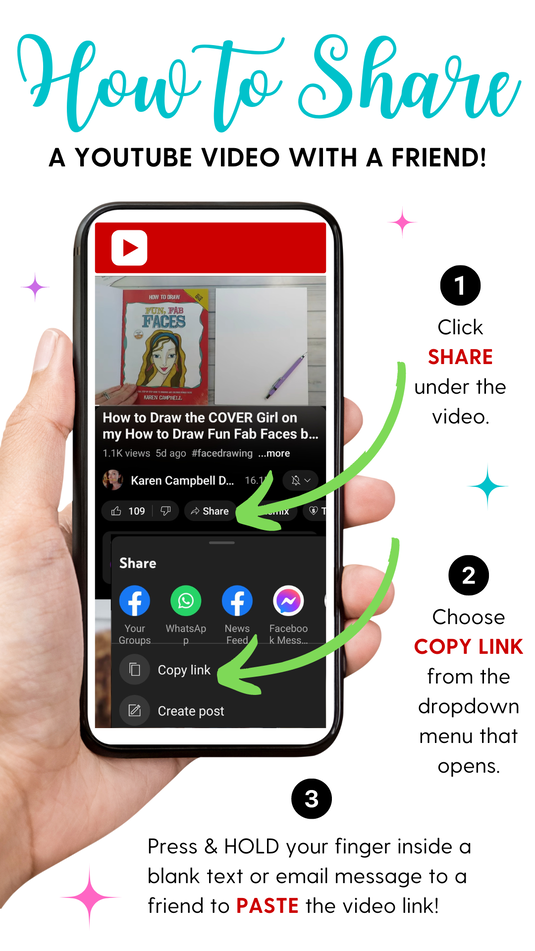
Wanna Create the Mixed Media Portraits
|

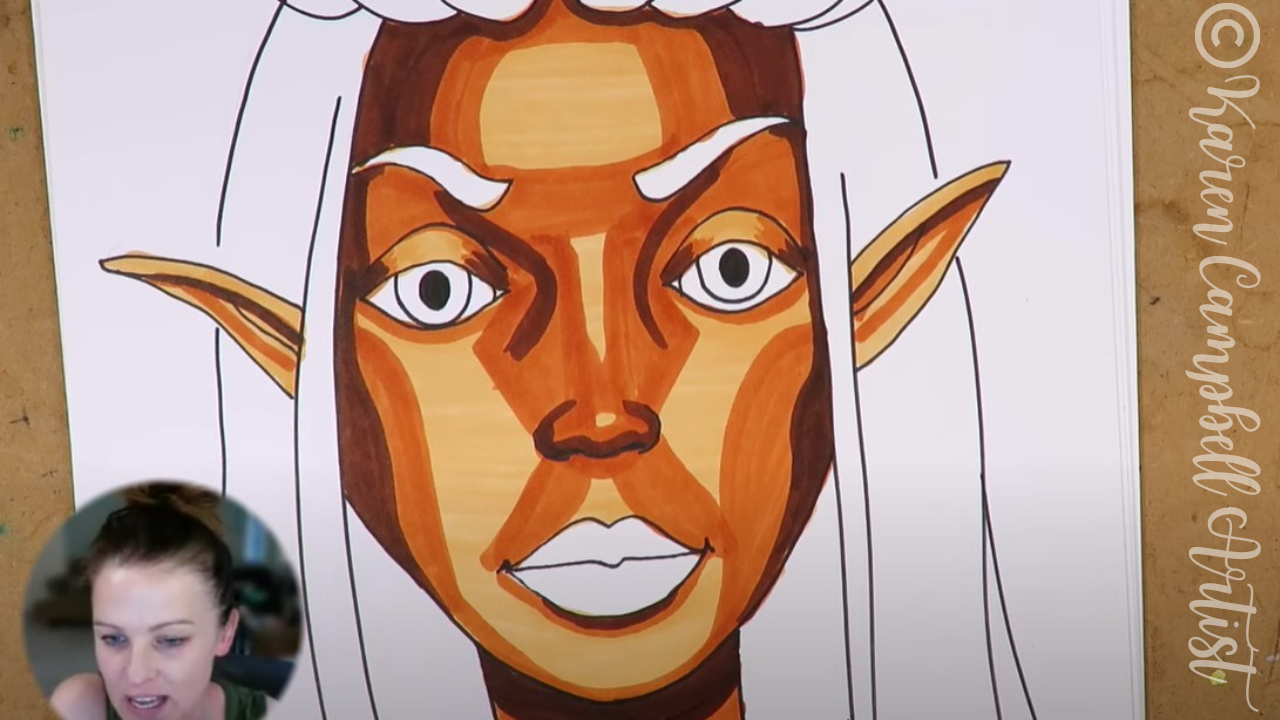
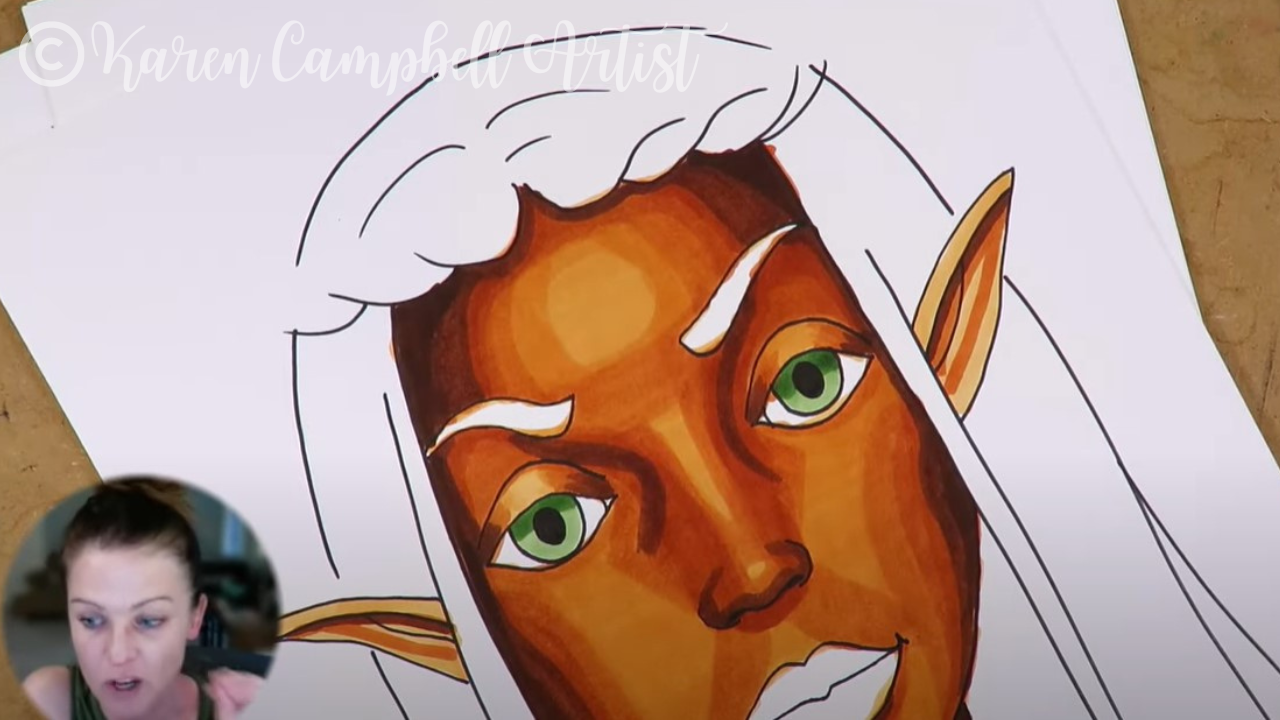
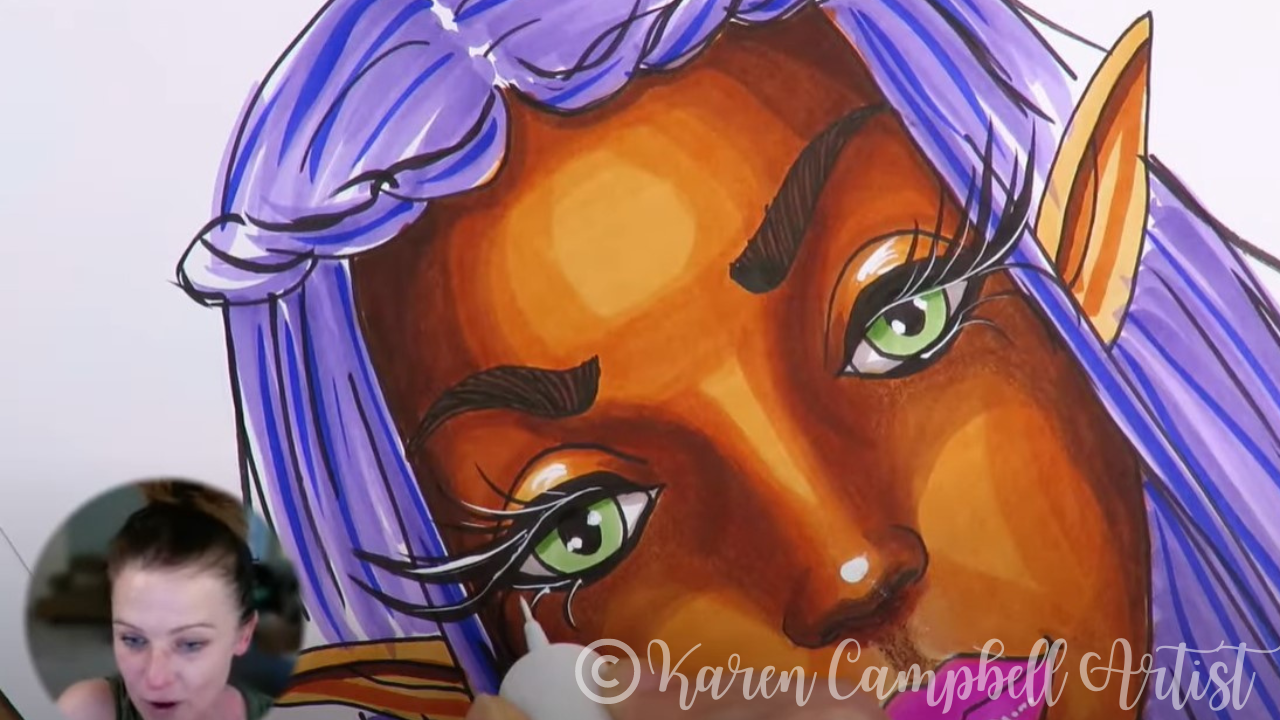


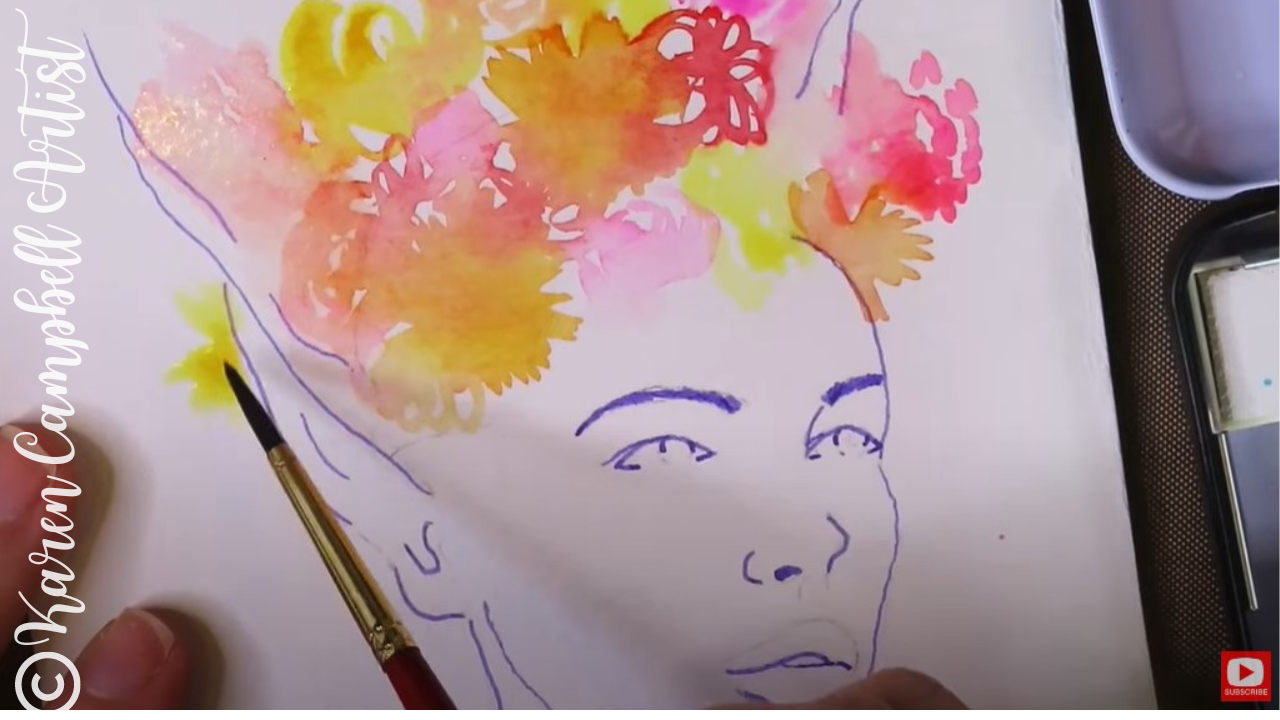
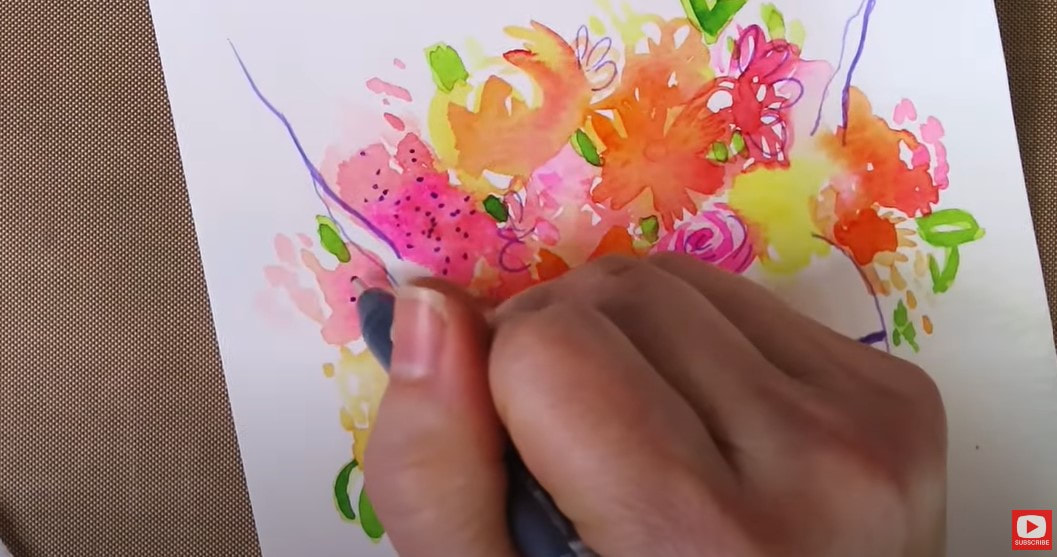
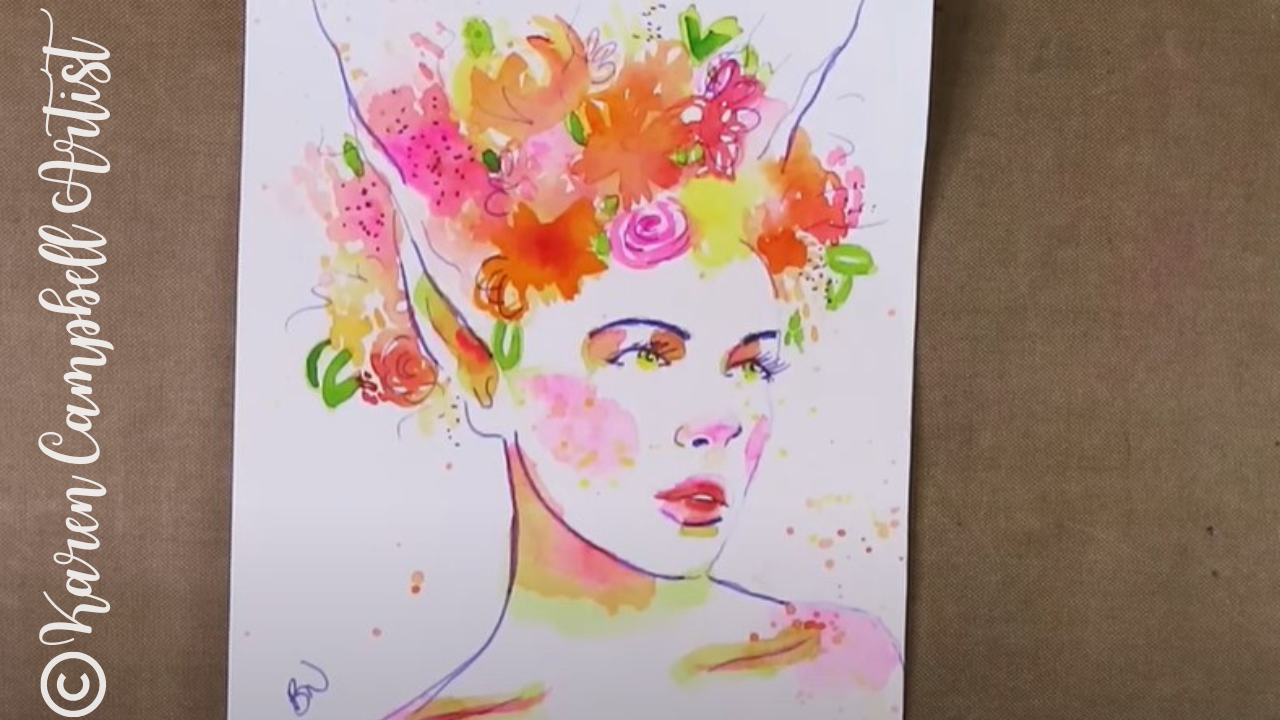


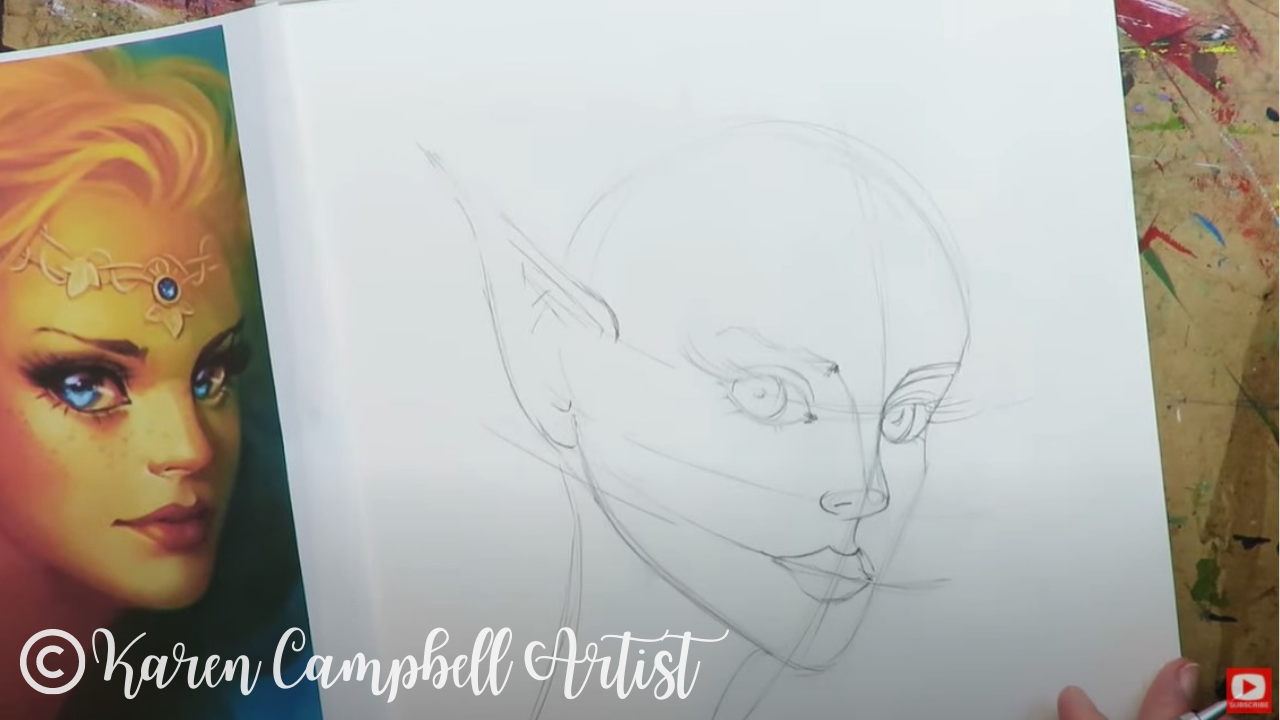

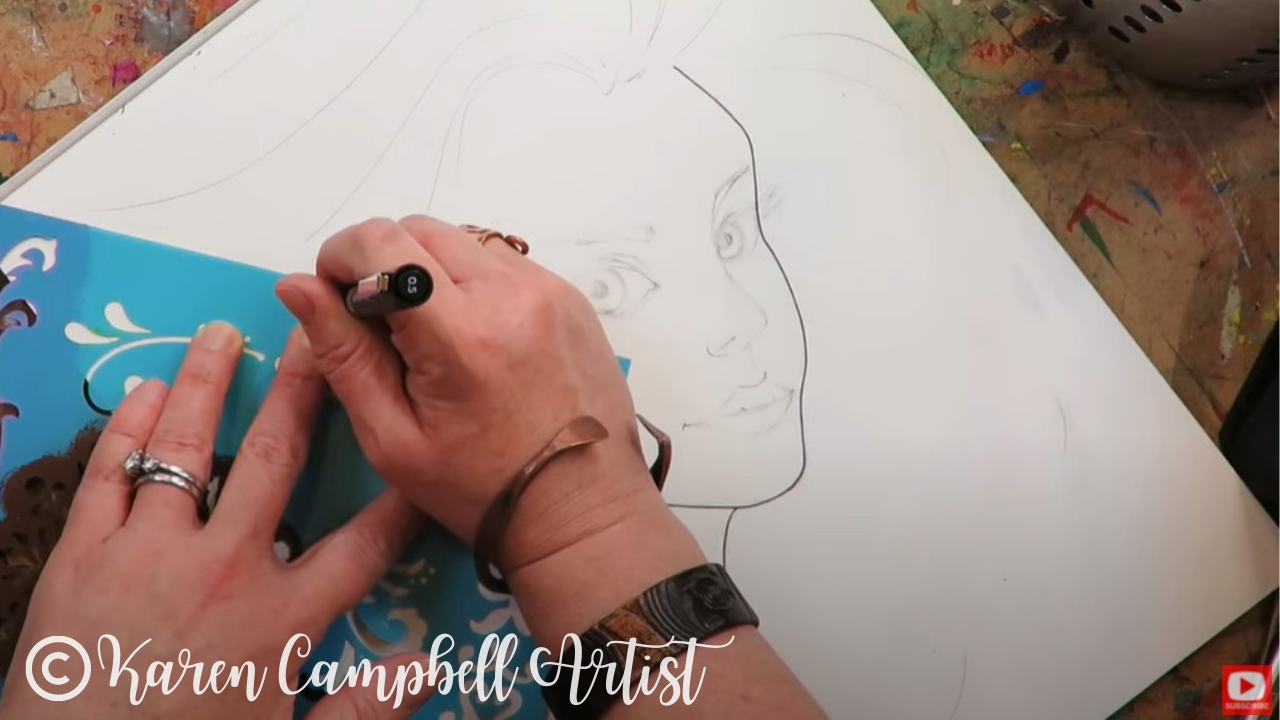
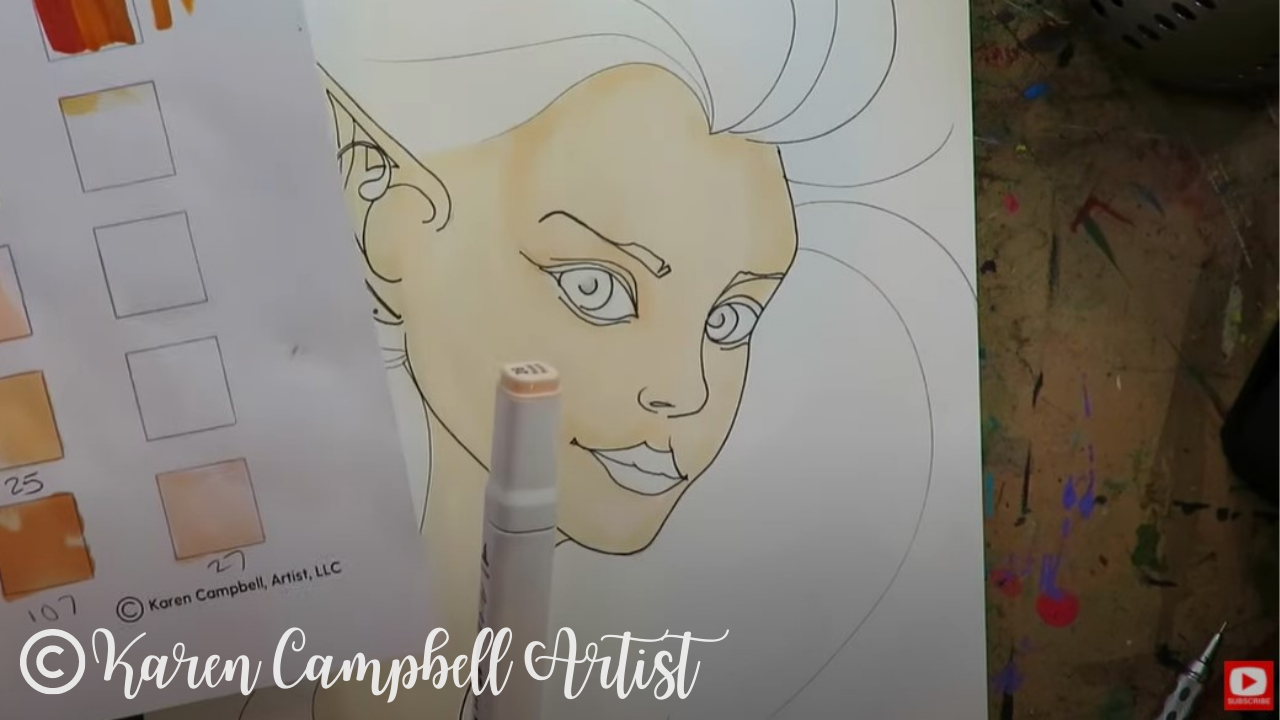
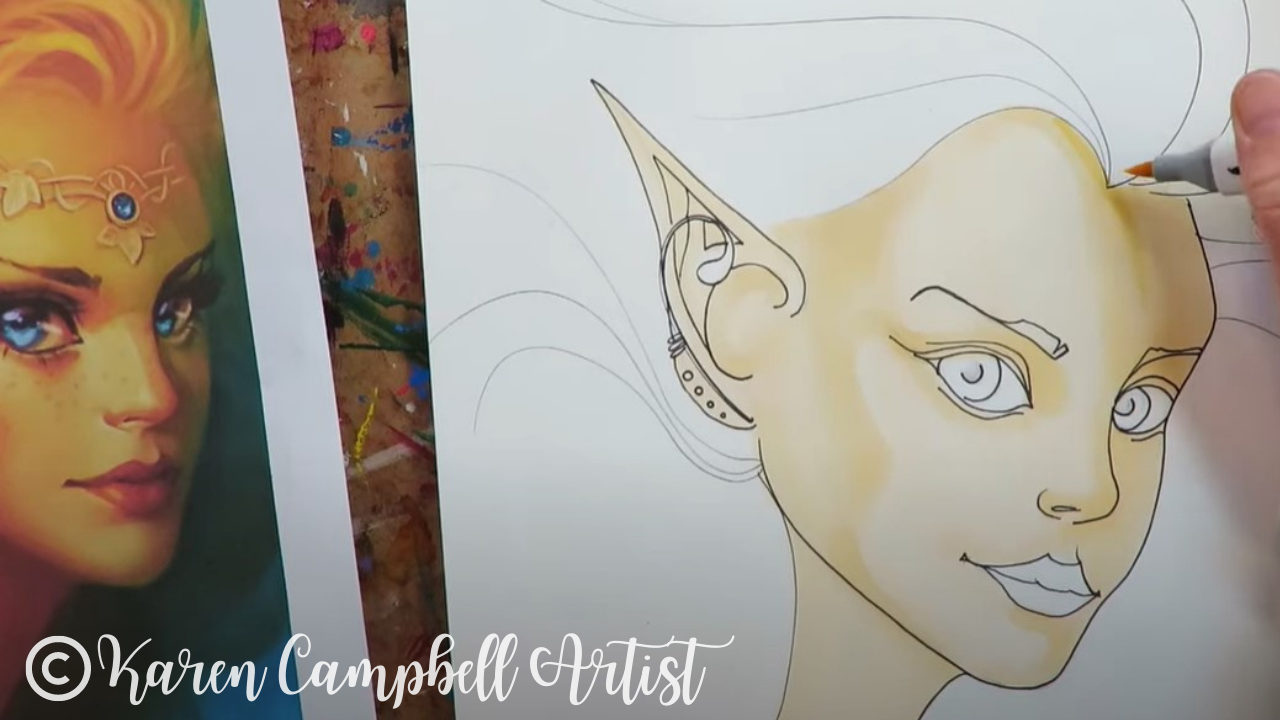


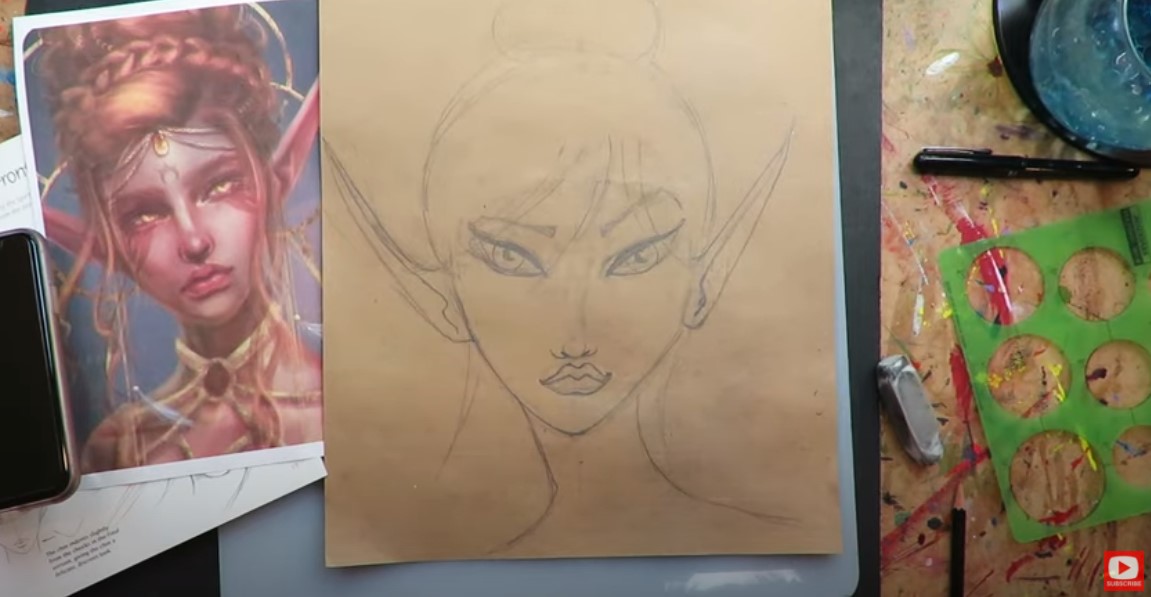
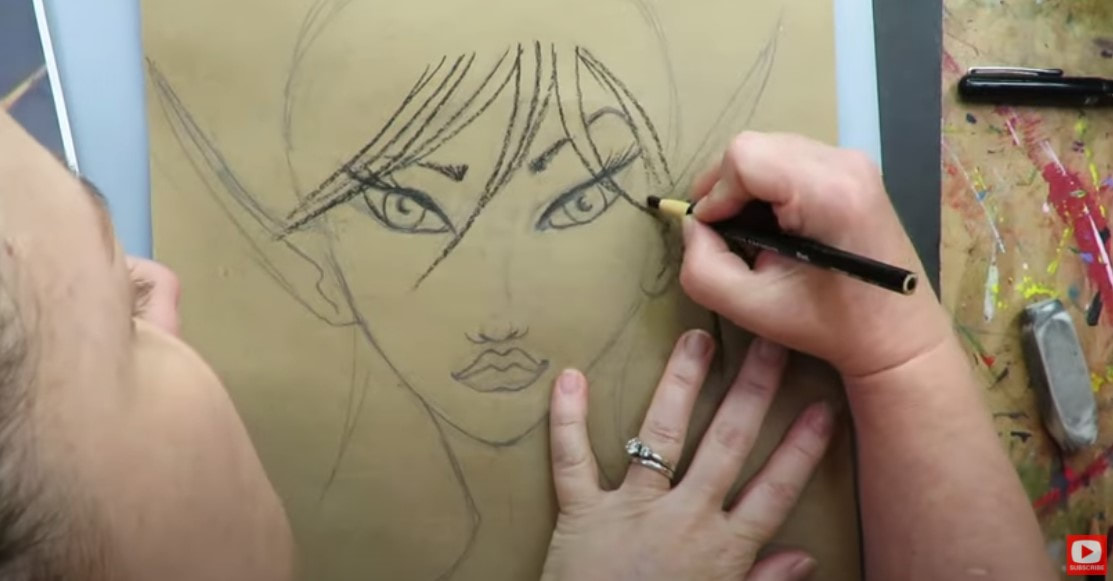
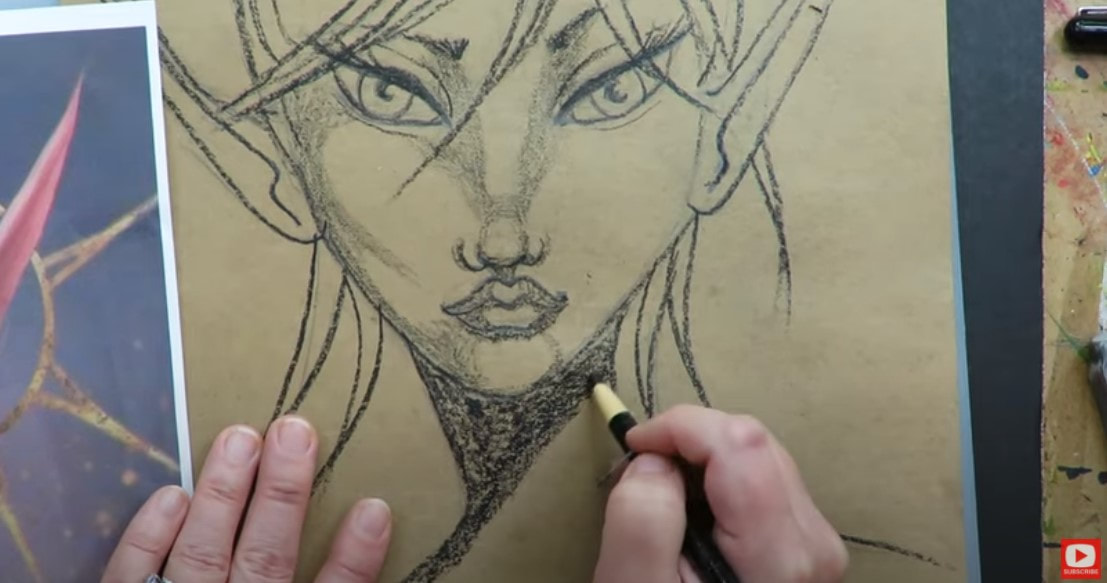

When your drawing is done - keep on watching so you can take your drawing one step further. First, we'll shade her and add dimension with pencil...
Then, I'll teach you how to shade a face using alcohol markers!
❤️ CHECK OUT ALL my art books on AMAZON
❤️ MY FAVORITE ART SUPPLIES on AMAZON
❤️ MY BELOVED FACEBOOK GROUP
❤️ FOLLOW ME ON INSTAGRAM
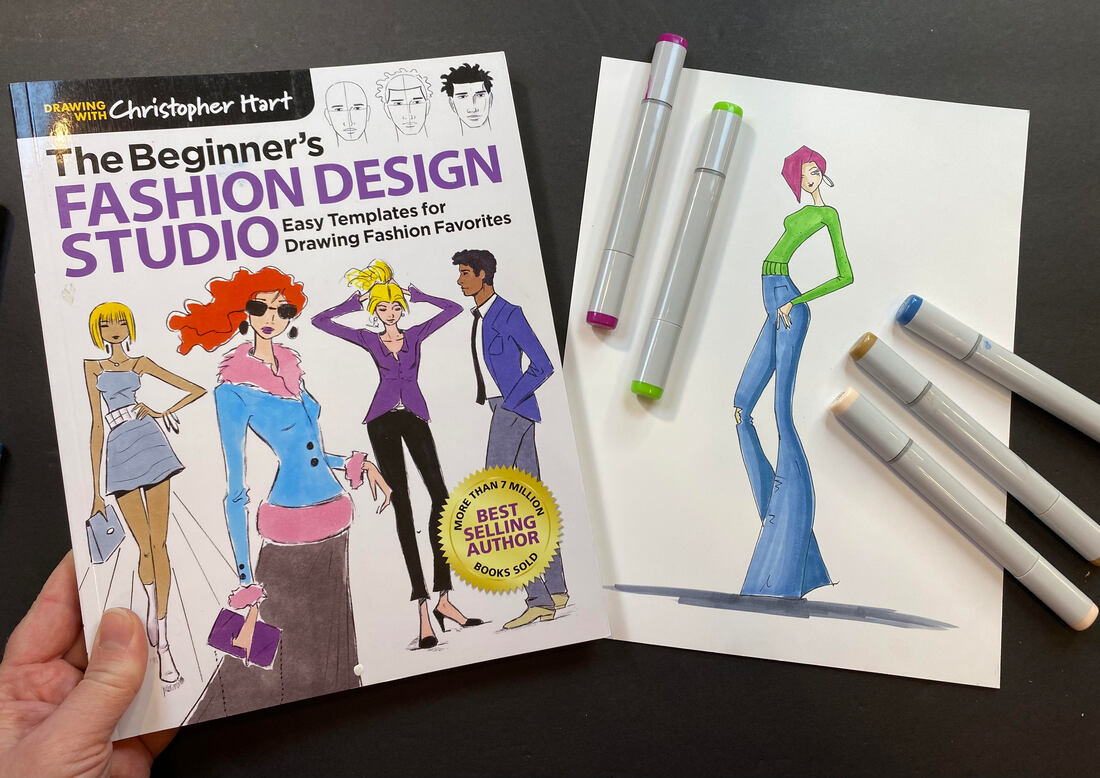
FUN & EASY Male Fashion Illustration Sketches like Christopher Hart! [Perfect for Beginners]
12/4/2022
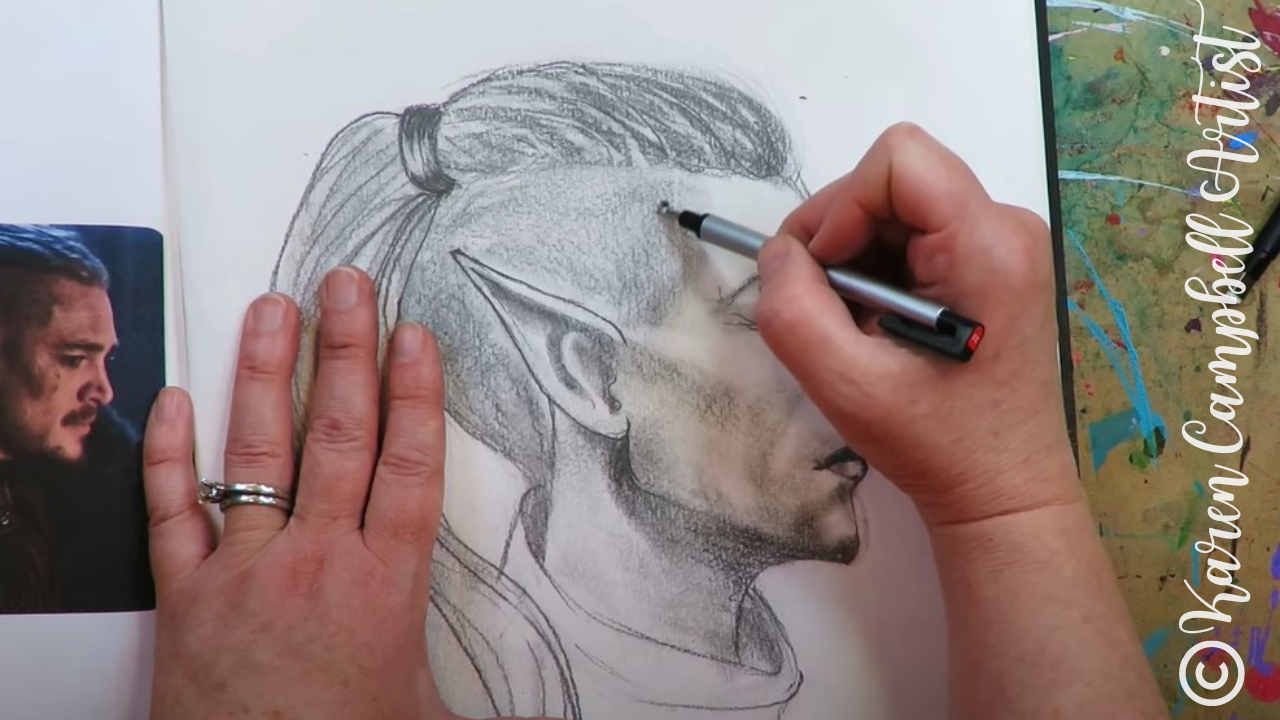
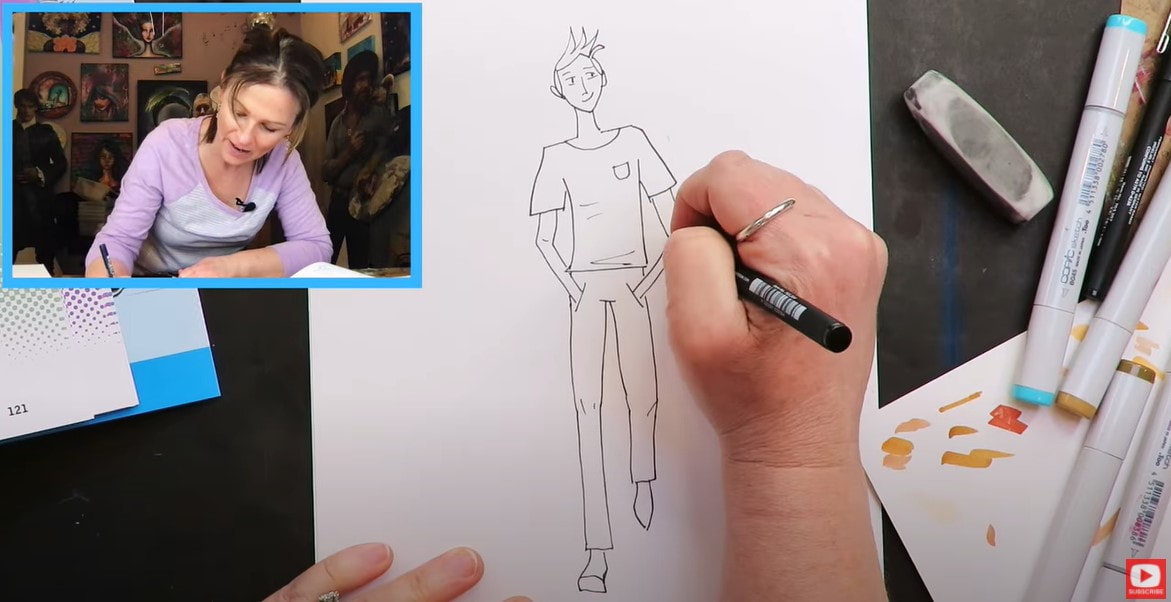
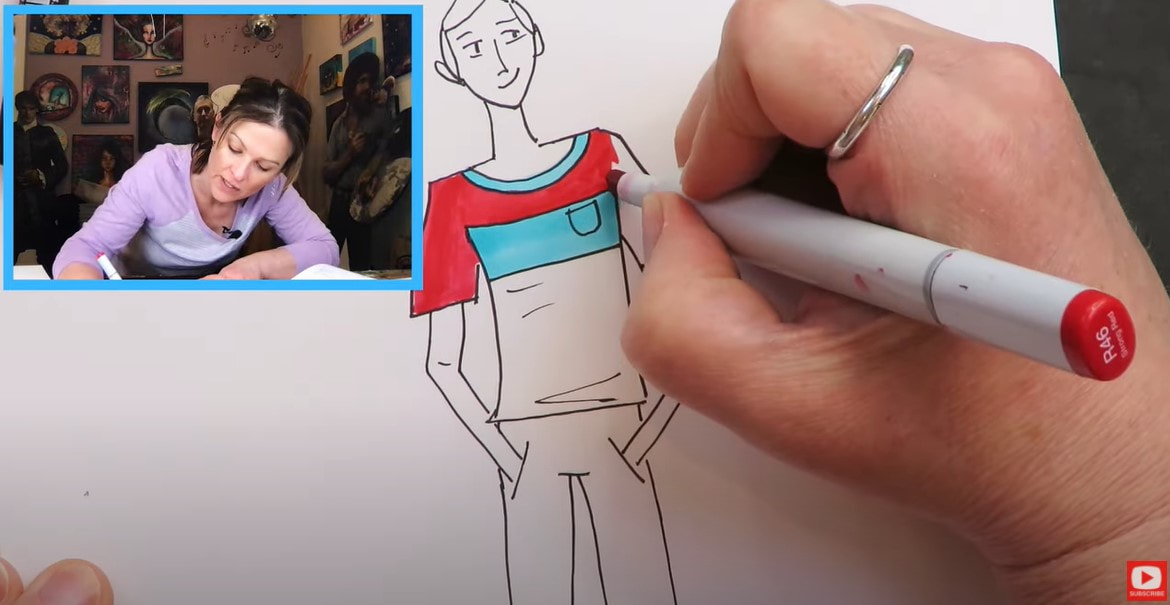
Today we're sketching an EASY fashion illustration figure in pencil, and coloring him in with alcohol markers. He's simple enough to do even if you've never tried fashion figure sketching before. Grab a pencil, some markers & come draw with me!

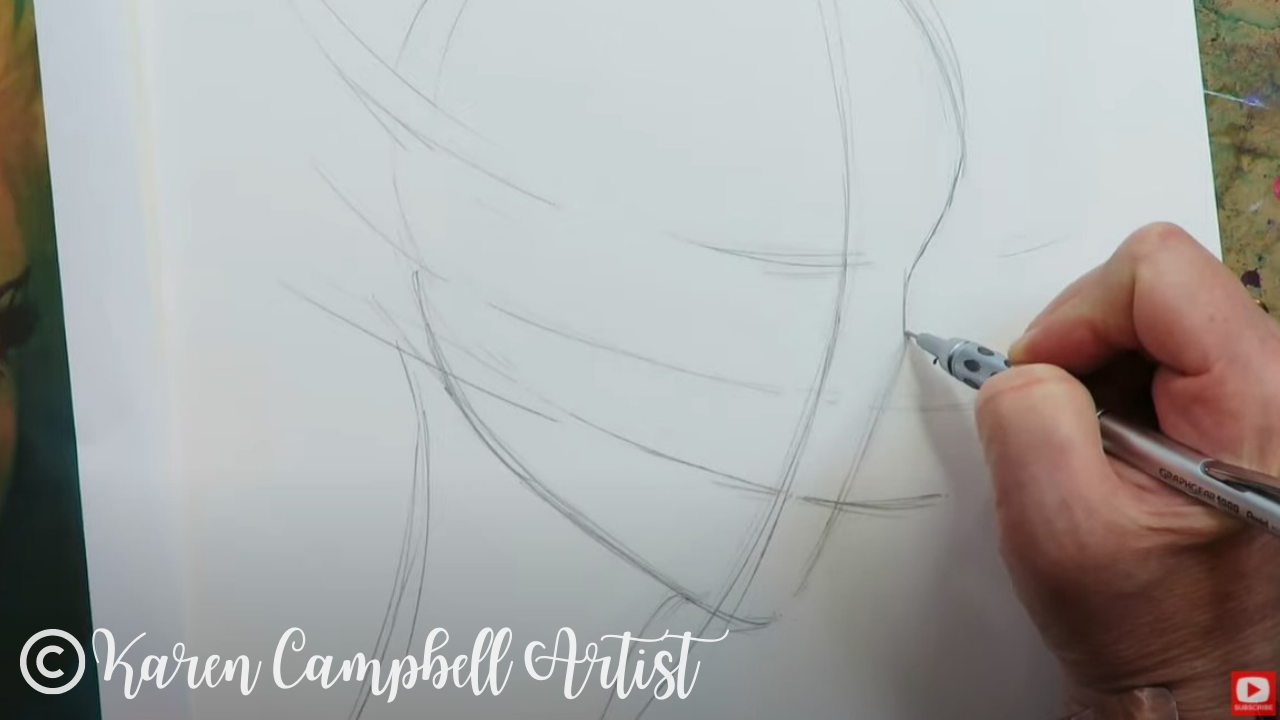
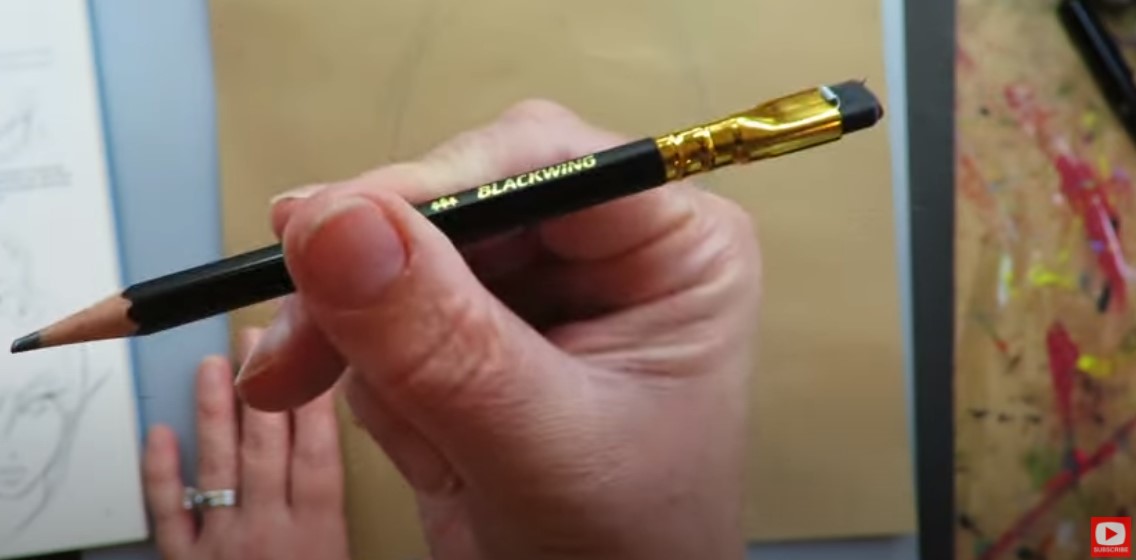
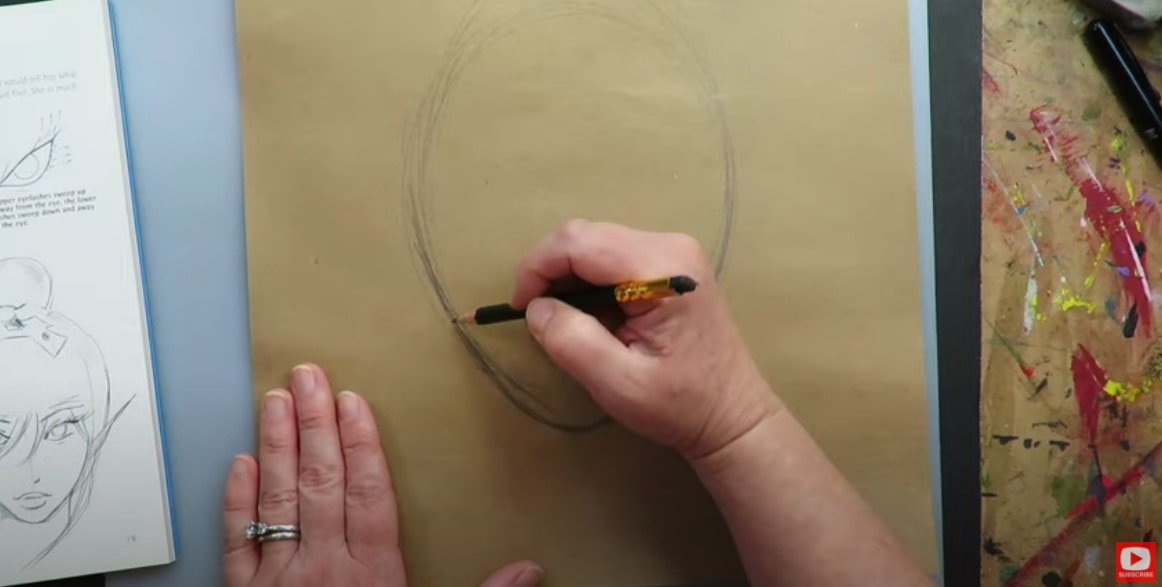
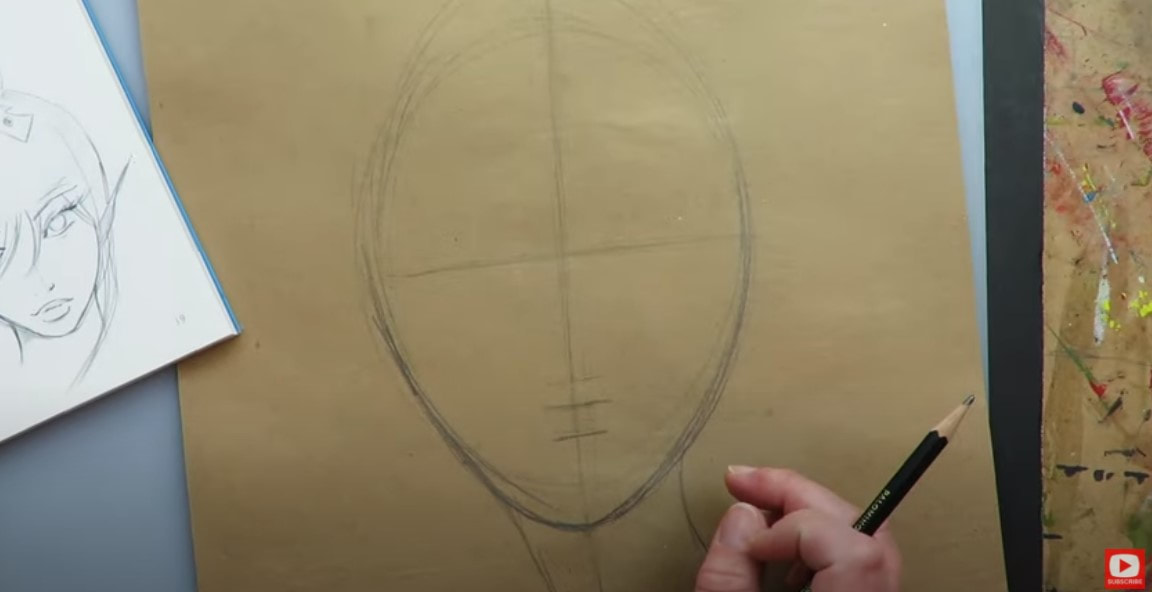
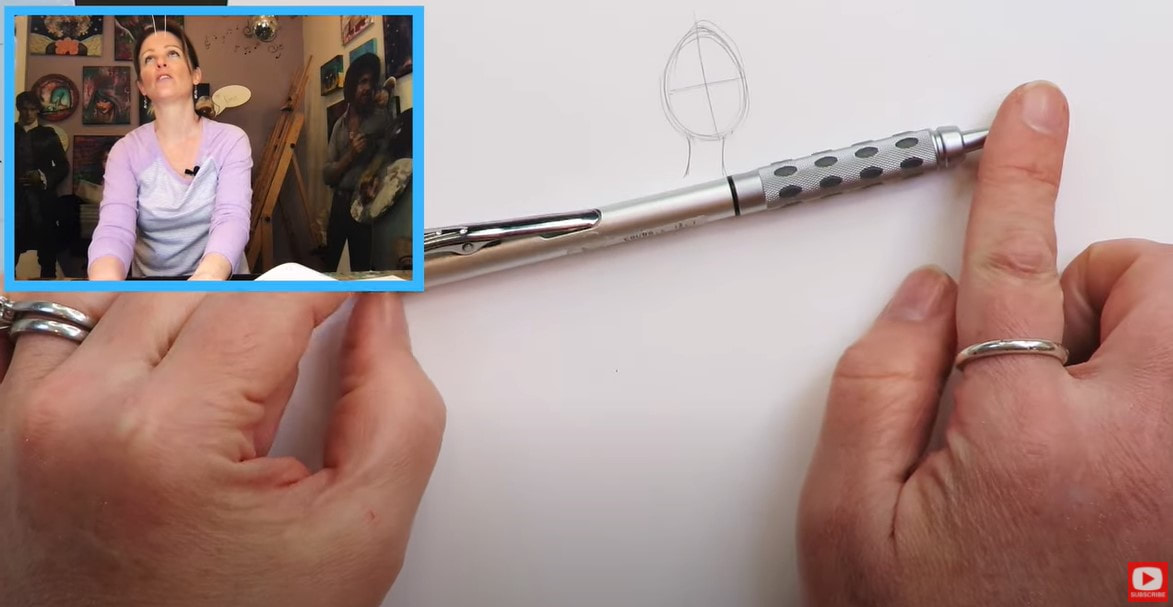
I'm using a mechanical pencil to sketch today's male fashion figure. I love the Graphgear Set by Pentel that I'm using in the video because it's weighted and helps me feel like I've got better control.
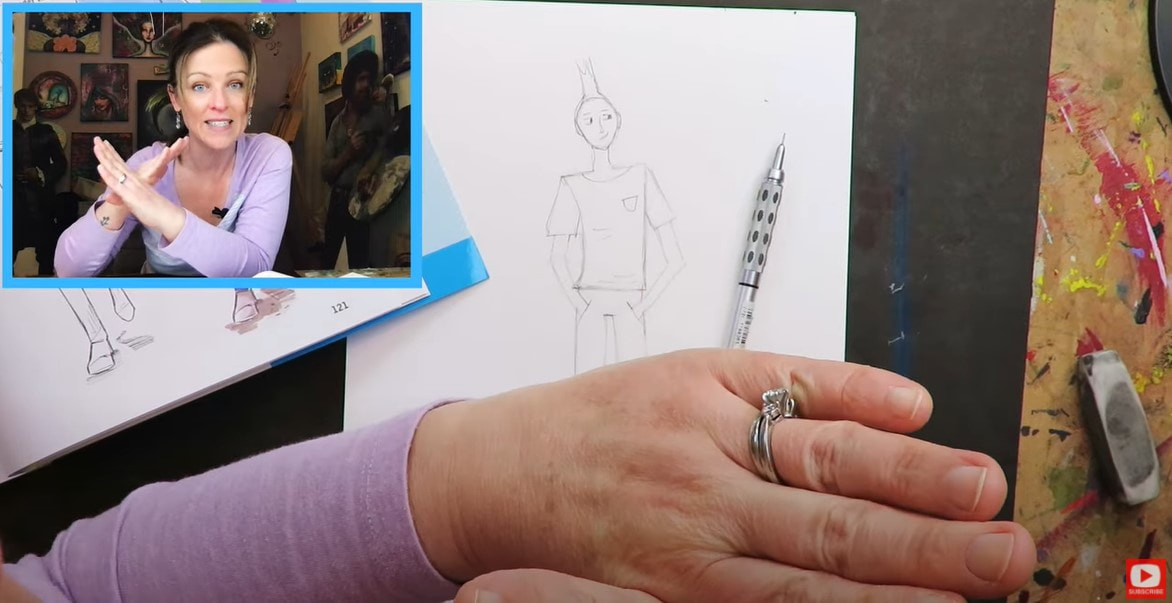
Our dude has a bit of a swagger in his step, which makes his torso curve. We're also drawing one leg "shorter" than the other to indicate he's in motion, mid-step.

Fun fact about fashion figure sketching - the elbows of your figure should always end up at the waist of your model, so keep that guideline in mind as you're drawing. I love that this illustration has the guy's hands in his pockets! Makes things SO much easier - no fingers to worry about.
If you are someone who wants to learn how to draw hands and fingers realistically, I've got a course over at Awesome Art School just for you, and a book of the same hand drawing projects on Amazon.
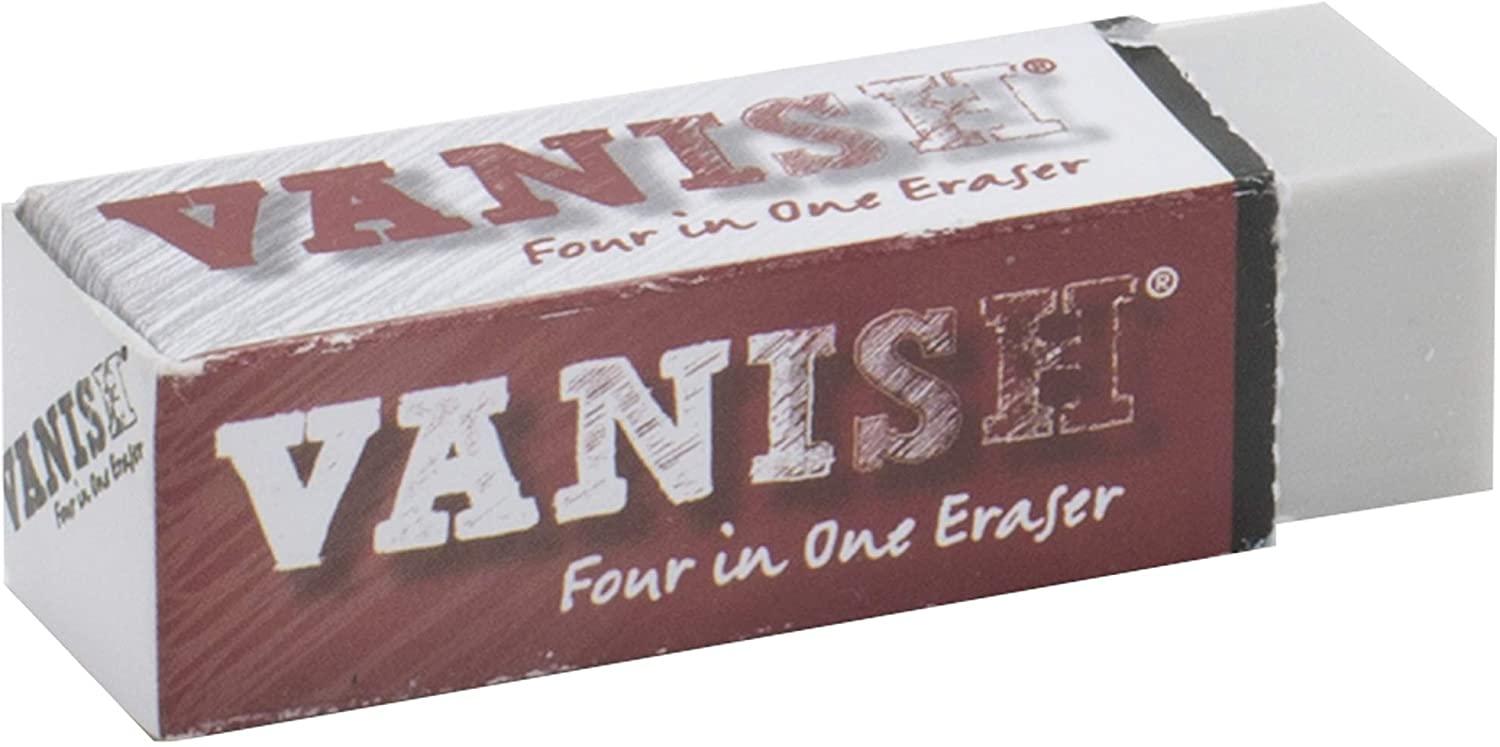
I'm using my favorite vanish eraser. It's super gentle on your paper and really lifts the graphite quickly. They sell these at Jerry's Artarama for $2! If you don't have a Jerry's near you, you can also pick them up on Amazon at that link above.
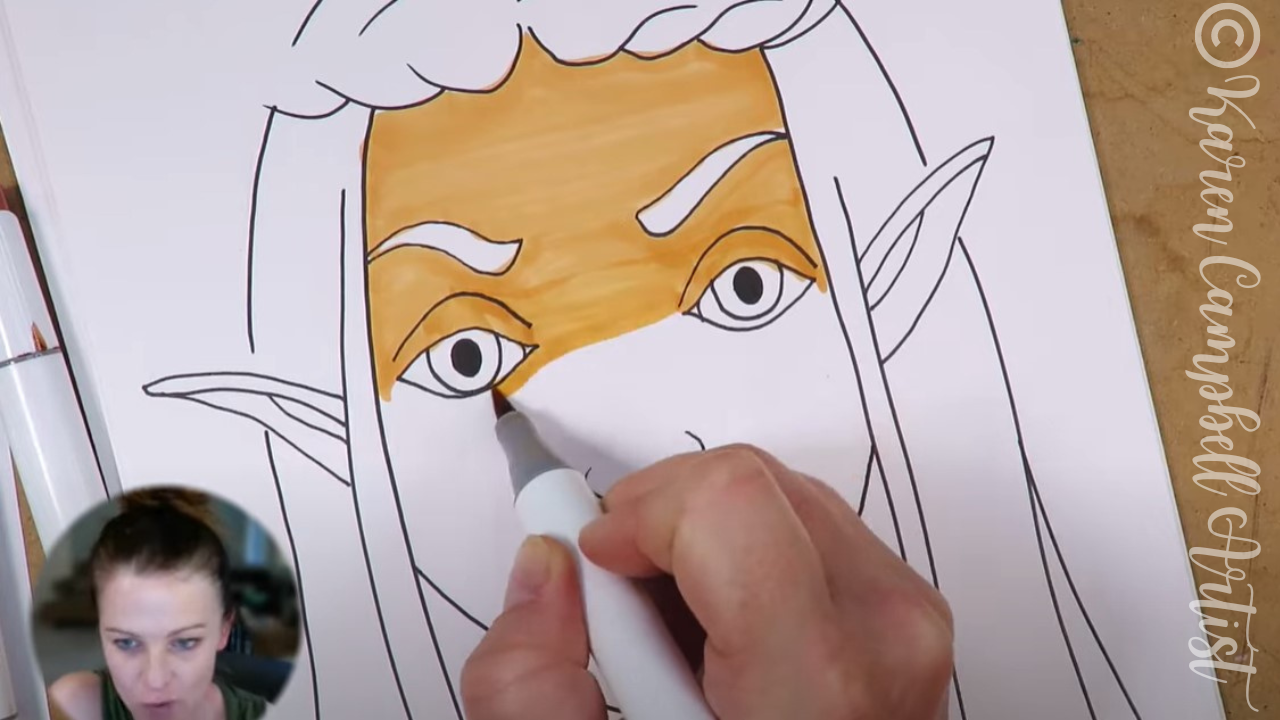
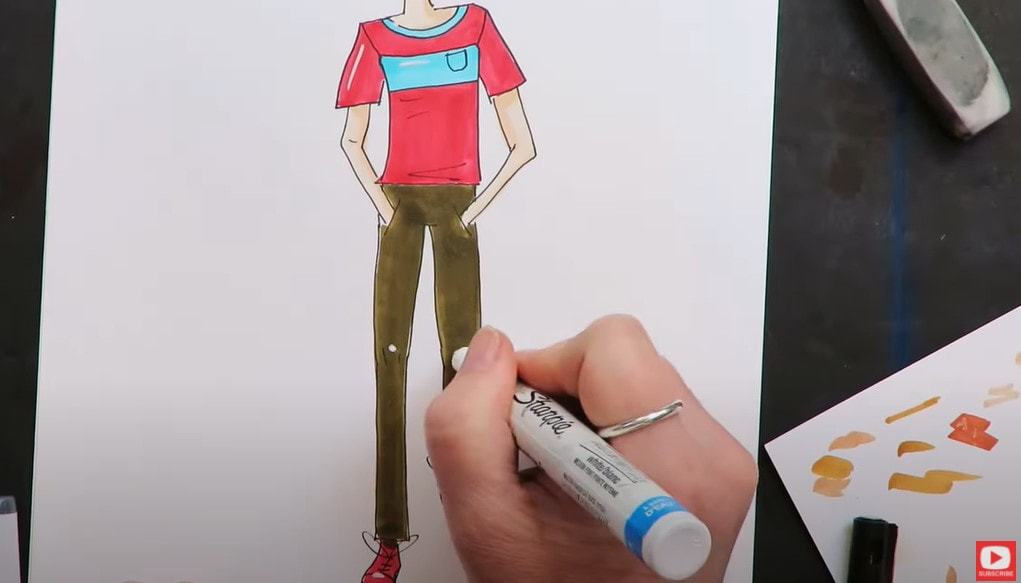
You'll want to outline first in a fineliner, then erase all remaining graphite because if you color OVER graphite with your alcohol markers, the underlying graphite will smear. It can also really wreck/stain your lighter marker shades like yellows, light skin tones or pastels.
You also need to really make sure you pay close attention to what your fineliners are made of. Alcohol markers blend beautifully with other alcohol markers. But... if you outline in sharpies (this is ALSO an alcohol marker)- you're gonna get smearing or "bleeding" because the fineliner is gonna try to blend with the alcohol markers you're shading with.
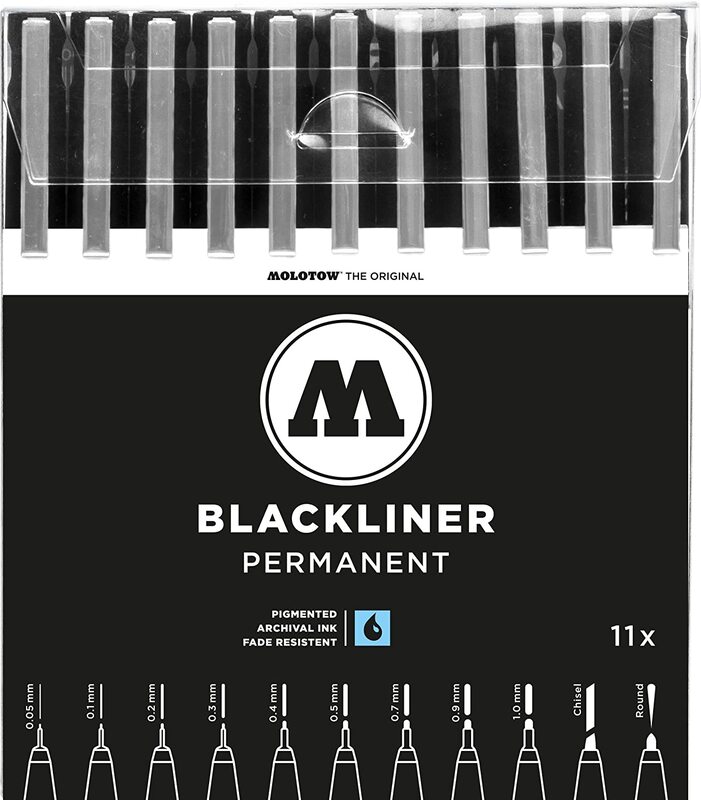
Do yourself a favor and use a fineliner that's a water based or pigment based. This will ensure NO blending takes place where you don't want it. I love this set by Molotow. It's a great value (11 fineliners in a variety of nib sizes for around $28).
If you don't have two shades of a color available - just use the same color and add another layer to darken parts of your drawing and indicate shadows. That's what I'm doing today.
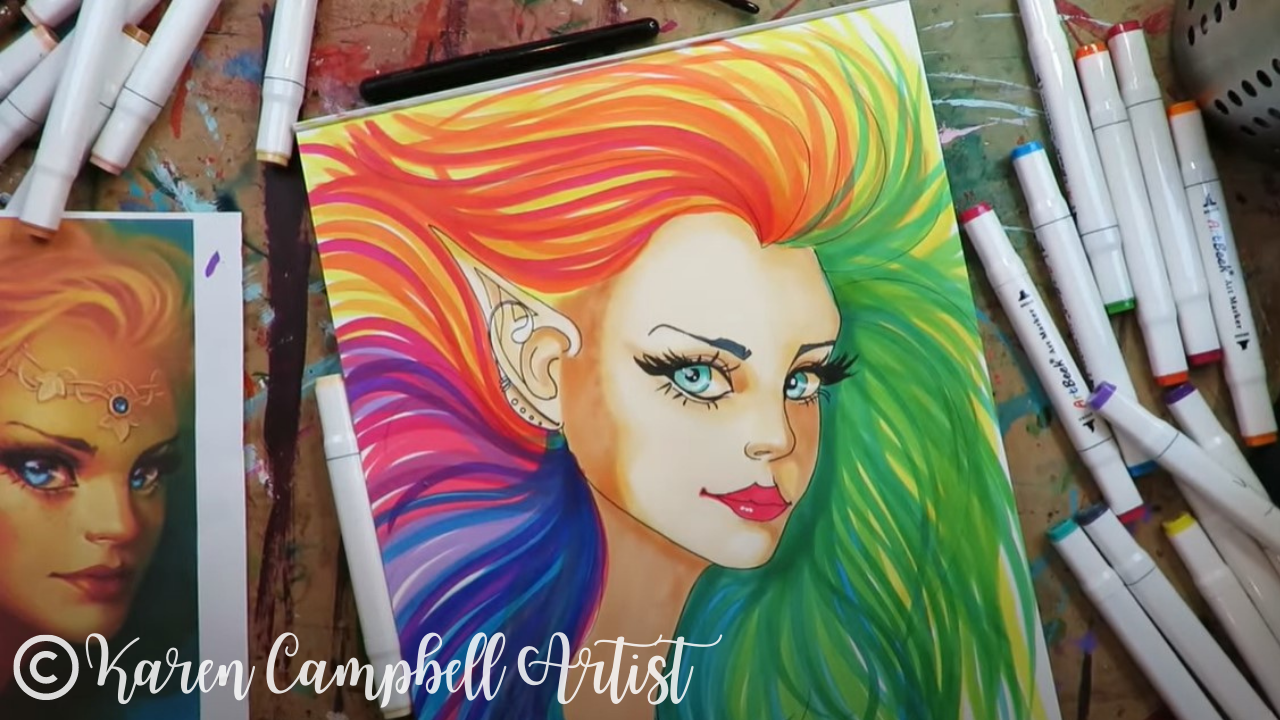
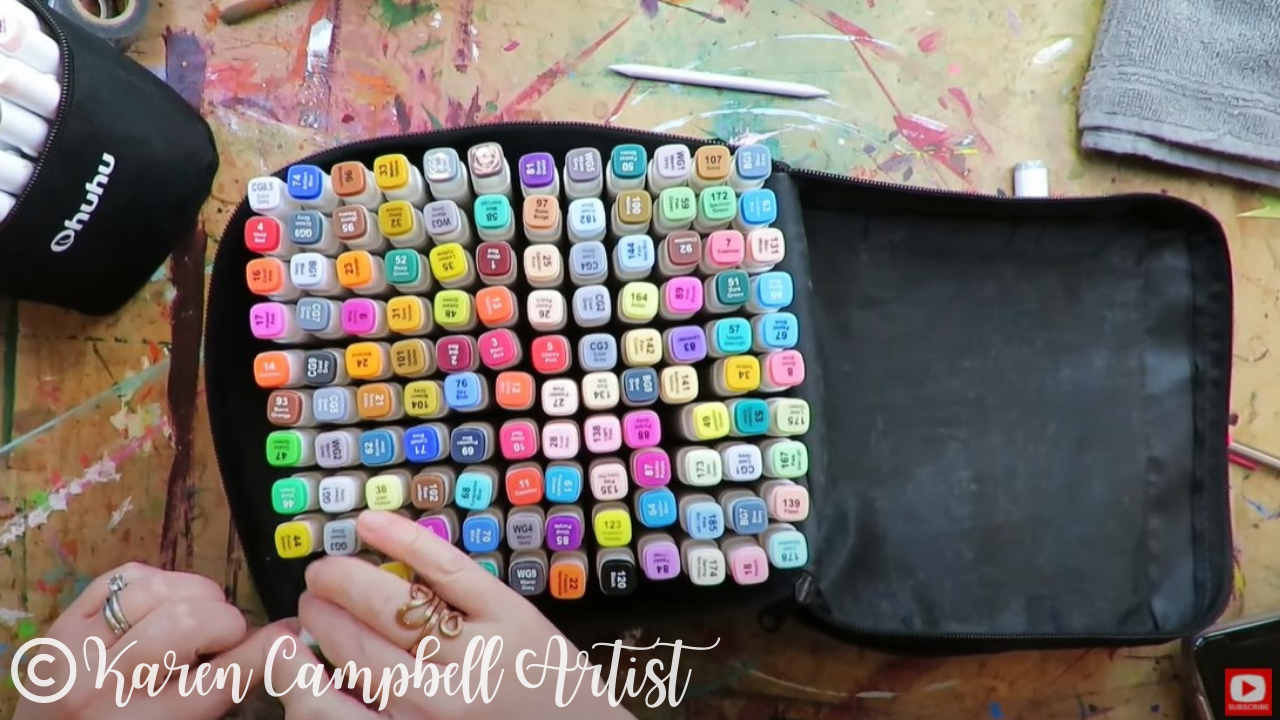
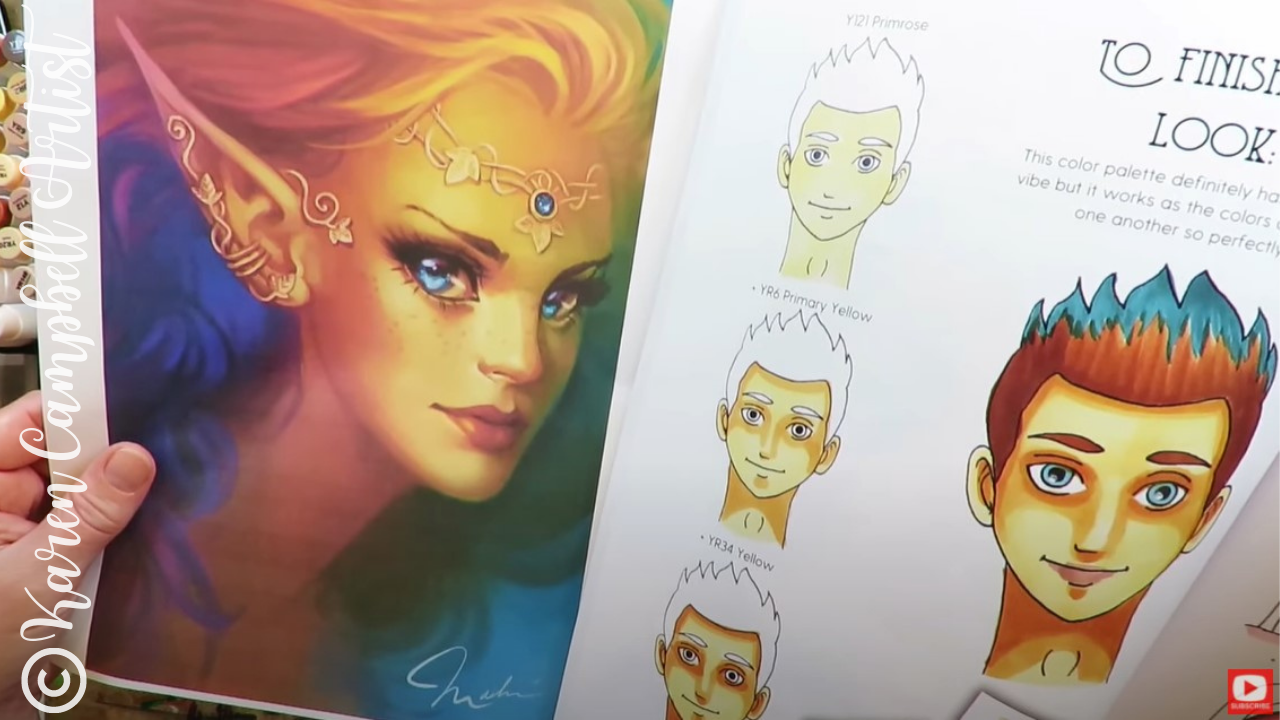
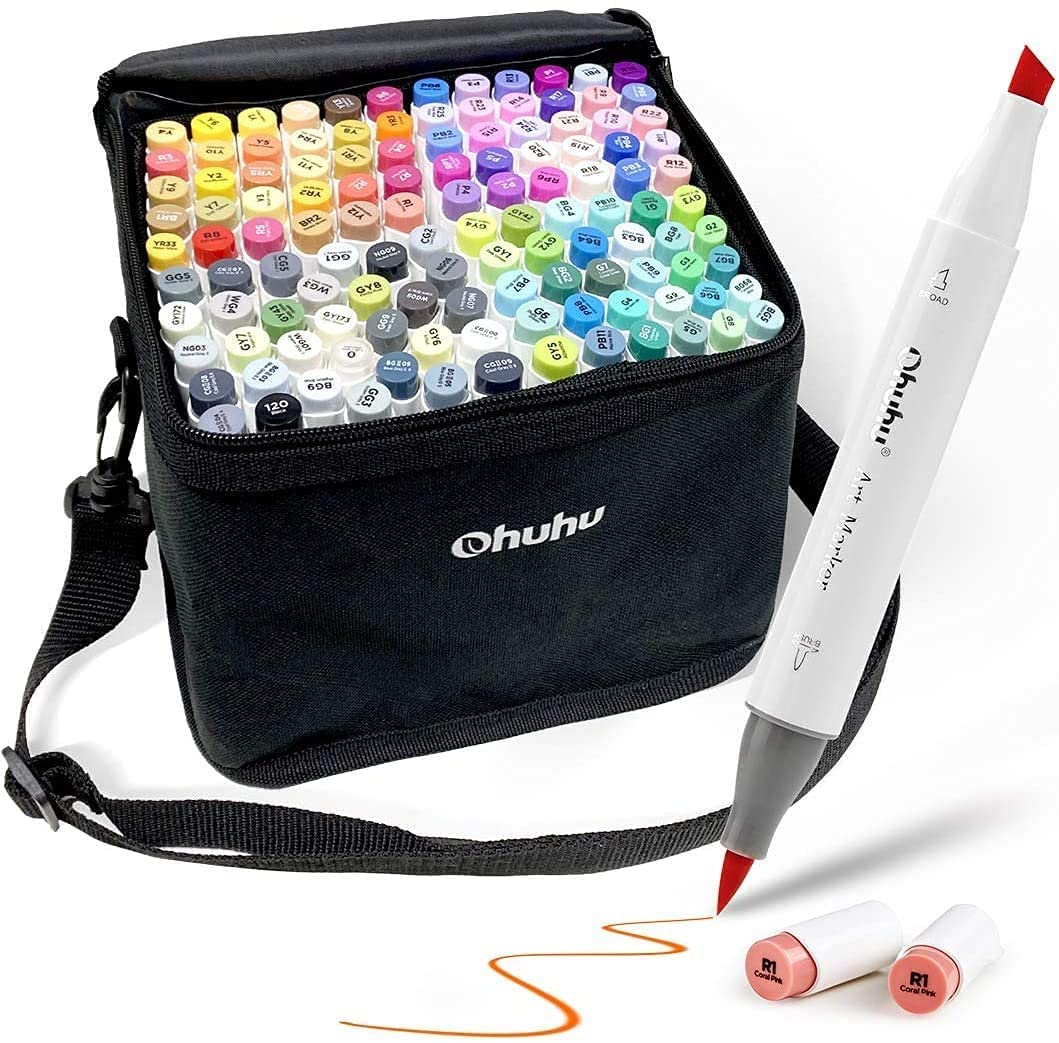
If you've been following me for a while, you know I'm in LOVE with my copic markers! But they cost an arm and a leg to collect (trust me- I've been adding to my collection for YEARS!).
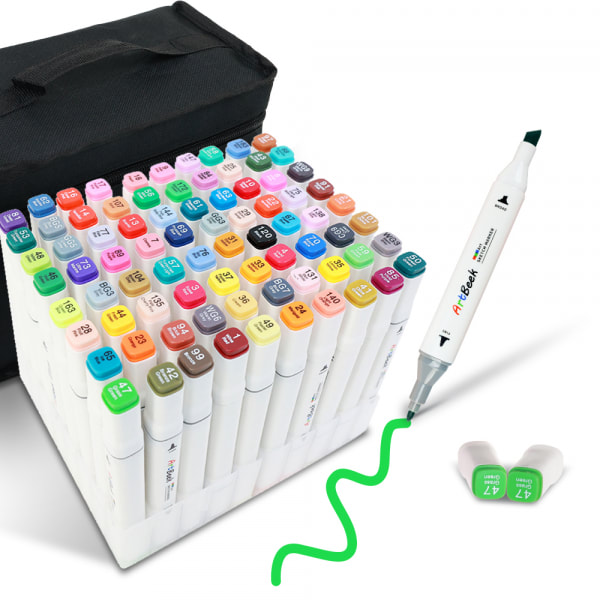
Usually I tell my students to purchase a set of Ohuhu alcohol markers because they're much cheaper and still great quality. You can get this giant set of 120 shades for around $99. I know $99 for markers still sounds kinda high - but if you want to play with the rainbow and not sacrifice quality, this is your brand.
If you're new to working with alcohol markers, watch this video - it's everything you need to know to get started.
You can totally mix and match your alcohol marker brands too. So if you feel like splurging on a smaller set of copics and grabbing the Ohuhu skin tone set - they work beautifully together. I work with both brands interchangeably all the time! Can you tell I've mixed brands below?

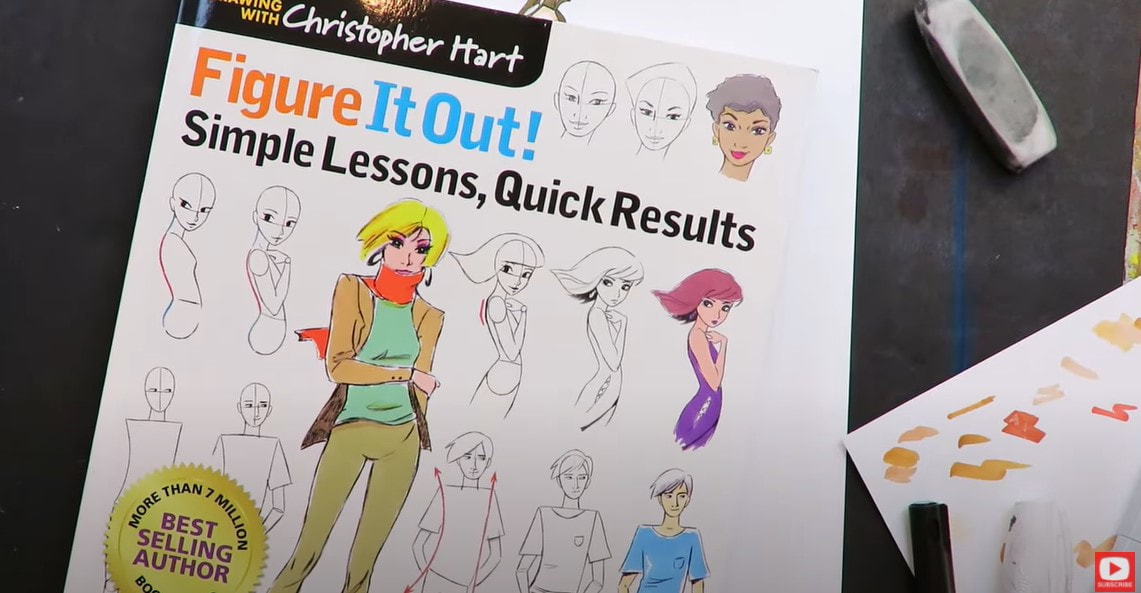
Make sure you stick with me until the end of today's video for a FULL flip through of Christopher Hart's book, Figure It Out! Simple Lessons, Quick Results. You're gonna love it!
Thanks for hanging out with me today!
❤️ CHECK OUT ALL MY ONLINE ART CLASSES & Art Clubs
❤️ CHECK OUT ALL my art books
❤️ MY FAVORITE ART SUPPLIES on AMAZON
❤️ MY BELOVED FACEBOOK GROUP
Karen Campbell
Founder of Awesome Art School. Mixed Media Artist. Author of 19 Instructional Art Books!
Posting on YouTube every single Wednesday of the year!

Whose work has appeared in...


Archives
July 2024
June 2024
May 2024
April 2024
March 2024
February 2024
January 2024
December 2023
November 2023
October 2023
September 2023
August 2023
July 2023
June 2023
May 2023
April 2023
March 2023
February 2023
January 2023
December 2022
November 2022
October 2022
September 2022
August 2022
July 2022
June 2022
May 2022
April 2022
March 2022
February 2022
January 2022
December 2021
November 2021
October 2021
September 2021
August 2021
July 2021
June 2021
May 2021
April 2021
March 2021
February 2021
January 2021
December 2020
November 2020
October 2020
September 2020
August 2020
July 2020
June 2020
May 2020
April 2020
March 2020
February 2020
January 2020
December 2019
November 2019
October 2019
September 2019
July 2019
June 2019
May 2019
April 2019
March 2019
February 2019
January 2019
December 2018
November 2018
Categories
All
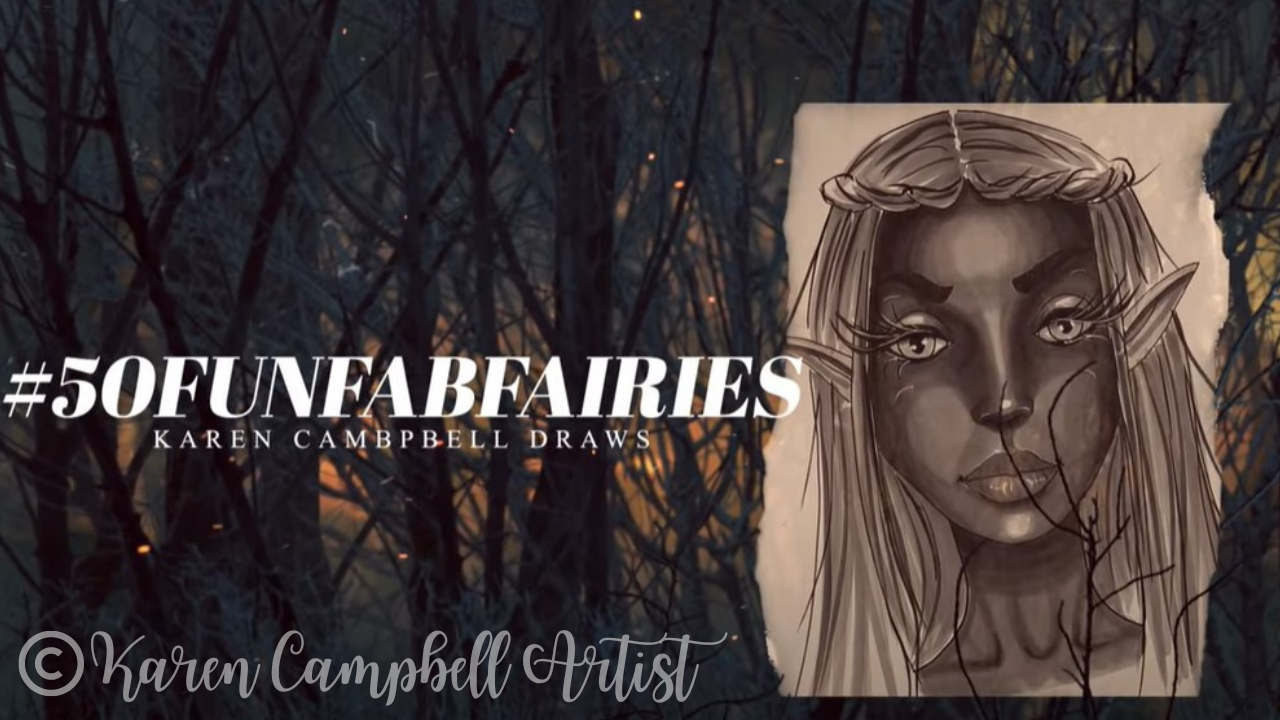
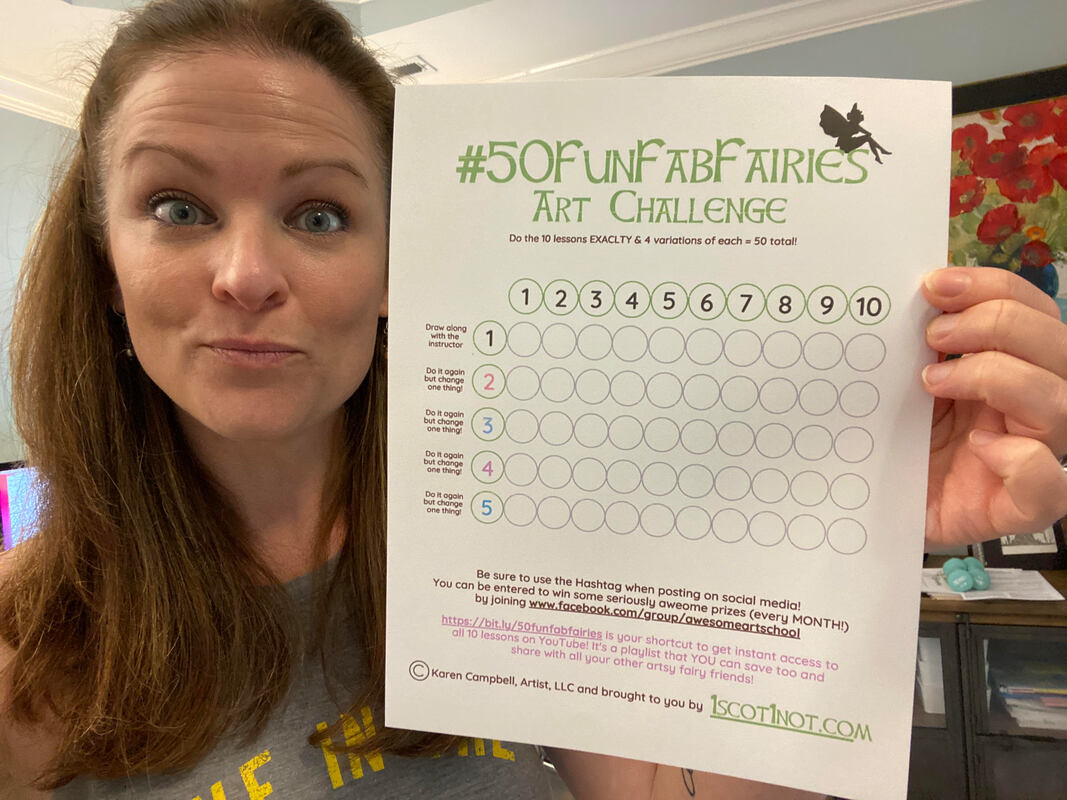
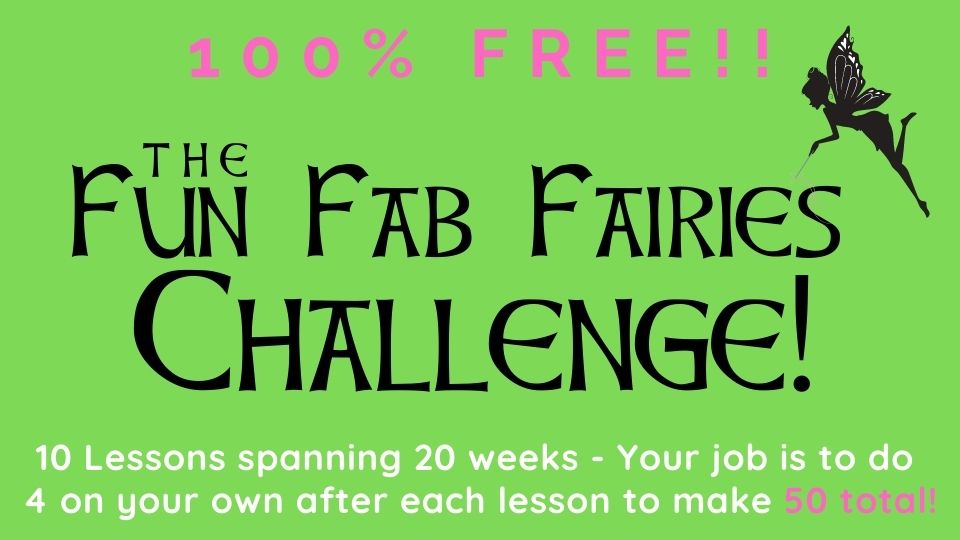
#50FunFabFairies Drawing Challenge
5 Minute Drawing Practice
Acrylic Brushes
Acrylic Painting Basics
Acrylic Painting For Beginners
Acrylic Painting On Canvas
Acrylic Painting Supplies
Acrylic Painting Tutorial
Acrylic Paint Types
Alcohol Ink Painting
Alcohol Ink Tutorial
Alcohol Marker Art
Alcohol Marker Blending
Alcohol Marker Brands
Alcohol Marker Drawing
Alcohol Markers By ArtBeek
Alcohol Markers Tutorial
Altered Book
Altered Book Art Journal
ArtBeek Alcohol Markers
Art Book Reviews
Art Books I Love
Art Deco
Art Deco Drawing
Art Deco Mixed Media Projects
Art Deco Style
Art For Beginners
Art Heals
Artist Collaboration
Artist Encouragement For Beginners
Artist Positive Mindset For Beginners
Art Journal
Art Journal For Beginners
Art Journal Ideas
Art Journal Inspiration
Art Journal Page
Art Journal Techniques
Art Retreats
Art Studio Makeover
Art Supplies
Art Supply Demos
Art Supply Reviews
Art Supply Storage
Asian Eye Drawing
Beginner Drawing Projects
Beginners
Behind The Scenes
Blackwing Pencils
Blackwing Volumes
Brush Pens
Canvas Painting
Cartoon Cat Drawings
Castle Drawing Lesson
Cat Art
Celtic Collective
Charcoal Drawing
Charcoal Portrait
Christmas Watercolor Ideas
Collage
Collage Ideas
Collage Techniques
Collage Tutorial
Colored Pencils
Copic Marker Alternative
Copic Marker Art
Copic Marker Drawing
Copic Marker Tutorial
Copic Skin Tones
Copic Vs Ohuhu Alcohol Markers
Craft Gem Projects
Create Your OWN Custom Watercolor Palette
Daniel Smith
Daniel Smith Watercolor Palette
Daniel Smith Watercolors
Dip Pens
DIY Travel Watercolor Palette
Drawing
Drawing A Baby Face
Drawing Books On Amazon
Drawing Cats
Drawing Challenge
Drawing Erasers
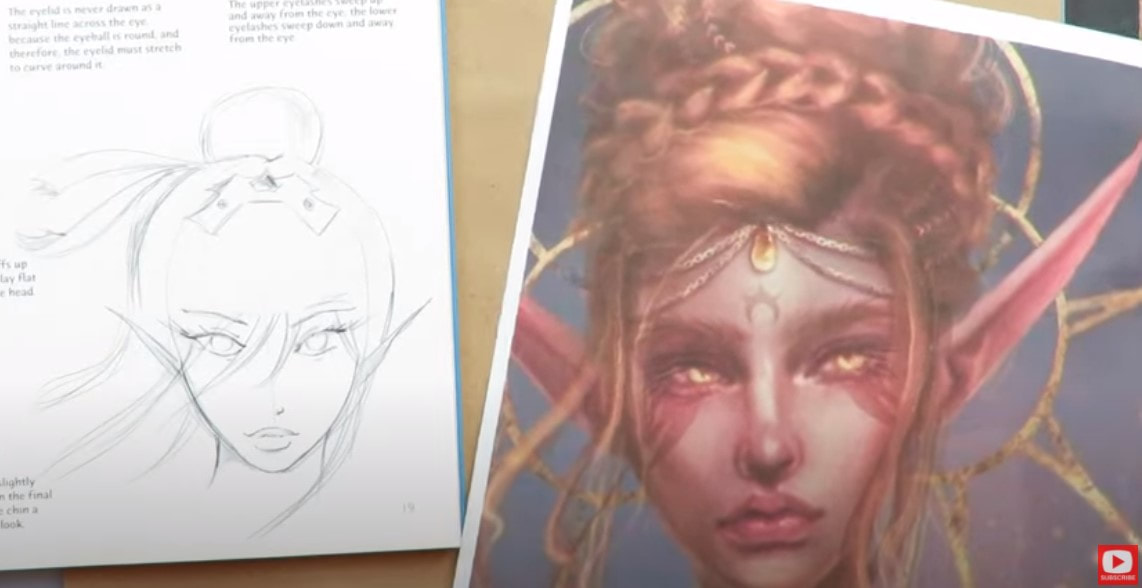
Drawing Eyelashes
Drawing Eyes In Pencil
Drawing Faces
Drawing Faces For Beginners
Drawing Facial Features
Drawing Female Hairstyles
Drawing For Beginners
Drawing Hairstyles
Drawing Highlights
Drawing Ideas For Travel
Drawing Necks Realistically
Drawing Pencils
Drawing Tutorial
Drink & Draw
Ear Drawing Practice
Easy Acrylic Painting
Easy Drawings For Beginners
Easy Face Drawing Tutorial
Easy Mixed Media Projects
Easy Owl Painting
EASY Watercolor Tutorial
Easy Zen Doodle
Ecoline Brush Pens
Elegant Writer
Erasers
Eyelashes Drawing
Faber Castell Gelatos
Faber Castell Watercolor Markers
Facebook Live Lessons
Face Chart Inspired Drawing Tutorial
Face Drawing
Face Drawing Guidelines
Face Drawing Practice
Face Drawing Tutorial
Face-shading
Face-shape-drawing
Face-sketch
Fantasy-art-drawing
Fantasy Art Drawing Projects
Fantasy Art Painting Projects
Fashion-face-drawing-tutorial
Fashion-figure-drawing
Fashion-illustration-for-beginners
Fineliner-tips
Flip-throughs-of-my-books
Foam Head Projects!
Fountain-pen-ink
Fountain-pen-ink
Fountain-pen-ink-painting
Fountain-pen-ink-painting
Free-art-lesson
FREE Cheatsheets!
Free-drawing-lesson
Free-lesson
FREE LIVE Art Alongs
Free-watercolor-lesson
Free-watercolor-lesson
Full Length Drawing Tutorial
Full Length Face Drawing Tutorial
Full Length Face Shading Tutorial
Full Length Mixed Media Projects
Fun Fab Drawing Club
Fun-fab-fairies
Fun Fab Famous People & Paintings
Gesso-brush
Gift Cards
Gift Ideas For Artists
Gift Ideas For Beginners
Glass-dip-pens
Gouache-meaning
Graphite-transfer-paper
Halloween-face-drawing-tutorial
Halloween-projects
Hamburger
Hamburger System
Hot-dog-system
How To Add Highlights To A Drawing
How To Add Highlights To Face Drawings & Mixed Media Portraits
How To Add Shading To A Drawing
How To Art Journal
How To Become An Awesome Artist
How-to-choose-face-drawing-references
How-to-color-a-baby-face-in-copic-markers
How To Create A Watercolor Palette
How To Draw
How To Draw A 34 View Face
How-to-draw-a-babys-face
How-to-draw-a-face
How-to-draw-a-fairy
How-to-draw-a-fairy-face
How To Draw A Fun Fab Face
How-to-draw-a-male-face
How-to-draw-and-shade-a-face-in-copic-markers
How-to-draw-and-shade-a-face-in-copic-markers
How-to-draw-and-shade-a-whimsical-african-american-face
How-to-draw-and-shade-a-whimsical-african-american-face
How To Draw Anime & Manga
How-to-draw-art-deco-style
How-to-draw-asian-eyes
How-to-draw-a-smile-with-teeth
How-to-draw-bangs
How-to-draw-cartoon-cats
How-to-draw-dreadlocks
How-to-draw-ears
How-to-draw-expressions
How-to-draw-eyebrows
How To Draw Eyelashes
How To Draw Eyes Realistically
How To Draw Fairy Ears
How To Draw Figures
How To Draw Freckles
How To Draw Hair
How To Draw Lips
How To Draw Lips Realistically
How To Draw Noses Realistically
How To Draw Realistic Ears
How To Draw Teeth
How To Draw Wrinkles
How To Paint Eyelashes
How To Seal Your Work
How To Shade
How To Shade A Face In Color
How To Shade DARK Skin Tones With Alcohol Markers
How To Shade Faces With Alcohol Markers
How To Shade Faces With Tombow Markers
How To Sketch A 3 Quarter Portrait
How To Sketch A Face
How To Swatch Art Supplies
How To Transfer A Drawing
How To Use Gloves In A Bottle
How To Use Linseed Oil
How To Use Oil Pastels
LARGE Canvas Painting Technique
Lickleyhead Castle
Line Drawing
Magical Mashup
Marker Storage Solutions
Marker Tips
Martini Glass Drawing
Mermaid
Mixed Media
Mixed Media Art
Mixed Media Art Books I Love
Mixed Media Art Ideas
Mixed-media-art-journal
Mixed Media Art Journaling
Mixed Media Art Journal Tutorial
Mixed Media Art Supplies
Mixed Media Art Techniques
Mixed Media Art Tutorials
Mixed Media Backgrounds
Mixed Media Brushes
Mixed Media Canvas
Mixed Media Challenge
Mixed Media Collage
Mixed Media Collage Background
Mixed Media Collage Tutorial
Mixed Media Drawing
Mixed Media Eyes
Mixed Media Faces
Mixed Media Face Shading
Mixed Media Foam Heads
Mixed Media Girls
Mixed Media Hamburger
Mixed Media Hot Dog System
Mixed Media Ideas
Mixed Media Layering Process
Mixed Media Paintbrushes
Mixed Media Painting
Mixed Media Portraits
Mixed Media Project
Mixed Media Society
Mixed Media Techniques
Mixed Media Tutorial
Mixed Media Tutorials
Mixed Media Watercolor
Mixed Media YouTube
Monochromatic Drawing
My Favorite Art Supplies
My Favorite Watercolors
My Journey As An Artist
My Mixed Media Layering Process
New Book!
No Draw Mixed Media Art Project
Noodler's Ink
Nose Drawing Practice
Ohuhu Alcohol Markers
Oil Pastels & Acrylic Paint
Oil Pastels Brand Comparison For Beginners
Oil Pastels & Colored Pencils
Oil Pastels For Beginners
Oil Pastels + Linseed Oil
Oil Pastel Tutorial
Old Book Crafts
Owl Painting
Paint Brush Types
Painting On Canvas
Painting With Ink
Paint Markers
Palette Knife Painting
Pan Pastels
Paper Napkin Art Journal Background
Pastel Watercolor Sets
Pencil Drawing Tutorial
Pitt Pen Alternative
Portrait Drawing
Portrait Drawing Tutorial
Posca Alternatives
Posca Paint Pens
Prima Watercolor Sets
Profile Drawing
Profile Drawing Tutorial
Quadrant Method
Quick & Easy Face Drawing Tutorial
Reference Drawing
Scotland
Scottish Castle Art Retreat
Sealers Vs Fixatives
SEE INSIDE MY Art Books!
Shading Faces
Sheet Music Art
Side Profile Drawing
Side View Drawing
Silver Black Velvet Brushes
Sketching Tutorial
Skull Watercolor Tutorial
Spray Paint On Canvas Idea
Stabilo All Pencil Projects
Steampunk Drawing
Stenciling & Stamping Techniques
Three Quarter View Face
Time Lapse Drawing Video
Tissue Paper Art Journal Background
Tombow Brush Pens
Tombow Mono Zero Eraser
Tombow Skin Tone Markers
Toned Paper Drawing
Travel Art Supplies
Upcycled Art
Upcycle Old Books
Value Scale Drawing
Vintage Book Pages
Wardhill Castle
Watercolor
Watercolor And Colored Pencil
Watercolor And What Else?
Watercolor Brushes
Watercolor Fairy
Watercolor For Beginners
Watercolor Markers
Watercolor Marker Tips
Watercolor Marker Tricks For Mixed Media
Watercolor Palette Setup
Watercolor Portrait
Watercolors
Watercolor Sets I Love
Watercolor Supplies
Watercolor Techniques
Watercolor Tutorial
WatercolPainting Techniques
Watersoluble Art Supply Tricks
Water Soluble Markers
Water Soluble Pencils
What Is Mixed Media Art?
Whimsical-christmas-tree
Whimsical Face Drawing Tutorial
Whimsical-face-drawing-tutorial
Whimsical Women Of The World World Portrait Drawing Series
YouTube Drawing Channel
Youtube-giveaway
Youtube-video
Youtube-video
Zentangle Drawing Ideas
Zentangle Drawing Tips
Zentangle Drawing Tutorial
Zentangle Feather Drawing Tutorial
 RSS Feed

"Karen is flipping hilarious and she's very real...I like the way she teaches in a way that really gives you confidence, whether you're a beginner or advanced there's always something new to learn!"
- Elizabeth W. |
What Fans Are SayingKaren, you are absolutely fabulous! You make me feel like I can draw anything. I have recently retired and finally have the time to do some of the art that I have loved since I was in school. I am really at the beginning of my art journey and I hope to learn as much as I can. Thank you for all you do. |
Contact ME |