
|
Scrapbook paper backgrounds are my GO TO for the mixed media art I create on canvas or in my art journal! Before I get into WHY - I want to show you some of the effects you can achieve with various types of collage material - in case you're new to the world of collage or creating mixed media backgrounds! In the pic below you'll see a closeup view of one of my favorite mixed media collage projects from my book, Mixed Media Magic. See the wrinkly, raised bumps of texture? That happens when you collage with NAPKINS in your bottom layer! 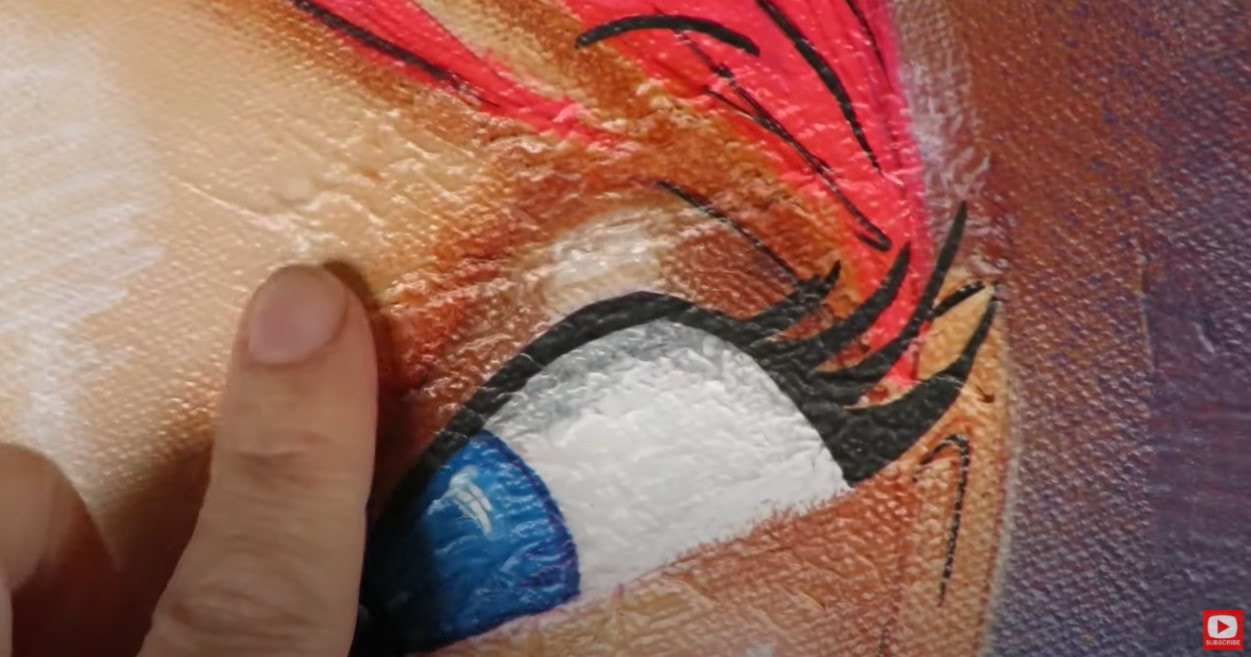 Some people LOVE this kind of texture in their art (I'm one of them!!). From a distance, the texture in the background is very prominent. You can see the wrinkles and bumps from my napkin pieces. This is a look I was going for on purpose in this particular painting. 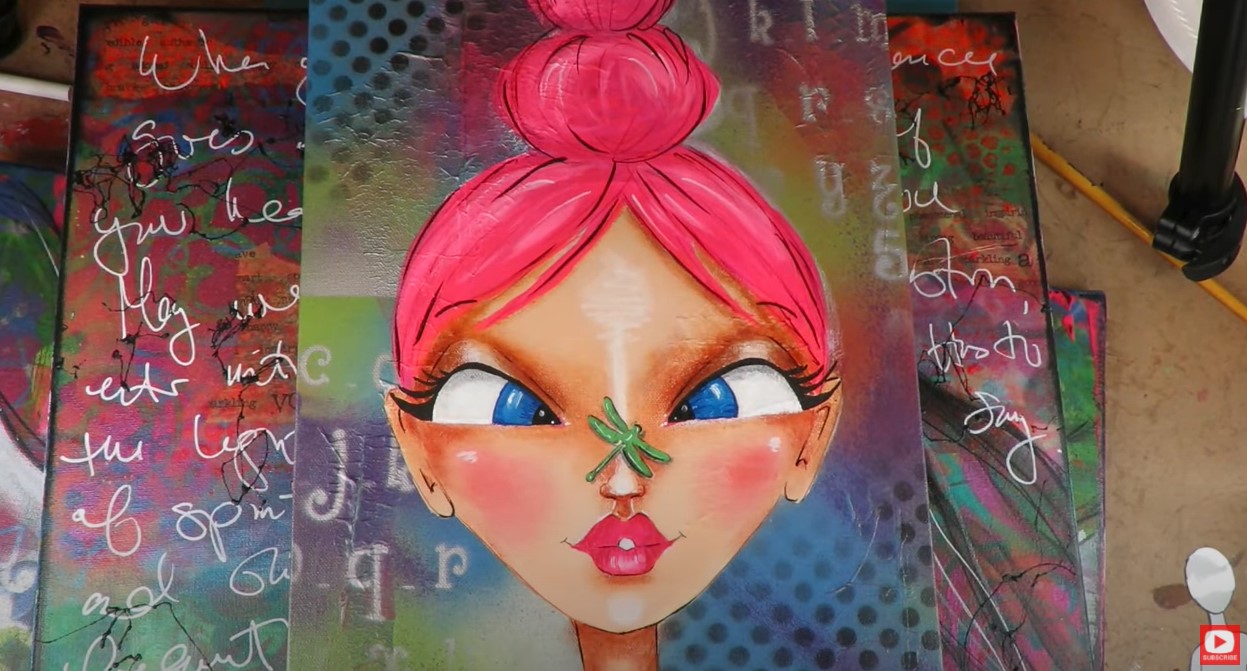 Some people aren't into this bumpy goodness, and that's ok! YOU do YOU!!!! In case you're one of them... here's what collaging with TISSUE PAPER can do in your mixed media art backgrounds!!  See the typewriter words smack dab in the middle of her face? That is a ripped piece of tissue paper! Tissue paper will give you a transparent effect in your collage, which I also LOVE!!! You can definitely see there are some bumps and wrinkles up close, but it's more chill than using napkins like I did in the previous piece. From a distance, the tissue paper texture is VERY understated... 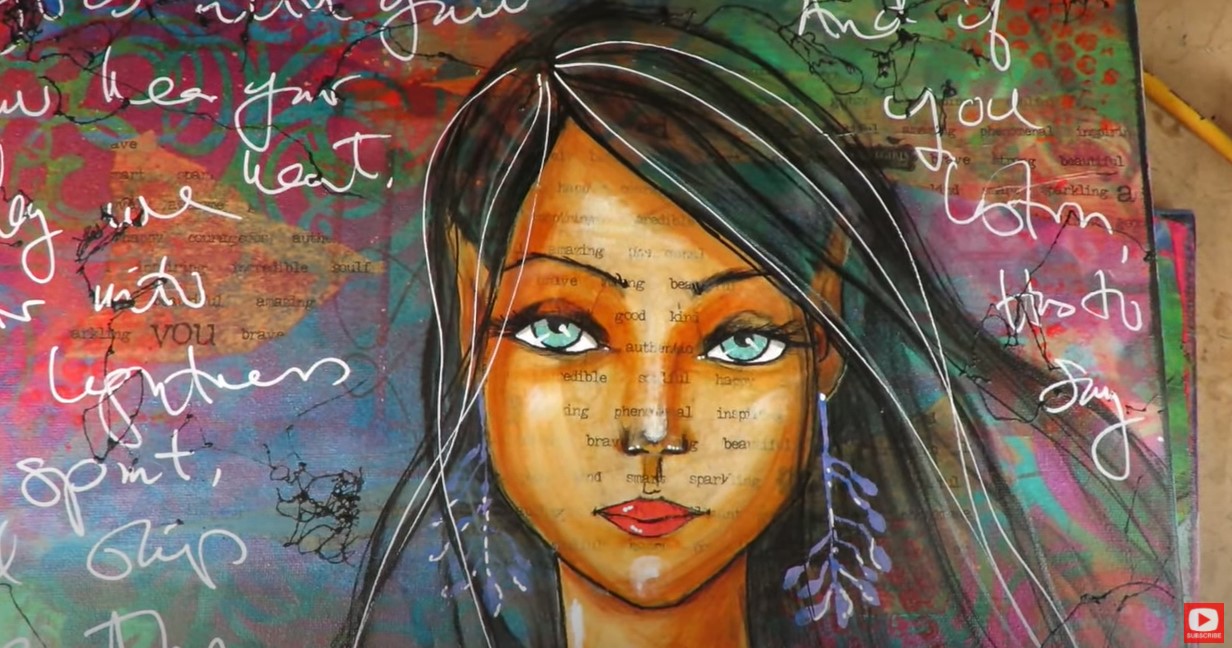 The next example I'm going to show you is a piece I started with a collage layer of torn scrapbook paper pieces!  Look closely at the background of this mixed media girl painting. You'll see there are 3-4 sheets of scrapbooking paper that were collaged into my first layer of this canvas. I like to rip palm sized chunks from papers that have the same color scheme going on. It's SO easy to find matching colors with an assortment of patterns because ALL the craft stores sell these giant books of gorgeous sheets with repeating color schemes that are totally designed to be used together! 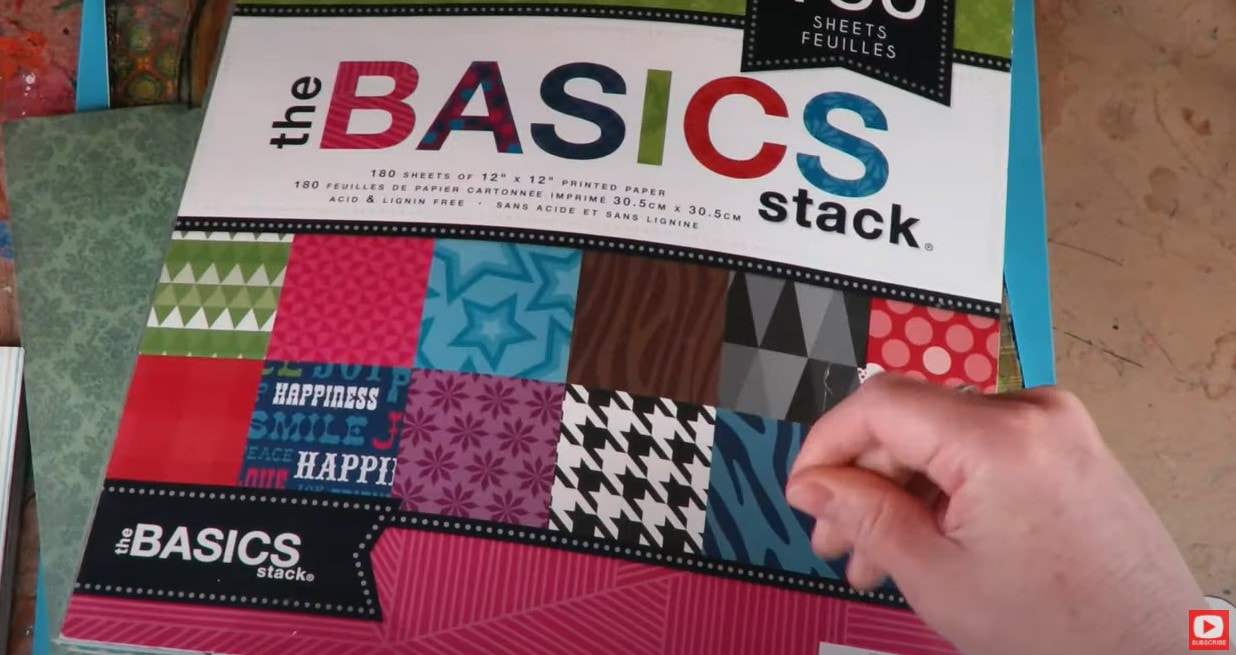 Personally, this is my FAVORITE collage material because you really DON'T get any wrinkles at all! This type of collage creates a smooth surface that is PERFECT to paint on. That doesn't mean it will create a "boring," or texture-less background. Take a look at this painting close-up! As you can see below... there are pretty subtle, raised edges from each chunk of scrapbook paper I used. And I have to say, I'm OBSESSED with this look!! I really feel like it adds a layer of sophistication to my art. You can achieve some VERY rich, complex backgrounds that really pull your eye around the piece as a whole, and make it interesting to look at- both from a distance, and up close!! 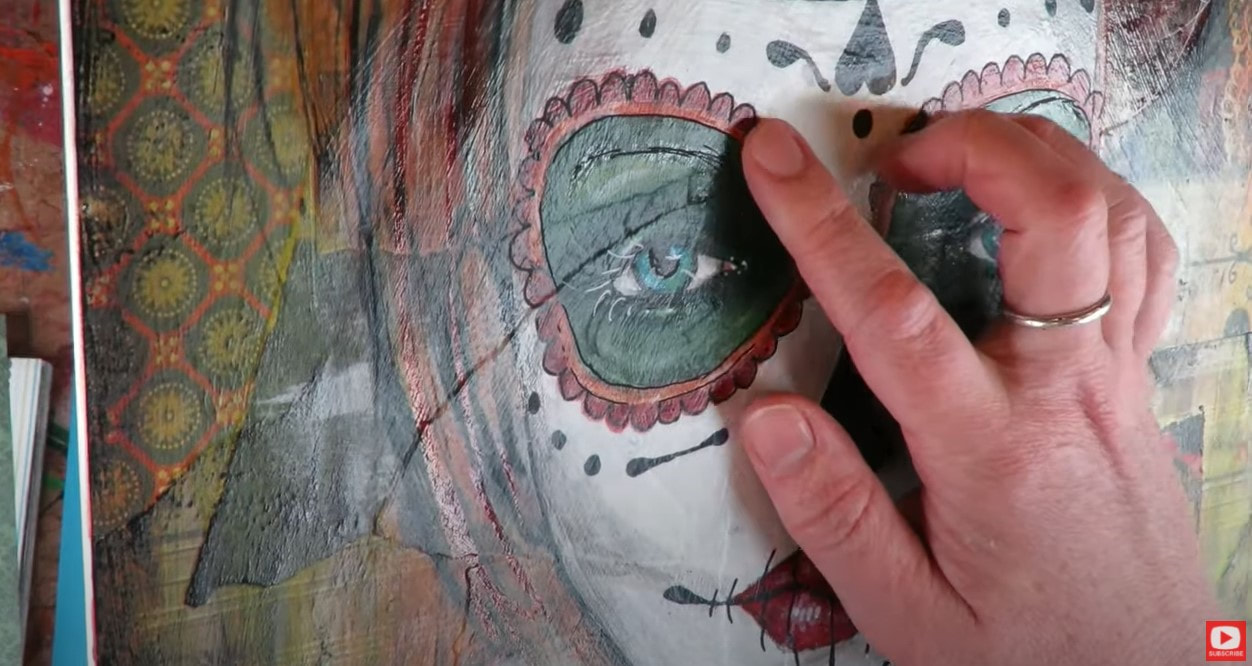 In today's mixed media tutorial, I've got a FULL-LENGTH, FREE art lesson for you!! I'm showing you my EXACT mixed media collage process using scrapbook paper so you can play right along with me at home. I find this process works amazing on canvas boards, wood panels, or as an art journal page or spread. It's a little harder to do on pre-stretched canvas because the middle of a pre-stretched canvas isn't super sturdy, so you have to be a bit more gentle. When you do collage work, you add a lot of pressure to whatever surface you're working on, and I don't want to be precious about anything- so I reach for something like a canvas panel, because it's more substantial (AND they are super cheap!!). Here is your supply list for today's project:
Go grab your supplies and meet me over on YouTube to get crafting with me!!!! CLICK HERE or press the play button below when you're ready to start!! 💜Product Links listed may be affiliate. I only link to products that I have personally used and tested and love! I may receive a few pennies if you purchase through these links, but no worries, there is never any cost to the consumer for doing so!
0 Comments
Today is Friday which means NEW FREE YouTube lesson!! This project was particularly satisfying for sooooo many reasons! Well, I'll just list them off so you know what they are! First all, I got to paint with my fountain pen inks. They are soooooo vibrant and juicy and satisfying (due to their vibrancy and juiciness) that I cannot even compare them to any other medium I love them so much! This is the one I use for skin color. It's DIVINE! 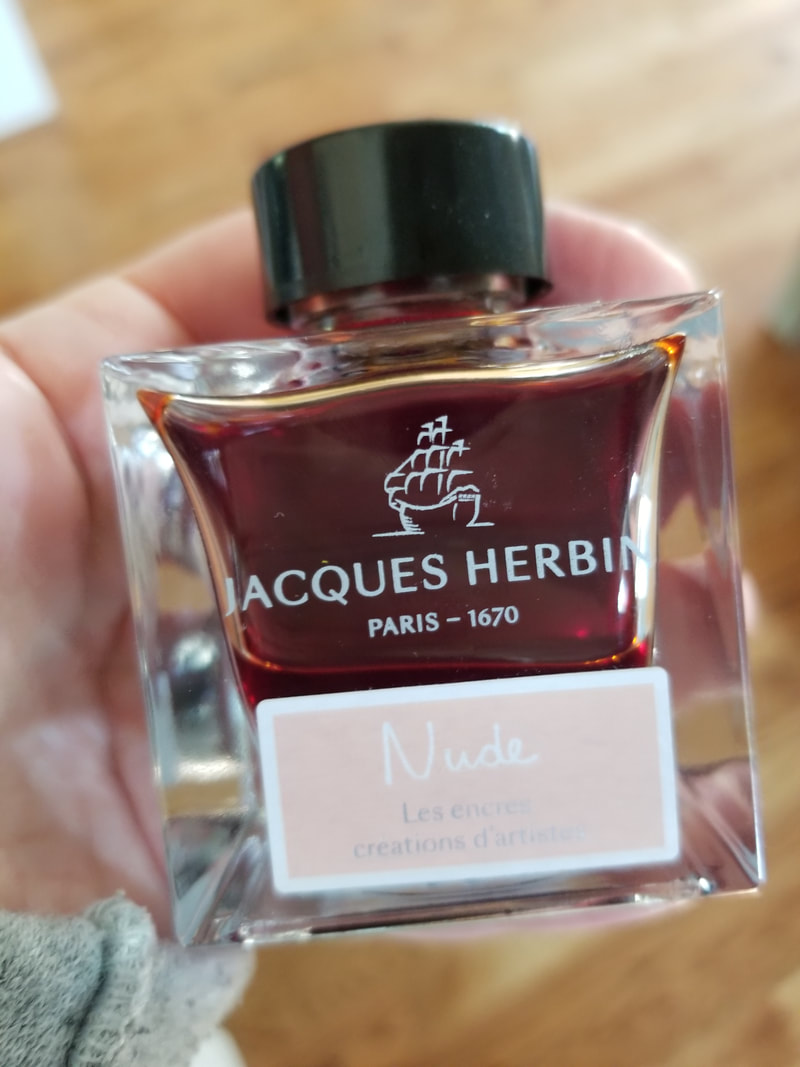 I can now draw hands after publishing a book on them! I can finally dive into any project that involves them and has truly opened up a whole new world of faces and characters now that I'm no longer afraid to tackle any drawing!  I spill 3 oz. of permanent ink all over my studio floor. There's nothing quite like an explosion of ink to liven things up in the old art room! 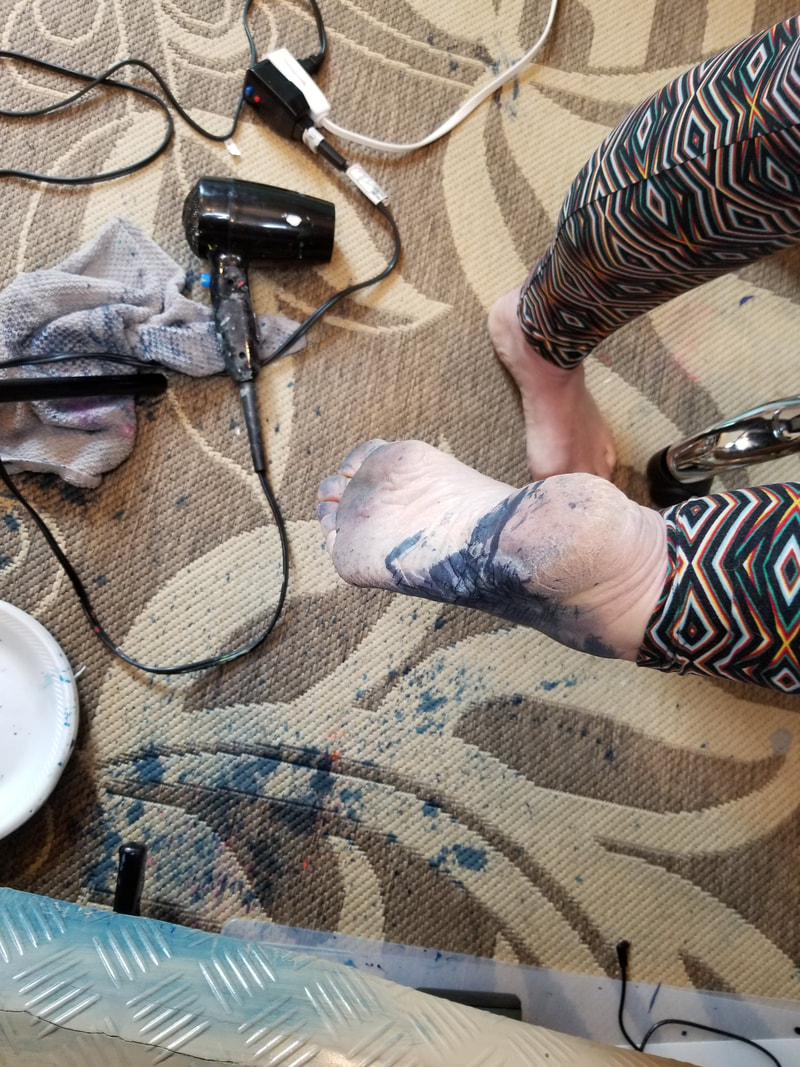 Glasses. Having the guts and courage to draw OVER and ON TOP OF a completely painted girl, is, well, TERRIFYING! But then the level of proud you feel when you actually pull it off is the BEST FEELING EVER!! So while it's scary, it's worth it!!! So my advice to you is to simply GO FOR IT. 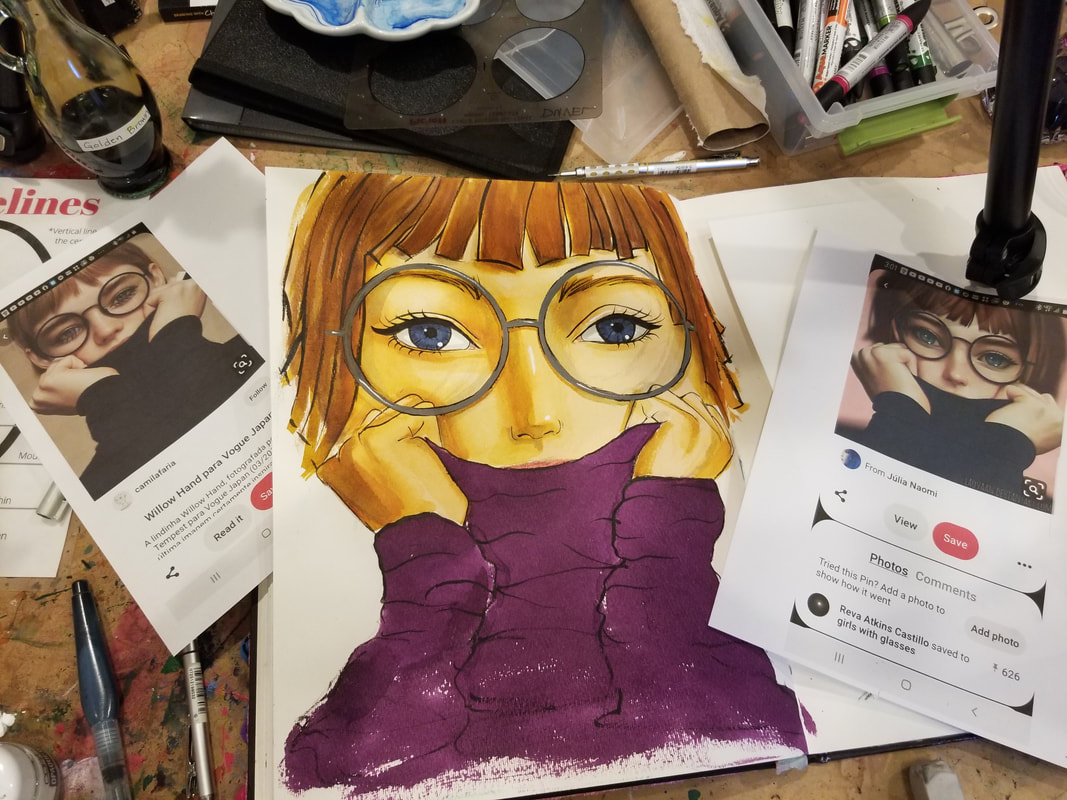 The references I used today are so super cute!! The original reference photo was taken from Vogue Japan and I just fell in love with it when I saw it!!! Another reason today's project was so fun was because of my little feline side-kick!! Oh Tippie!!! So after the spill and the cat play and the juicy brushes filled with ink I was just delighted at the final outcome. Click on the video here to watch how YOU can learn how to paint glasses on YOUR mixed media girls!! I hope you're staying safe indoors and have found some activities to keep your mind, heart and soul occupied and happy. I personally find the best way to keep my heart and mind happy is to keep my body busy!! I've gone on A LOT of walks. But I'm also keeping busy with painting and drawing!!! You may remember from last week's email that we painted our son Max's room? Well yesterday I painted his favorite video game character in there too. Lifesize. 'Cause, really, why not if it keeps me busy and him DELIGHTED! Seemed like a double win so we went for it! 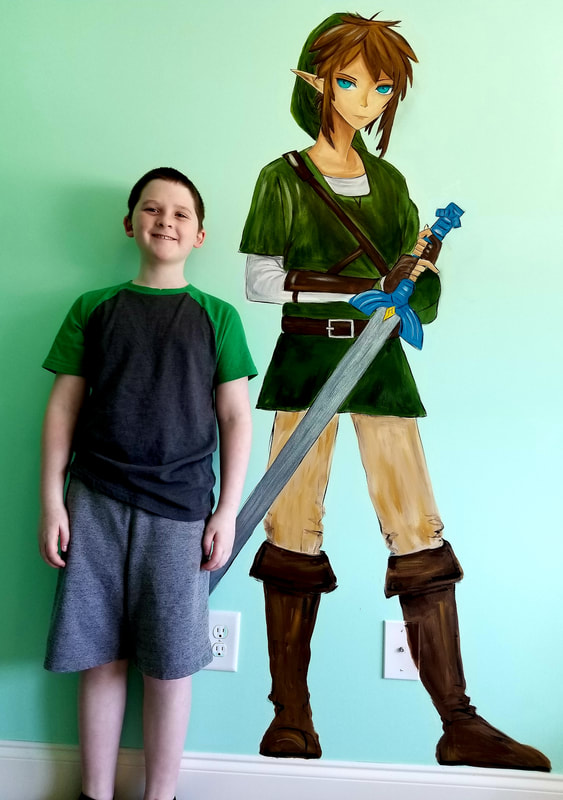 Sadly it only took me 2 hours so I still had to keep busy for the rest of the day but it definitely helped me take my mind off of things for an afternoon. Since being creative is working so well for ME these days, I thought maybe it would work well for you too! So today I'm bringing you a fun demonstration tutorial about how to use colored pencils to help you shade your mixed media drawn faces. The funny thing is that I REALLY DO HATE COLORED PENCILS. You can see so (and learn why) in the video!! lol! But then you can also see how I use them to really pack a shading PUNCH to my best art journal faces. Here's a peek! 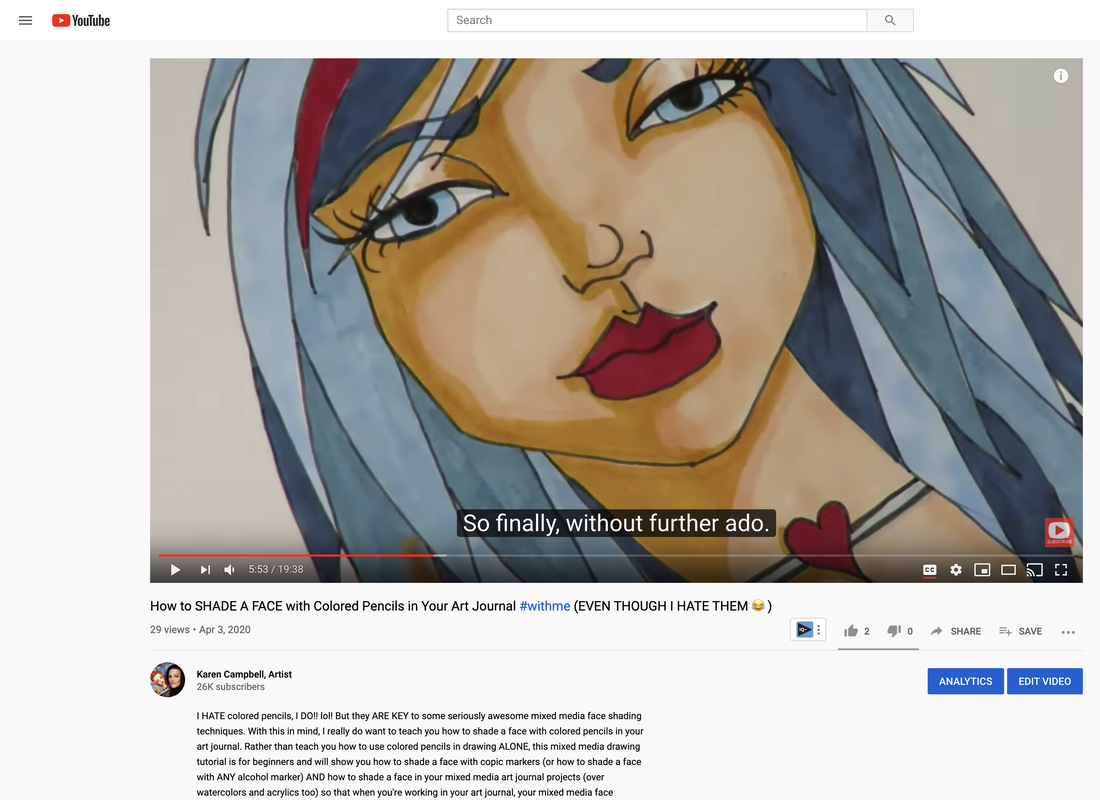 Ready to learn and see? Grab some pencils and meet me at your art table. Then press play and let's gooooo! In today's video I am going to be creating a mermaid painting using ONLY Noodlers Ink!!!! I know! So fun! If you haven't tried these inks yet you must, they are GORGEOUS and lightfast and GORGEOUS!! Lol! You catching my drift here? Let's paint! SUBSCRIBE if you're new to my channel & click on the bell 🔔so you never miss a new video: http://bit.ly/KarensYouTube ✔️ 💜 I upload a NEW VIDEO EVERY FRIDAY and Now LIVESTREAM on Tuesdays as well! A TON of you have been asking about my supplies so here is the list for this project! to Products Used: 👉Strathmore Hardcover Watercolor Journal, 11x14 https://amzn.to/33W9bXA 👉Black Velvet Brush set for Beginners https://amzn.to/32O1JNY 👉Uniball Signo Black Pen, 1mm nib https://amzn.to/32L6mIF 👉Tombow Brush Pens (Portrait Set) https://amzn.to/2BEMf30 👉Noodler's Ink 54th Massachusetts (Bulletproof) https://amzn.to/347FmUh 👉Noodler's Ink Purple https://amzn.to/2olUBJW 👉Noodler's Ink Cactus Green https://amzn.to/365nsTW 👉Noodler's Ink Turquoise https://amzn.to/32OdZOv (these are all affiliate links but no worries, there's never any additional cost to you for purchasing through these!) 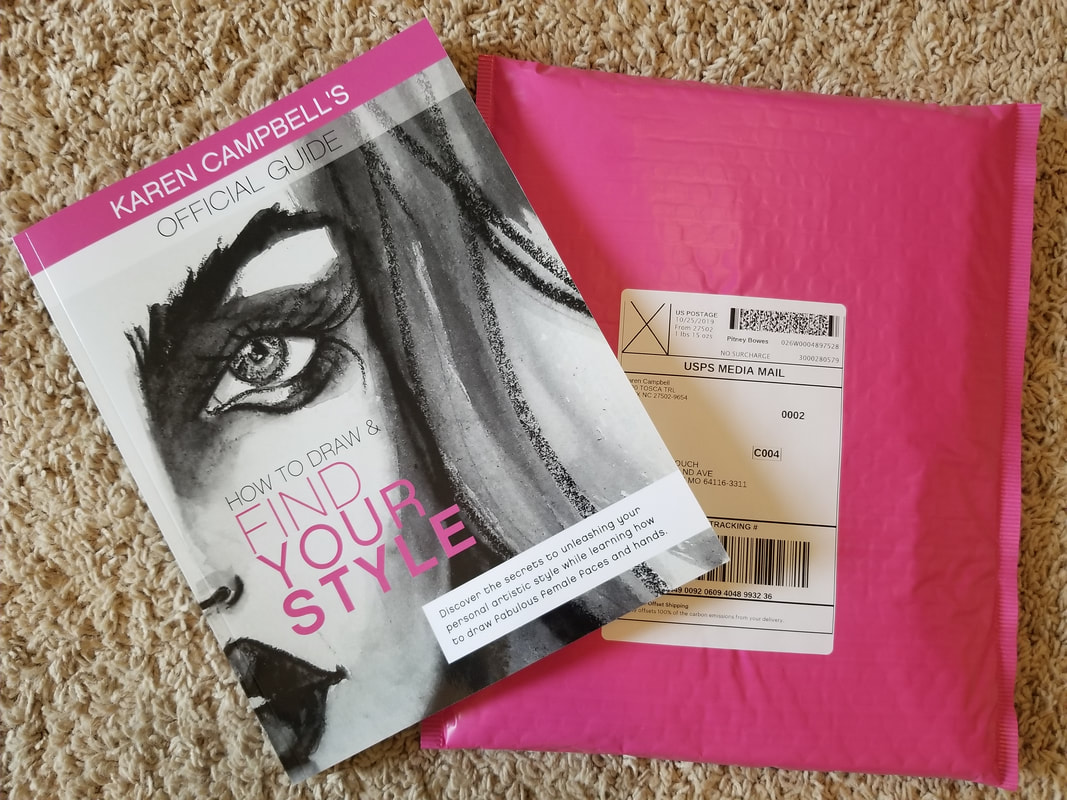 On another fun note, TONS of people are now purchasing the new book through me (autographed, of course!) because as of last Tuesday, I finally received my shipment of them! Yay! So if you've already placed your order, keep an eye out for your pink mailer!! So fun! CLICK HERE to visit my Etsy Shop to browse! All orders over $35 ship FREE! Haven't had a chance to preview the new book? Here's a flip through for you! I have been having an absolute BLAST mixing and matching certain mythical references and combining them in new and exciting ways to produce new, unique works of art. I think what's even more fun is that I'm not even playing this fun game by myself, no sireee. My Friend, Artist Jenny Manno and I, have enlisted the help and fun of our respective Facebook Groups to play along with us and the results are sooooooo so much fun! Here are the references this week! The first one is my the amazingly talented folks over at thepicsees.com. If you don't know them you ought to!! They are amazing!!
The second reference (both chosen by Jenny this week, is this sweet bird sketch she found on Pinterest. 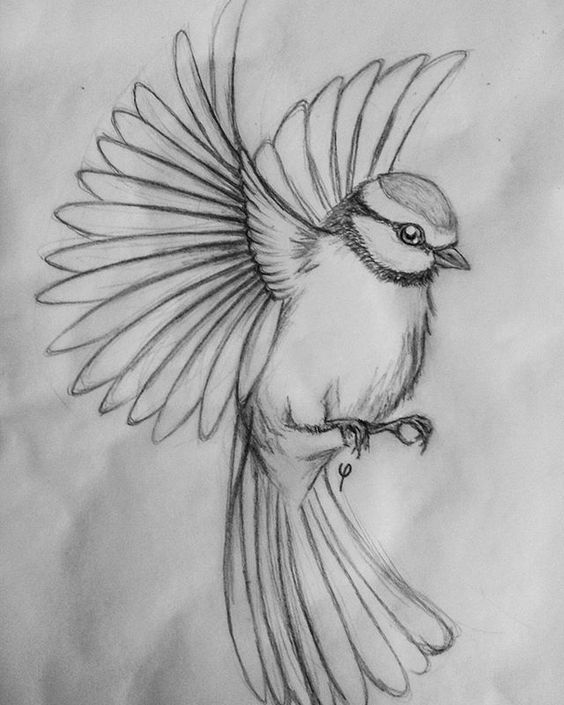 Personally, I needed a bit more to kick start my creativity so I added two additional references...and here are my results!  I blame my Daniel Smith Watercolors for her success, along with my giant 15" x 22" watercolor pad of Strathmore Paper. Who ever said bigger is better was RIGHT! If you'd like to see what other references I used and watch the entire process unfold I made a sweet video of the process, voiceover and timelapsed for your enjoyment (and so that it doesn't take up too much of your precious time). I hope you enjoy! As you may or may not know, every Friday I release a new tutorial or inspirational art video on YouTube. Today I am posting something quite different. Today I talk about a much deeper topic, what art means to me and what it means to you. Does the act of doing art take away your emotional or physical pain? Allow you to escape for a short while? Help whisk you away to your happy place? Remind you of what it feels like to be a carefree 8 year old again? Me too. Watch this week's video to learn more about how I'm hoping to use art that I teach through the Mixed Media Society to address these very important issues for the thousands of students I meet through my school. What is the Mixed Media Society? Watch the video below and find out. |
Karen CampbellFounder of Awesome Art School. Mixed Media Artist. Author of 19 Instructional Art Books! 
Whose work has appeared in...
   
 Archives
July 2024
Categories
All
|
 RSS Feed

"Karen is flipping hilarious and she's very real...I like the way she teaches in a way that really gives you confidence, whether you're a beginner or advanced there's always something new to learn!"
- Elizabeth W. |
What Fans Are SayingKaren, you are absolutely fabulous! You make me feel like I can draw anything. I have recently retired and finally have the time to do some of the art that I have loved since I was in school. I am really at the beginning of my art journey and I hope to learn as much as I can. Thank you for all you do. |
Contact ME |