
|
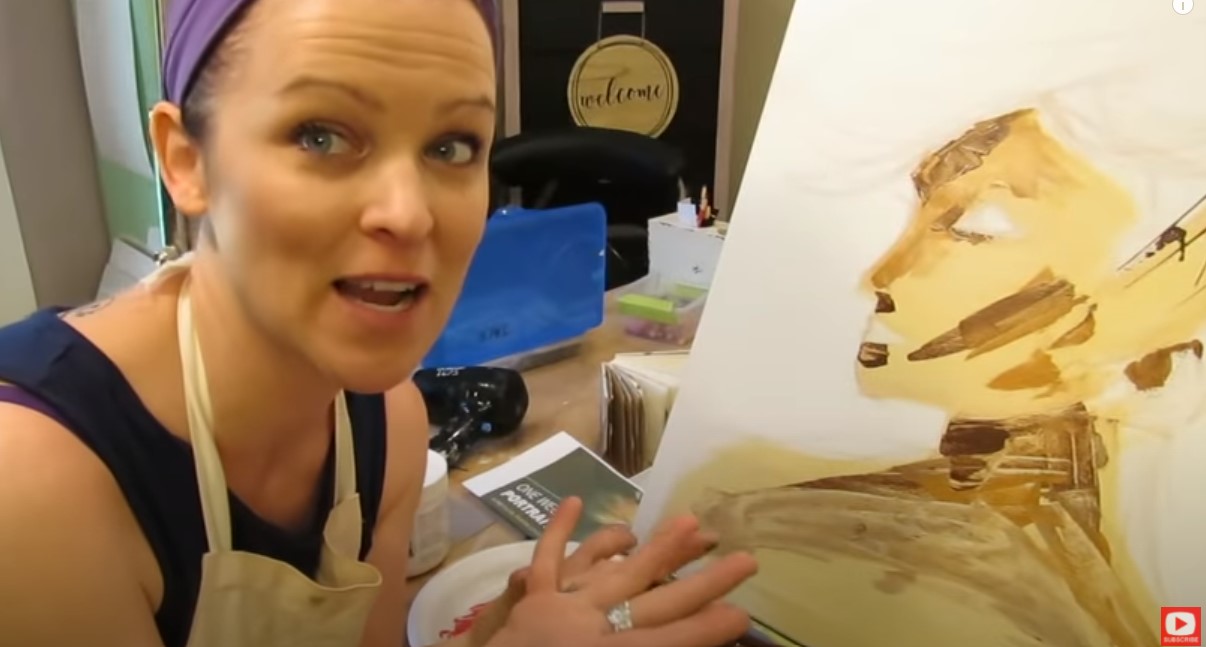
Struggling with eyelash drawing? Let me tell ya, this stresses out SO many of my students. There's nothing worse than going through the entire creation process on a mixed media face in your art journal or on canvas, only to add some eyelashes, and poof.
You're ready to dump the entire project into the trash. DON'T DO IT!! In today's video I'm breaking down ALL my best tips on how to draw eyelashes, sharing my absolute FAVORITE mixed media art supplies for adding stunning lashes, and giving YOU an entire practice sheet just for eyelash drawing:) 
*All product links are affiliate & for U.S. residents only.*
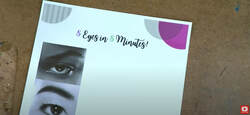
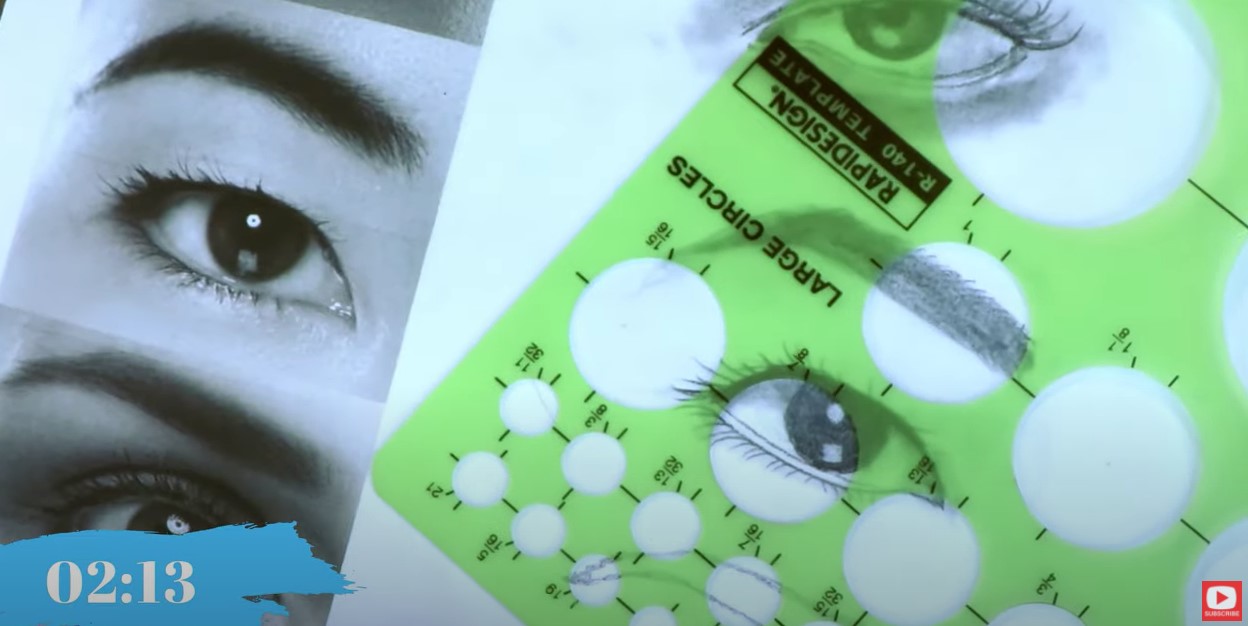
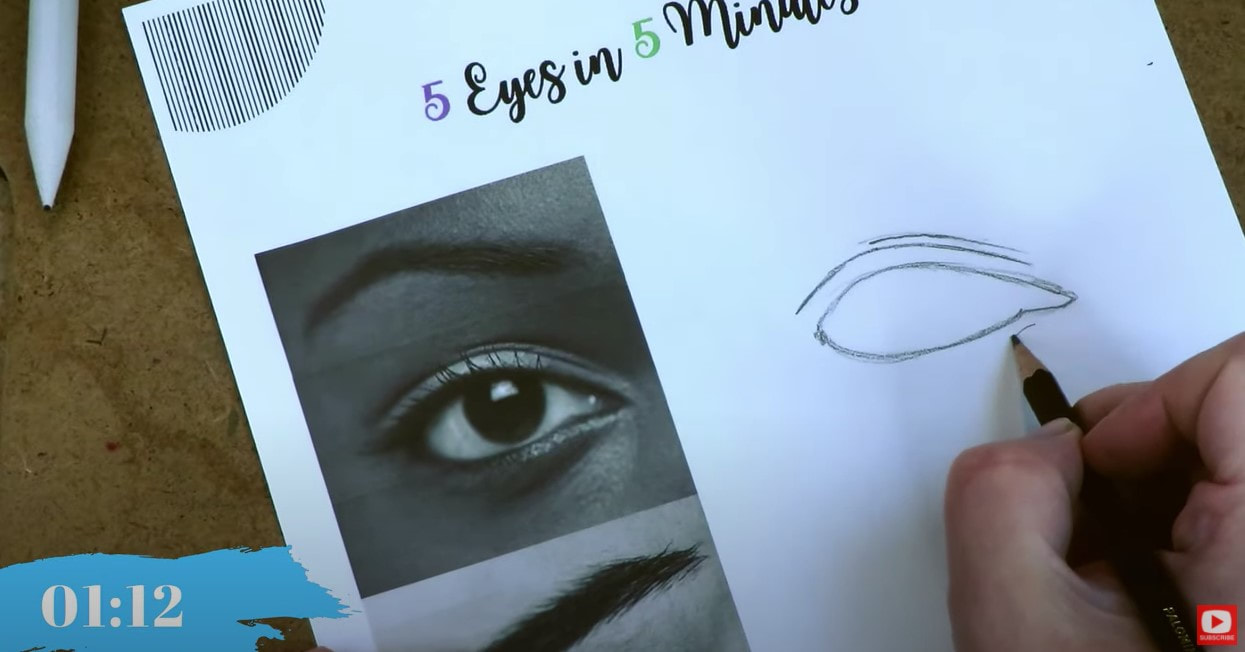
Before we dig into specifics, make sure you download my FREE 5-page PDF with ALL the deets on how to draw AMAZING eyelashes!!
It clearly breaks down the three key elements of eyelash drawing, provides tons of eyelash inspiration, AND even has an entire practice page of empty eyeballs just waiting for you to draw in the missing lashes:) 
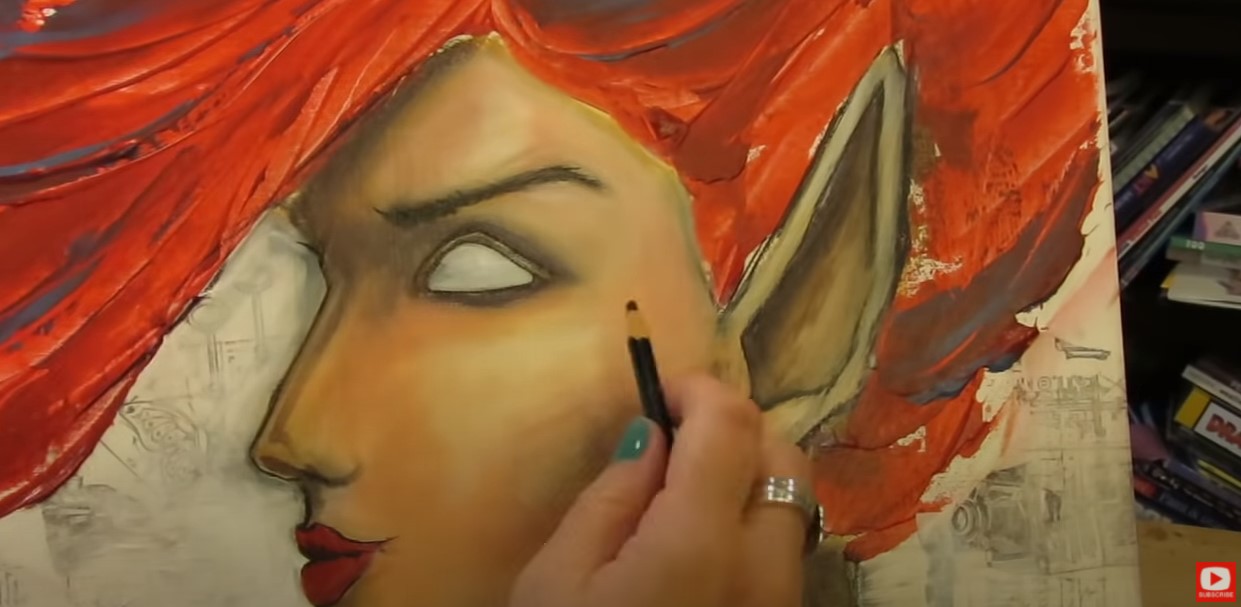
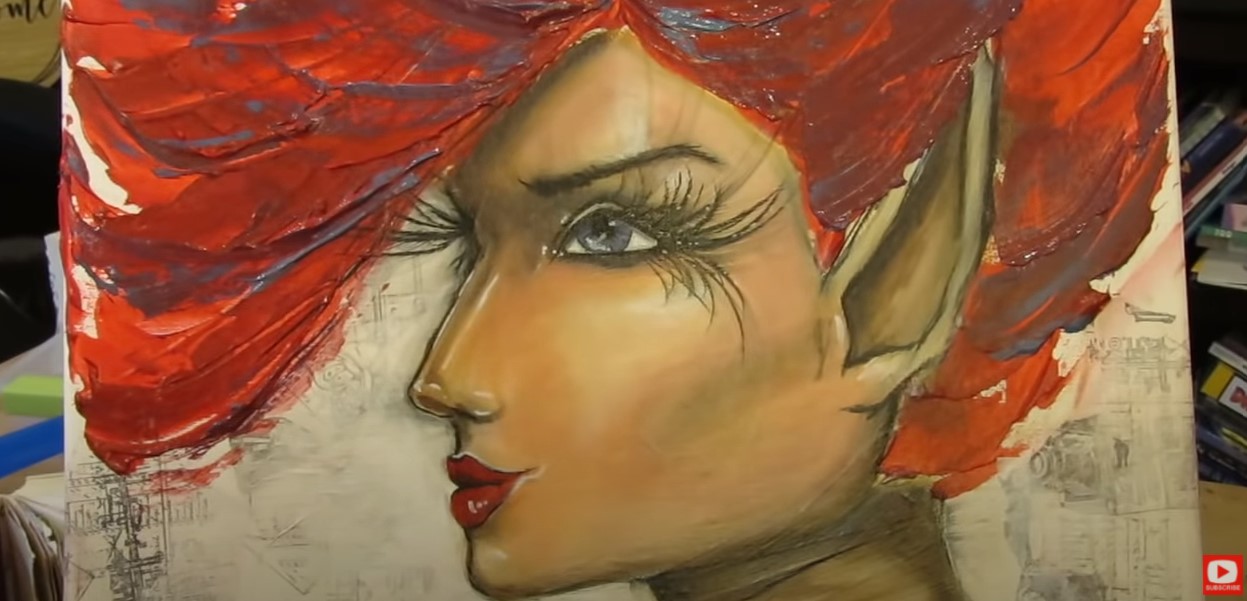
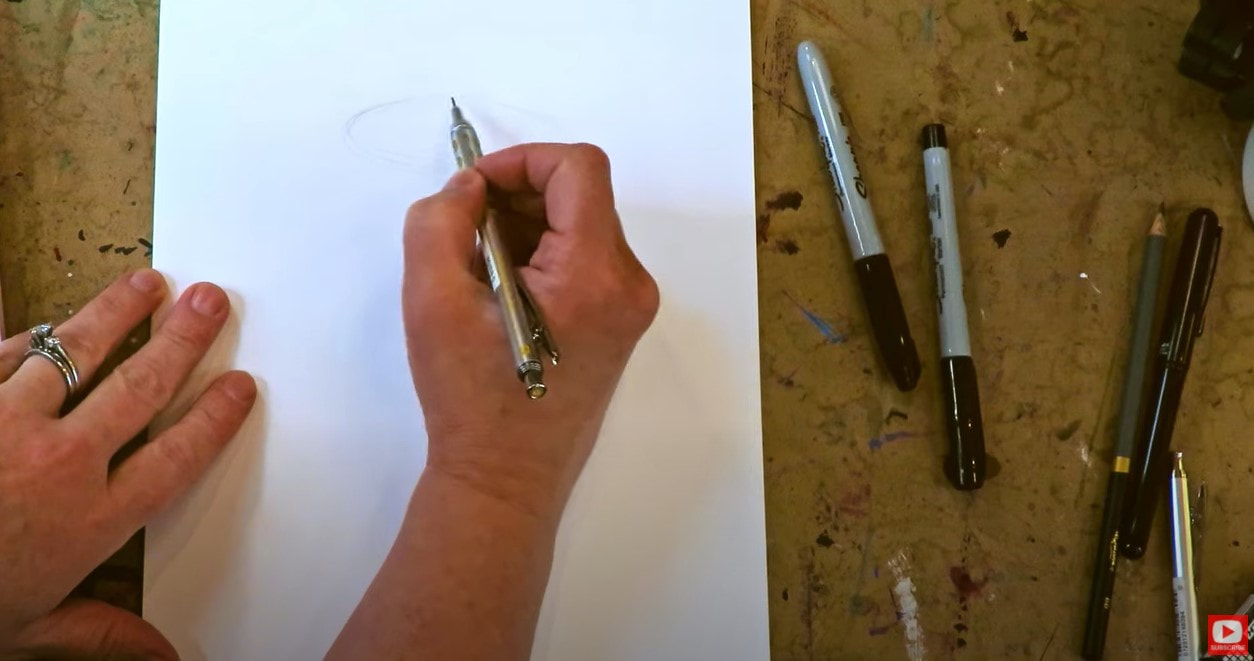
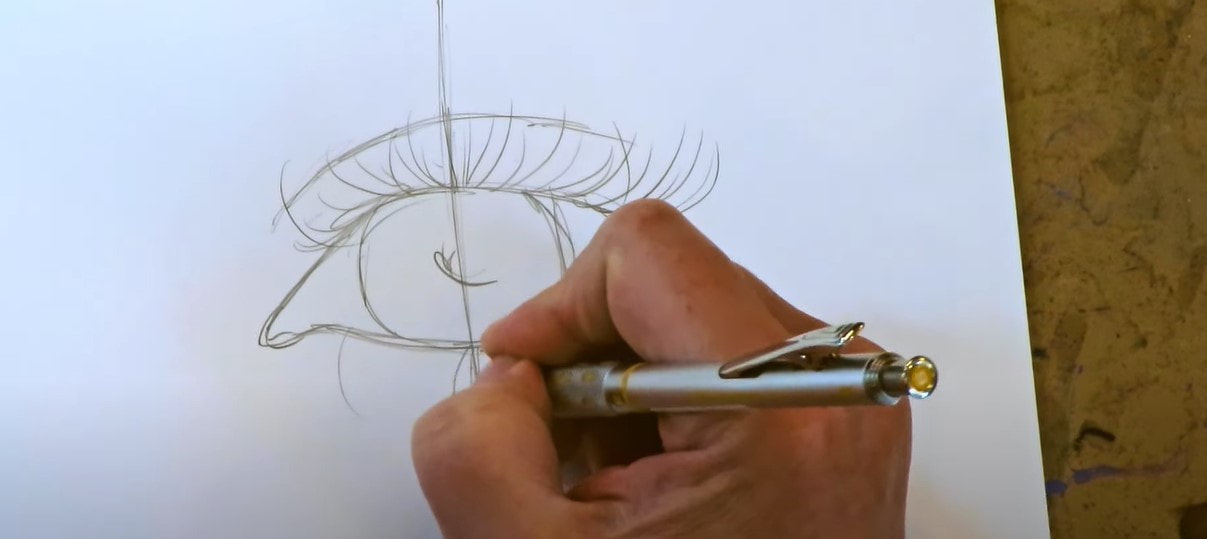
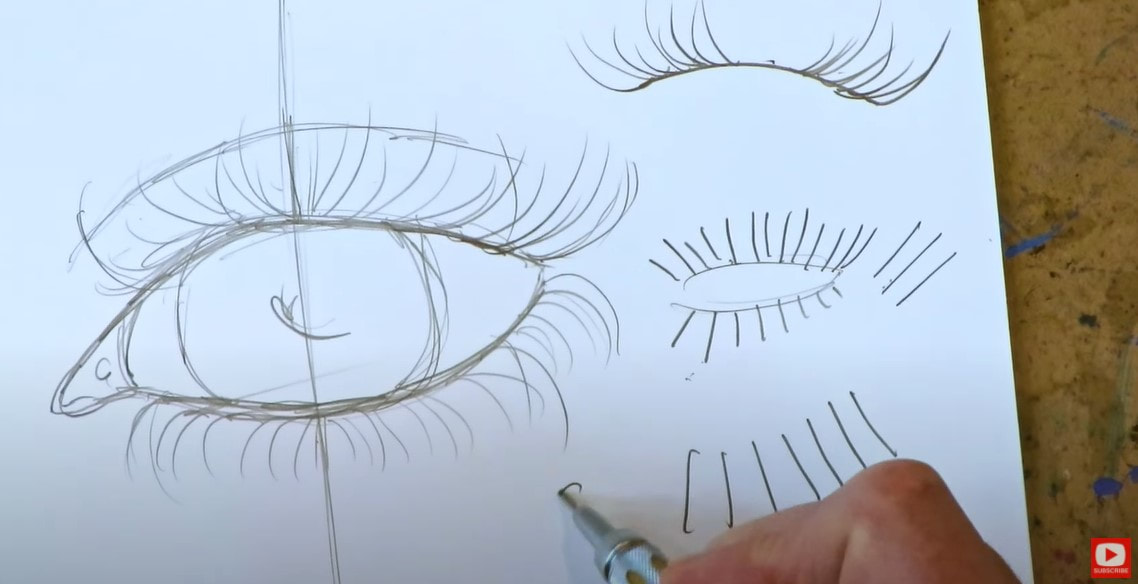
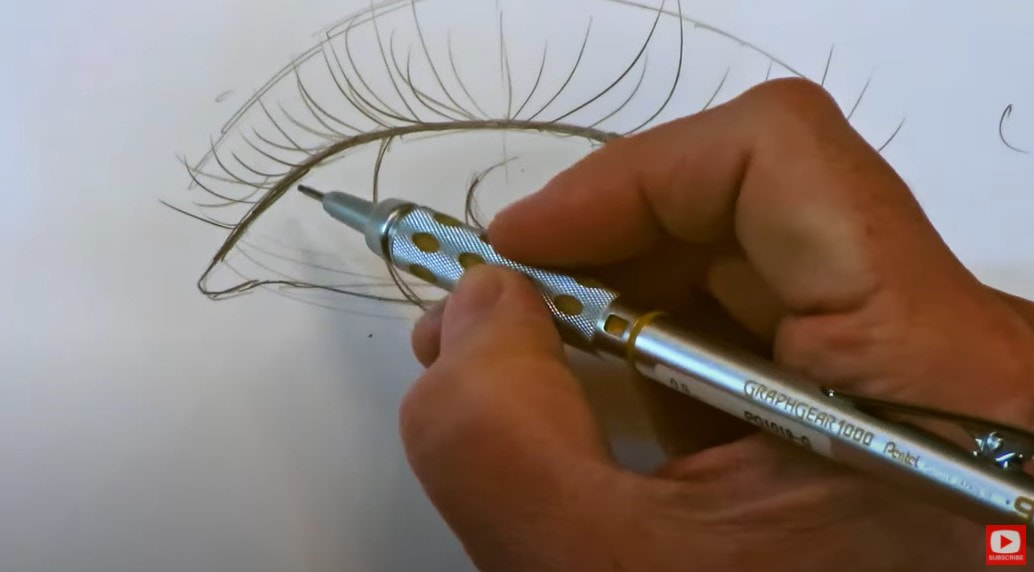
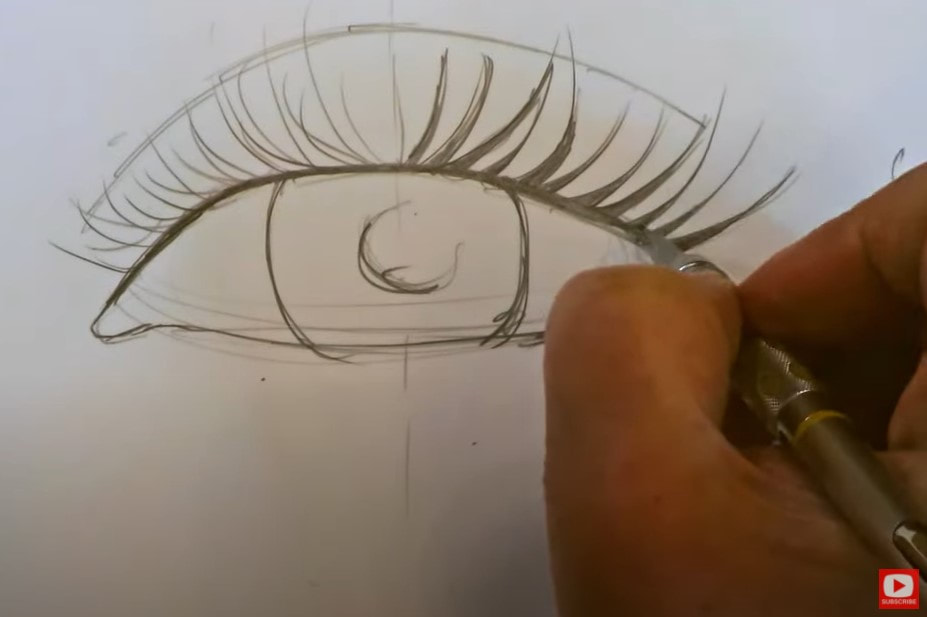
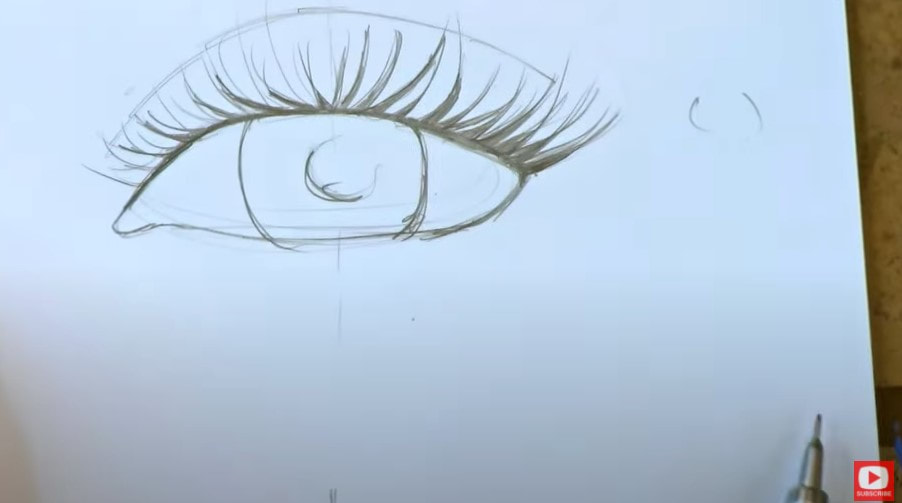
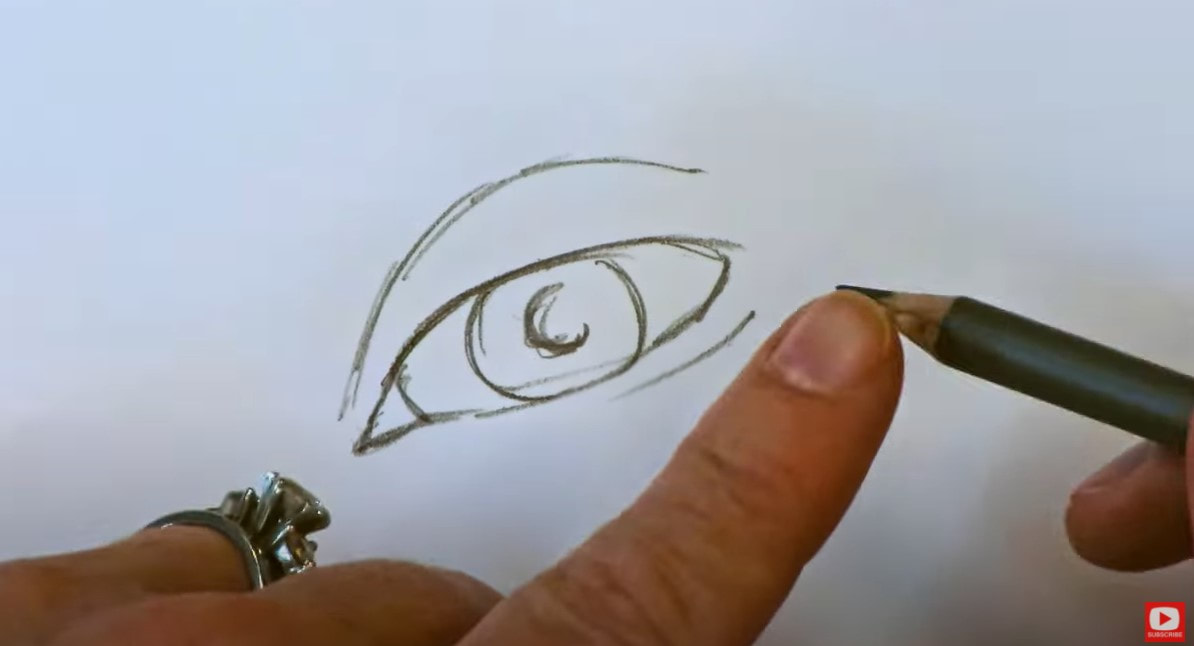
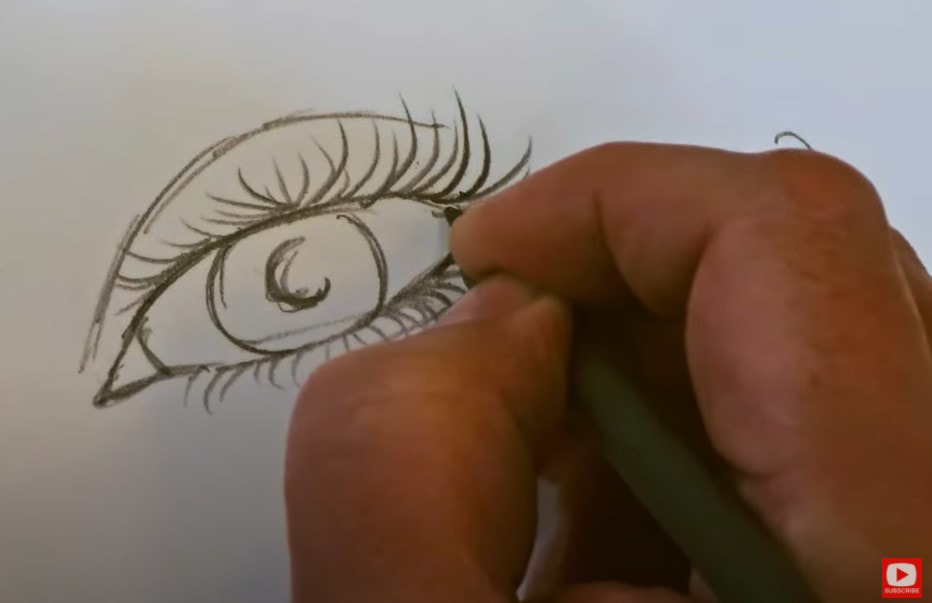
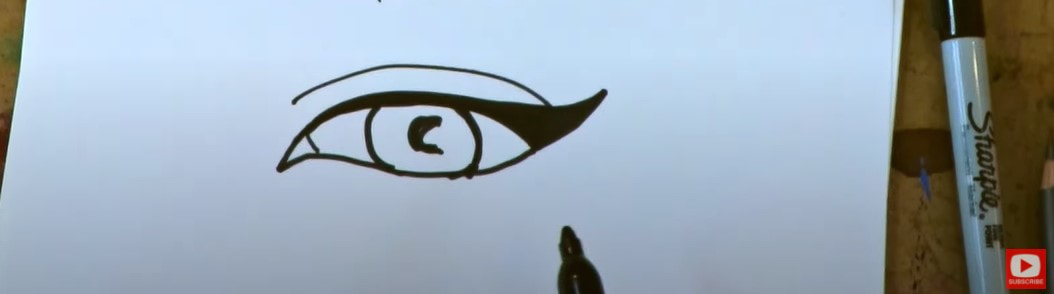
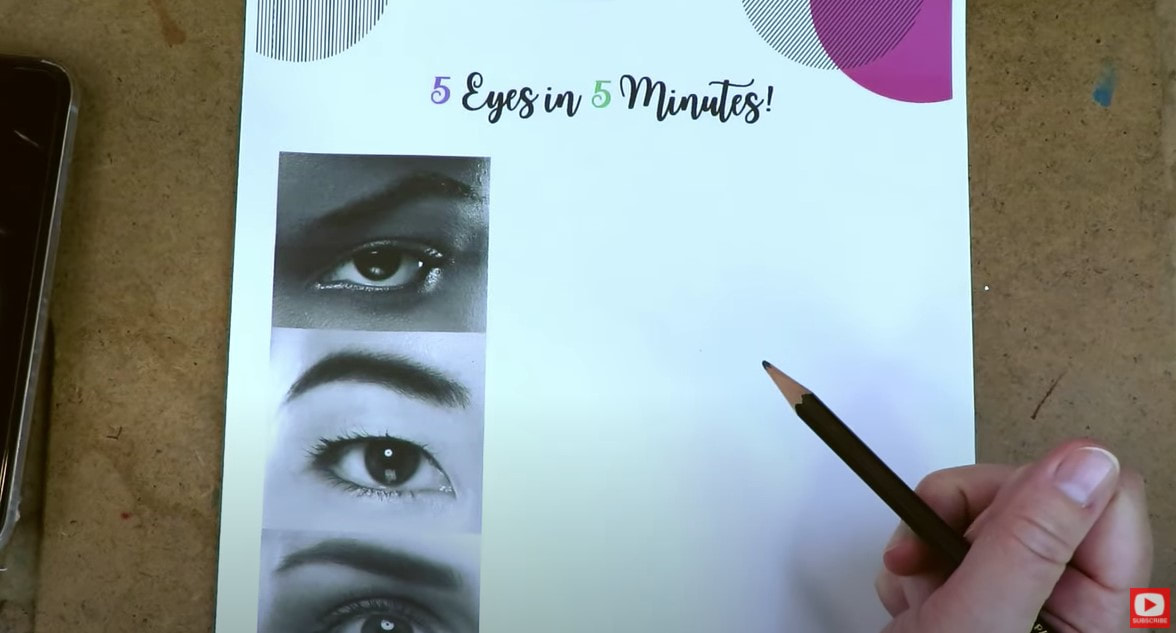
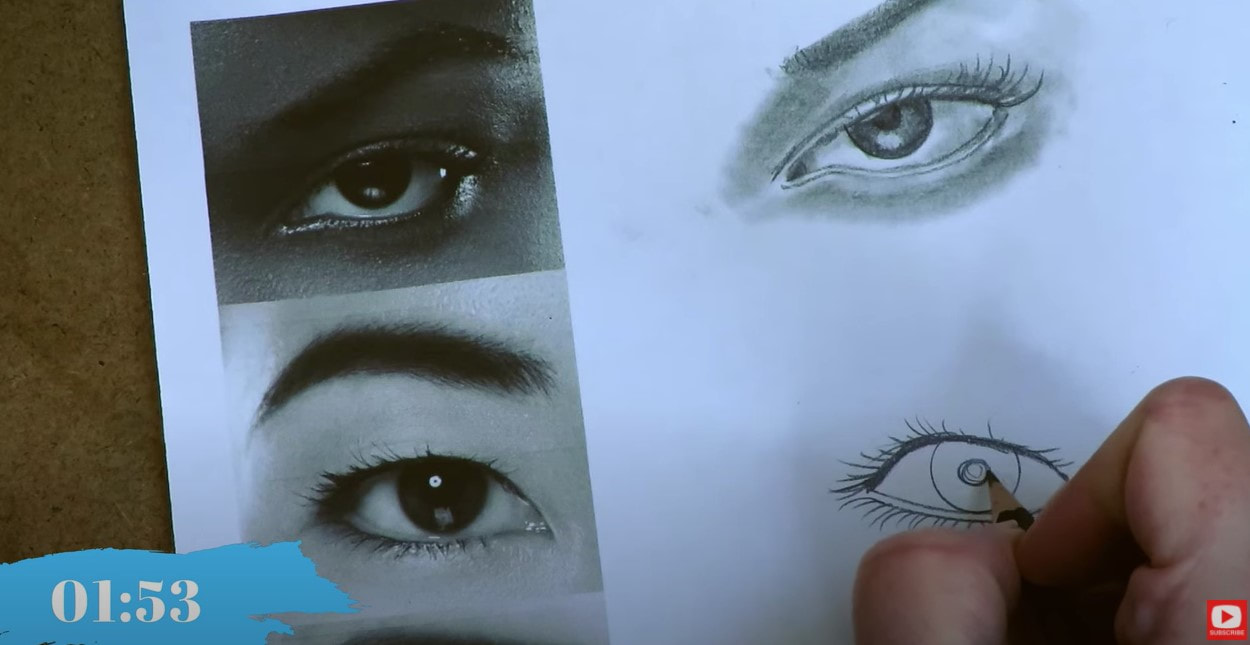
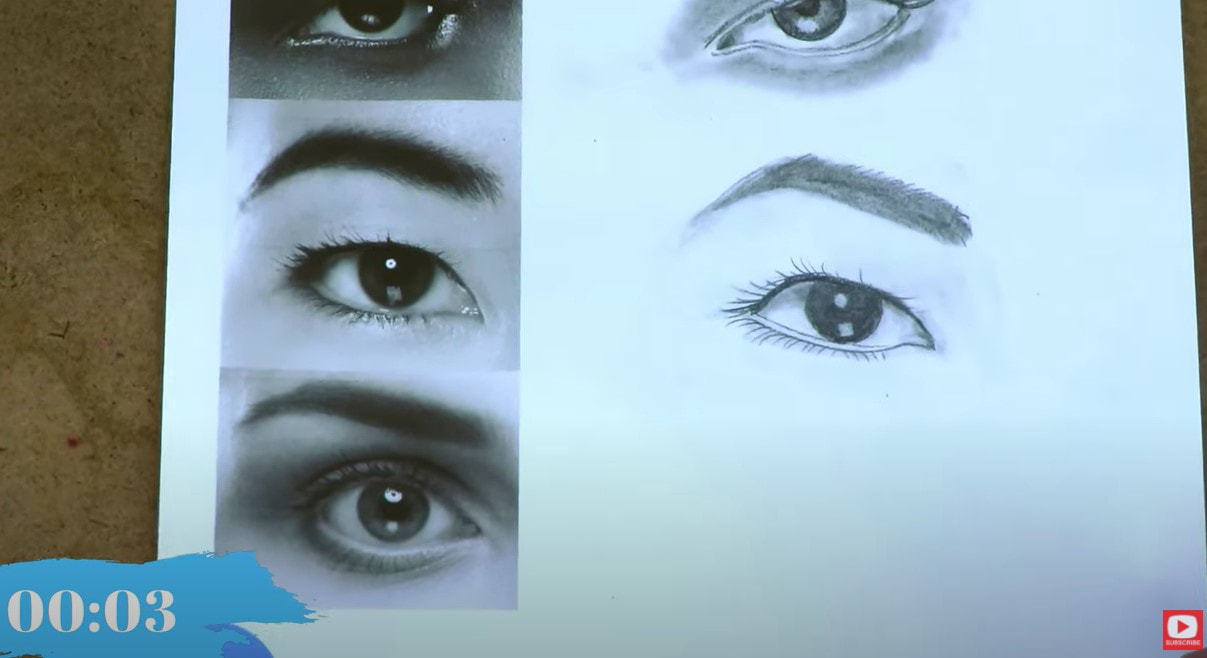
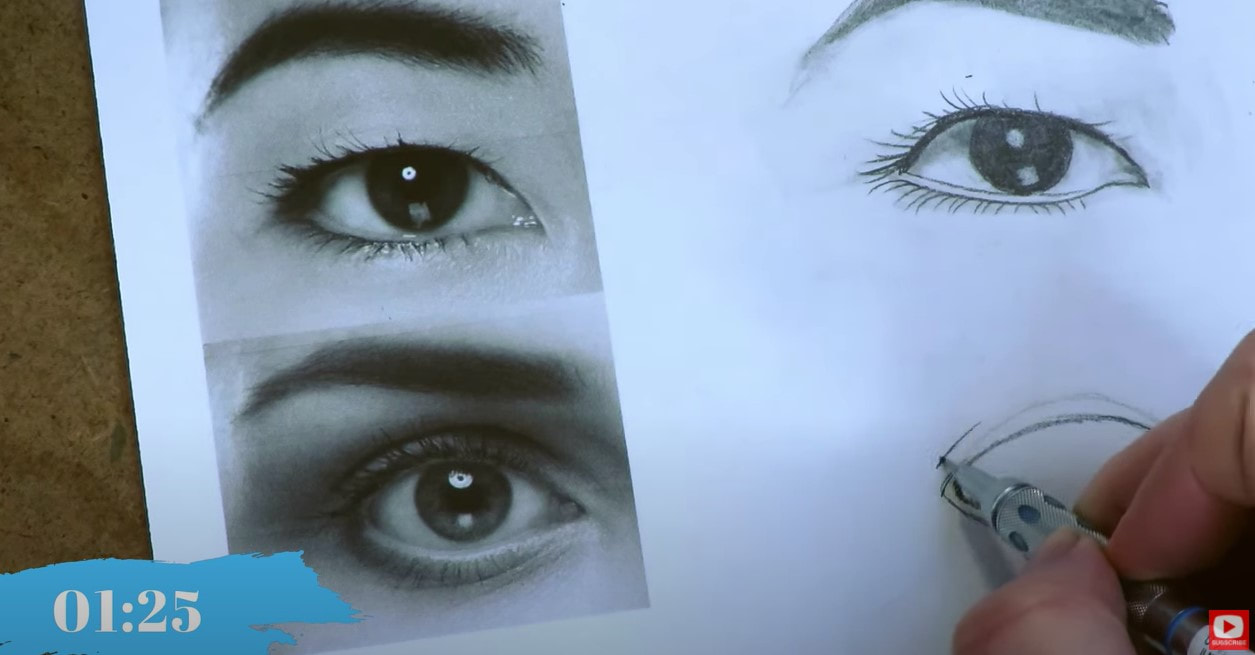
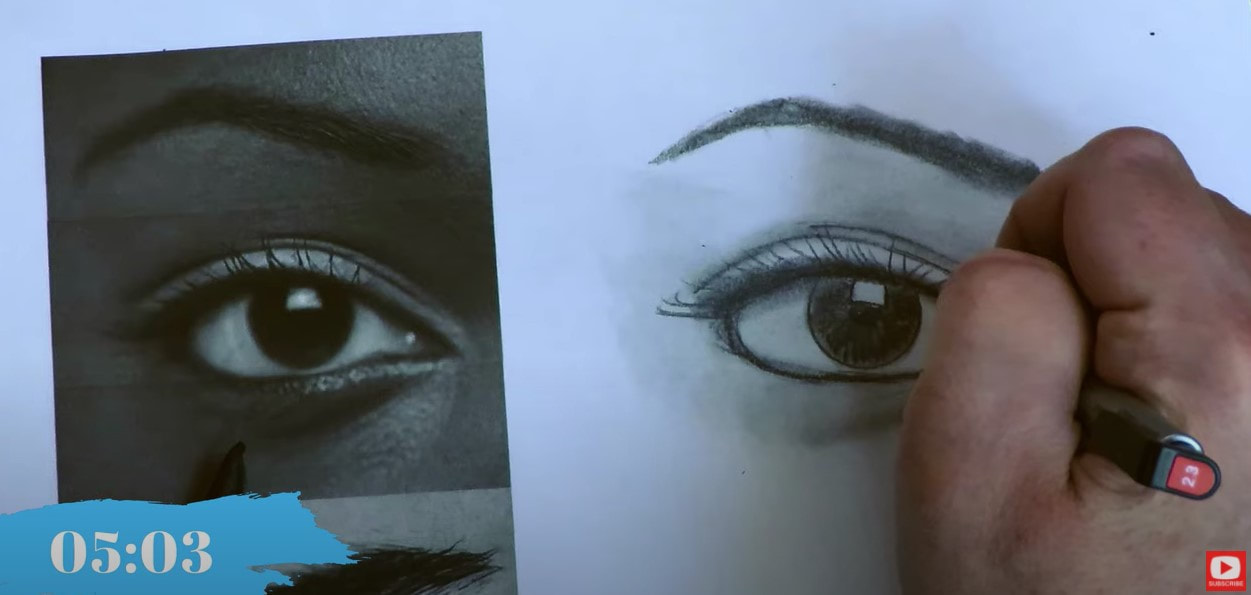
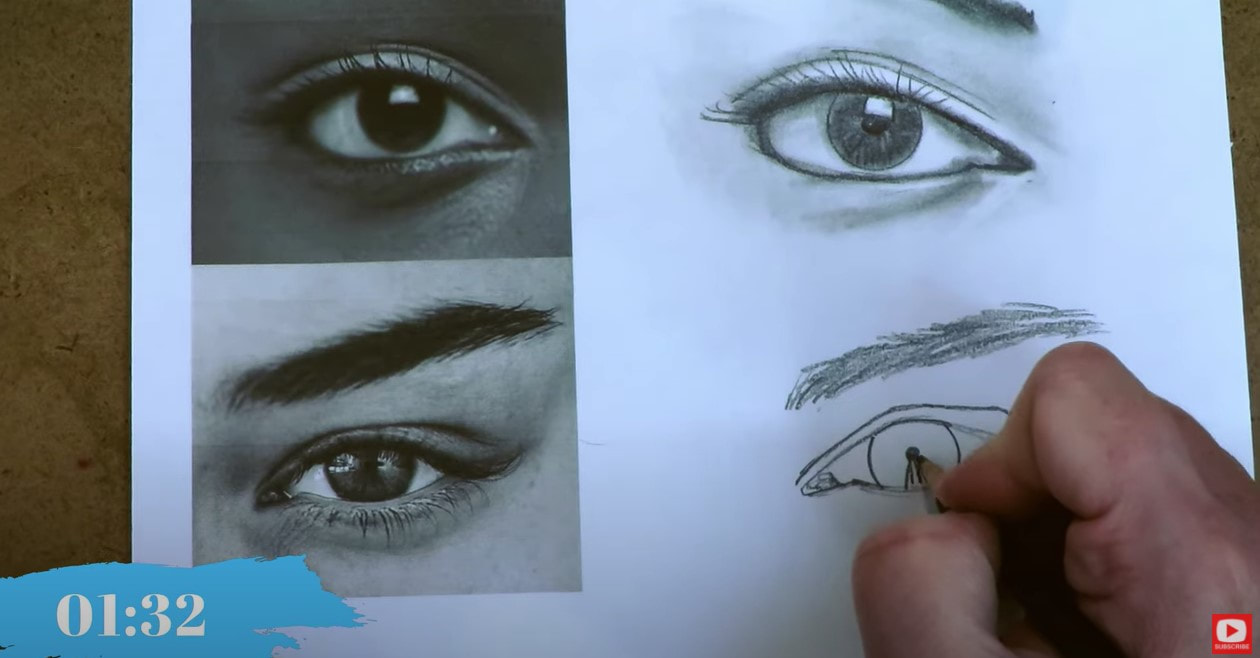
1Pay CLOSE Attention to Directionality
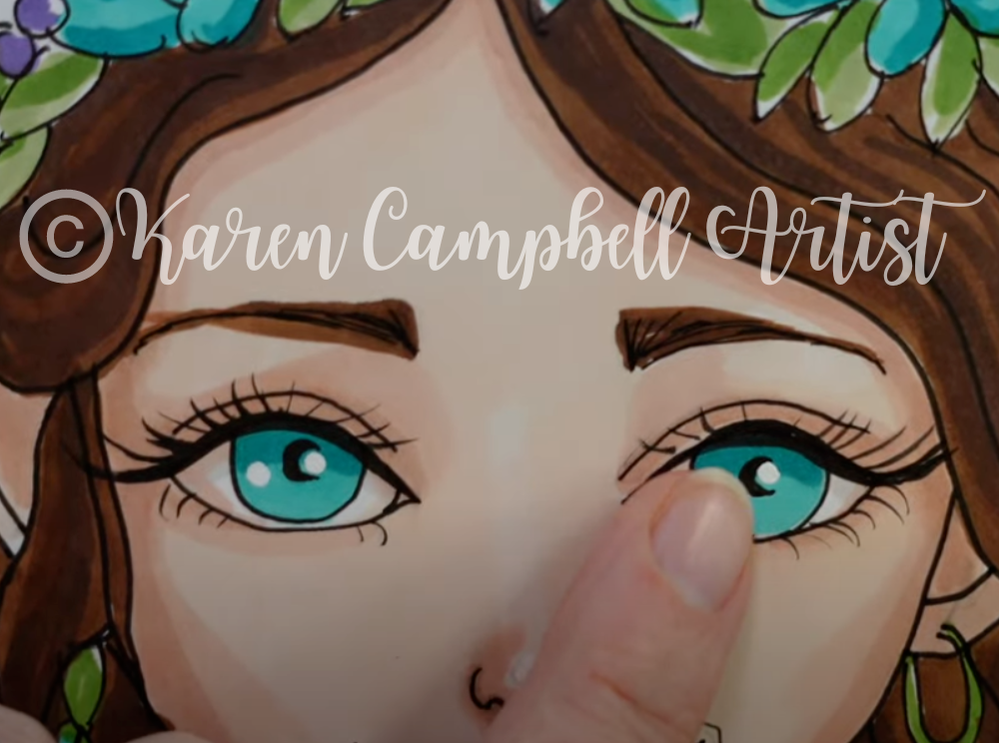
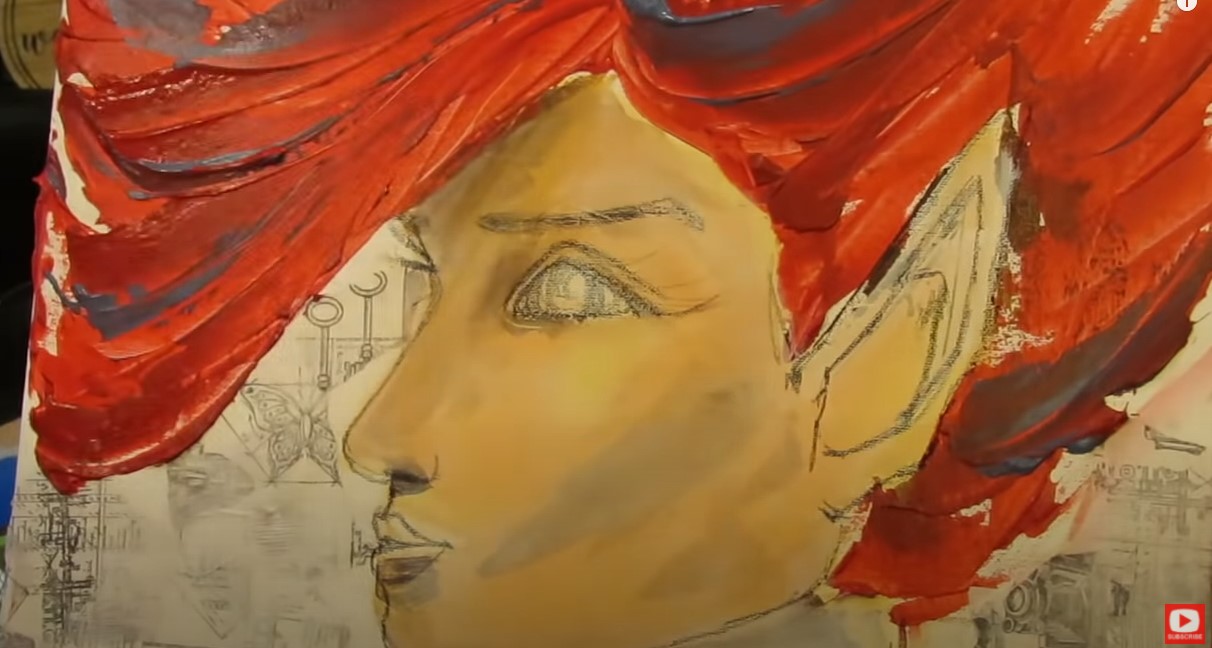
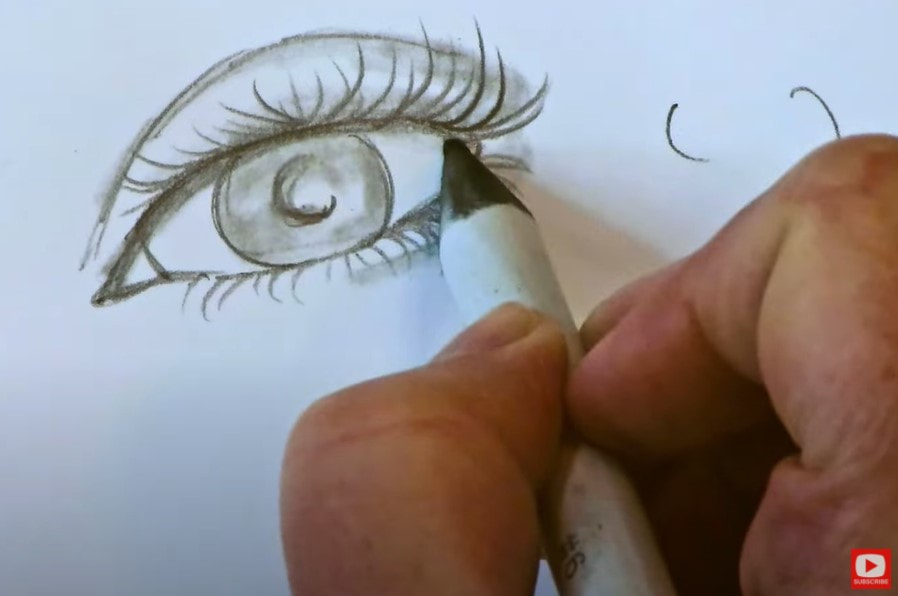
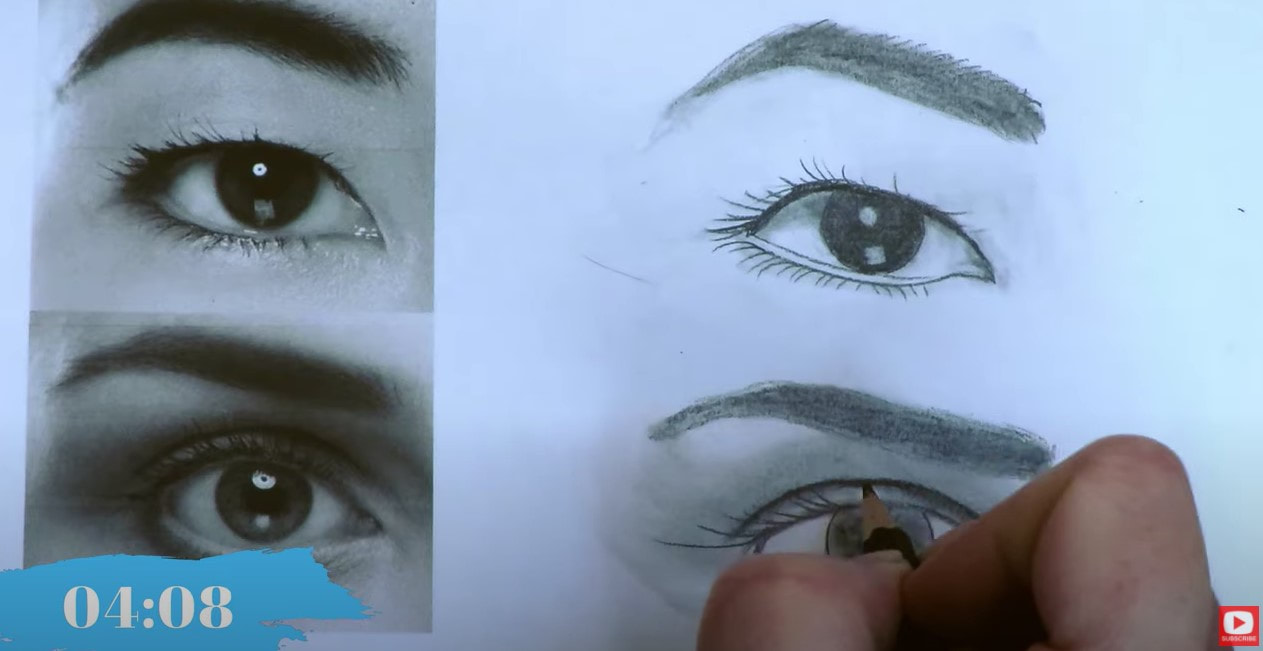
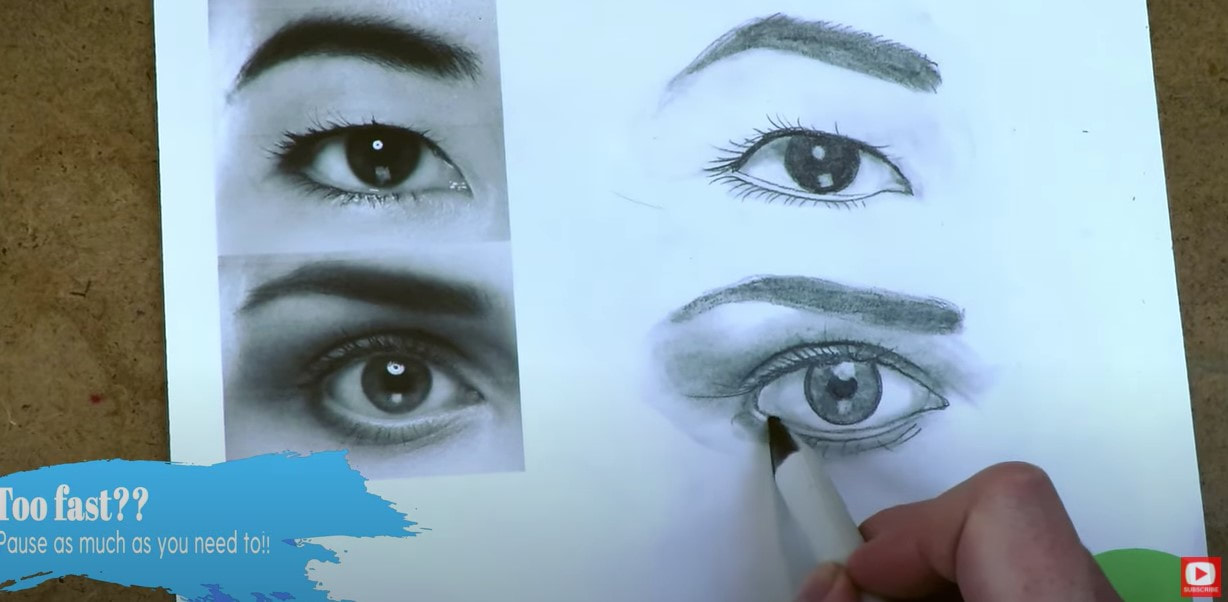
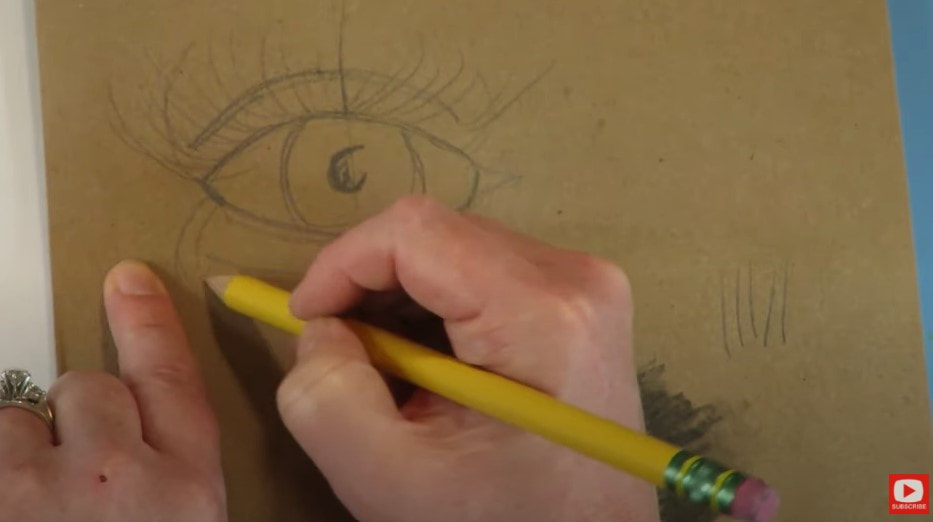
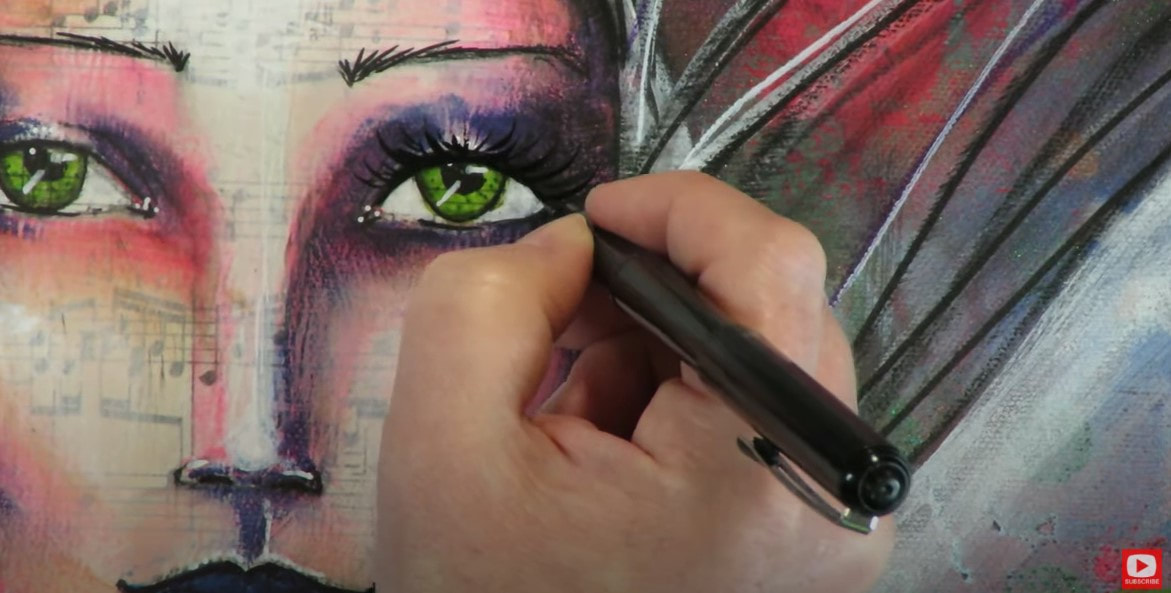
The first thing we need to consider when drawing eyelashes is directionality. Trust me, it's a game-changer. When you take a close look at natural eyes, you'll notice eyelashes don't grow in just one direction – they switch about halfway across the eyeball.
Copying this ONE observation into your mixed media drawings and paintings will immediately take your art to the next level. When I'm drawing eyelashes, it helps me to think of them like parentheses – top and bottom, left to right. 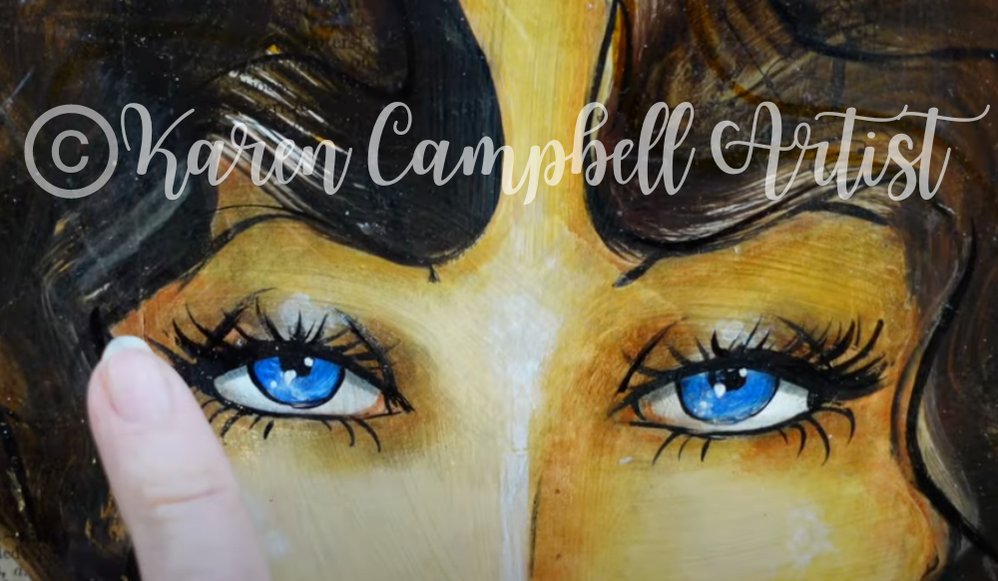
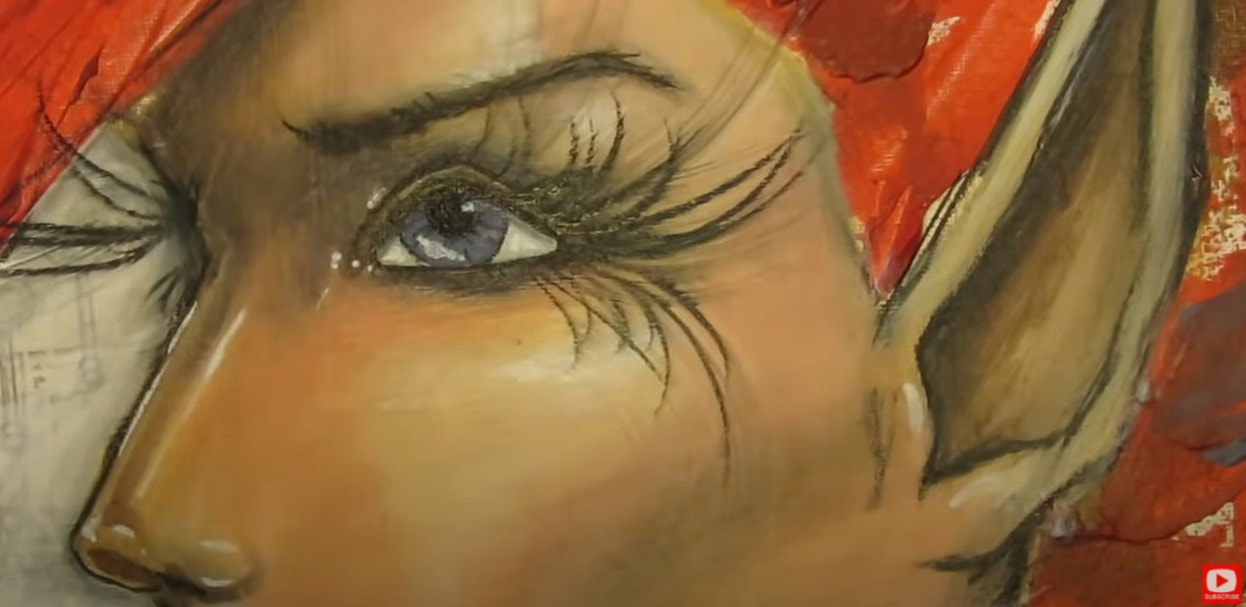
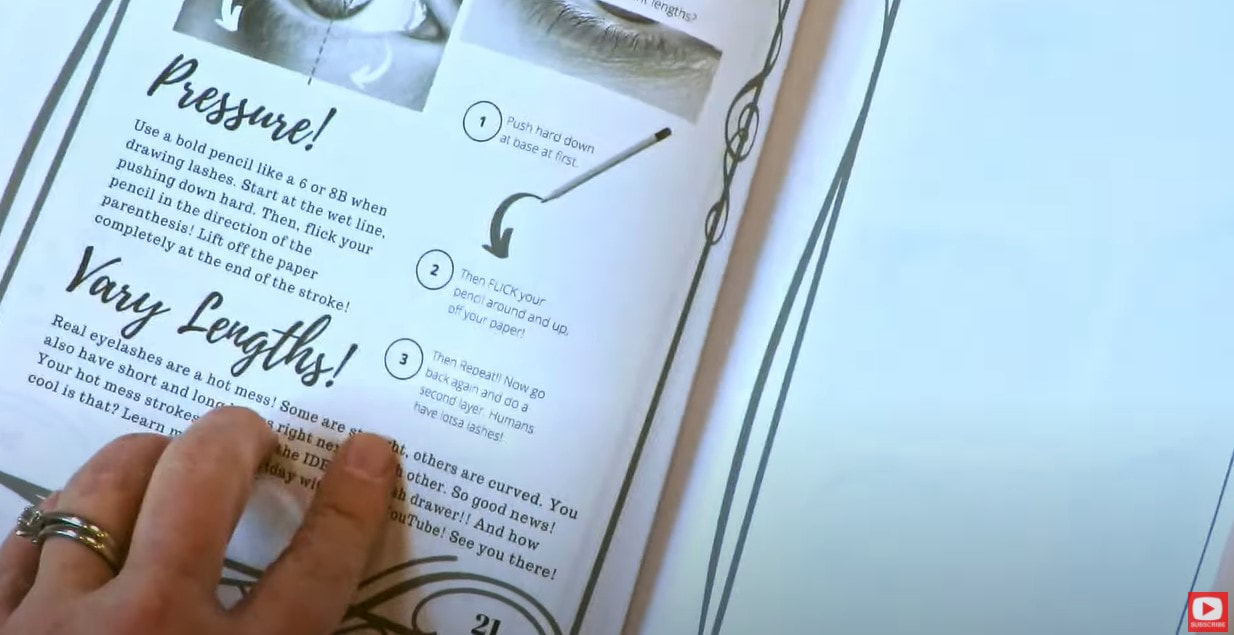
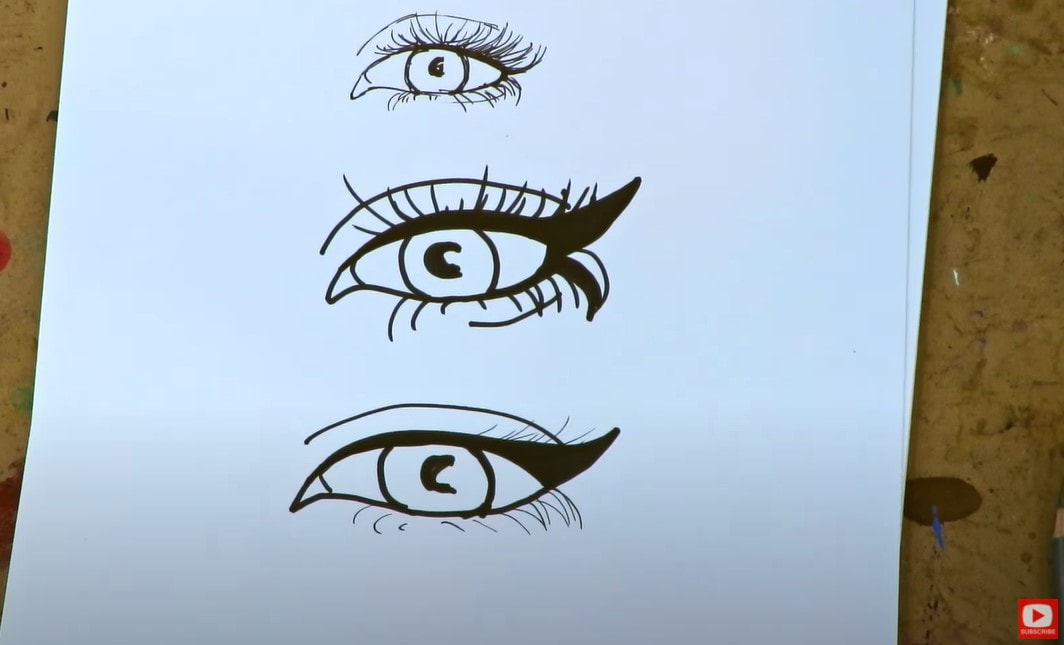
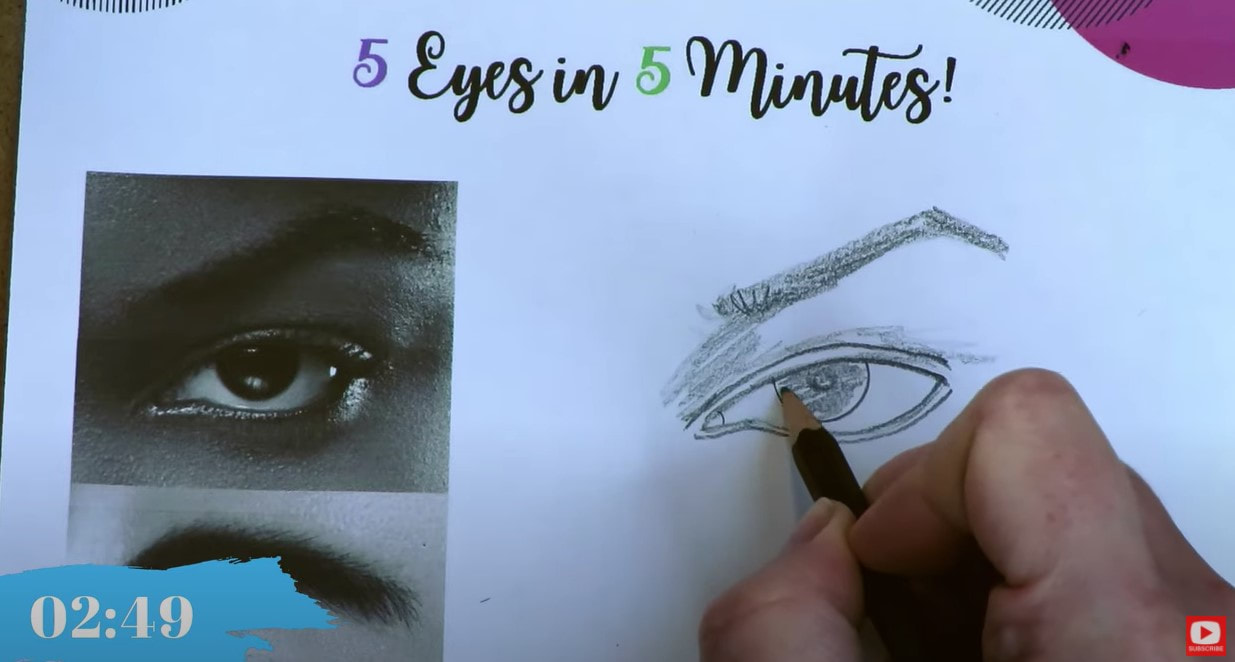
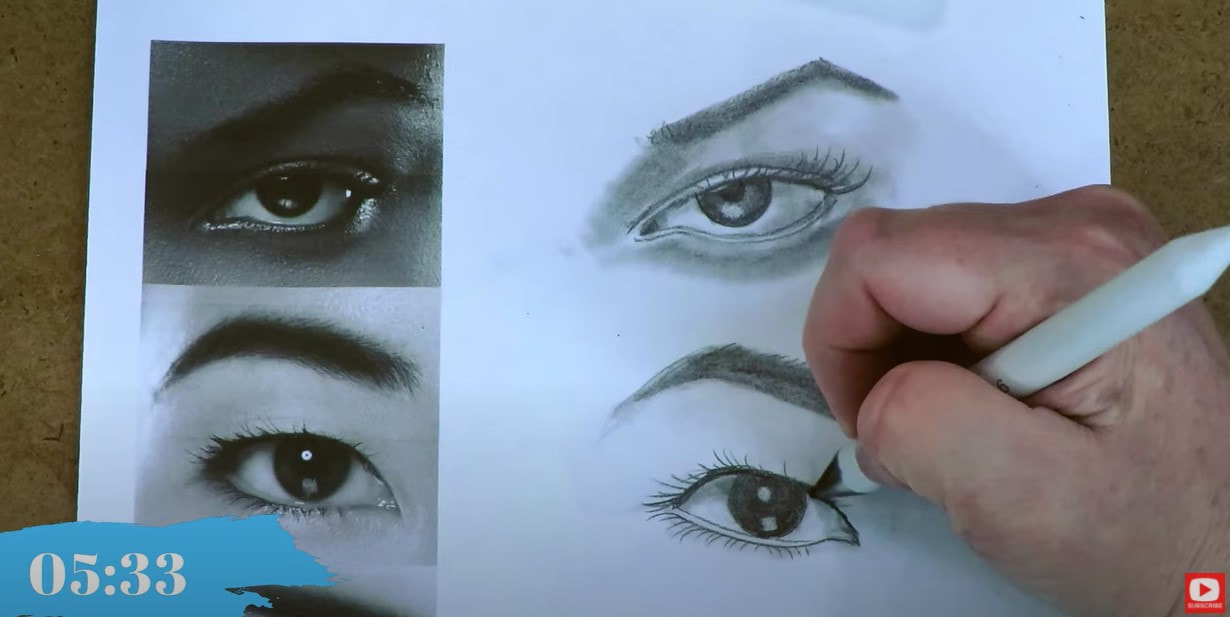
2Vary Your Pressure
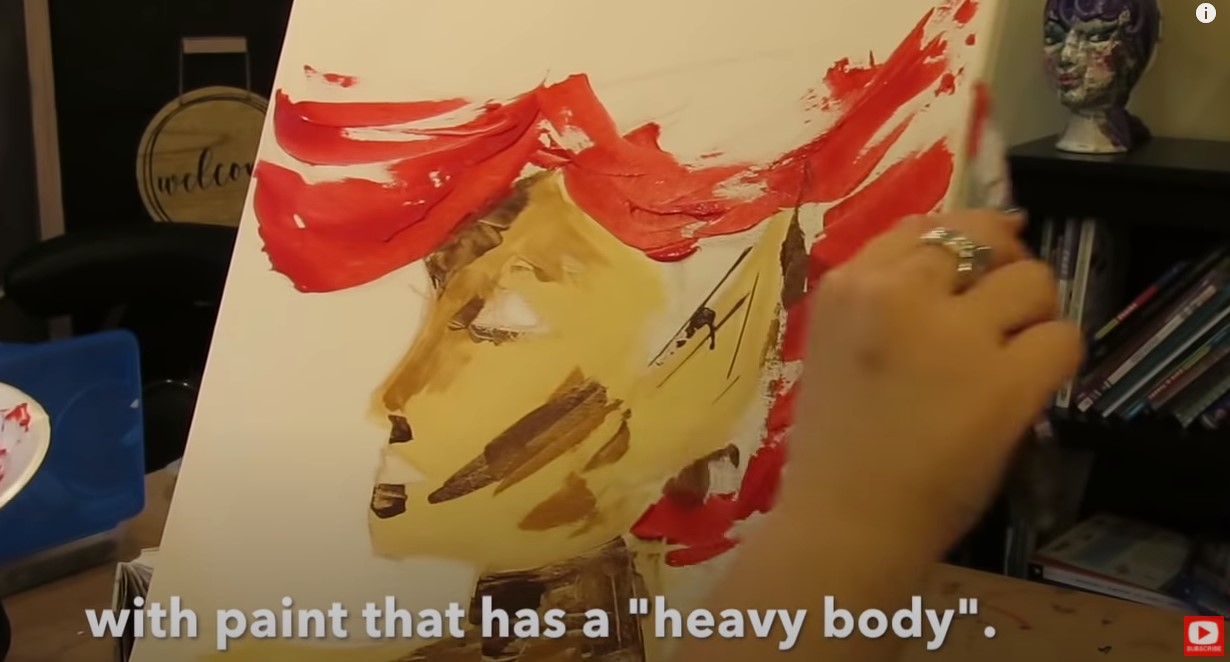
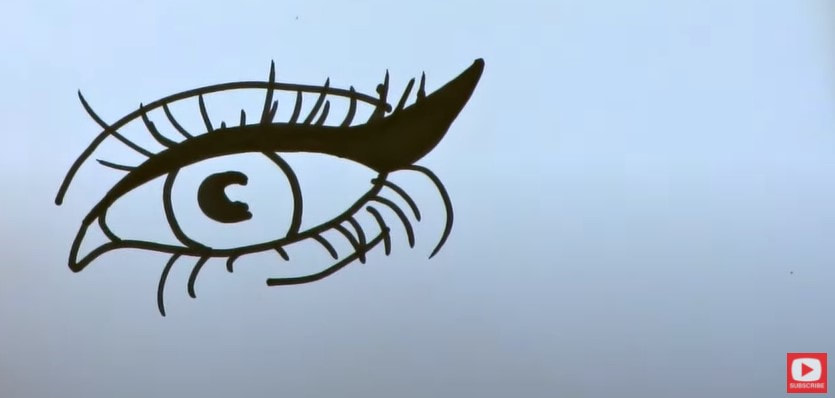
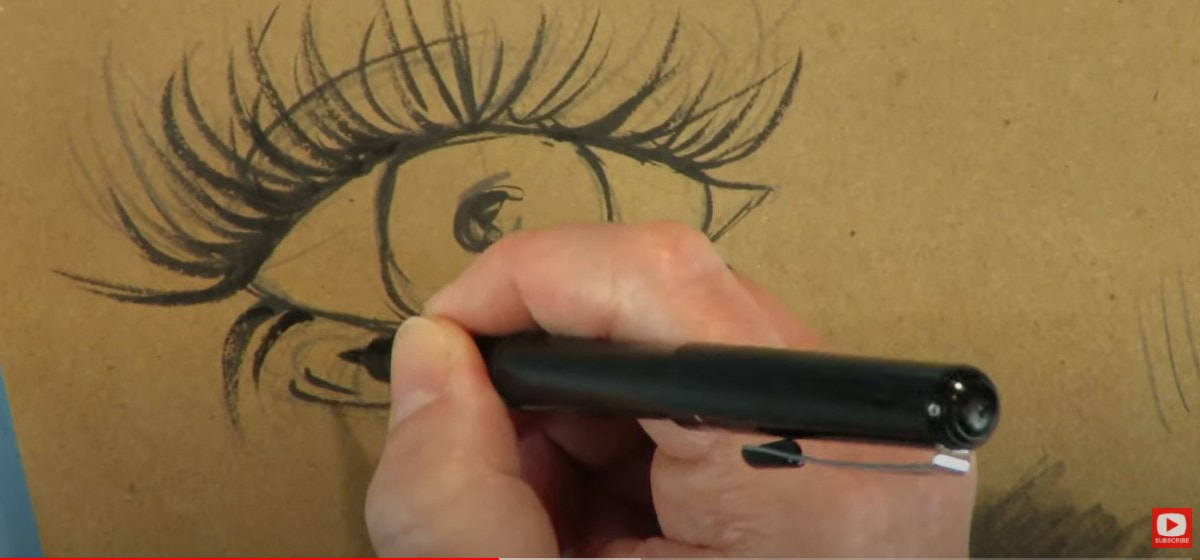
Most of the mixed media faces I create on canvas or in my art journals are wearing makeup. I LOVE a dramatic cat eye. To make the whimsical girls you draw and paint look even more realistic, vary the pressure or line weight from your art supplies when drawing eyelashes.
Whether you're using a brush pen or a fine liner, mastering this trick, along with the "flick," (see today's video for the demo!) is essential for achieving that perfect flare. And remember, practice makes perfect! 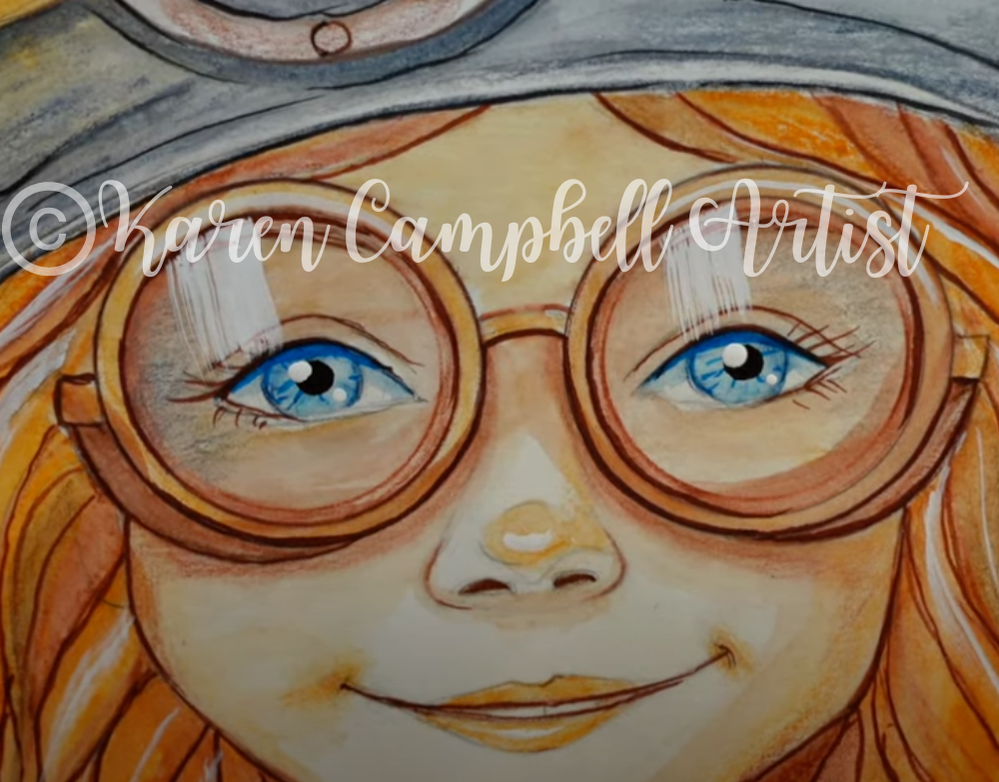
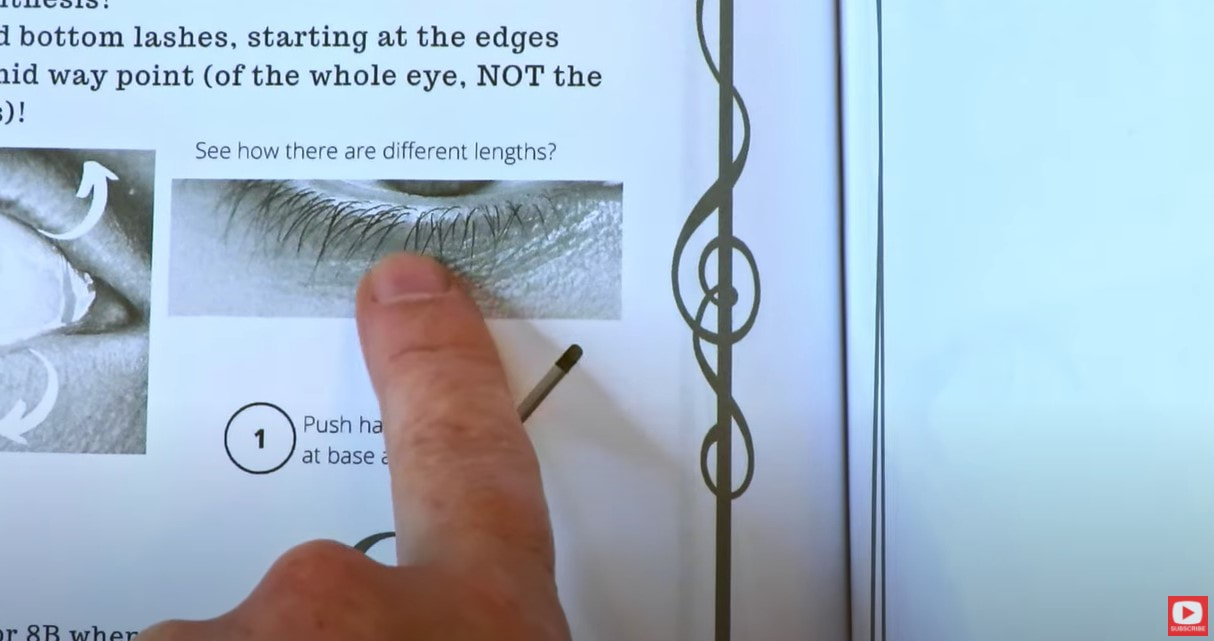
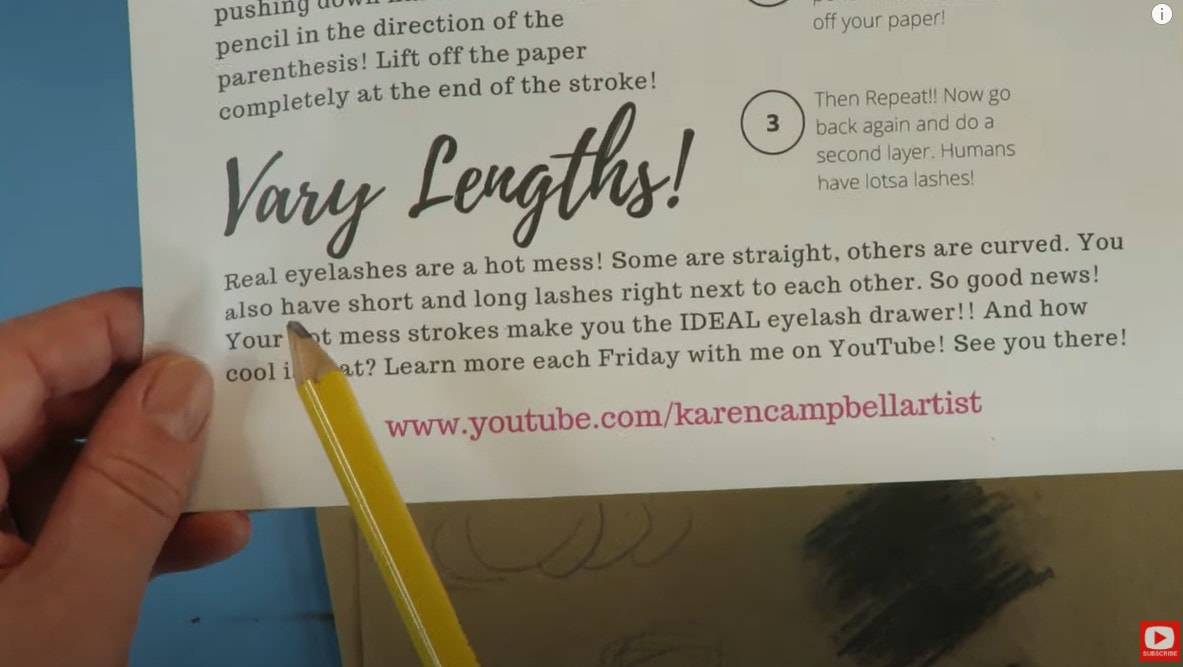
3Vary Lash Length Throughout
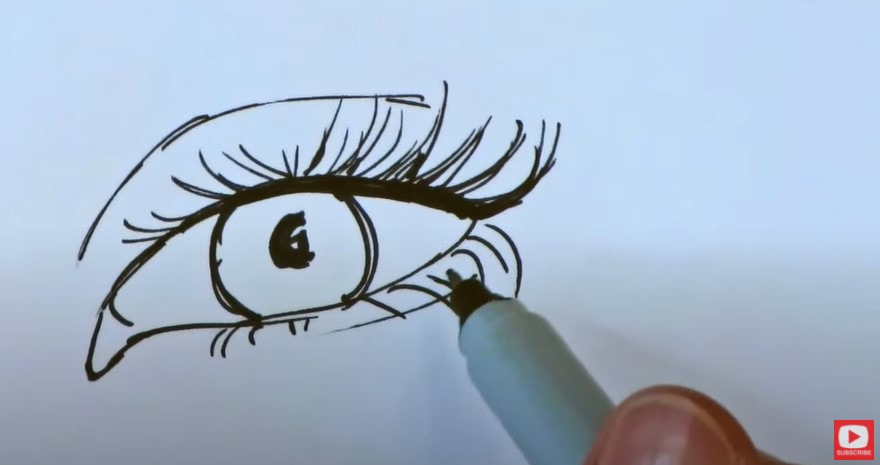
Another super simple observation from real-life eyeballs is our lashes vary in LENGTH!! Yep, it's true! Look up close at ANY picture of the natural eye, or simply look in the mirror.
Some are long, some are short. Sometimes they even grow in clumps or in multiple rows. When you copy these real-life observations in your art, your mixed media faces will instantly become more sophisticated! 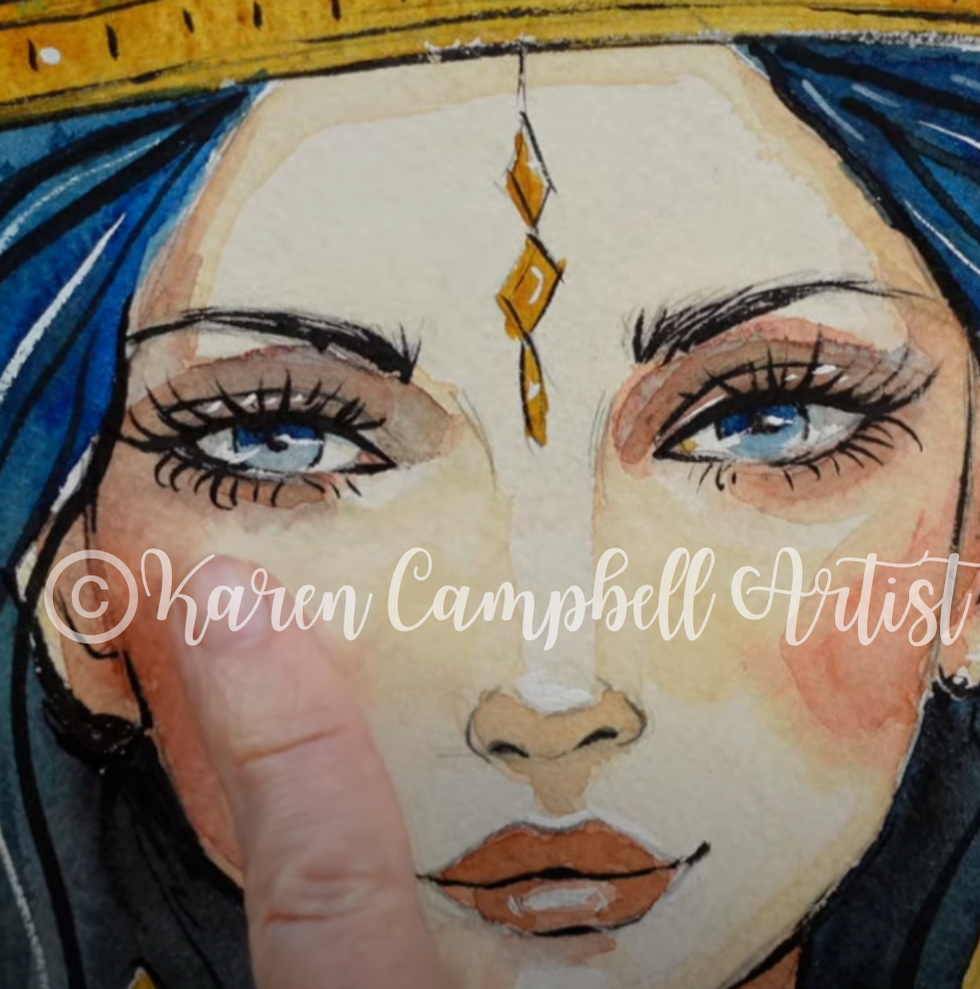
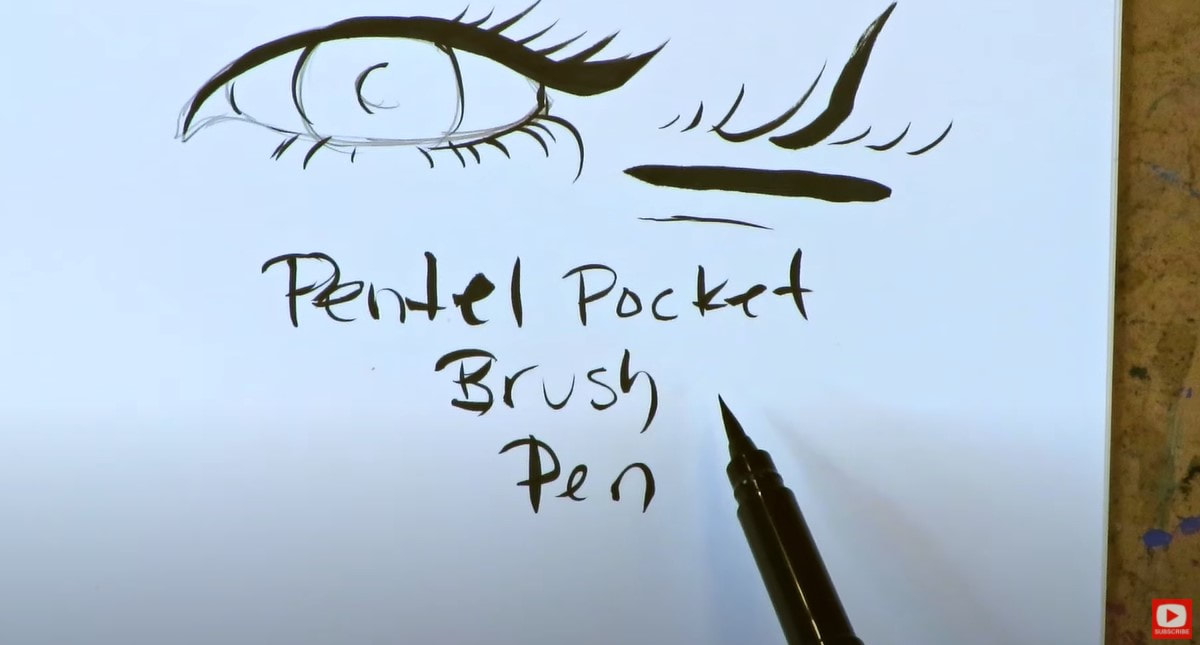
My FAVORITE Brush Pens for Drawing Eyelashes!
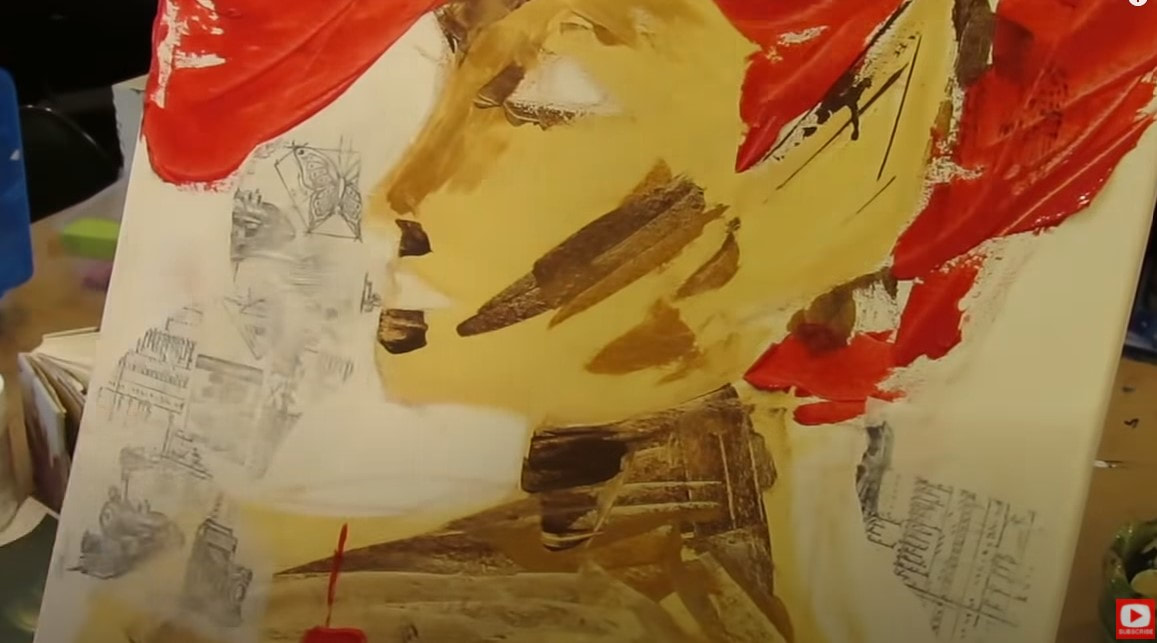
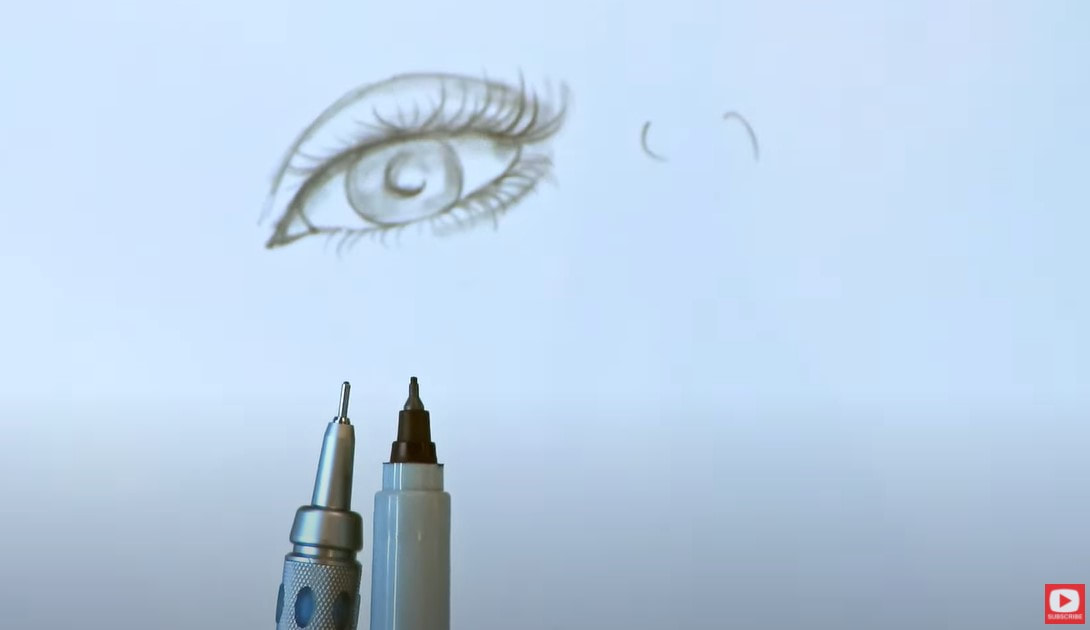
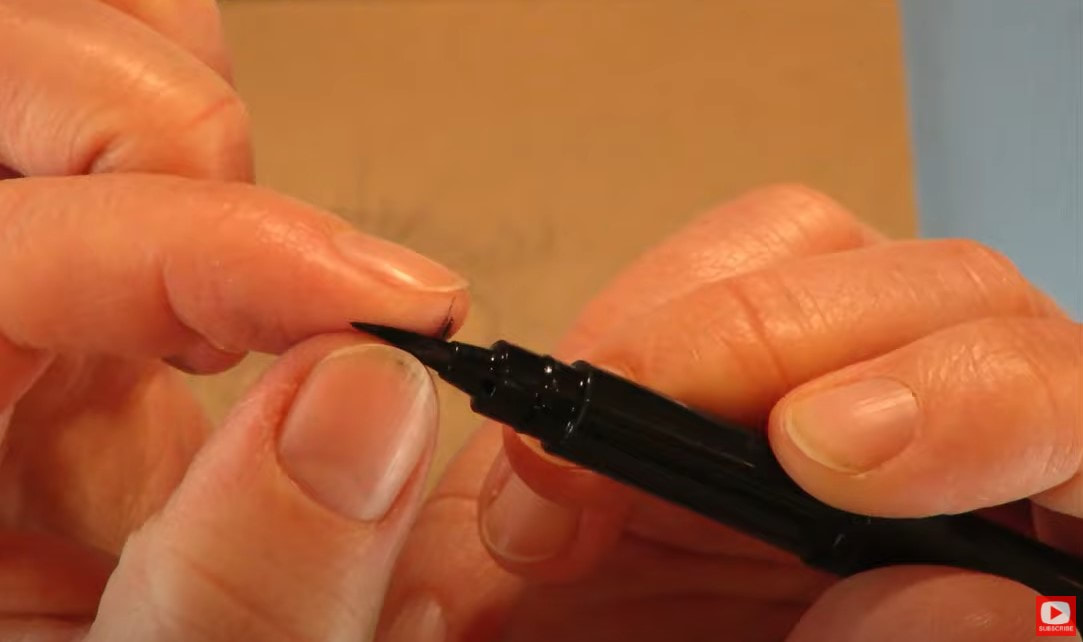
All my favorite pens are from Pentel, but when I discovered the Pentel Pocket Brush Pen, it changed my mixed media faces FOREVER!!
I use this literally all the time for adding eyelashes to the whimsical faces I draw and paint. Instead of a regular marker "nib," this pen and it's "little sister," the sign pen have actual bristles! Both feel very painterly to draw with and help me achieve all three eyelash drawing tips I just shared with you (vary directionality, pressure, and lash length). If you've never used either of these products, they DO take a little getting used to because of the bristles. Play around with them on scrap paper and DEFINITELY print out my cheatsheet from today to get thateyelash drawing practice sheet so you can practice right on the page to perfect your own technique!! LOVE this Video? Share it With a Friend!
If you LOVED today's video, SHARE IT WITH A FRIEND!
It's SO easy!! Either copy and paste this exact video link here: https://youtu.be/IXSgiy16HGc Or if you're on your phone watching on YouTube, hopefully this will help :) 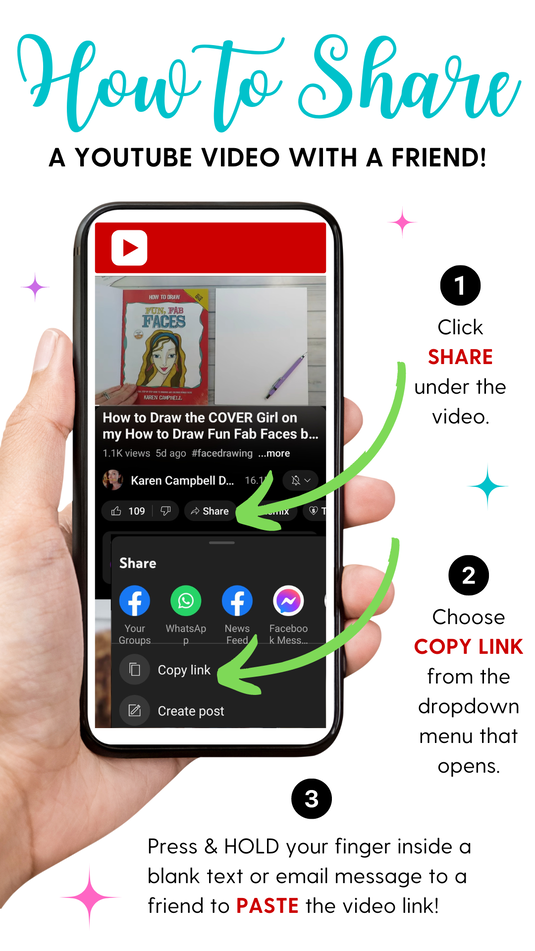
Wanna Create the Mixed Media Portraits
|
Karen CampbellFounder of Awesome Art School. Mixed Media Artist. Author of 19 Instructional Art Books! 
Whose work has appeared in...
   
 Archives
July 2024
Categories
All
|


 RSS Feed

"Karen is flipping hilarious and she's very real...I like the way she teaches in a way that really gives you confidence, whether you're a beginner or advanced there's always something new to learn!"
- Elizabeth W. |
What Fans Are SayingKaren, you are absolutely fabulous! You make me feel like I can draw anything. I have recently retired and finally have the time to do some of the art that I have loved since I was in school. I am really at the beginning of my art journey and I hope to learn as much as I can. Thank you for all you do. |
Contact ME |