
|
There's NO wrong way to store your watercolors. It's totally personal preference. But if you're an art supply hoarder like me, your studio can become a MESS in no time!
And, if you're a watercolor beginner, you likely have no idea what your organization options are. Today I'm going to show you MY FAVORITE way to store watercolors at home, and will demo the entire process so you can create YOUR OWN at-home palette if you want! Stay with me till the end for a timelapse of one of my first watercolor projects for the Celtic Collective! 
*All product links are affiliate & for U.S. residents only.*
If you've been following me for a while, you likely already know that my absolute FAVORITE watercolors of all time are by Daniel Smith. These colors come in tubes instead of little trays or pans (like the Prima watercolor sets I've been reviewing lately).
I get asked all the time by watercolor beginners what the deal is with me making my own watercolor palettes. Why don't I treat my watercolor tubes like my acrylic ones and simply squeeze a little watercolor out each time I want to paint? 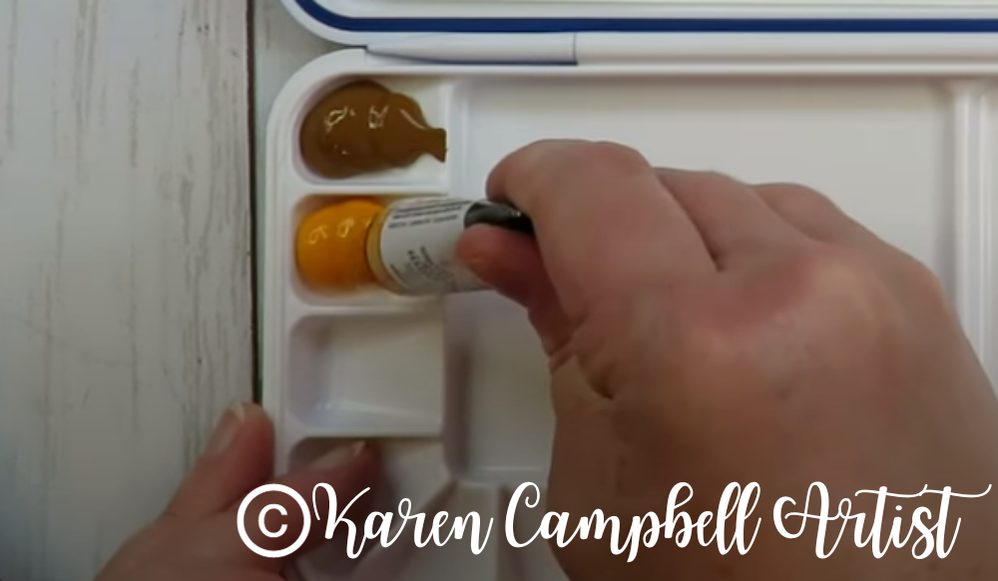
Lots of reasons actually!
The first one is, you can't really tell from that blob of watercolor, the color of it's packaging OR the color's individual name HOW it will actually look on paper. Watercolors can be really sneaky like that. Take a look at the pic above again. Now look at the one below. THIS is what those two colors actually look like on paper. 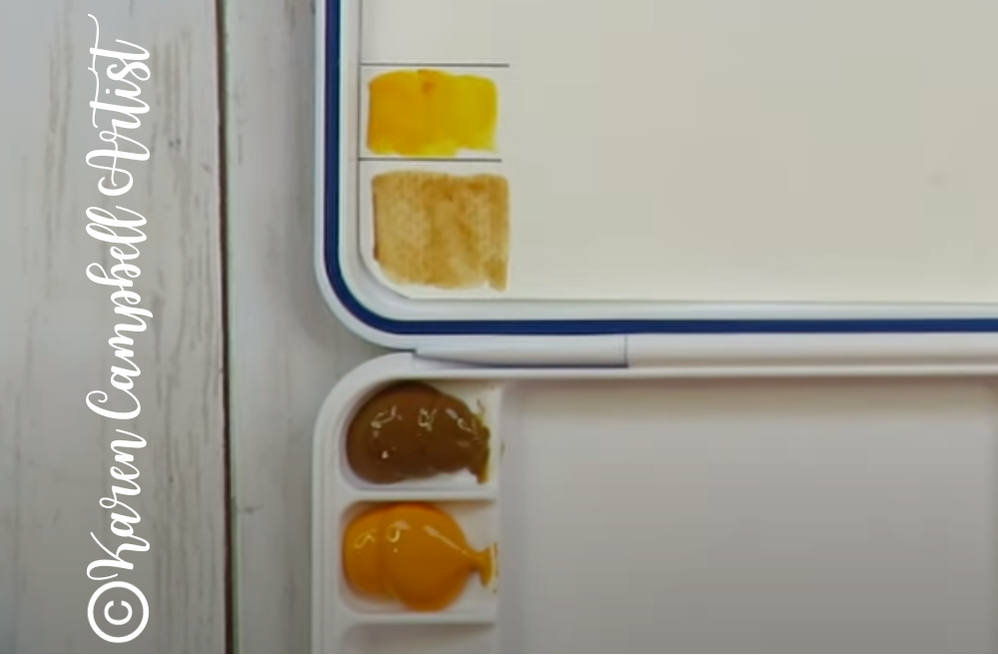
Not quite what you may have expected from the darker brown, right? This happens all the time.
As an artist, I need to be able to quickly glance down at my watercolors and KNOW how they will look on paper. The only way I can do that is with a swatch card. If I've decided to squeeze a tiny amount of watercolor out to use each time I want to paint, and decided I want to use multiple watercolors, it can be SO easy to forget which blob of color is which. Another reason why it's essential to swatch! 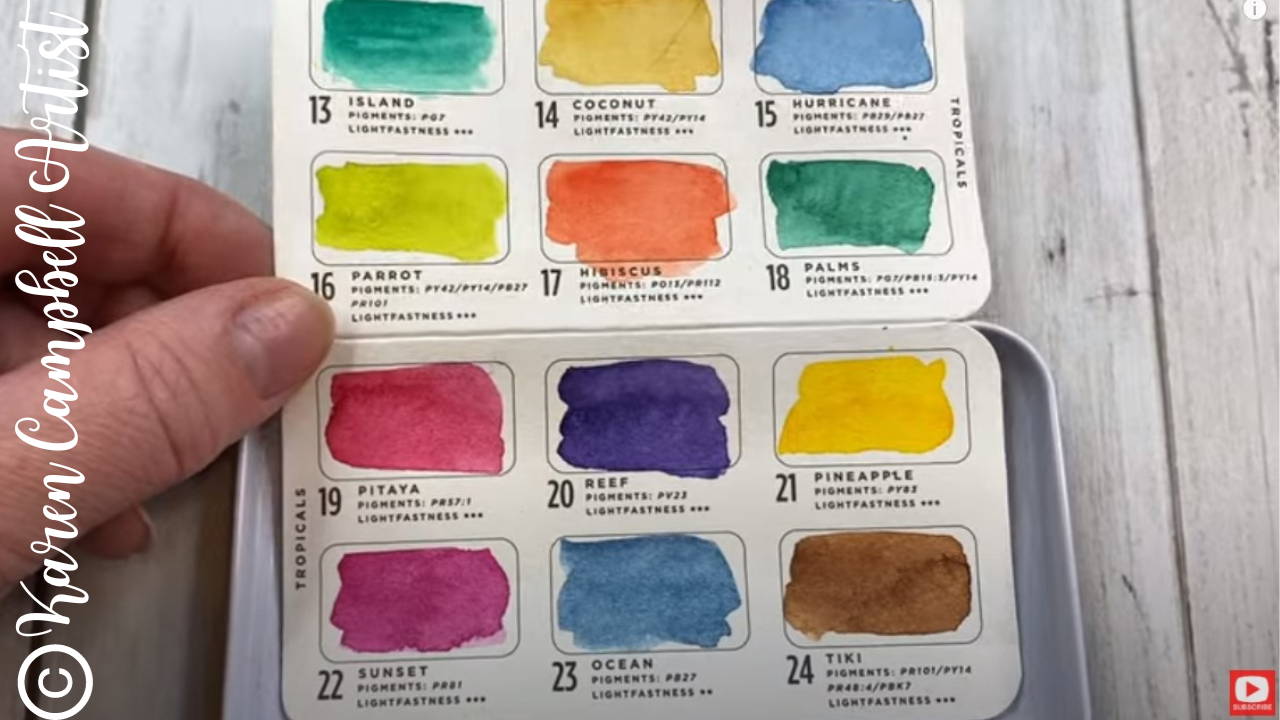
The second reason I don't work straight outta the tube and prefer to squeeze my watercolors into palettes is because I don't want to waste a single drop of my precious (and expensive!) watercolors.
When it comes to watercolor, we NEVER need as much as we think we do. So if you were to squeeze out a big blob of some beautiful expensive watercolor that you only needed a tiny bit of, what happens to the leftover? Does it get saved for a while, until you forget what color it was, and eventually dump it? I can't bear the thought!! 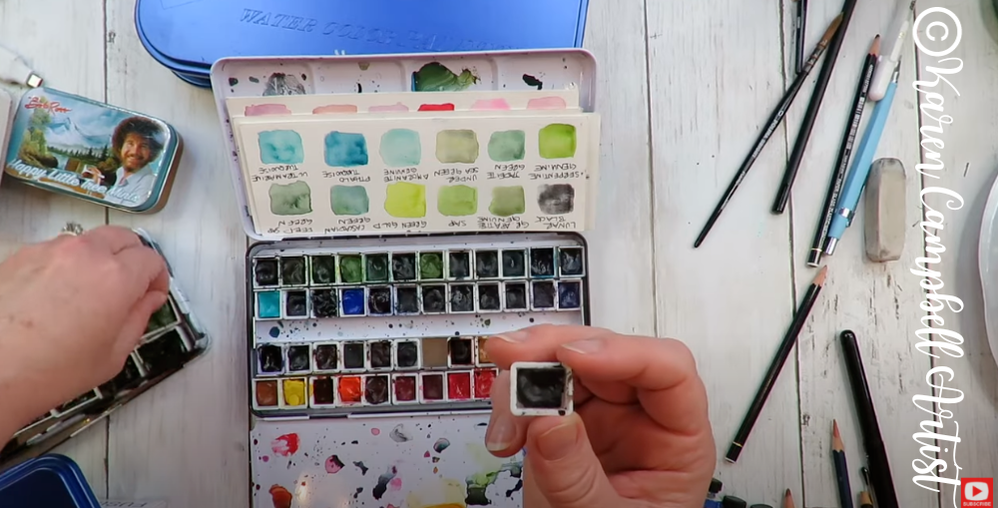
Enter, the watercolor palette solution!
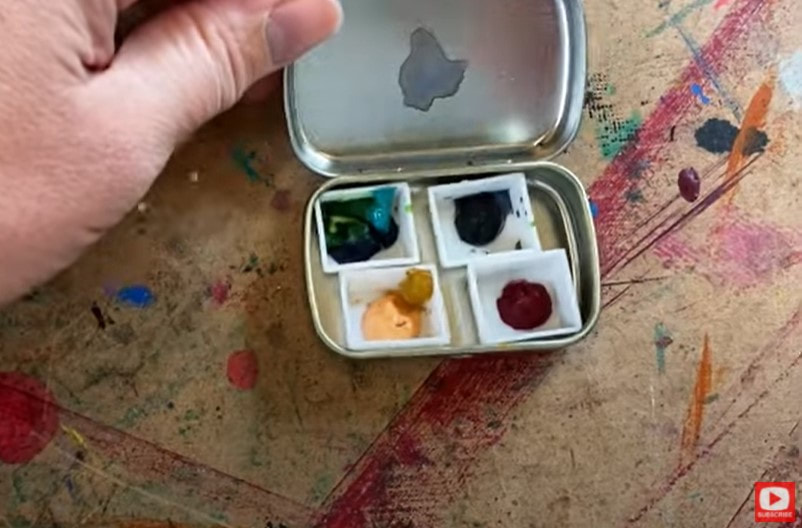
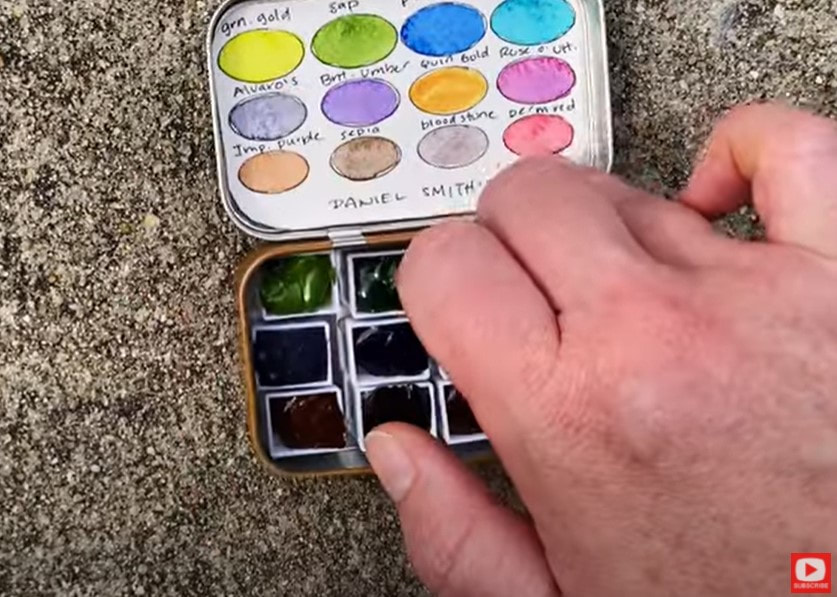
As you'll see in today's video, I've tried a number of palettes over the years. The one pictured above started out as an empty watercolor tin with no little squares of color (these are called half pans). I purchased the little half pans separately, then squeezed my colors into each pan and snapped them into place. Cool, right!? This is an awesome way to store your colors and is very portable. You can use them at home or take them on the go like this. An empty watercolor tin like the one above doesn't come with a swatch card for colors, so you have to get a little creative to make one of your own. Click over to watch the video to see these ideas in action. 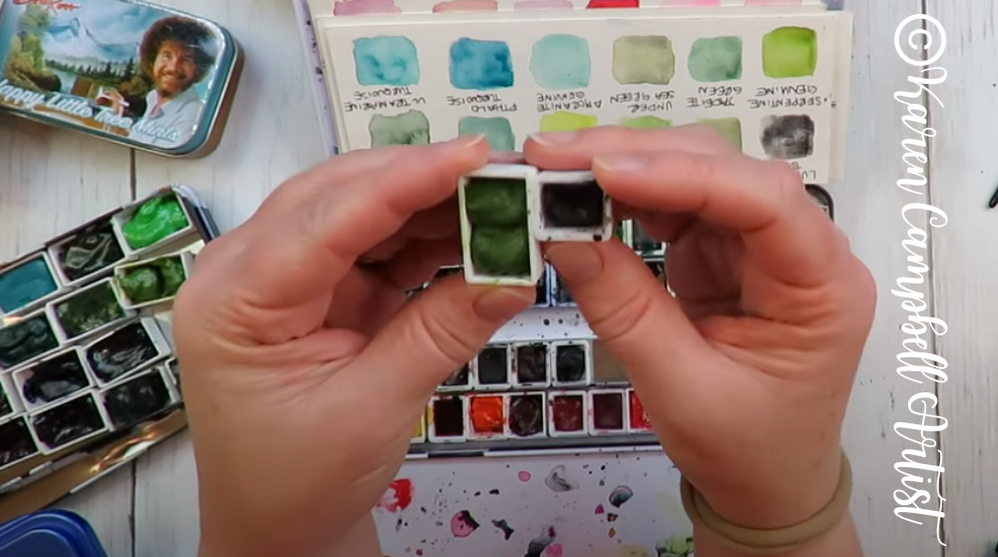
I've also made a few palettes using full pans of watercolor, like the one shown above, left. A full pan is exactly what it sounds like, double the size of the half pan.
As you'll see in the video, I've tried everything from hot glue to magnets over the years to get my little pans to stick to the watercolor tin. They've all worked ok, but not amazingly well. That brings me to my FAVORITE way to store watercolors!! An empty palette with built-in wells. I've actually purchased at least four of these Mijello Airtight watercolor Fusion 18-well watercolor palettes because I love them SO much!! 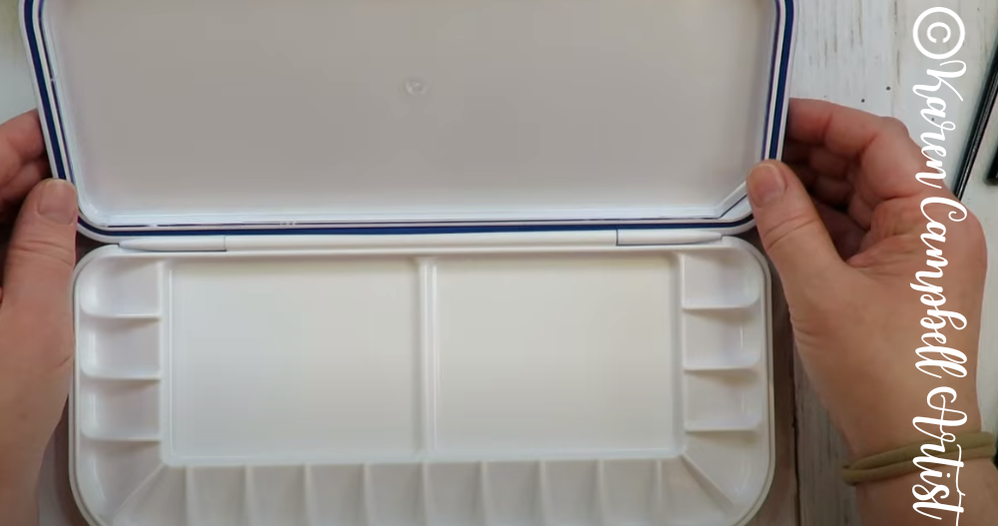
Cool, right?! Now I don't have to worry about my full or half pans sliding around or coming loose from the tin anymore! Perfect solution, right?!
I also love watercolor wells in a palette because they honestly hold more color than a half pan, but aren't quite the size of a full pan. The way the mixing trays have been arranged in this particular palette above, also makes it very accessible for my larger watercolor brushes! Another essential for me :) One more little bonus with this palette, I can create my own swatch card and store it neatly behind the removable, plastic mixing tray that snaps into the top cover of this set. Awesome, right?! 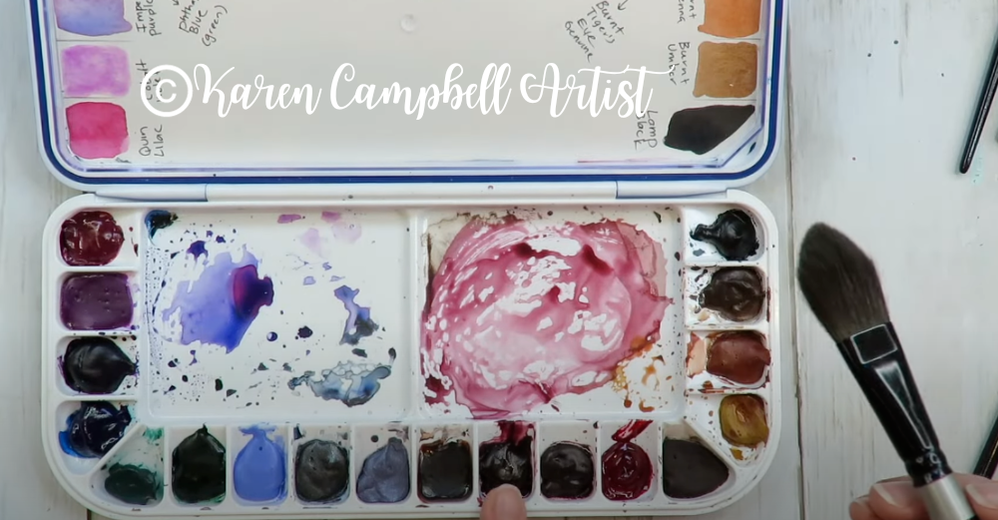
I hope you find today's video helpful for considering your own watercolor storage options at home! Thanks for hanging out with me today!! Make sure you stick around to the end to see this Spiderwick Fairy come to life for my fantasy art club membership called the Celtic Collective! 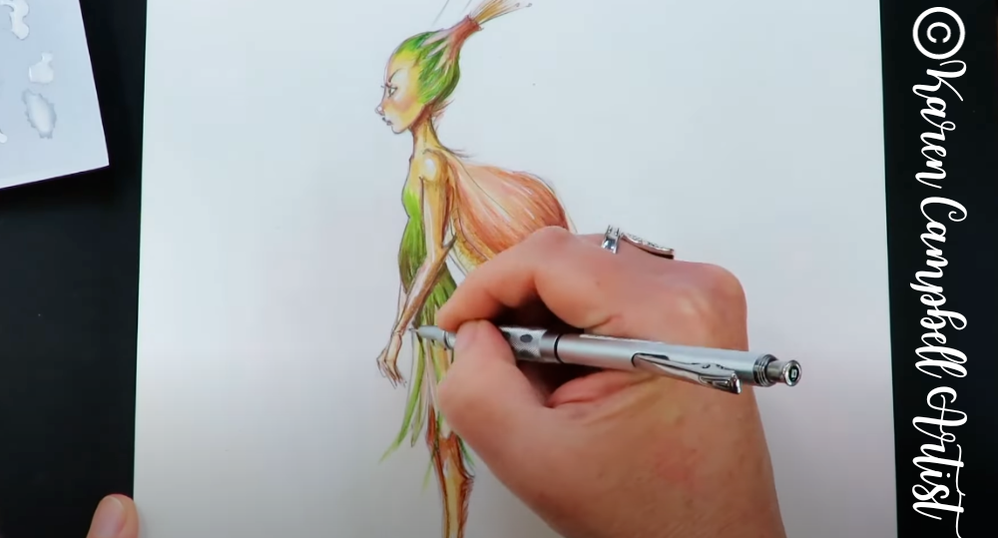
Love How I Added Colored Pencil OVER My Watercolors?
Me toooooo!! Did you know the addition of that ONE super simple art supply makes this a piece of mixed media art?! So cool, right?!
Mixed media art doesn't always have to mean doing collage and using tons of art supplies. Sometimes it's just a combination of a few art supplies. ?♀️Wondering what other art supplies go well together like watercolors and colored pencils? You need my FREE HOT DOG PACKET! Say wha????! It's a free 32-page PDF filled with tried-and-true mixed media art supply combos (4 supplies or less!) that my artsy friends and I have come up with together. Even better, I've got a WHOLE YouTube series all about it. Also for FREE! Simply click the button below, and I'll send it straight to your inbox! 
What to Watch Next
Watercolors also come in ready-to-use pans or half pans like the adorable sets by Prima that I've been reviewing on YouTube lately. Check out this playlist to learn more about them and which ones I love most!

What's the Celtic Collective?
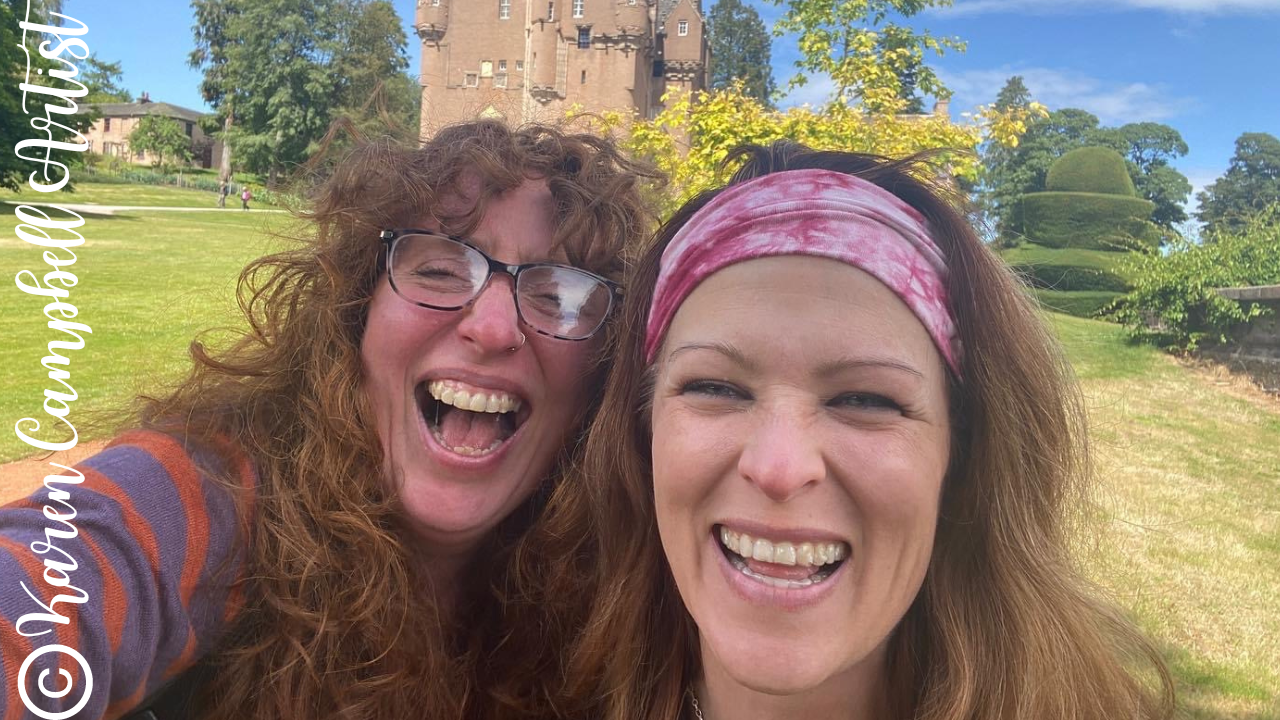
The Celtic Collective is an online fantasy art themed membership that I co-host with my Scottish bestie, Lucy Brydon, over at Awesome Art School! We have an absolute blast together creating beautiful lessons of mermaids, fairies, castles, unicorns, and SO much more for our students.
Want a sneak peek at ALL the projects inside the club?! Check out our Visual Index to see what we've been up to :)

Need More Resources?
❤️ CHECK OUT ALL my art books on AMAZON
❤️ MY FAVORITE ART SUPPLIES on AMAZON (affiliate links) ❤️ MY BELOVED FACEBOOK GROUP
0 Comments
Today I'm showing you how EASY it is to set up a travel watercolor palette from scratch! All you need is a small metal tin (an empty altoids or mints tin works great!), some watercolor tubes, watercolor half pans, an adhesive magnet roll or glue gun, a sheet of watercolor paper ... and you're good to go!
Before we continue - super quick announcement! All product links below are Affiliate. I may earn a small commission if you choose to order through these links but by law there is never any additional cost to the consumer for doing so. I thank you for your support! 
Watercolors are one of the easiest art supplies to travel with because they don't take up much room. If you make your own diy watercolor paint palette - YOU get to choose how many colors to include and how big the palette is.
Today I'm choosing my tin first. I've got a number of random ones in my stash on hand that I've purchased at my local craft stores or other shops when I've been out and about. You can often find cute, empty tins for $1, sometimes less! I also found this little set of tins on Amazon in case you're interested. 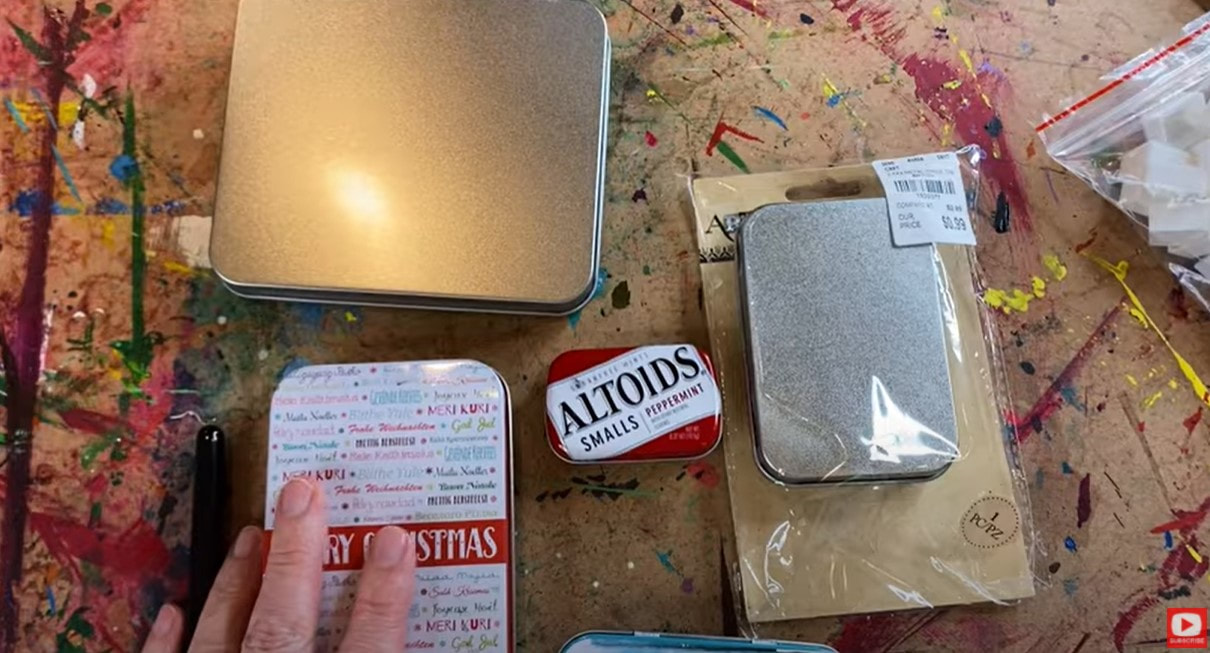
One of my favorite ways to travel with only a few watercolors is to create an altoids watercolor palette! It's so compact - you can pop it into any bag and bring along 3-4 of your favorite colors. These make the cutest little gifts!!
All you need to do this is an empty Altoids tin and a few empty watercolor half pans (shown below).
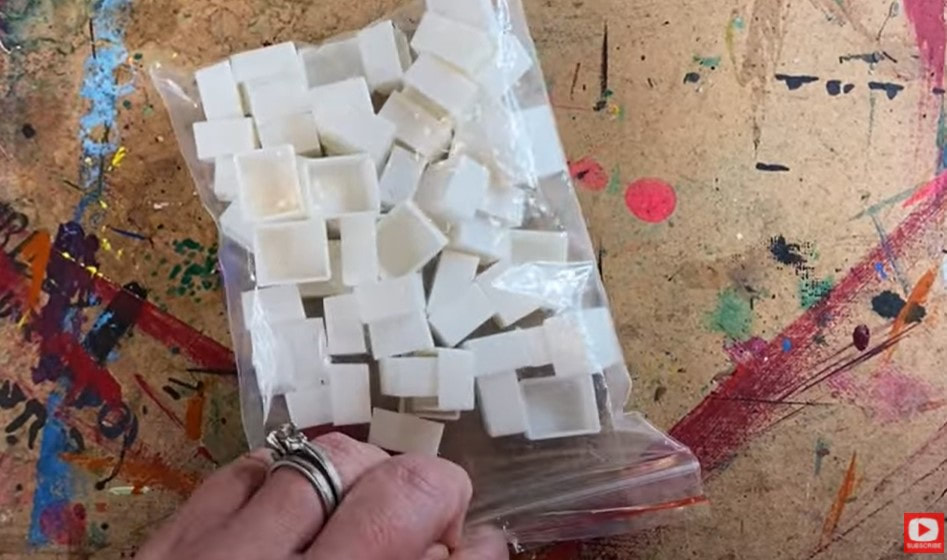
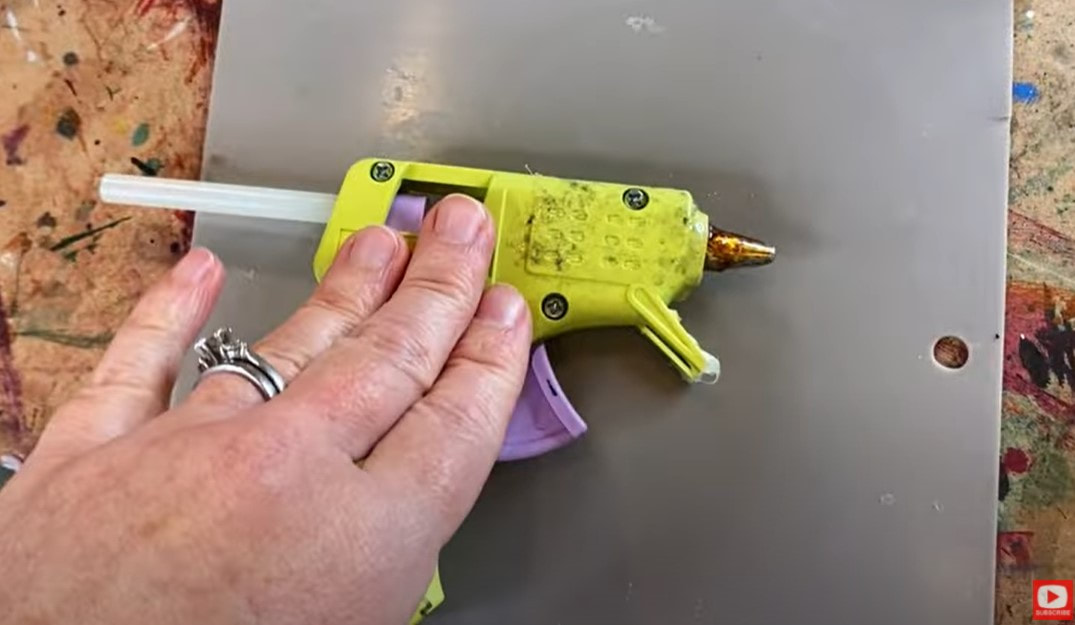
Next you need to decide how you want to affix your half pans into your tin! My two favorite ways to do this are to either cut off a snippet of adhesive magnet tape, or to hot glue each half pan into the tin.
Be sure to click over to the video to SEE how I'm doing this! I've found using magnets is a great way to give yourself some flexibility in case you want to change your colors out from one trip to another. For example- if I'm headed to Scotland I know I'll want a variety of greens, grays, purples, light blues and golden shades to paint fairies, florals, landscapes and castles! If I were headed to the beach- I might trade out a lot of my greens for a wider variety of blues, and I may add in more colors to paint sunrises or sunsets - depending on what I'm in the mood to capture! If trading out the colors of your travel paint palette sounds like something you want to do - definitely use the adhesive magnetic tape. I actually found 50 half pans on Amazon with magnetic strips already attached for only $6! Next, we need to select which watercolors to include in your palette. Honestly- this is probably the hardest part! The struggle is REAL as I start pulling out my watercolor tubes and comparing them. 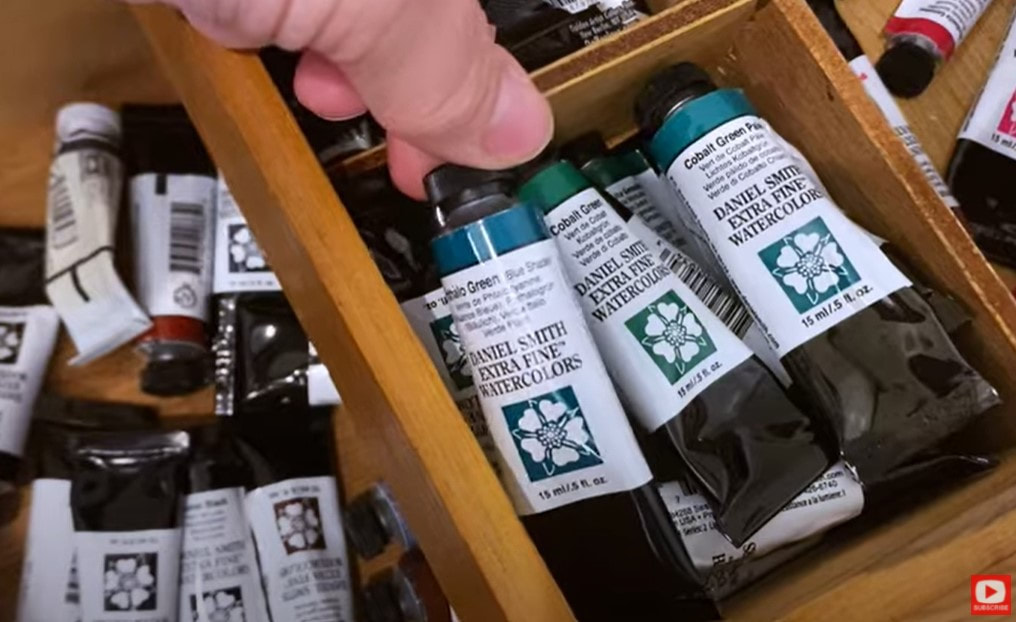
If you're having a tough time choosing from the tubes and only have room to include a few - do a little swatching to compare the shades and help you narrow things down.

Once you decide which colors you want to include (I only have space for 12 today), simply squirt a little paint from each watercolor tube into your half pans and let them dry overnight.
If you want to know exactly which colors I selected, scroll down to the bottom of this post or click over to the video and check out the description box. 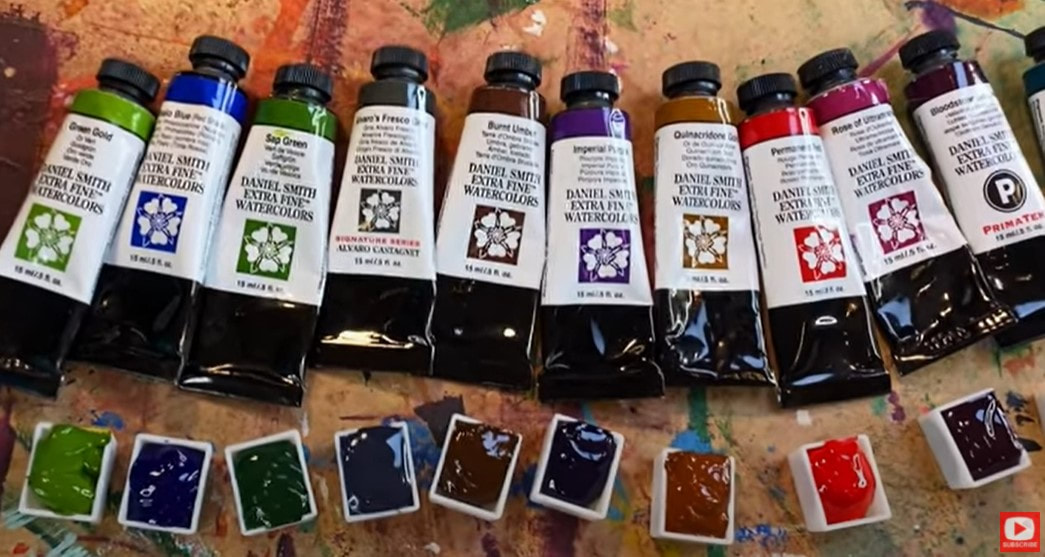
Since the watercolor half pans I'm using actually had some raised writing on the bottom, my adhesive magnet wouldn't stick so I needed to use hot glue to get them to stay in my tin.
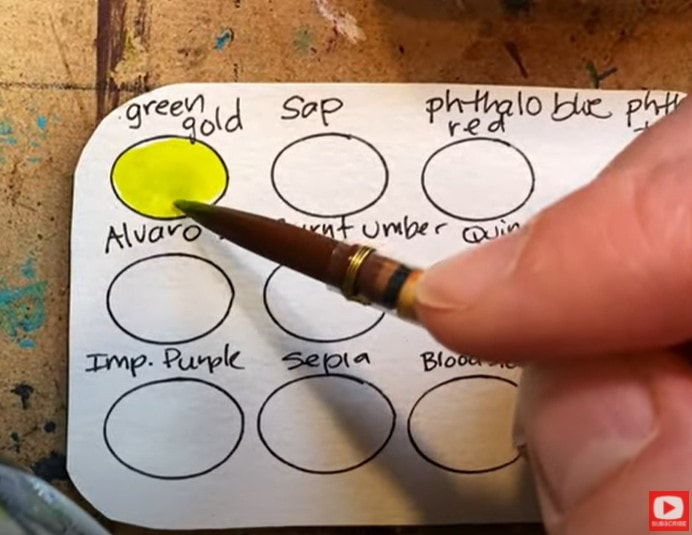
After all of my half pans were in position in my tin, I cut out a piece of watercolor paper to fit inside my tin, and traced some ovals on the sheet with this template. Then I added a touch of watercolor to each half pan and labeled what color each oval was (so future me knows which watercolor tube to pull out later when it's time to refill my half pans). Easy!!
When my swatches were finished, I brought my swatch card outside and sprayed it with a touch of Mod Podge Clear Acrylic Sealer (in matte).
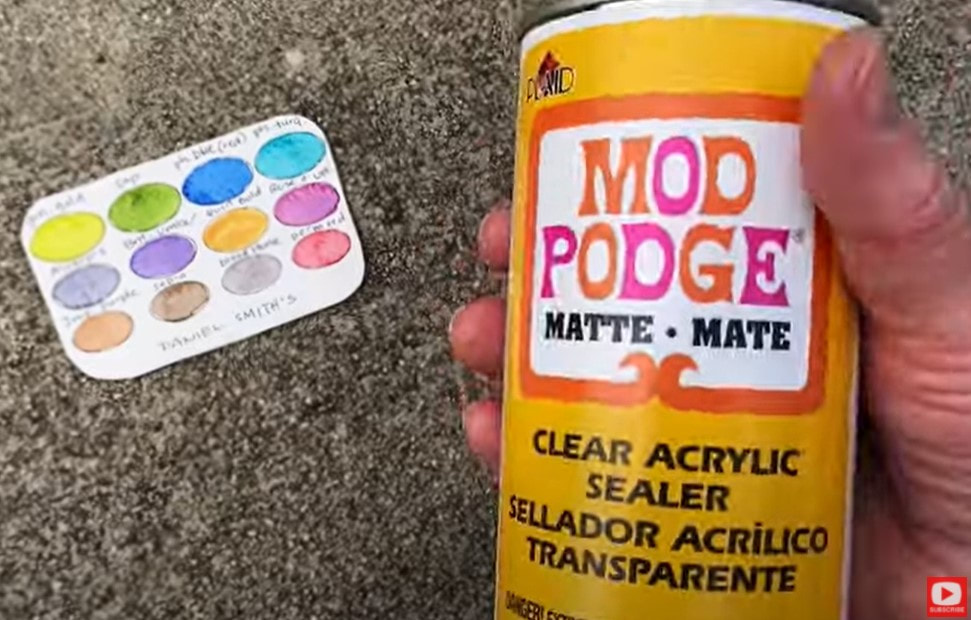
I've found this stuff to be amazing because it doesn't re-activate the watercolor I've already put down, and it's fantastic for when I'm actually watercoloring later because that little card is protected. If I spill water or a drop of paint on top - it TOTALLY wipes off!
Click over to the video to see how EASY this is!! If you have a laminator- that would be a great choice too, and you can totally skip the mod podge spray. 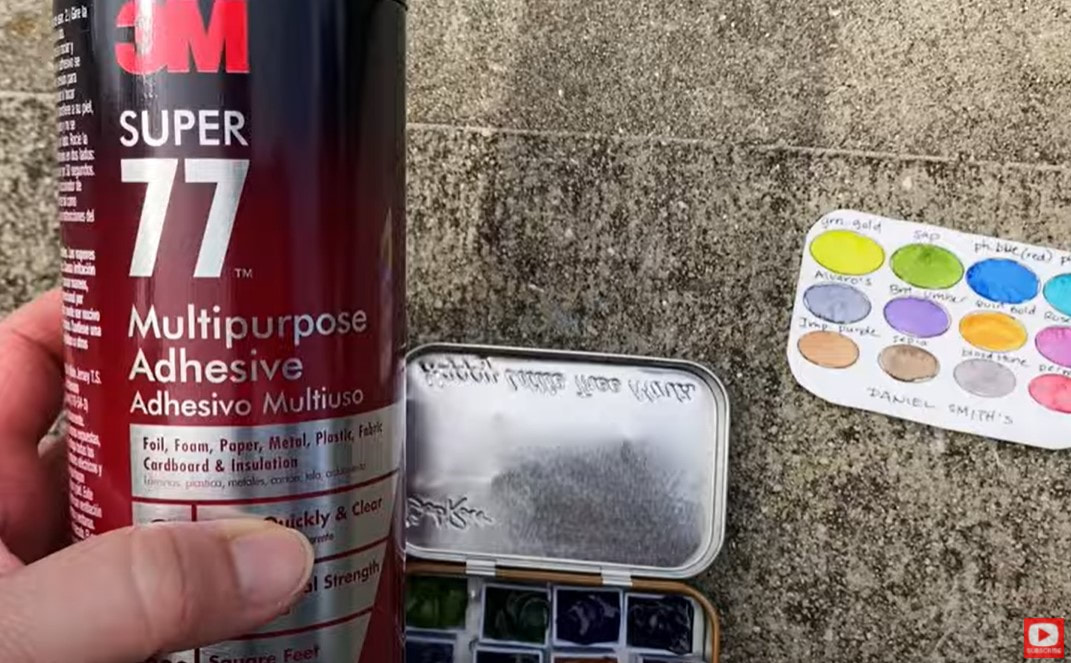
Once my mod podge sealer was dry, (or your swatch card has been laminated), I flipped my card over to spray some multipurpose adhesive on the back. This way I can pop that card into the lid of my tin, glue it in place, and not worry about it falling out! (Trust me - this step is SO helpful becuase those little cards ALWAYS fall out!!)
SO EASY, right?! These cute travel watercolor palettes make excellent gifts and are also a good way to split the cost on more expensive watercolor tubes (like Daniel Smith!), if you have a creative friend who wants to share a few tubes together!
If you're interested in building your own Daniel Smith watercolor collection - I've got a video on that to help you. I know these are super expensive and it can be so hard to decide which colors to get. They're all gorgeous and there's no wrong answer, but check this video out for a few pro tips before ya buy!! Need a list of the colors I added to my travel watercolor palette today? Here ya go!!
Thanks for hanging out with me today! See ya back here next week!
❤️MY ARTIST BESTIE, LUCY BRYDON & I created a NEW ART MEMBERSHIP together called The Celtic Collective! It's now open for enrollment! Join us before the price increases on August 7. 
There are SO many watercolor supplies on the market today! It can feel totally overwhelming if you're a beginner thinking about trying watercolors for the first time, or someone who wants to invest in a special watercolor palette, and no idea where to start! Which watercolor brand should you buy? If you have a limited budget - which colors should you start with? Today's YouTube video on my mixed media channel is all about what I WISH someone had shared with me before I started building my first watercolor collection!  I'm in LOVE with a watercolor brand called Daniel Smith. If you're new to Daniel Smith watercolors, these tubes are pricey, but if you want to try watercolor, I recommend cutting through the cluter on the shelves at your craft store and choosing something that will give you a quality experience from the very beginning. You can absolutely try something cheaper that gives you more colors for less money, but I guarantee you'll go back to the store looking for something better in time, and you'll spend MORE on trial and error with your supplies than if you had selected one or two shades of Daniel Smith watercolors to play with from the start. 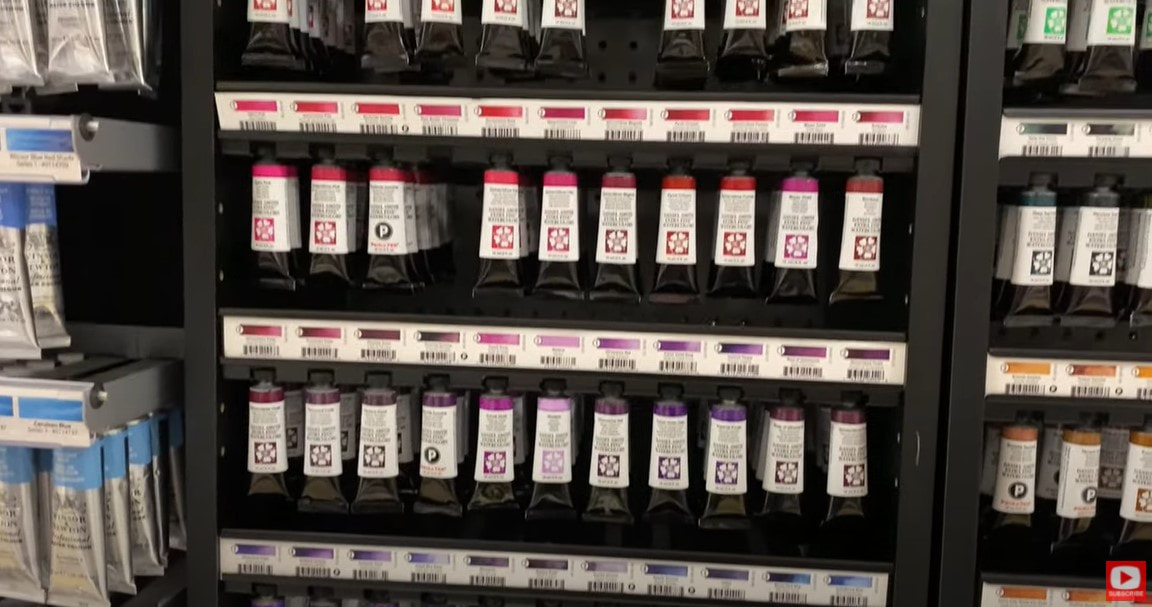 To me, there is just something magical about how Daniel Smith watercolors look when you put them on paper. They have some GORGEOUS granulation properties in them that make me feel like I'm working with raw elements directly from the earth when I paint!! 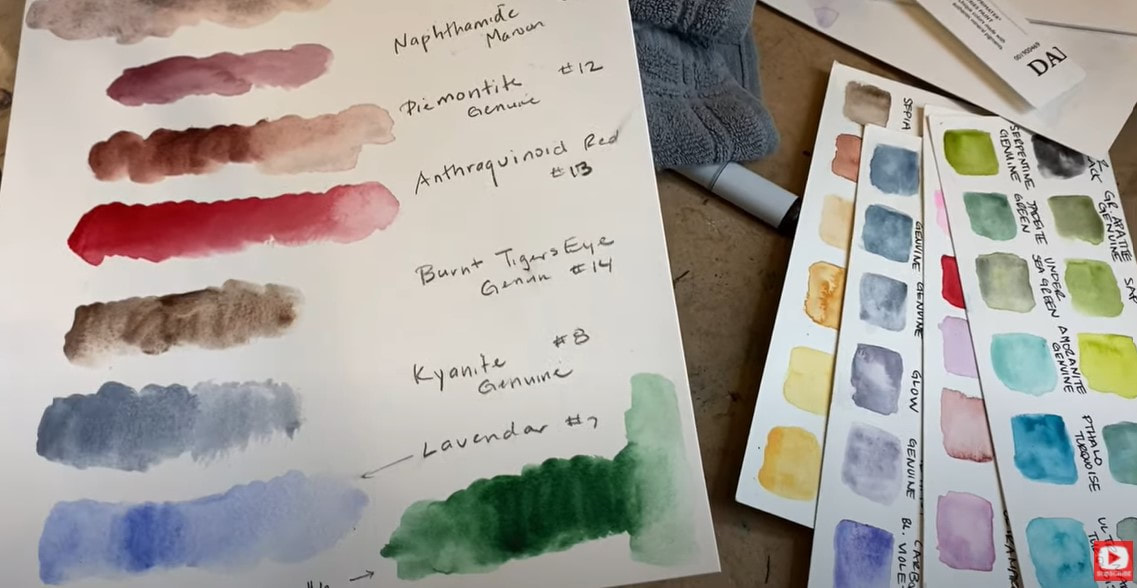 In today's YouTube video I'm showing you EXACTLY how to build your first Daniel Smith watercolor palette! A watercolor palette is simply a case to hold a collection of colors. Many brands carry sets of prefilled palettes, but typically I prefer to create my own. Before we continue, super quick announcement: All product links are Affiliate. I may earn a small commission if you choose to order through these links, but by law there is never any additional cost to the consumer for doing so. I thank you for your support!! 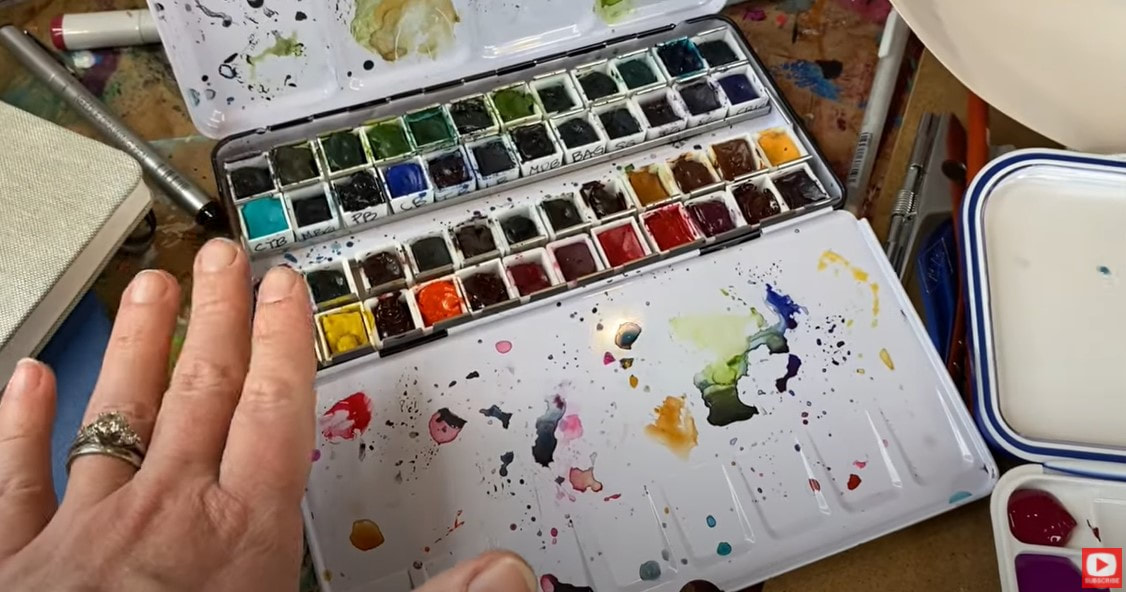 There are multiple ways to go about making your own palette. The one above contains tiny, removeable squares called half pans. I buy them empty so I can squeeze my favorite colors into them and create an entire palette of beautiful options to paint with. Alternatively, you can select a watercolor palette that has indentations or little wells in it - like the one shown below- to hold your colors. You choose whichever style you like best to work with! 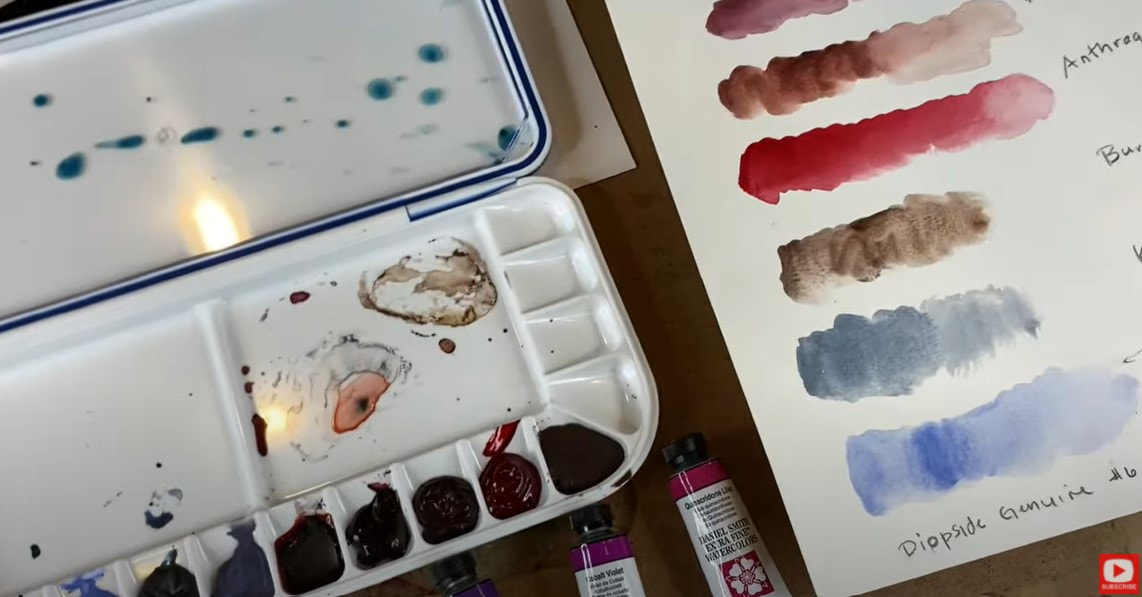 As you'll see- when you squeeze watercolor tubes onto your own palette- the paints look much darker here than they do when you add water to them and put them on paper! Because of this- it's SUPER EASY to wet your brush and think you're dipping into black, when it's actually indigo, green or purple!! To help yourself remember which colors live where in your palette, you'll want to create a little "key" for yourself. This is called color swatching. You can cut out a piece of watercolor paper to fit inside your palette, or you can swatch in your watercolor sketchbook, etc. I bought this adorable, long watercolor sketchbook and have decided to use this to swatch the colors I'm dropping into a new palette with only my absolute FAVORITE Daniel Smith watercolor shades! 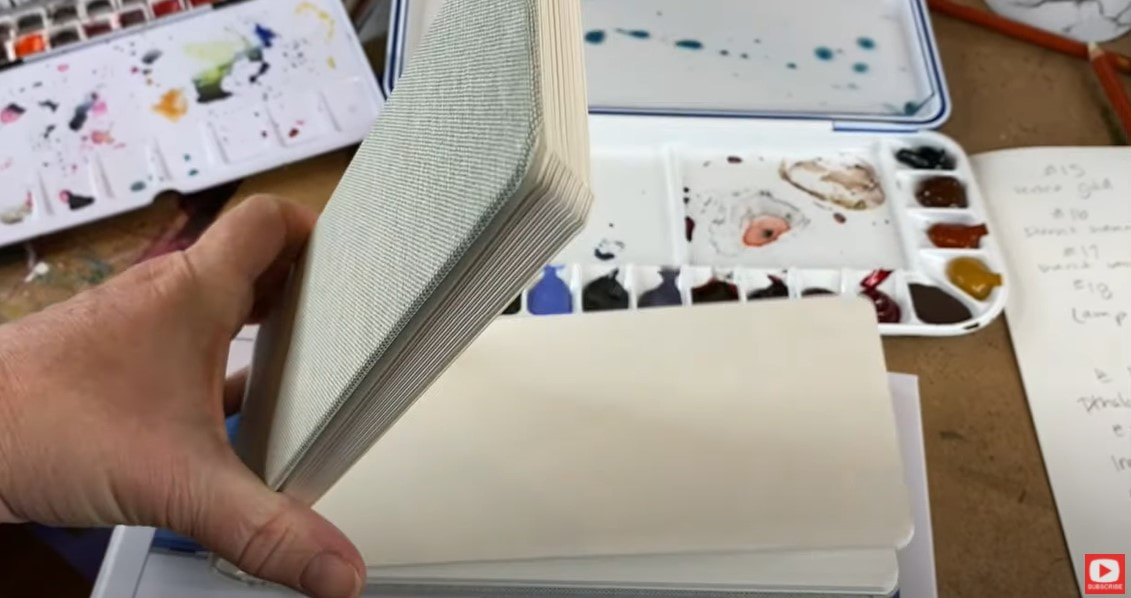 Be sure you watch the video to see just how I do this so you can replicate it at home for yourself whenever you're ready! In the video I also give you my recommendations about which colors you might want to start with if you have a limited budget or just need some ideas on where to begin!! I also love using Silver Black Velvet watercolor brushes, but if you need help selecting a watercolor brush - I've got an entire VIDEO on this subject ready and waiting FOR YOU!! 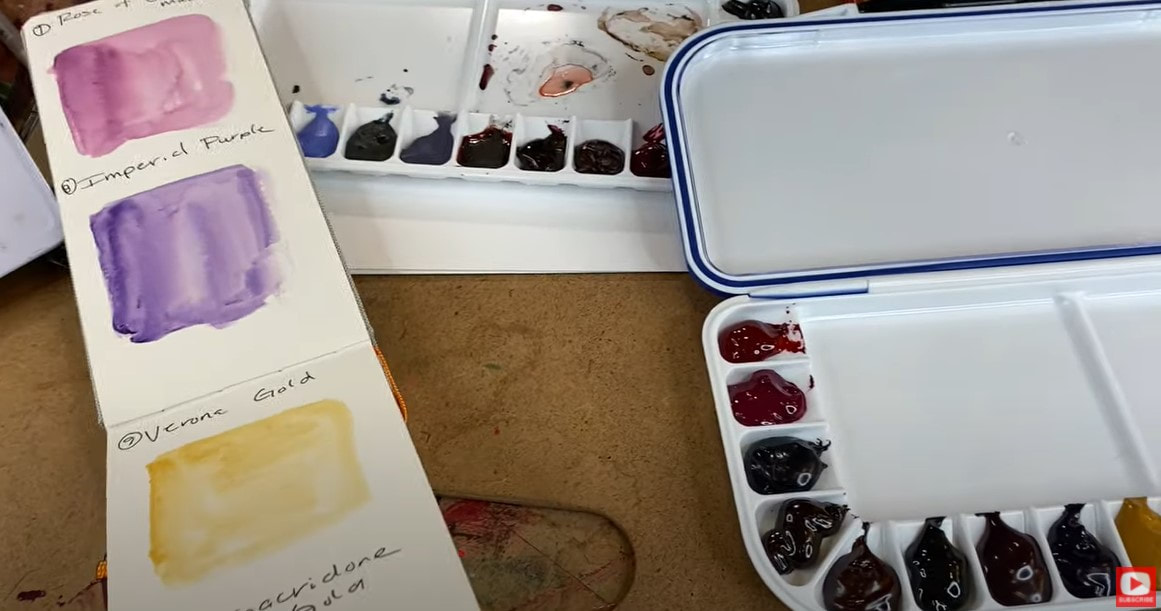 I hope you find this helpful and I can't wait to see what you create!!! I think you're going to LOVE the world of watercolor - especially if you're using Daniel Smith!! See ya back here next week!! |
Karen CampbellFounder of Awesome Art School. Mixed Media Artist. Author of 19 Instructional Art Books! 
Whose work has appeared in...
   
 Archives
July 2024
Categories
All
|
 RSS Feed

"Karen is flipping hilarious and she's very real...I like the way she teaches in a way that really gives you confidence, whether you're a beginner or advanced there's always something new to learn!"
- Elizabeth W. |
What Fans Are SayingKaren, you are absolutely fabulous! You make me feel like I can draw anything. I have recently retired and finally have the time to do some of the art that I have loved since I was in school. I am really at the beginning of my art journey and I hope to learn as much as I can. Thank you for all you do. |
Contact ME |