
|
*All product links are affiliate & for U.S. residents only.*
Hey there, creative soul! If you love drawing semi-realistic faces as much as I do, or have been looking for the PERFECT face drawing tutorial for beginners, you're in the right place!!
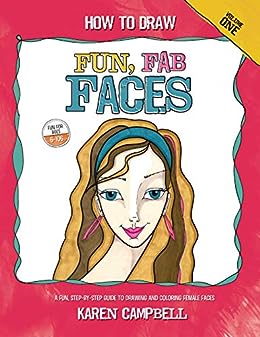
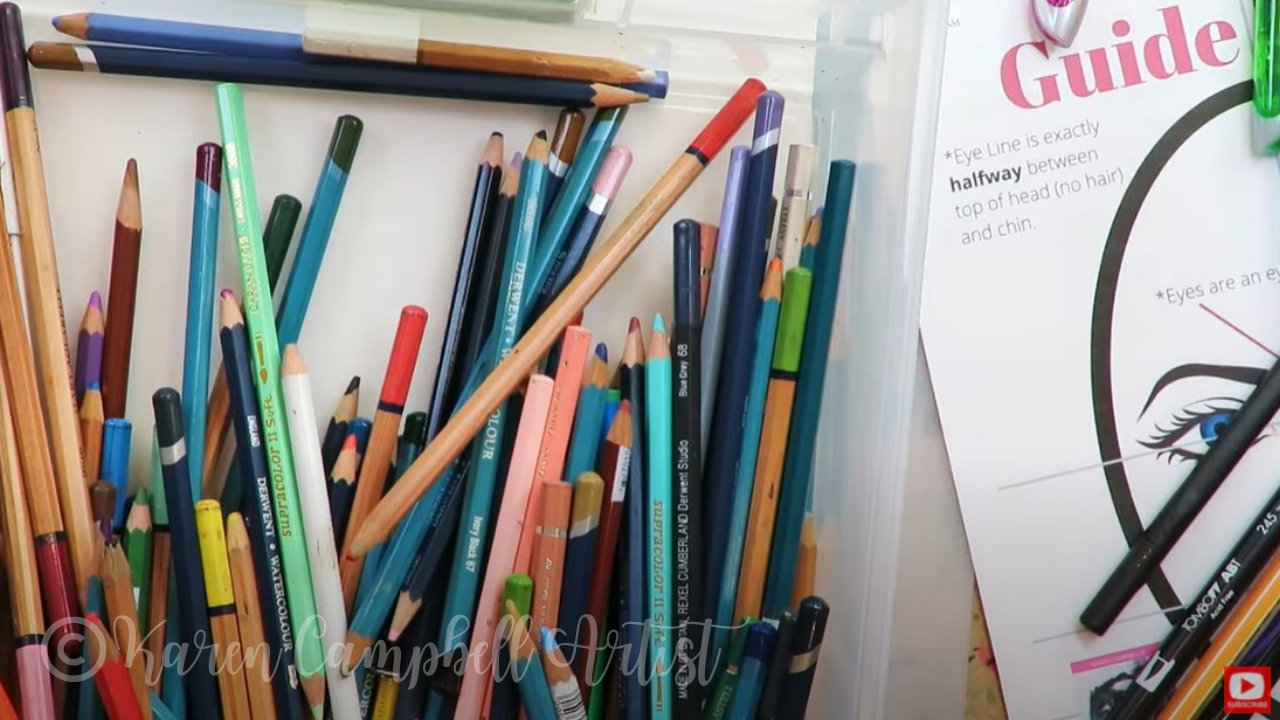
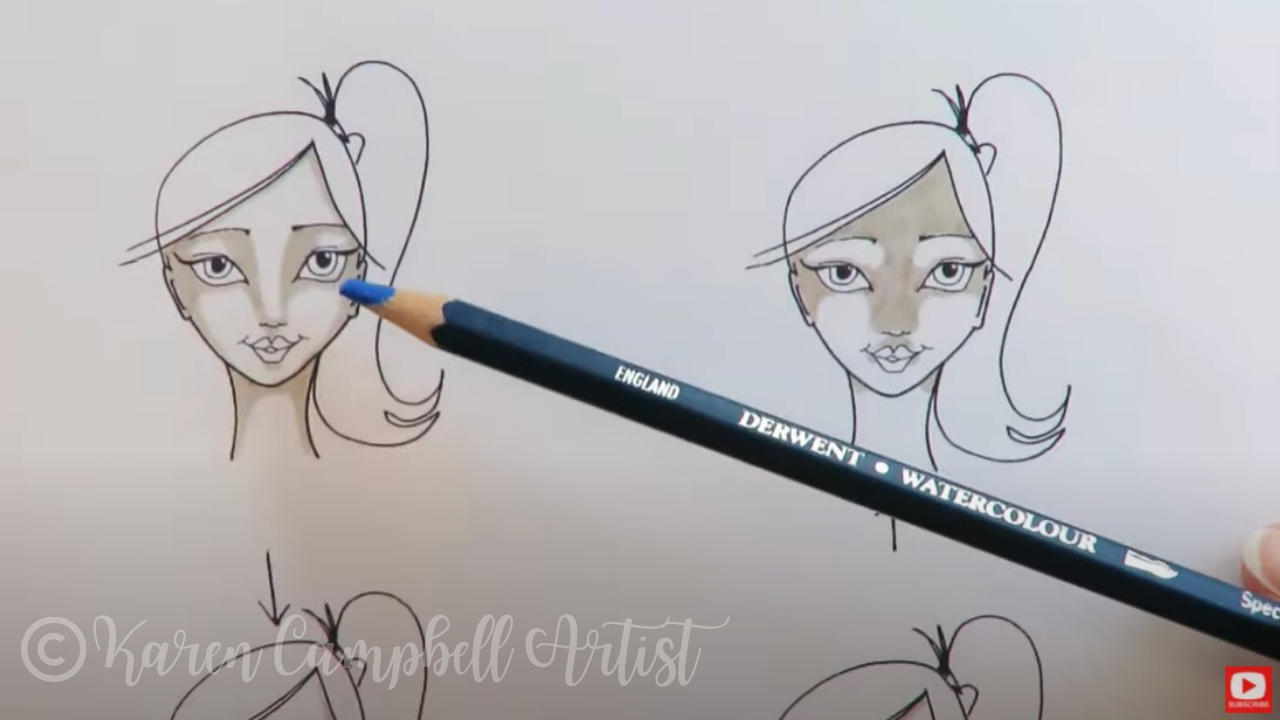
Today we're drawing another cutie in my signature "Fun, Fab style" from my very first published book, How to Draw Fun Fab Faces. In this QUICK & EASY face drawing tutorial, I'll take you step-by-step through my process of drawing a simple face in pencil using my whimsical face drawing guidelines. Last week, we did a similar drawing and colored her in with greyscale alcohol markers over on my Mixed Media YouTube channel. This time, we'll do our shading in COLOR using Tombow Markers and water. Grab the closest pencil and a sheet of watercolor paper (if you wanna color along using Tombows and water later). 
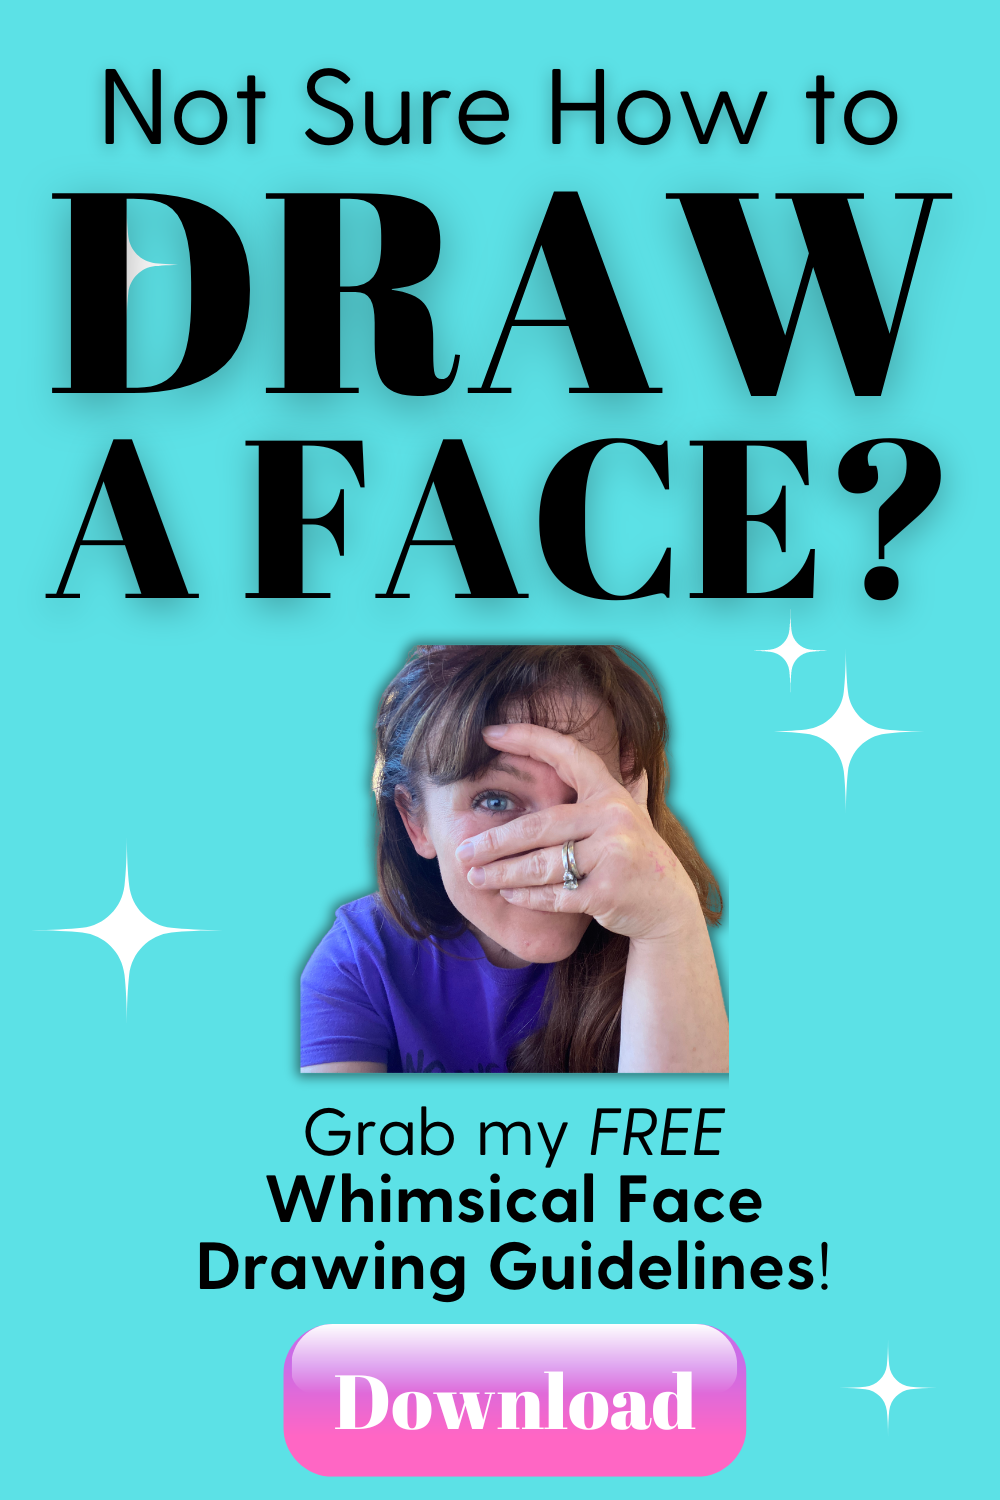
Need My FREE Face Drawing Guidelines?
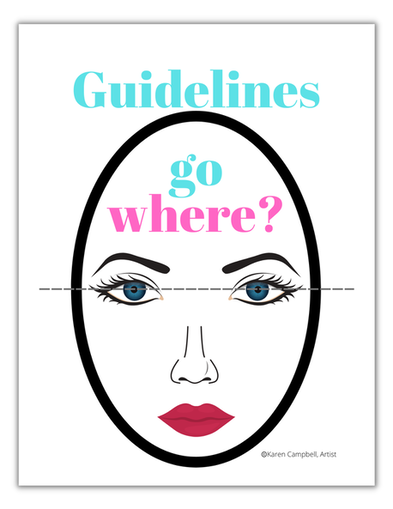
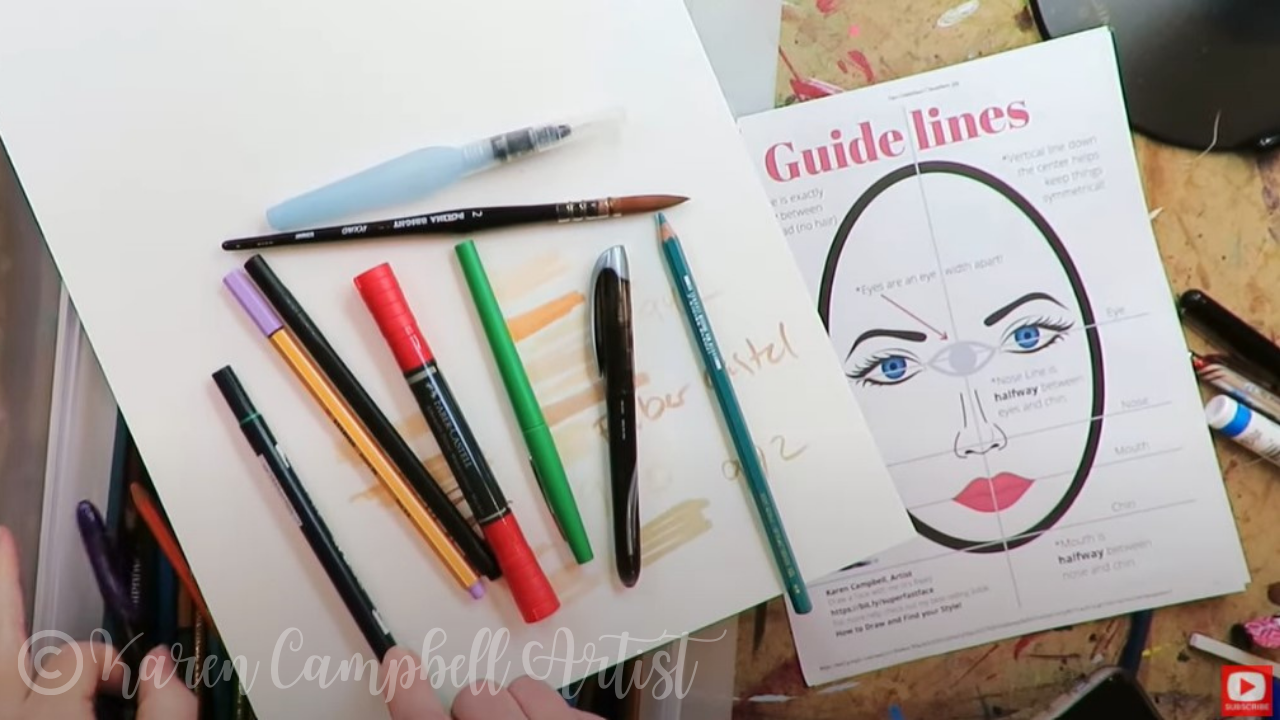
If you want to make your face drawings look MORE realistic, it's important to ALWAYS use face drawing guidelines. This will help your faces look more proportional because the facial features you draw will be in the right spots!
Grab a PDF of my FREE Face Drawing Guidelines Cheatsheet HERE, or click the button below! Then meet me right back here for the drawing tutorial. 
Already have my face drawing guidelines, butwould love a DIFFERENT FREEBIE? Grab a different one here :)
Ready to Draw? Let's Go!
Make sure you click over to the video to see the drawing process happening in action. It totally helps!
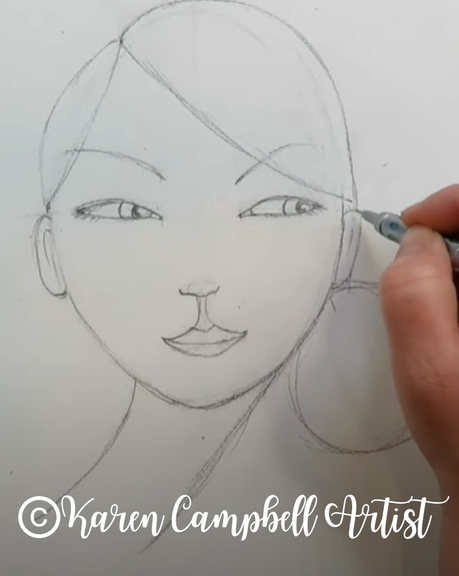
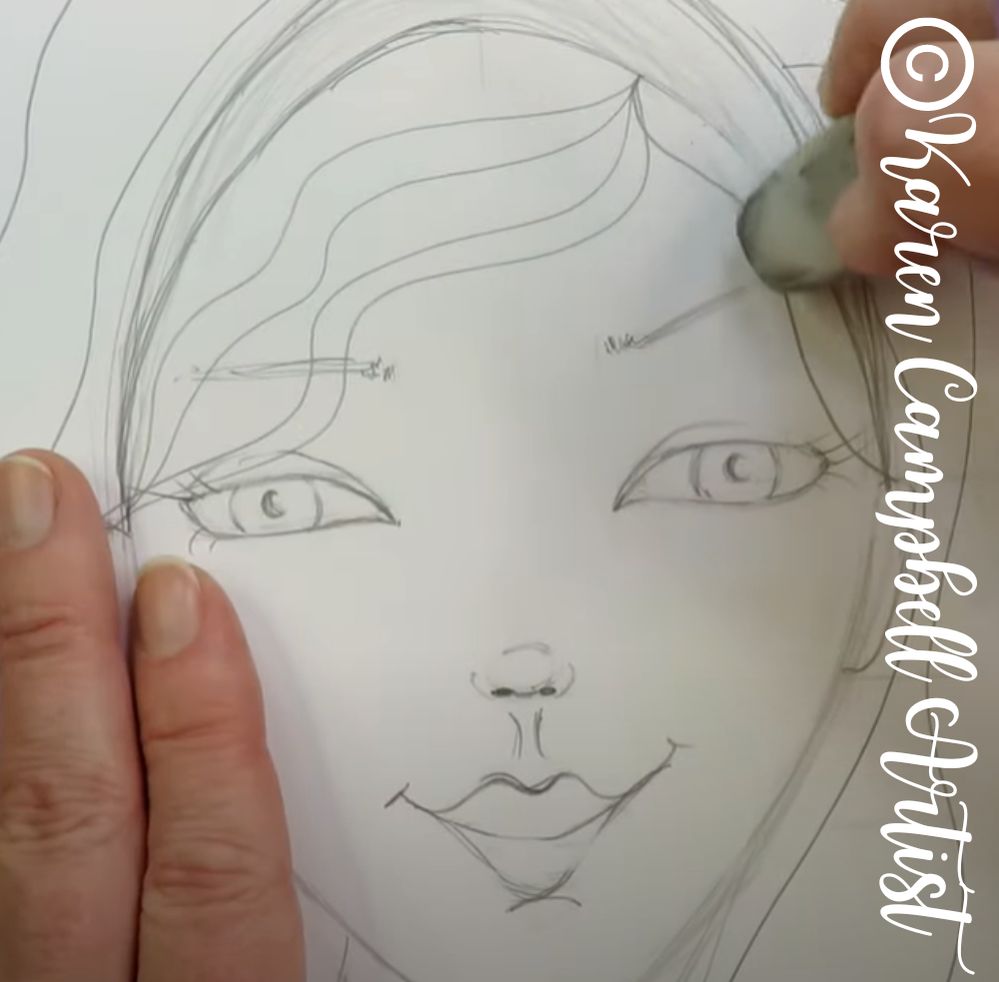
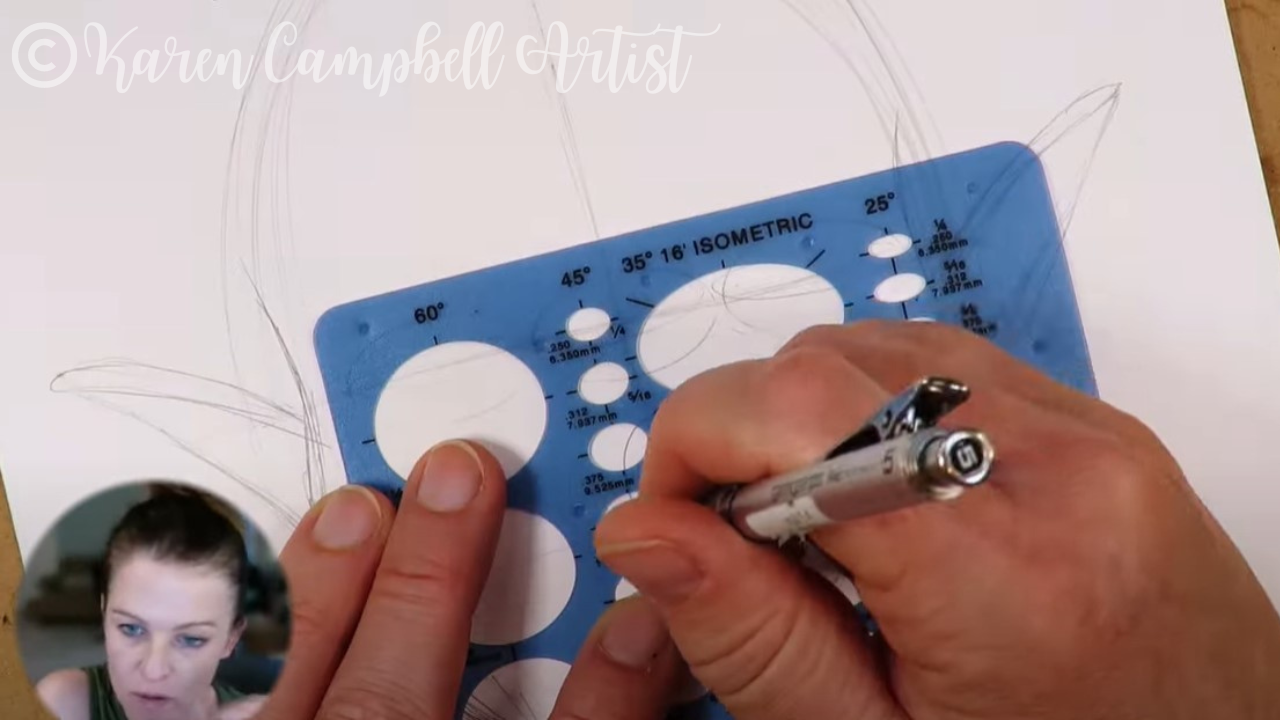
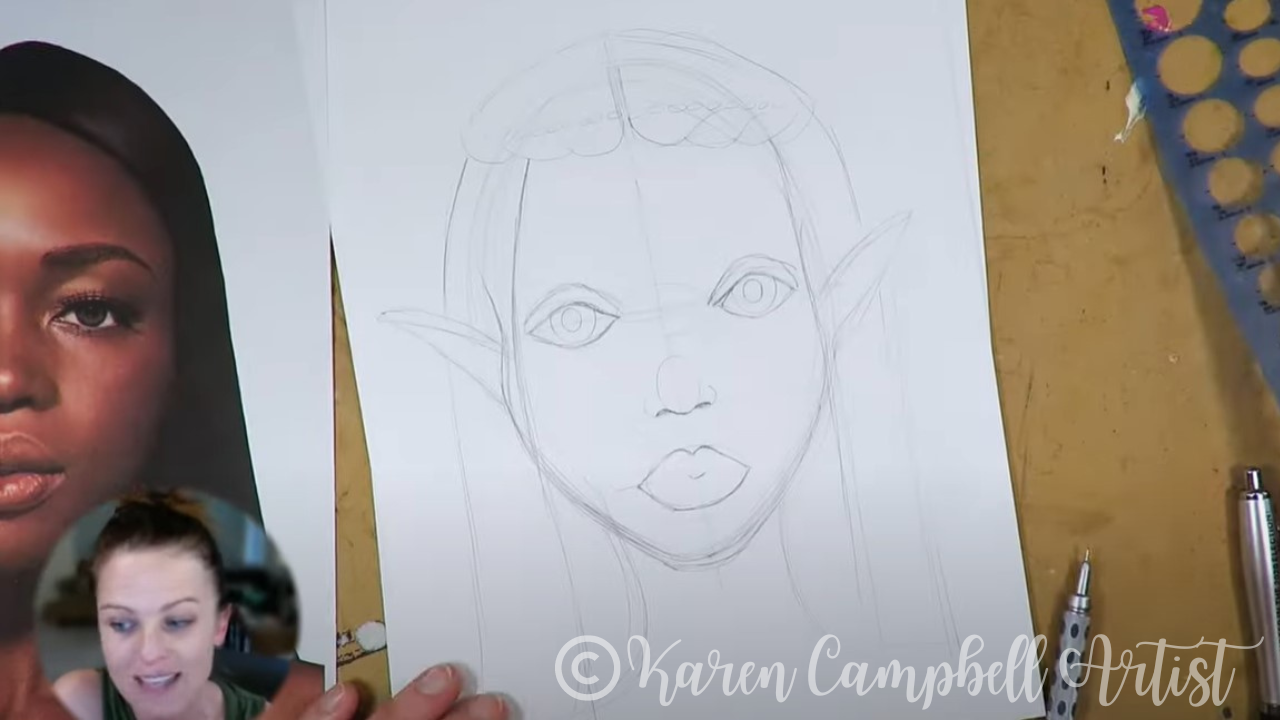
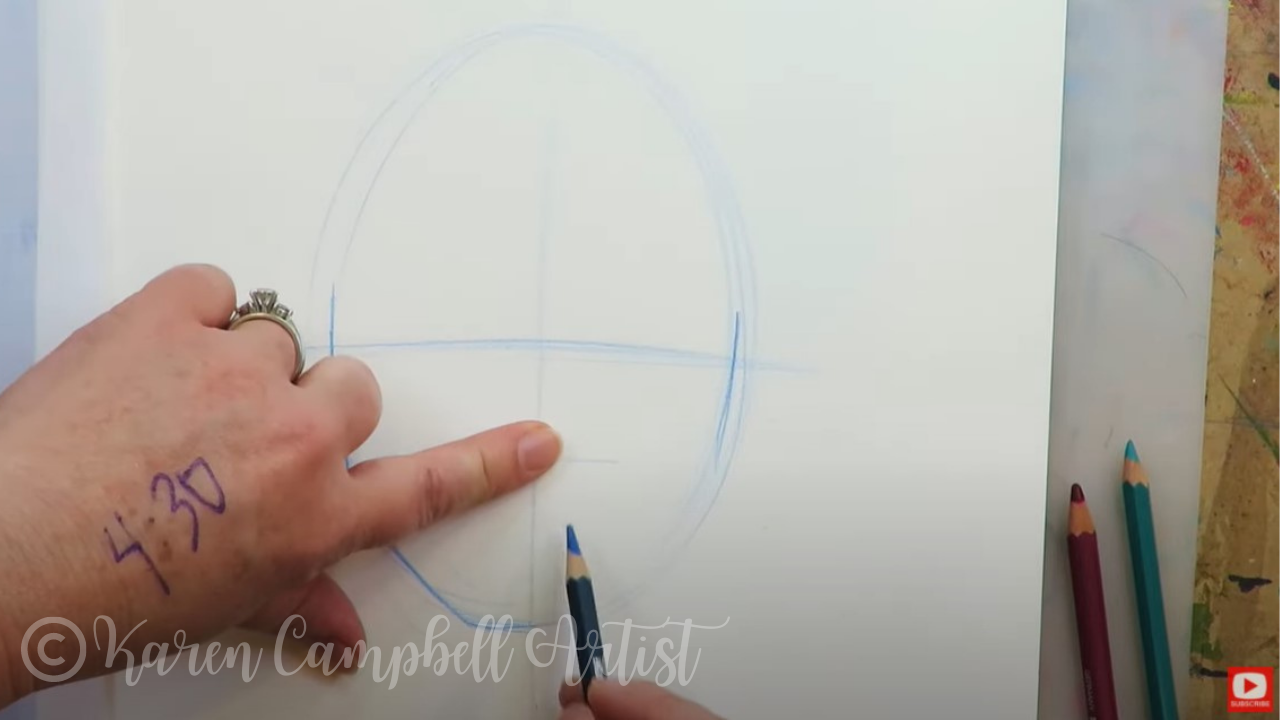
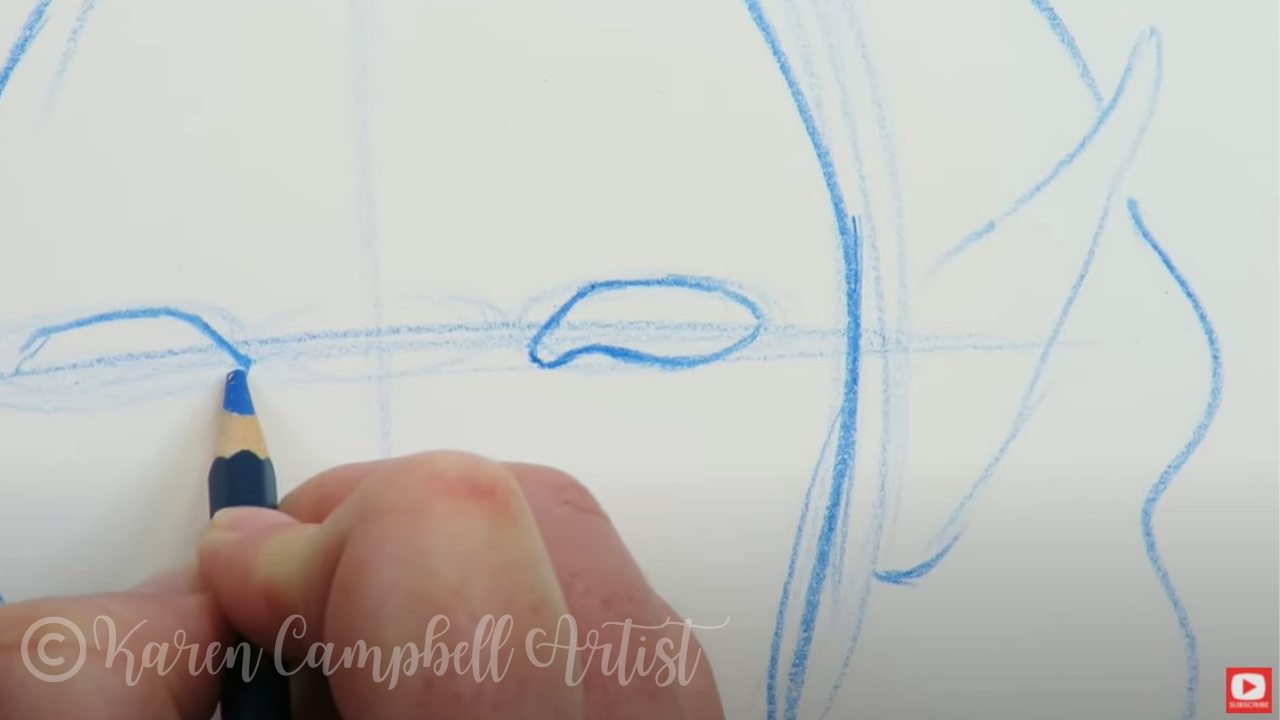
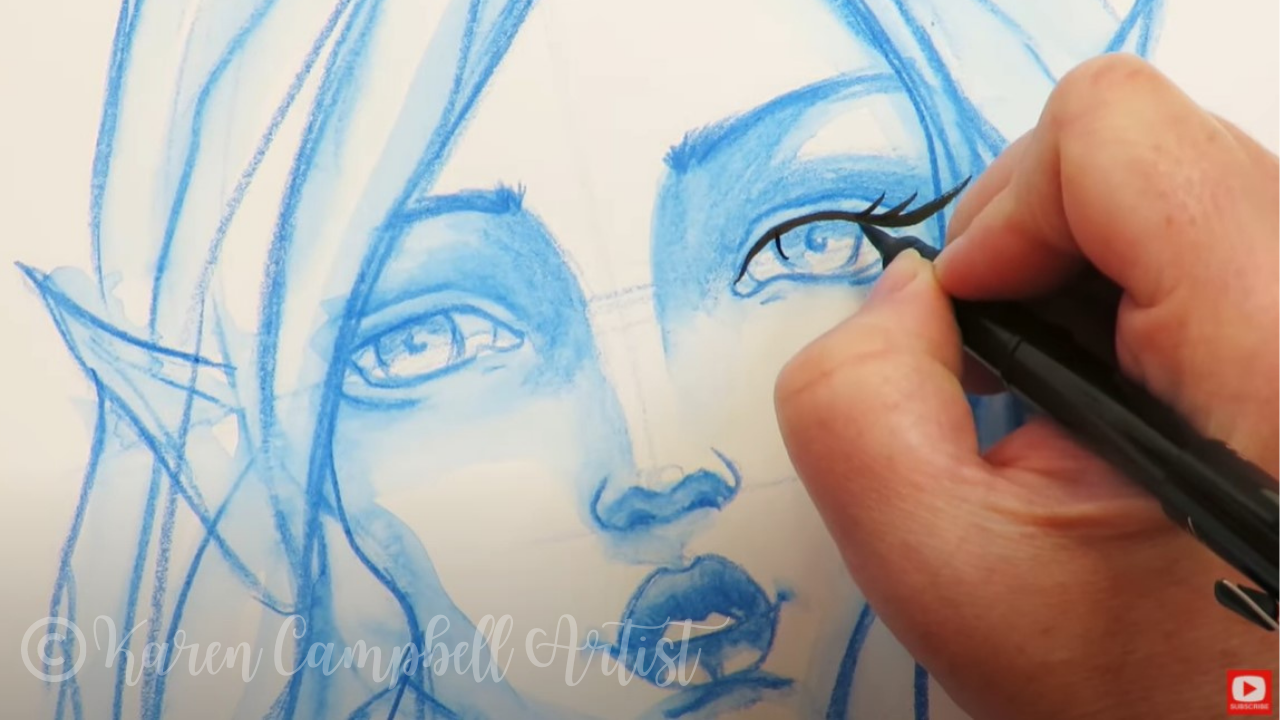
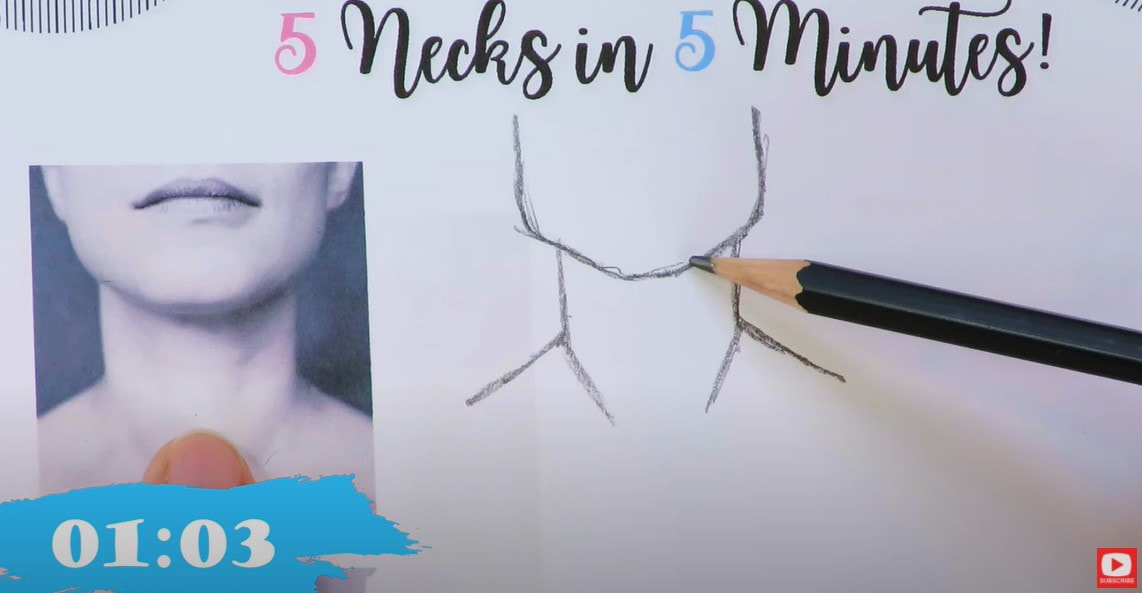
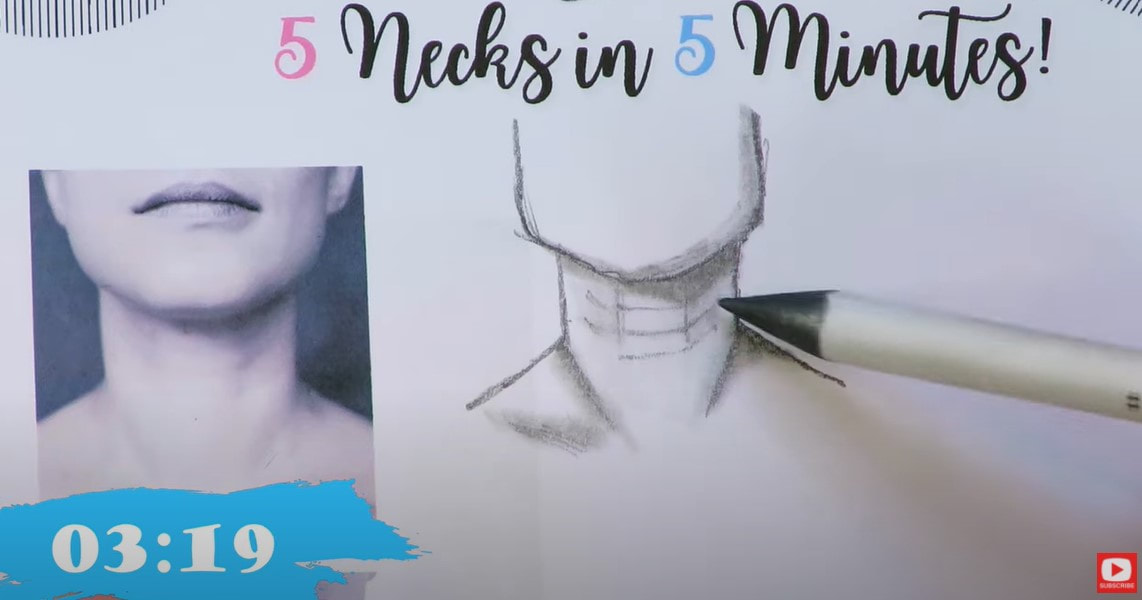
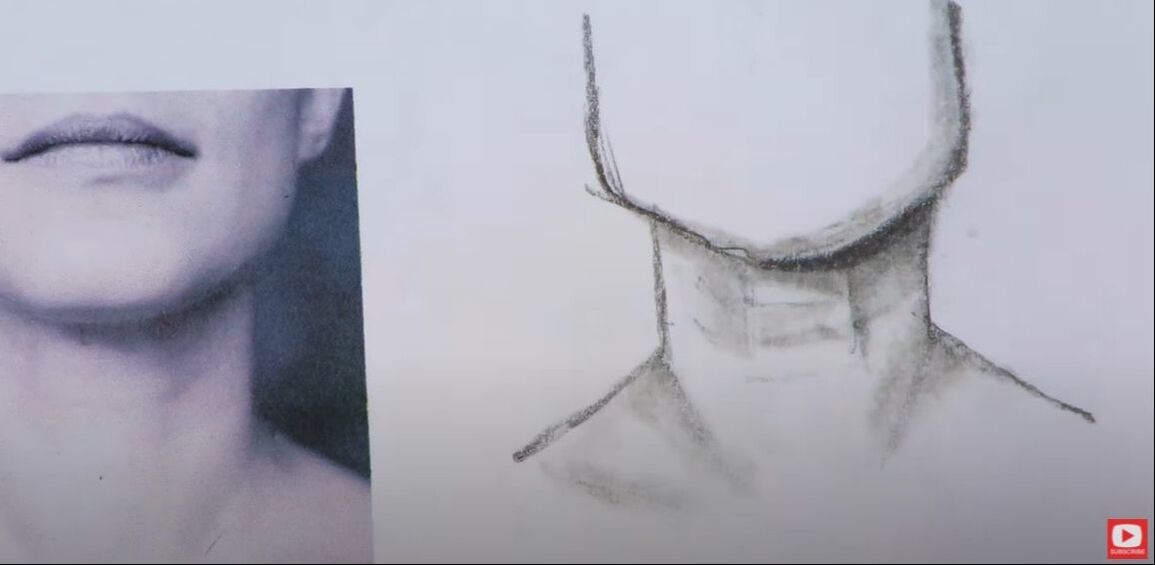
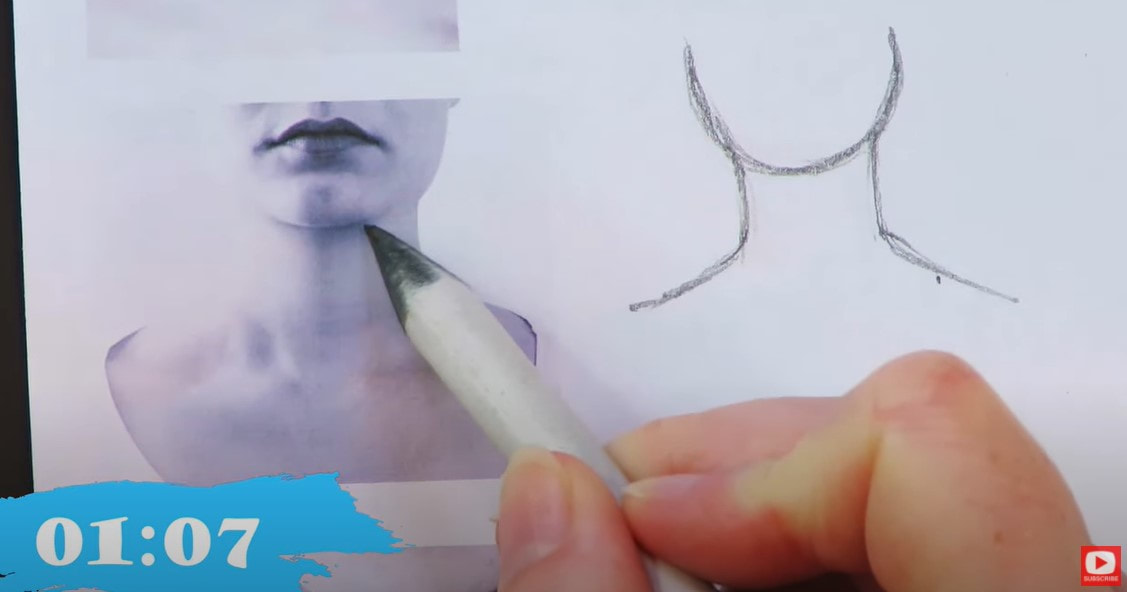
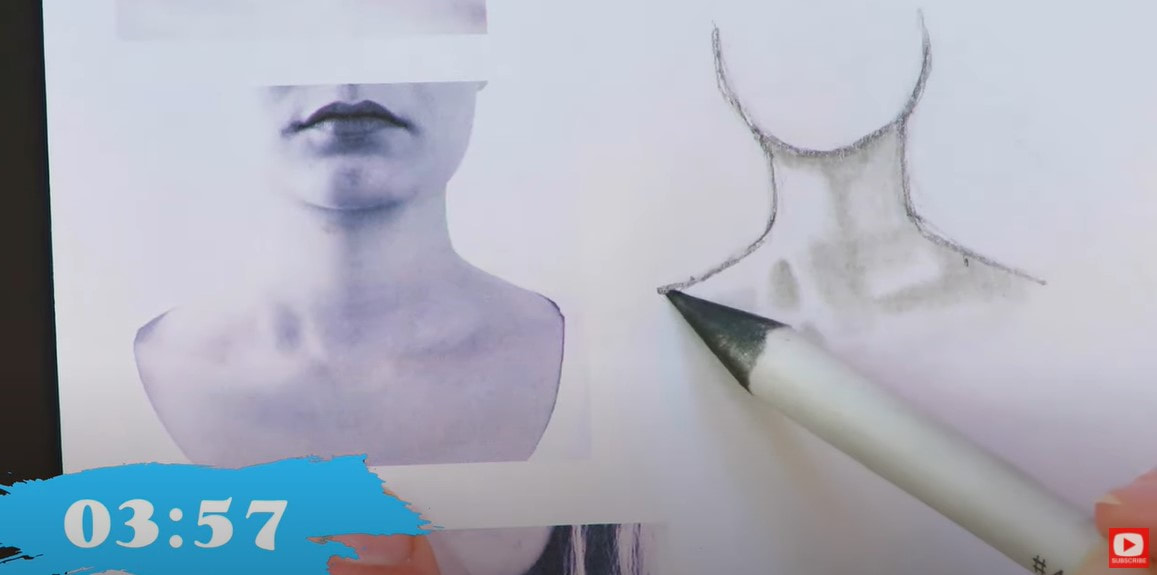
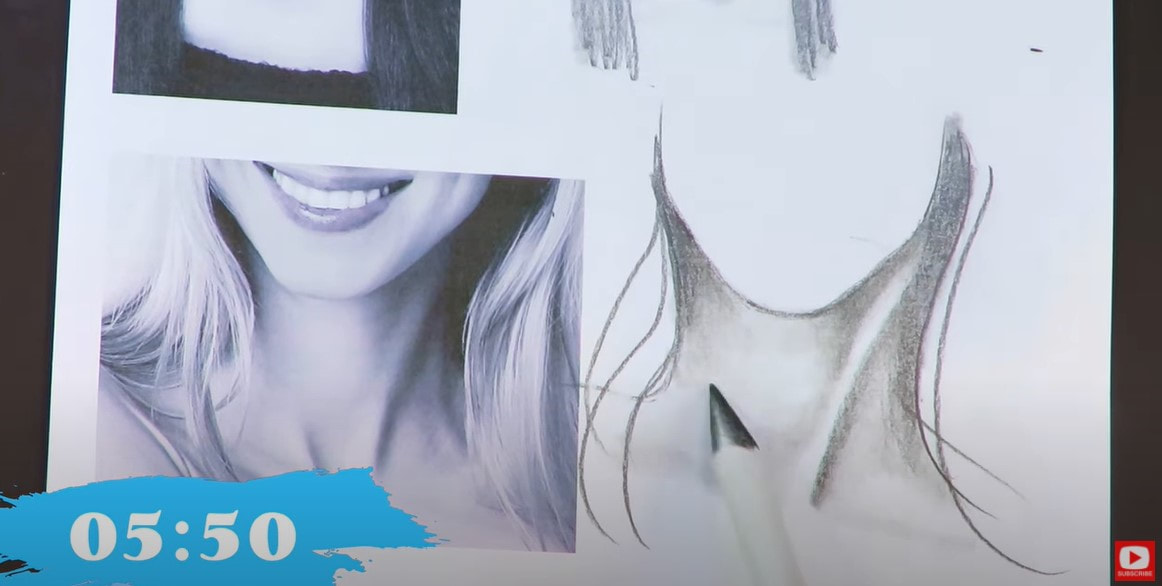
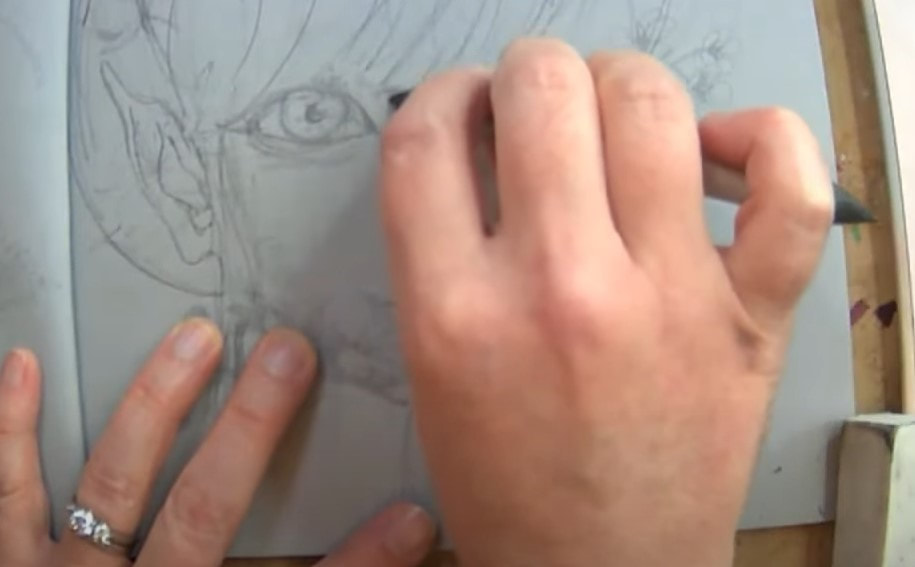
I started today's face drawing off the way I do all of them - by drawing a TON of ovals. Eventually one of them begins to emerge like a nice, solid face shape. After it does, we just need to add a cute and curvy, whimsical neck, and divide the face into quadrants to establish the position of key features like eyes, nose, and mouth. 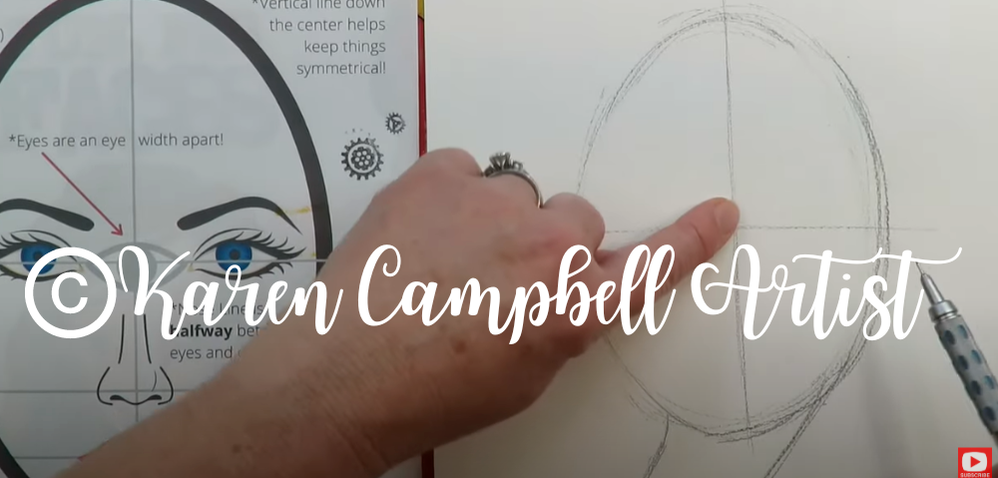
As you follow along with the video, you'll witness the transformation of a blank sheet into a delightful face just FULL of personality - in less than 20 minutes! Awesome, right?!
If you love the book shown in today's video - it's available on Amazons worldwide and has TONS of fun face drawing project ideas for beginners. CHECK IT OUT HERE.
After your adorable drawing is done, it's time to color her in on my mixed media channel using Tombows and water!
LOVED This Fun & Easy Face Drawing Tutorial?
Sharing is caring!!
If YOU loved this cute face drawing project, share the JOY drawing gave you with an artsy friend or someone who's ALWAYS wanted to learn how to draw, but still hasn't given it a shot. Here's the video link to copy and paste into a text or email: https://youtu.be/6c3y3MdM9Kk. If you're watching the video on YouTube using your phone, try this! 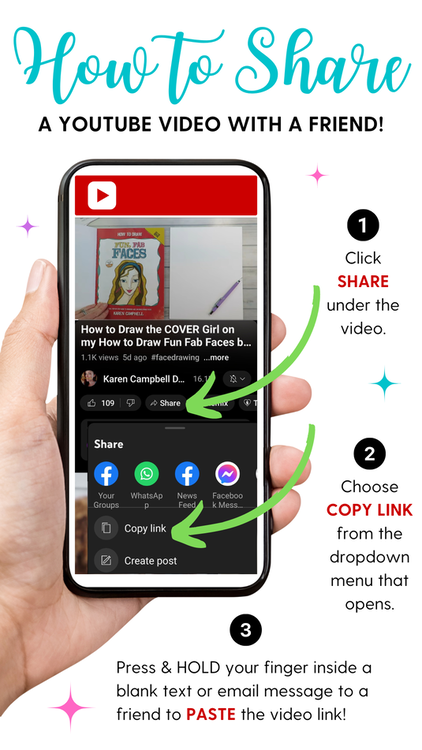
Ready to Color Her In with Tombows?Looking for Something Else?
0 Comments
Hi there, creative soul! I'm mixed media artist and author Karen Campbell, and I'm thrilled to dive into the world of drawing with you today. What's on the agenda? We're going to create something truly special - easy, fun, and absolutely fabulous! We're going to draw the cover girl from Volume #1 of my How to Draw Fun Fab Faces drawing book trilogy!
If you're ready for an artistic adventure, grab the closest pencil and any old piece of paper, and let's get started. 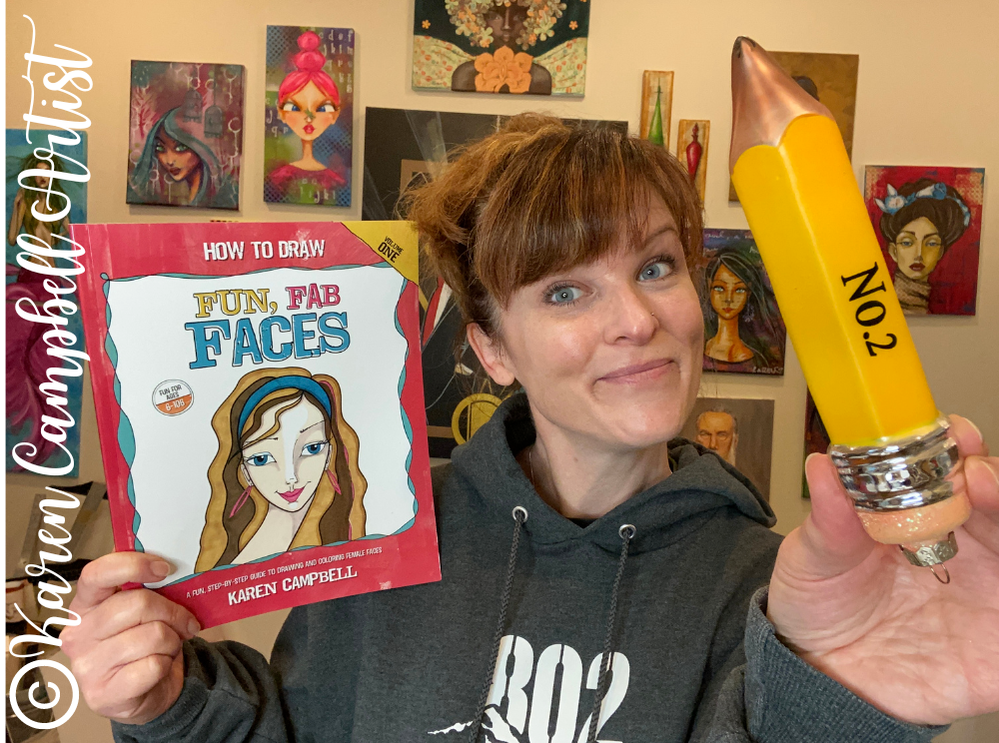
*All product links are affiliate & for U.S. residents only.*
The Basics
In my How to Draw Fun Fab Faces drawing book series, we're going back to the very beginning today – pages six and seven of Volume 1, to be precise. Our first step is simple but crucial: drawing an oval. If you've never tried it before, don't worry! Take your time, create lots of ovals, and let the motion become second nature. Soon enough, you'll have a standout oval that will form the foundation for your fun fab face.

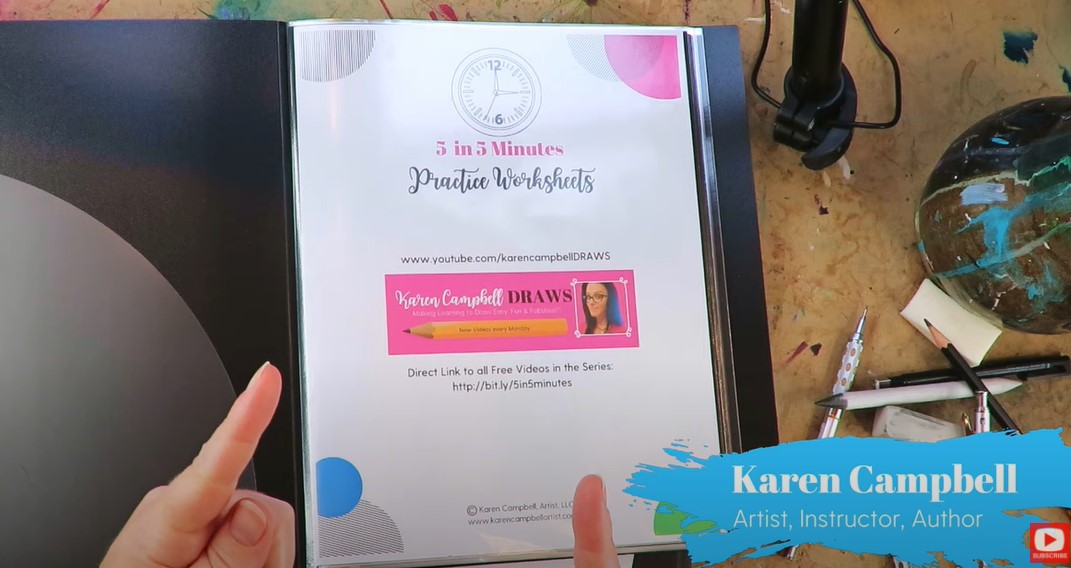
Before I unveil the how-to magic of my fun fab face, here's a little bonus for you... a FREE Face Drawing Guidelines cheatsheet !
Yes, you heard it right. All the guidelines we've been following in this tutorial are neatly compiled into a handy PDF. Simply click the button below and I'll send the PDF straight to your inbox! 

About Perfectionism
Don't stress about perfection with your drawing! I know this is easier said than done, but each face is a new opportunity to express your creativity. It's part of the magic!! Seriously, don't stress. My finished drawing didn't end up looking EXACTLY like the book cover, but she's super close and kinda like the cute little sister of my book cover, and I LOVE her!!
I can't wait to see YOUR VERSION of today's lesson!
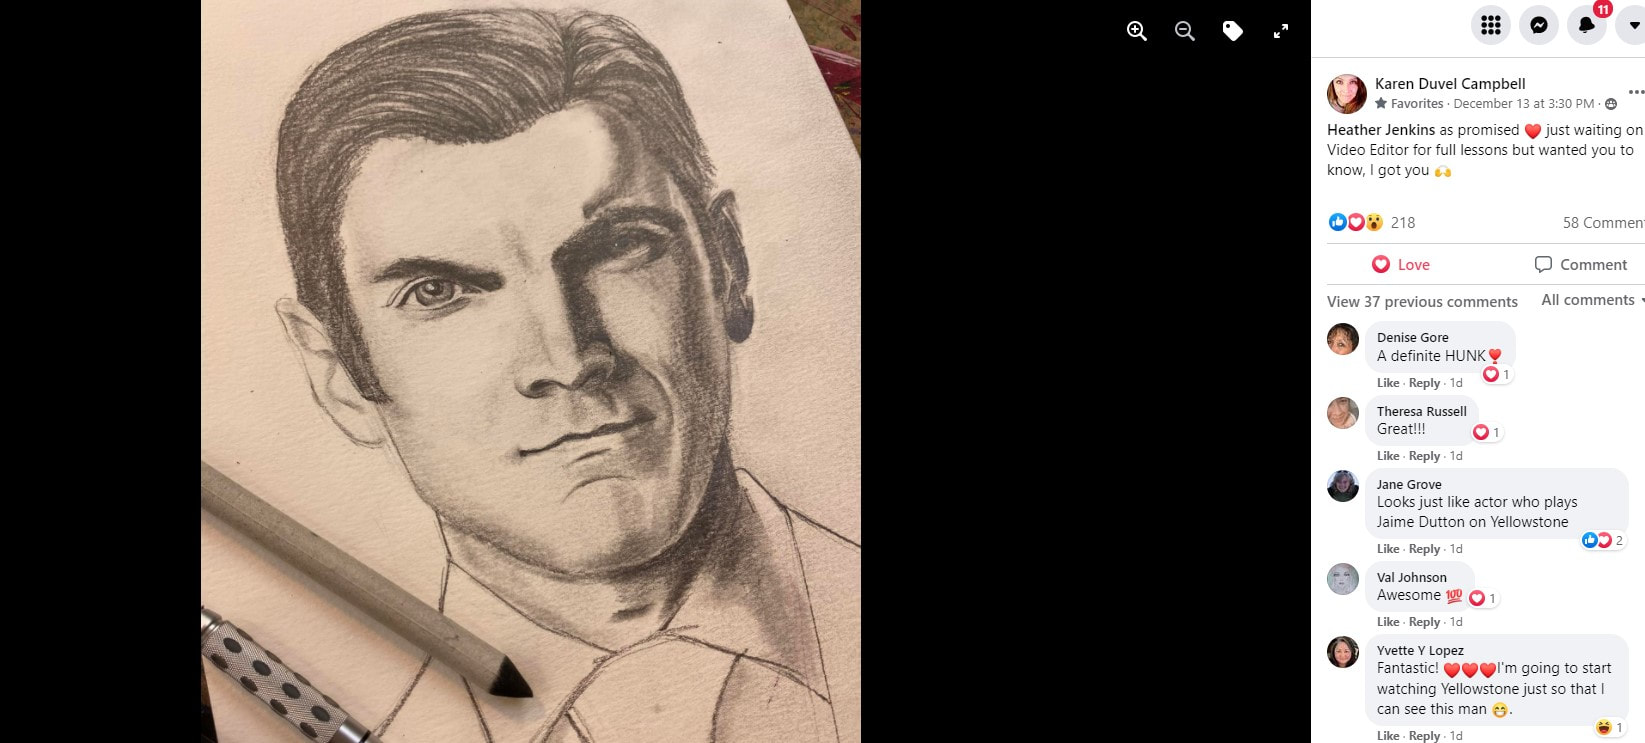
Share it in the Facebook Group with me and remember to add the hashtag #karensyoutube to enter yourself for a chance to win a prize during my next LIVE Giveaway on the 1st! What's Next?
Just before I hit the record button for today's video, I received a brand new set of Tombow grayscale markers! Now, if you've been following me for a while, you know I'm used to working with Tombows that are water-based markers, but these ones are alcohol-based, so I'm SUPER EXCITED to try them out.
If you're curious about how these markers will bring my Fun Fab Face to life, jump over to my mixed media channel for the continuation of this project to see how I shade her and if this new-to-me Tombow set is worth it! And always remember, the joy of drawing is even better when shared. If you enjoyed this tutorial, give it a thumbs up, and most importantly, share it with a friend. Let's spread the joy of drawing and inspire others to kickstart their creative journey. Here's the link to today's video so you can copy & paste it for a friend: https://youtu.be/GNZNGpnduuY 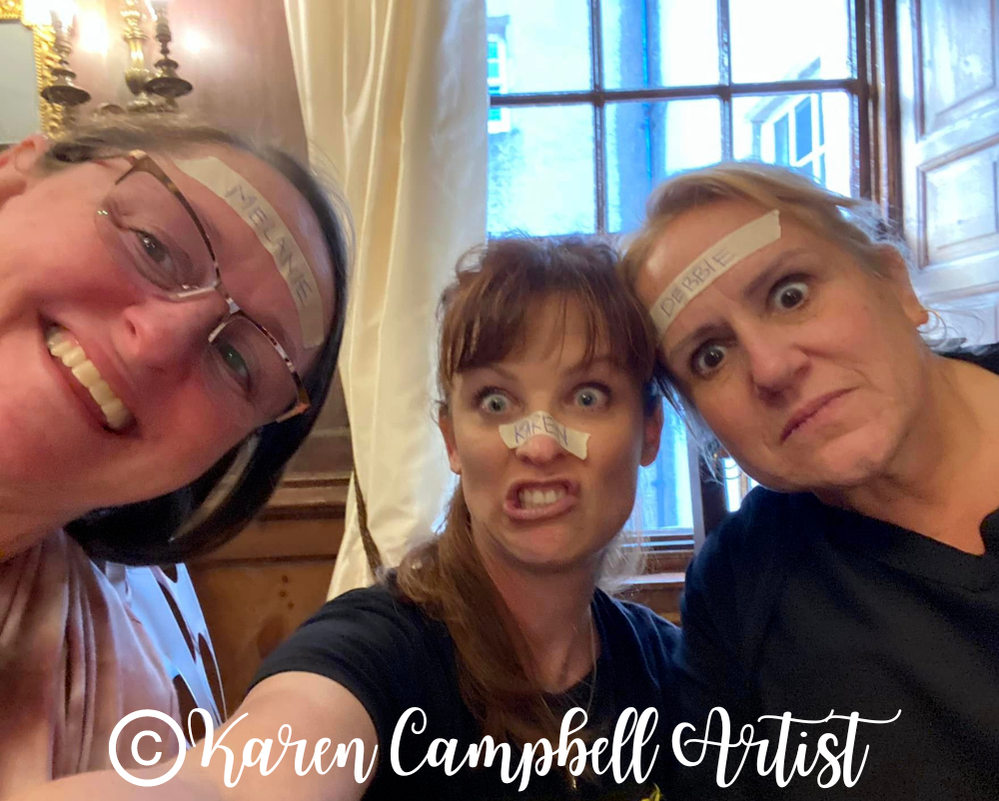
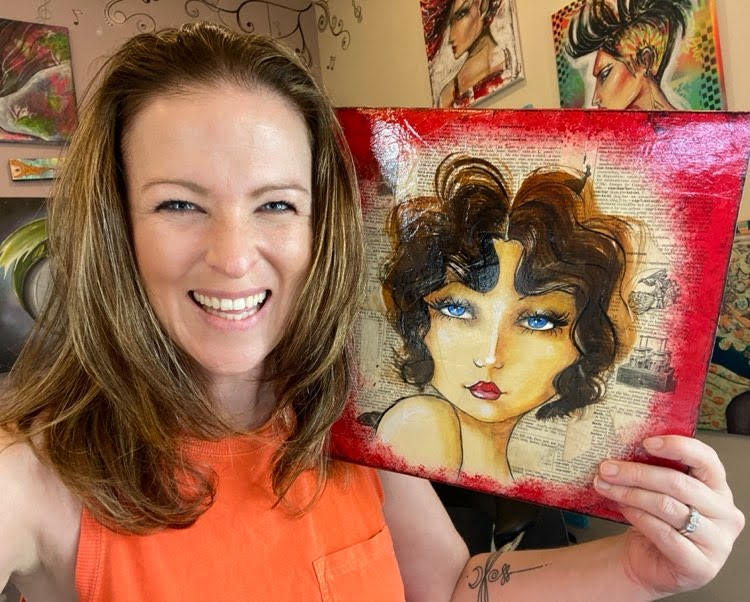
I love this pic! It's me, goofing around with two of my AMAZING artsy friends at our last Scotland Castle Art Retreat! LOL!
Until next time, happy drawing, and I'll catch you in the next video! Looking for Something Else?
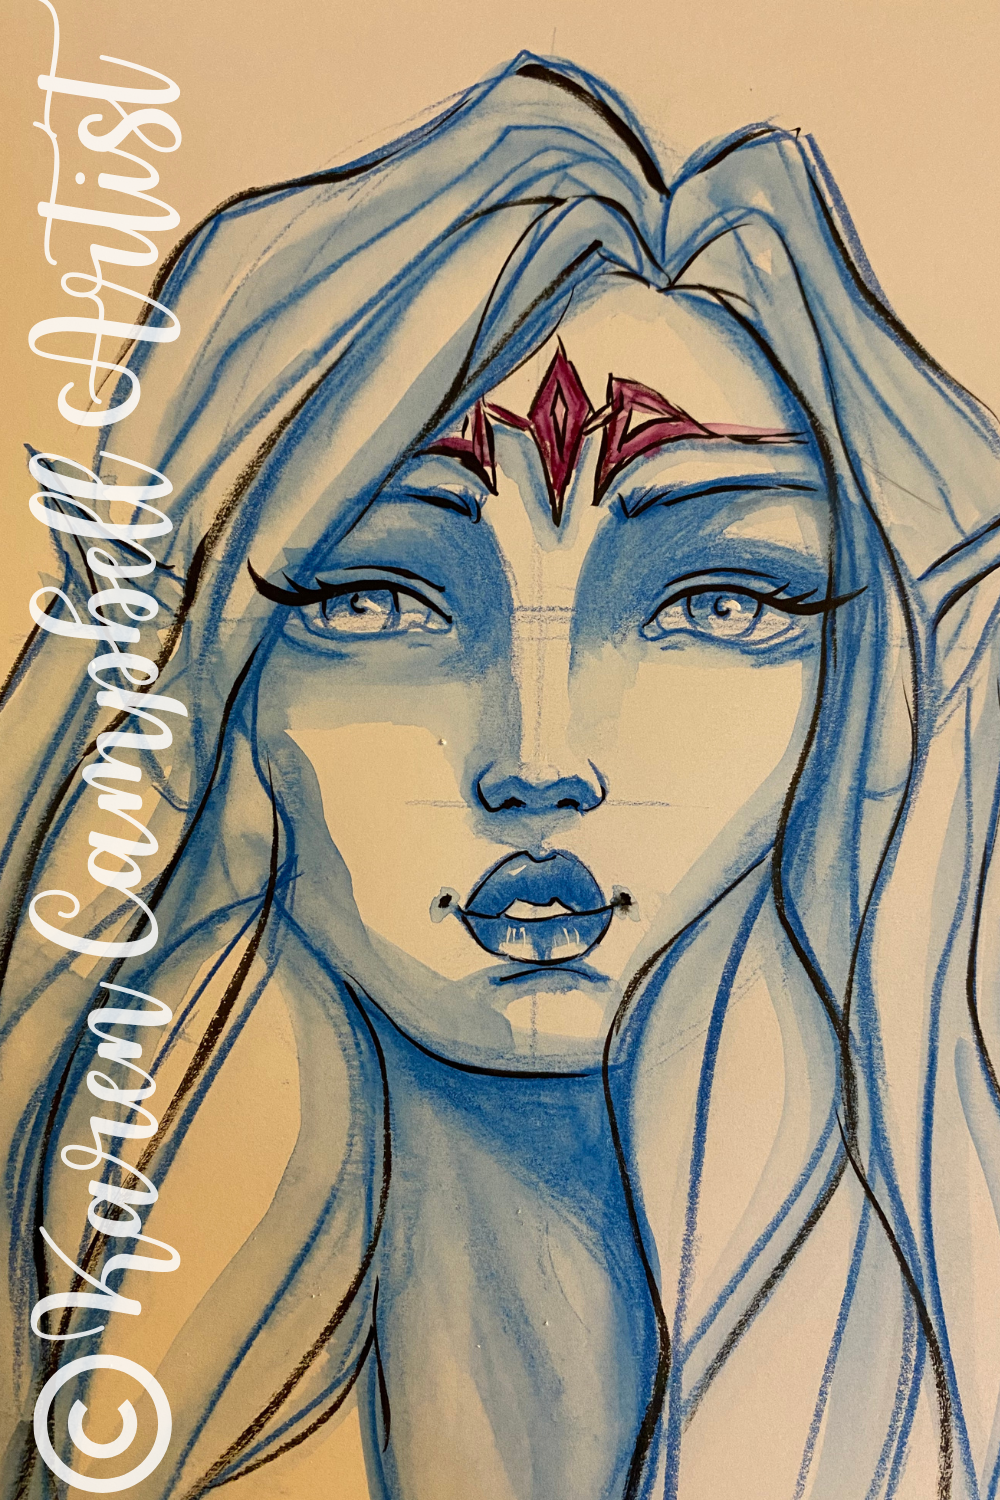
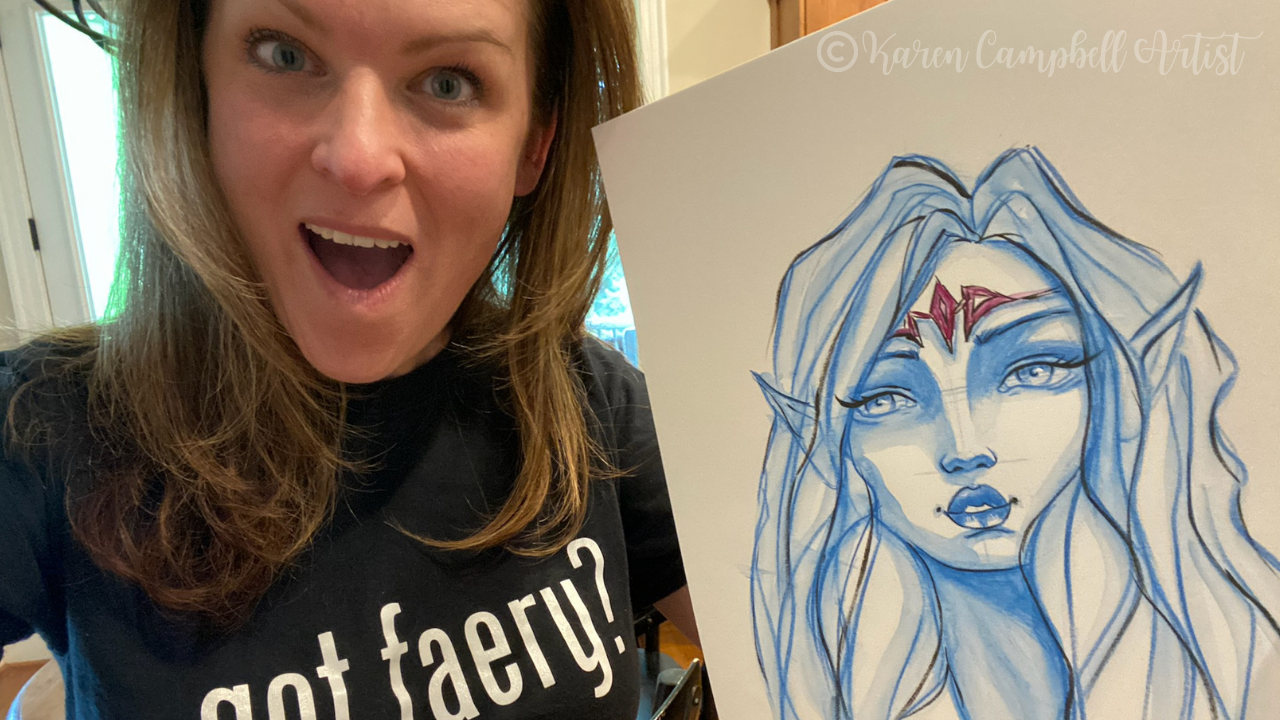
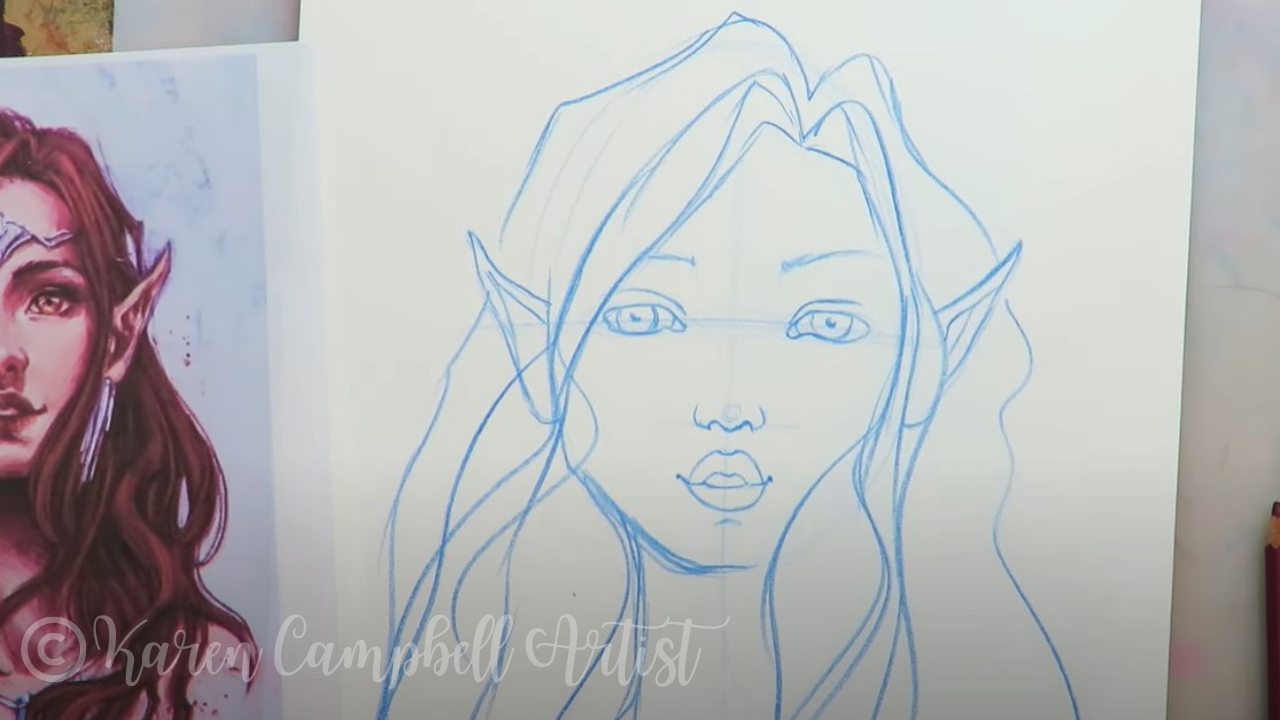
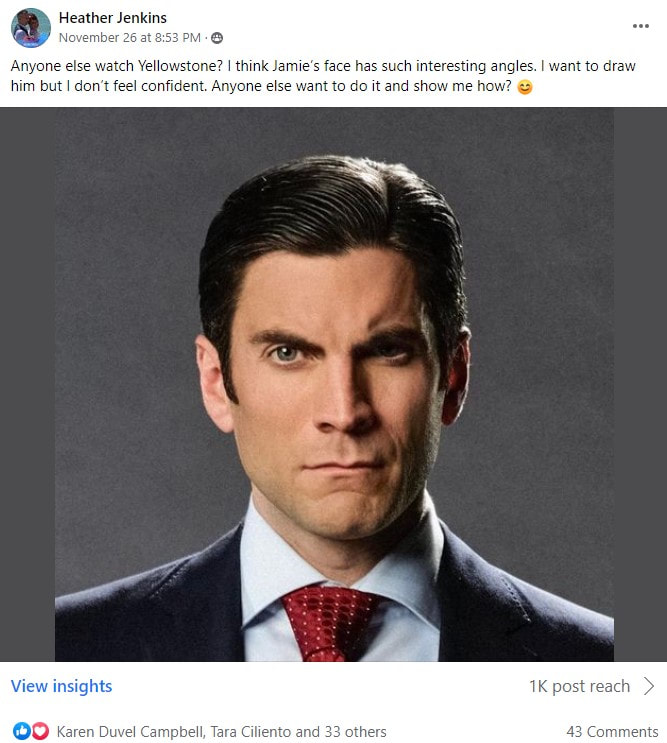
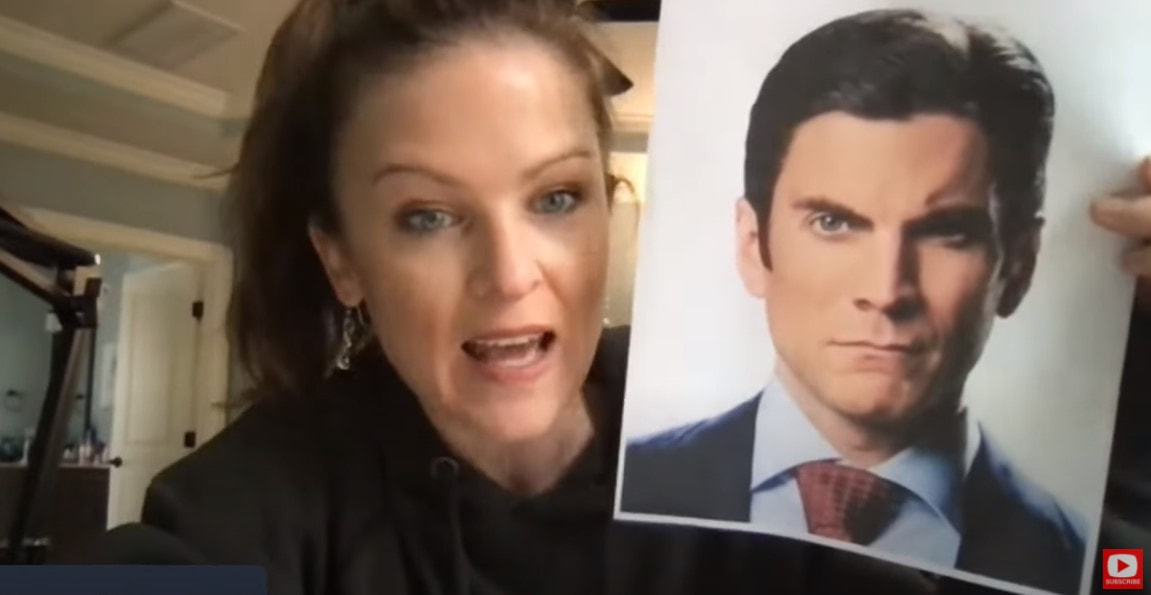
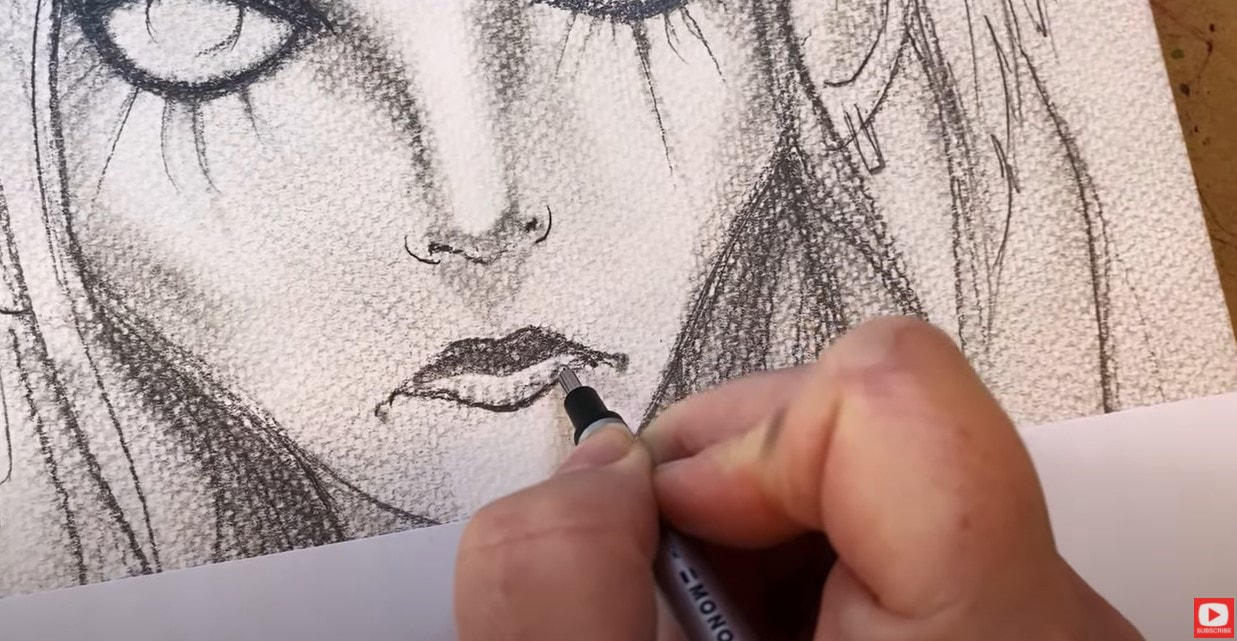
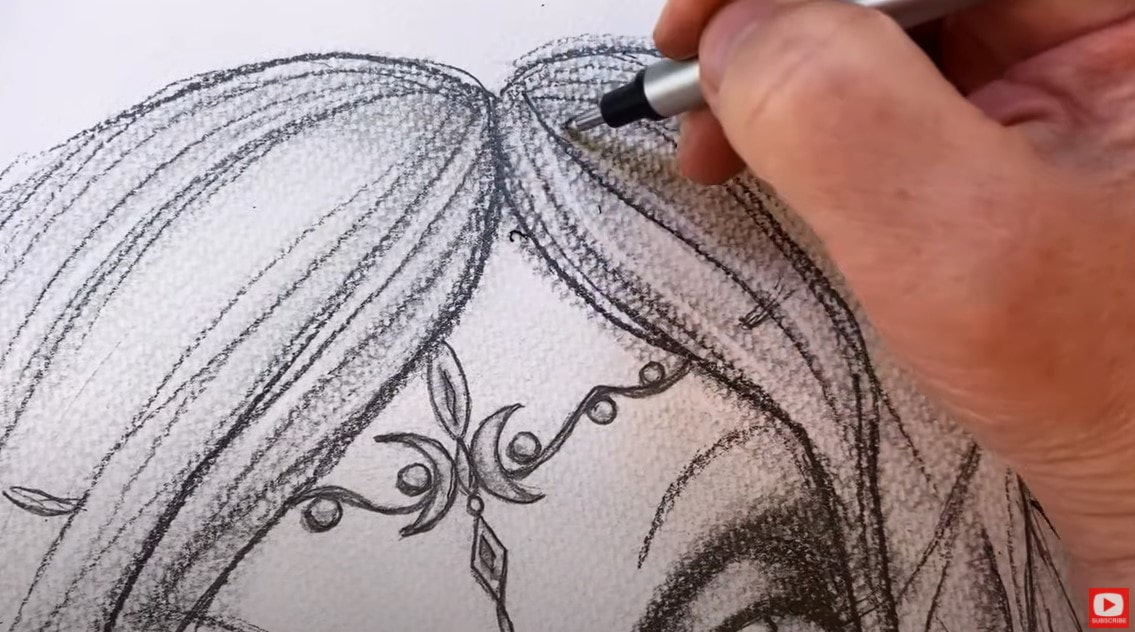
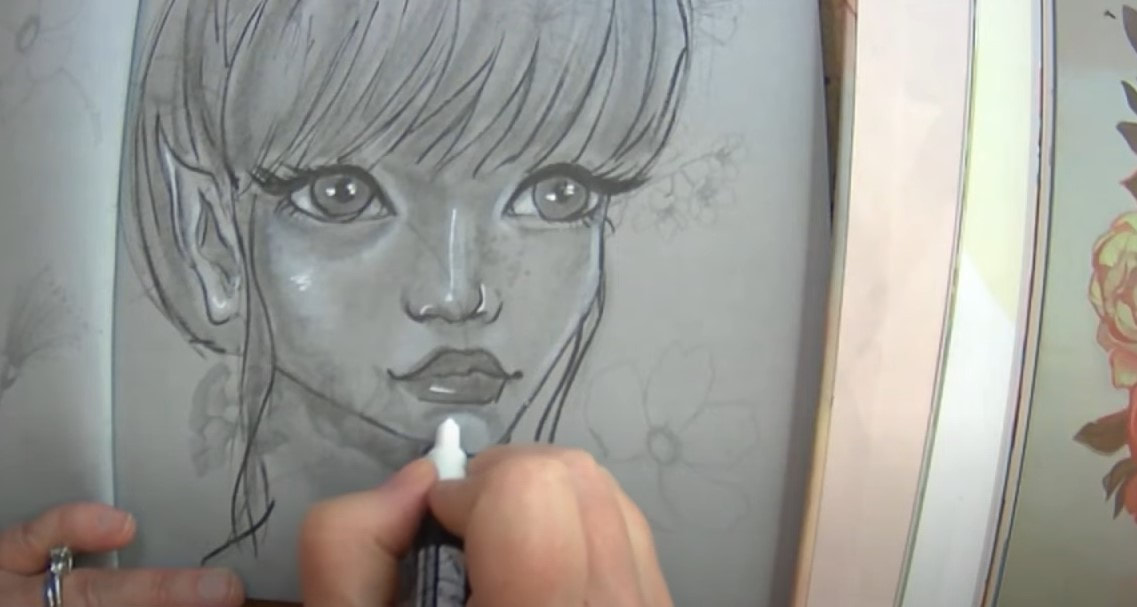
Already starting to think about Halloween? You're gonna LOVE today's TWO-PART evil fairy drawing tutorial! This full-length drawing lesson is step-by-step, simple enough for beginners, and challenging enough for seasoned artists interested in drawing faces at different angles.
When you're finished, hop over to my mixed media channel to add sophistication to your drawing with a layer of watercolor in PART TWO of this lesson. Grab a pencil, eraser, blending stump, and a sheet of watercolor paper to draw along with me for our final lesson of the #50FunFabFairies drawing challenge! 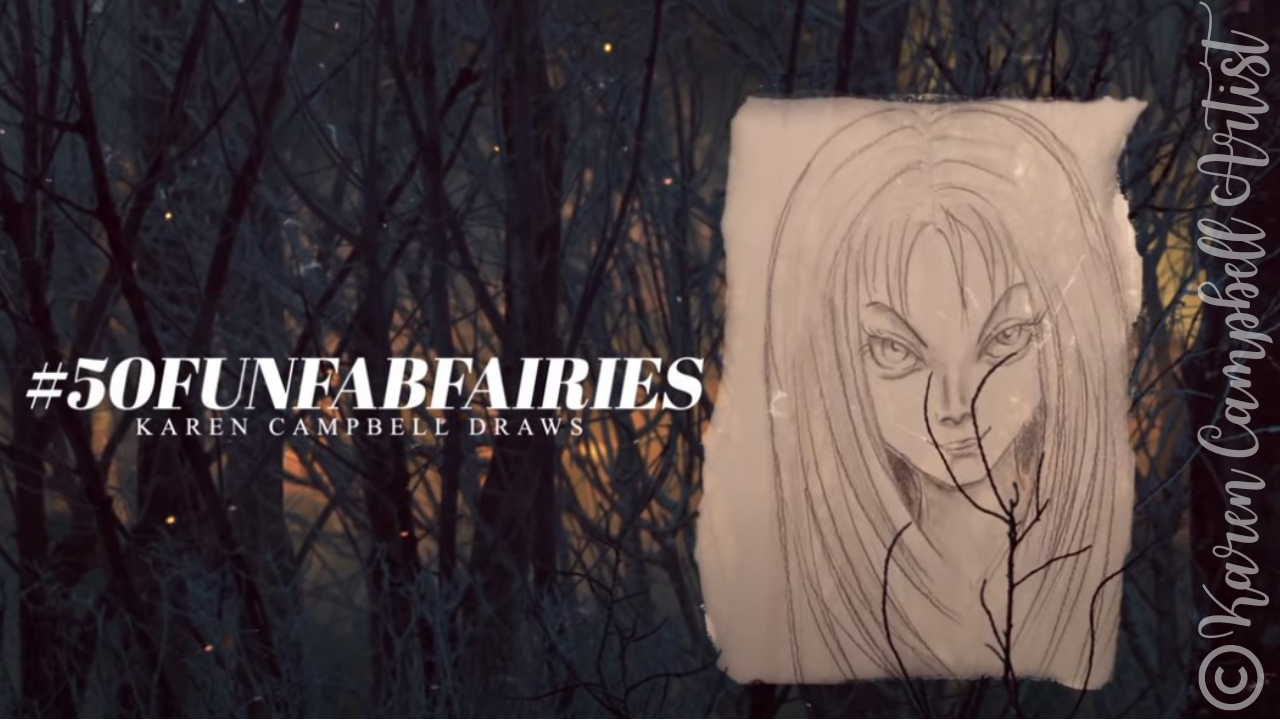
Want easy access to today's fairy drawing reference and even MORE fairy drawing ideas? Join my FREE #50FunFabFairies drawing challenge over at Awesome Art School!
Simply click the button below to receive instant access to ALL the fairy drawing images for each drawing prompt, plus info on supplies, cheatsheets, and more! 
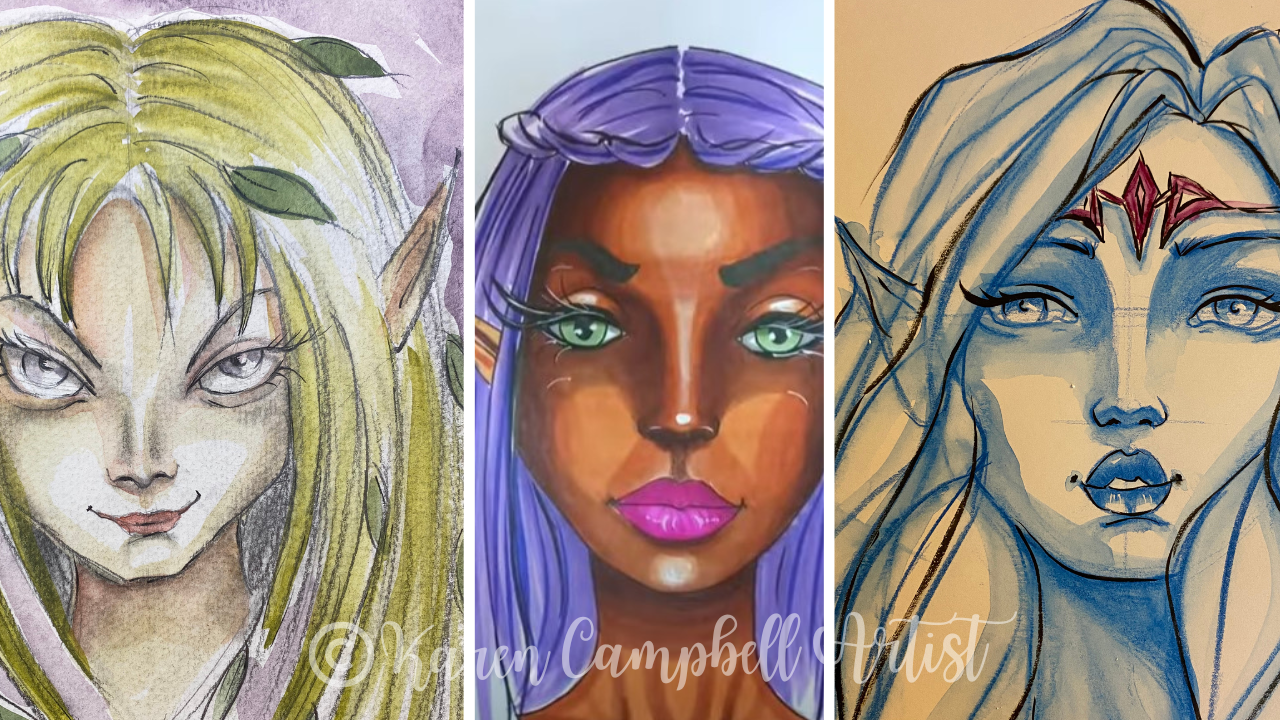
Wanna become a better artist? Do today's lesson (and every lesson of the challenge) five times, making a few creative alterations of your choice, and watch your skills soar as you practice fairy eyes drawing, fairy and ears drawing AND fairy hair drawing 50 different ways.
Before we continue, super quick announcement: All product links are Affiliate. I may earn a small commission if you choose to order through these links but by law there is never any additional cost to the consumer for doing so. I thank you for your support.
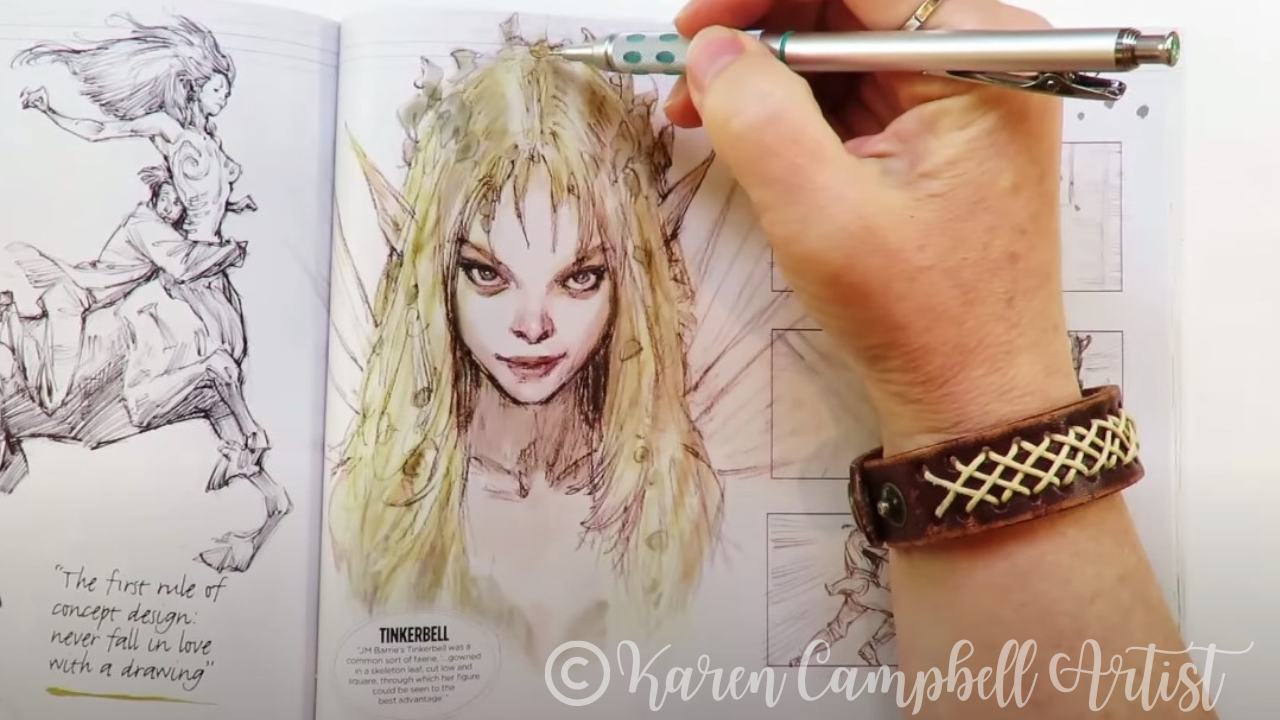
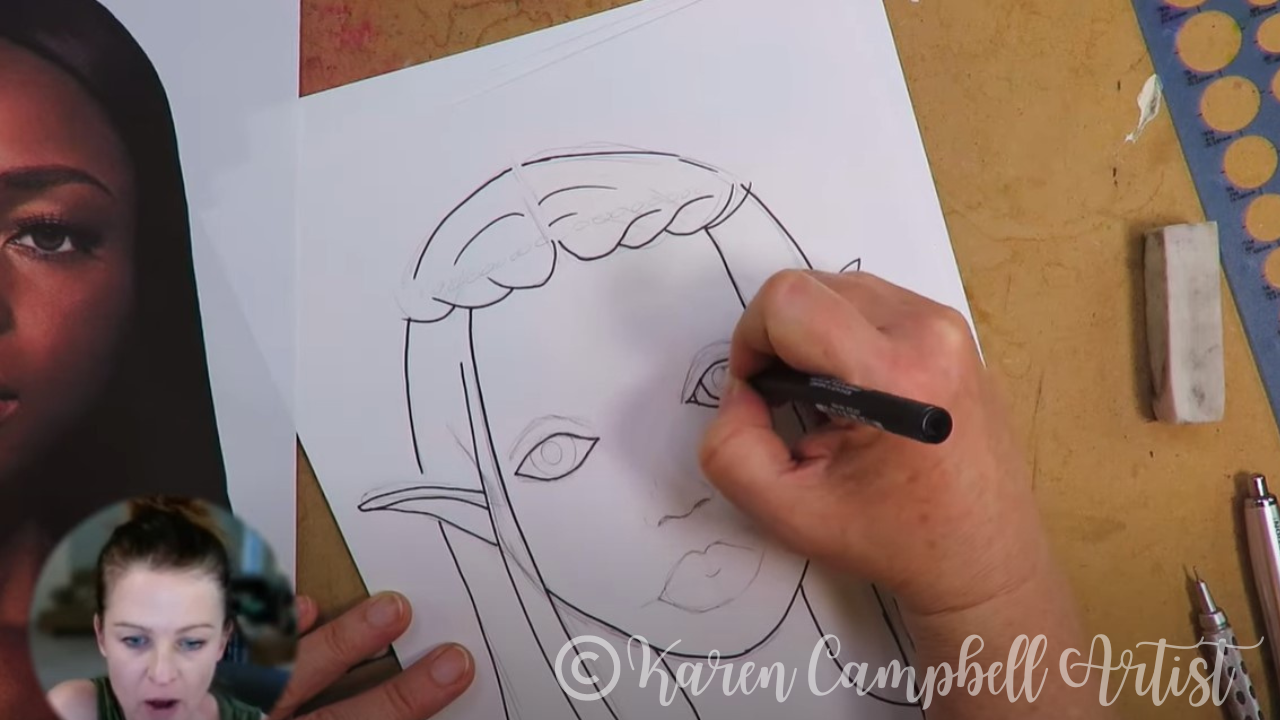
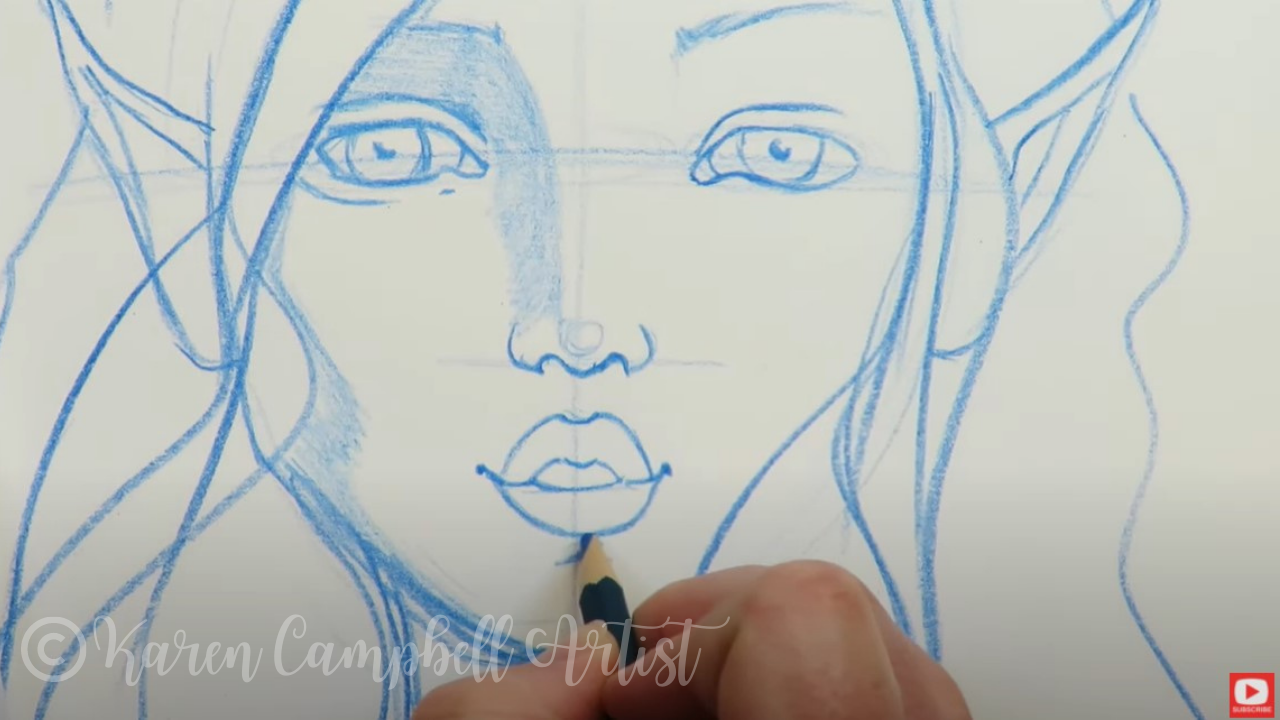
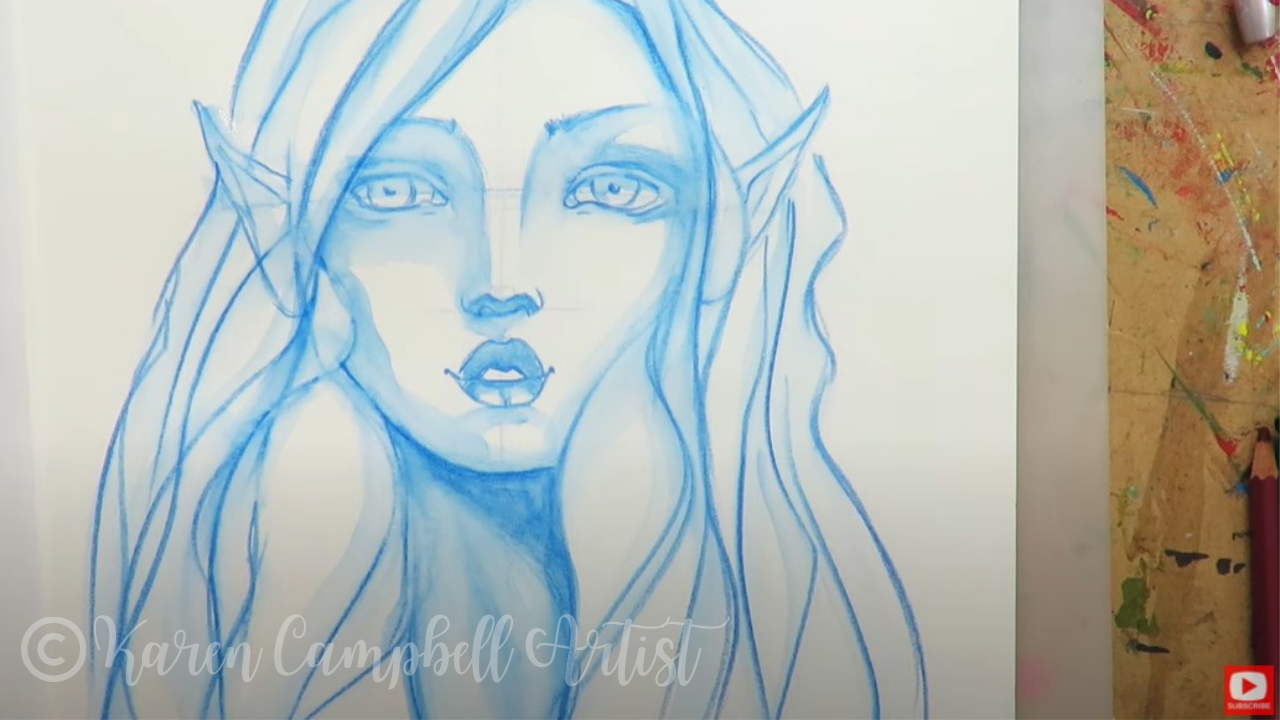
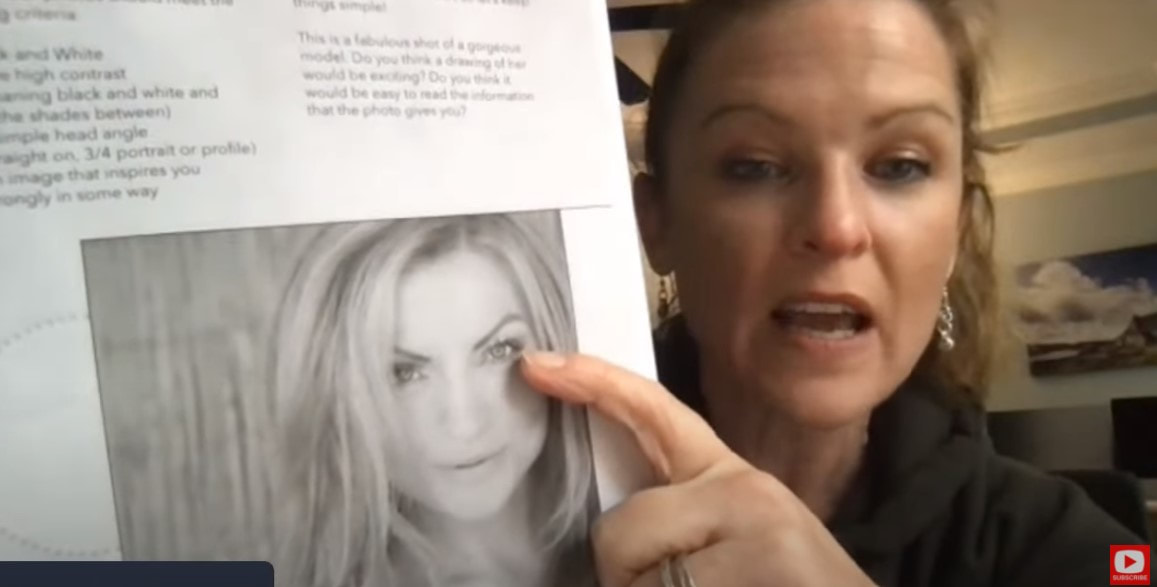
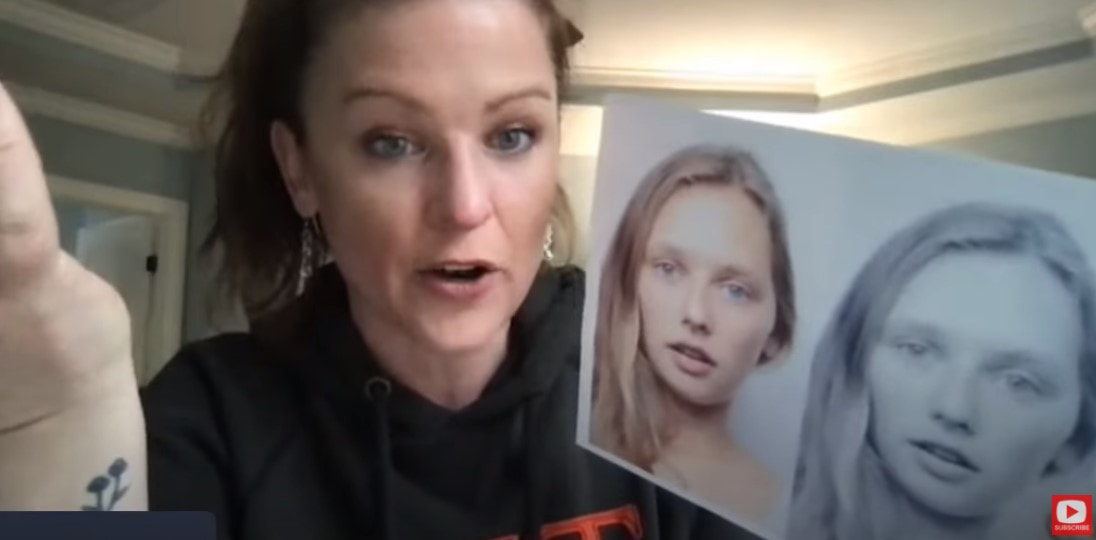
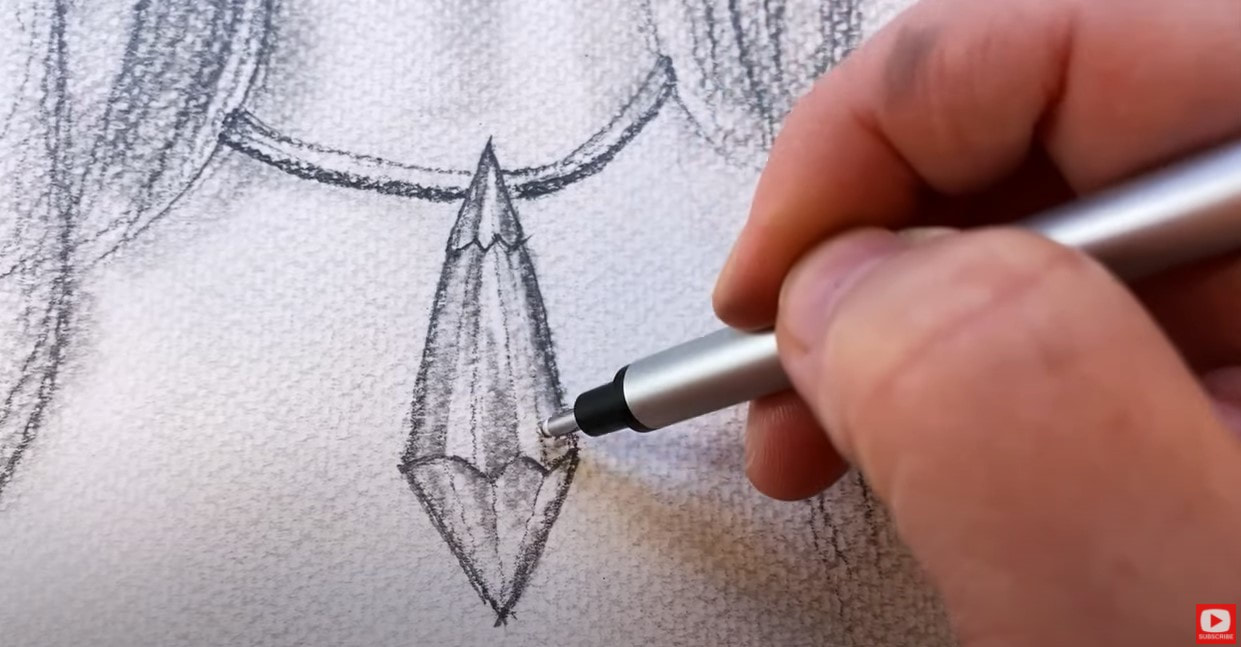
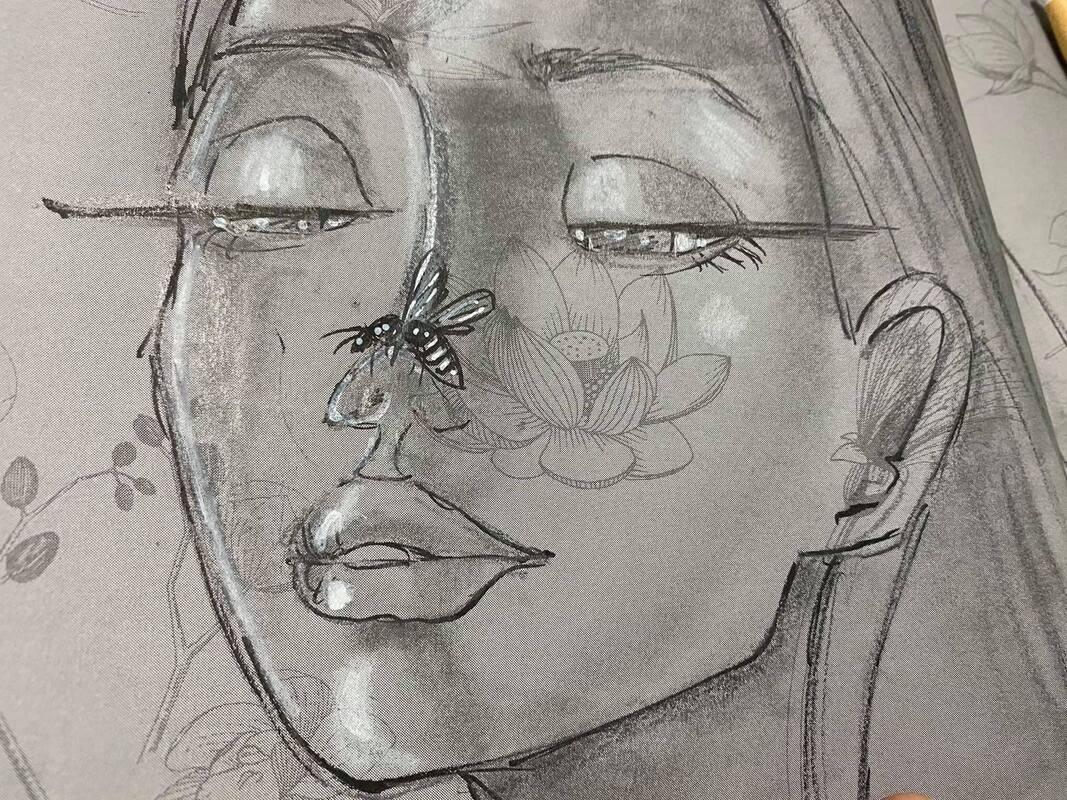
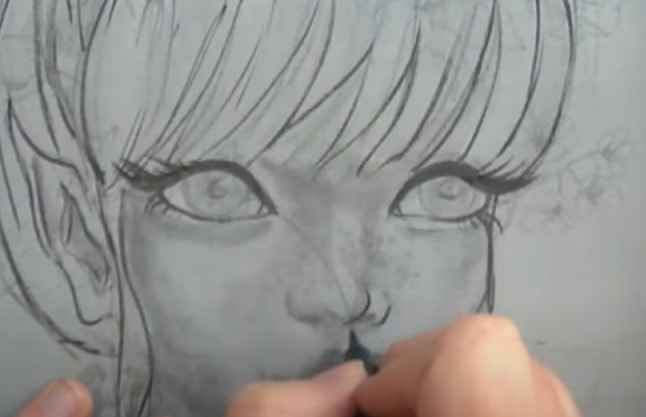
Today's fairy drawing reference comes from a cool art magazine I picked up a couple of months ago called Sketchbooks. I love the downturned head of this creepy fairy! If you've never drawn a head tilted down like this - don't worry, I've got you! Click over to the video and I'll show you how to do it step-by-step.
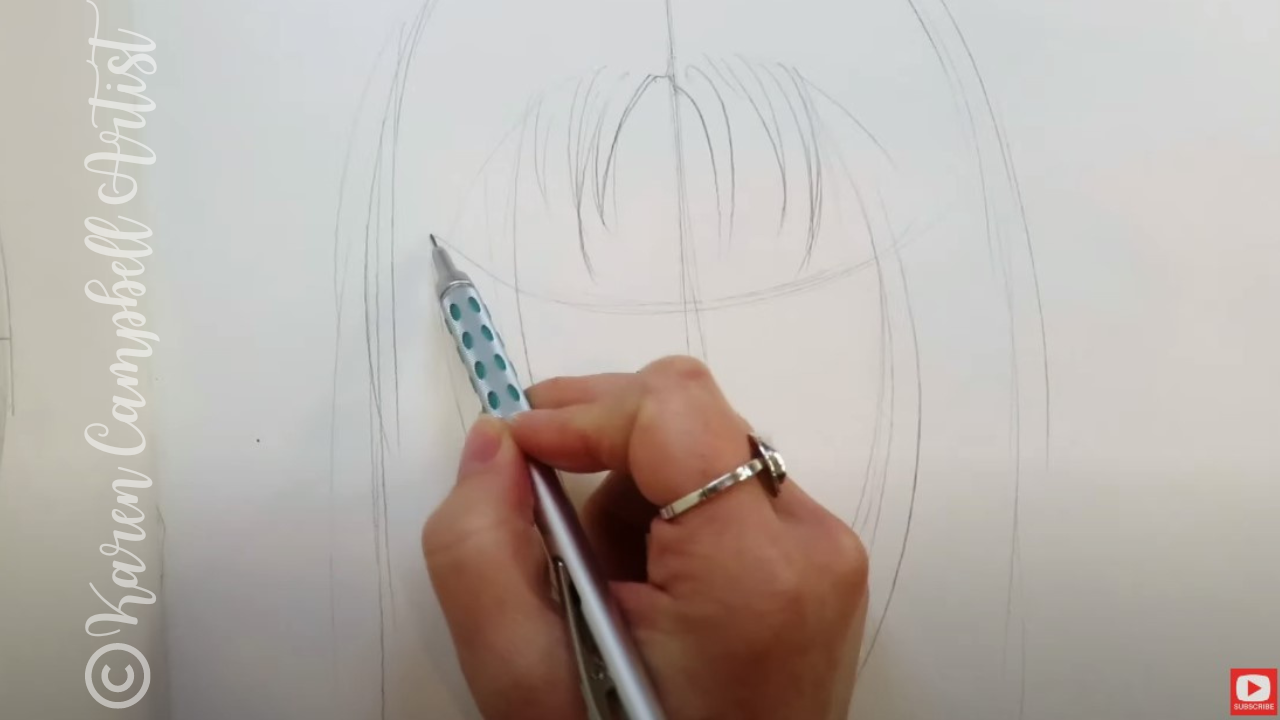
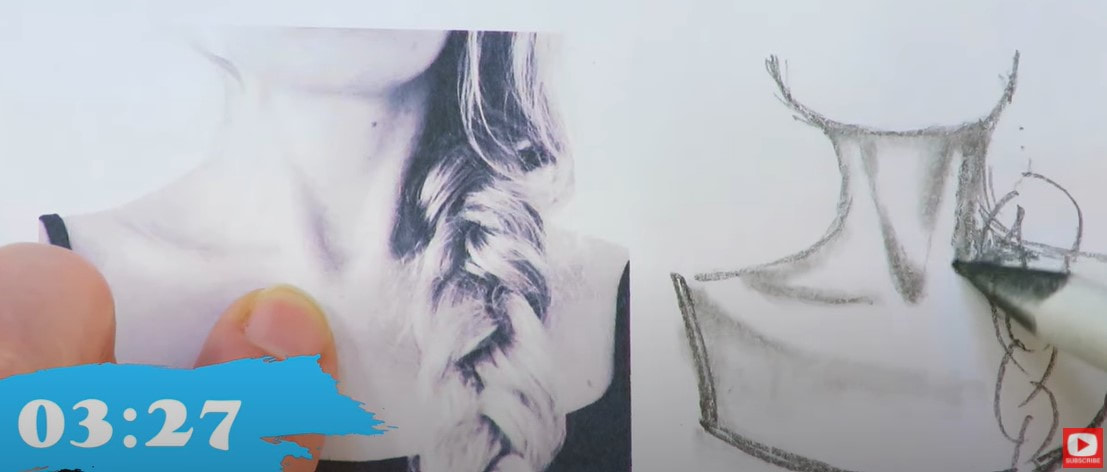
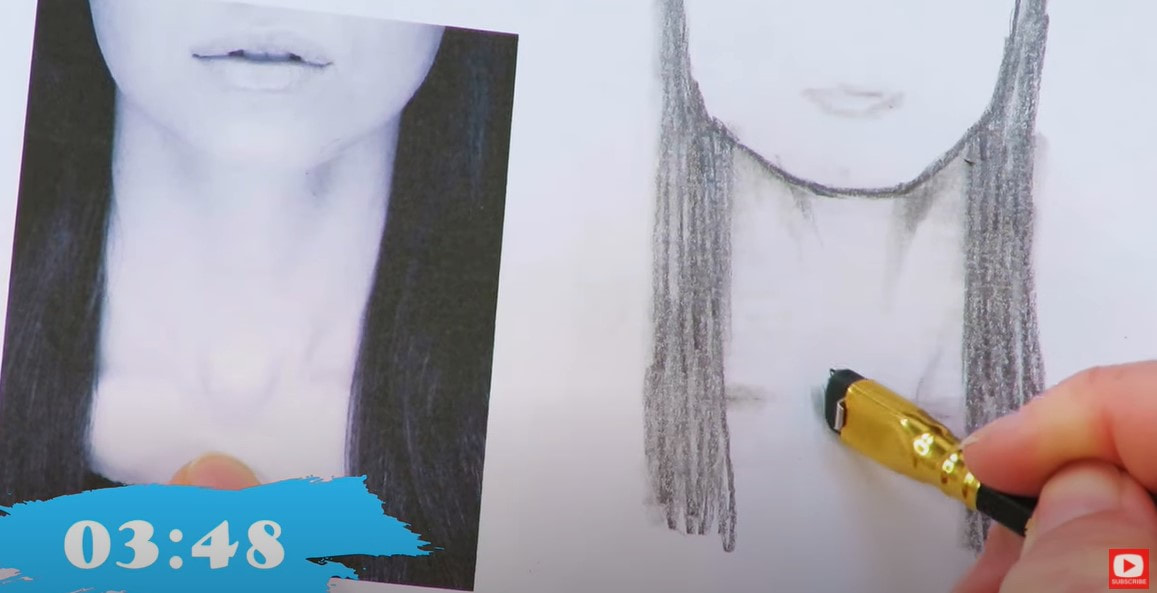
Typically I start my faces off by sketching a zillion ovals, but today we're starting with the hair because it's key to replicating the head tilt in our reference photo.
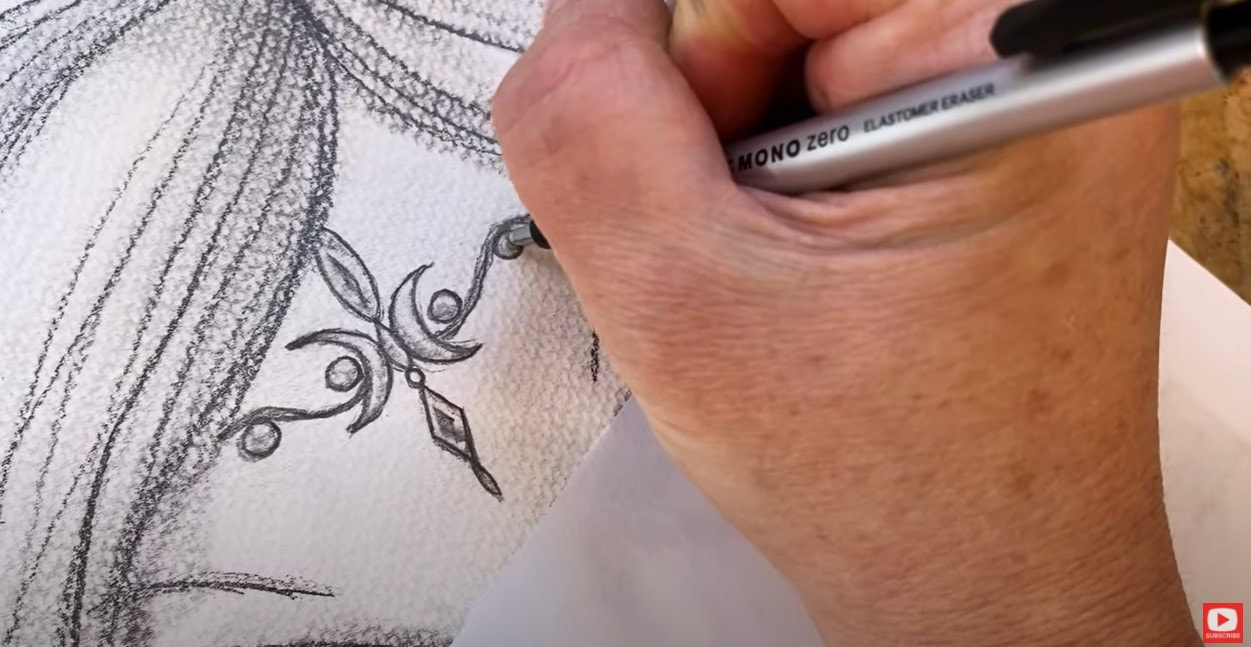
Lots of people are intimidated by drawing hair, so if this is you - you're not alone. When students tell me they're not sure how to draw hair, I teach them to break it down into "clumps," as I do in this lesson. As you'll see in the video, we're keeping things simple and not getting into the nitty gritty of drawing every hair strand. In fact, most of the clumps I draw are kinda like long skinny triangles. Easy, right? 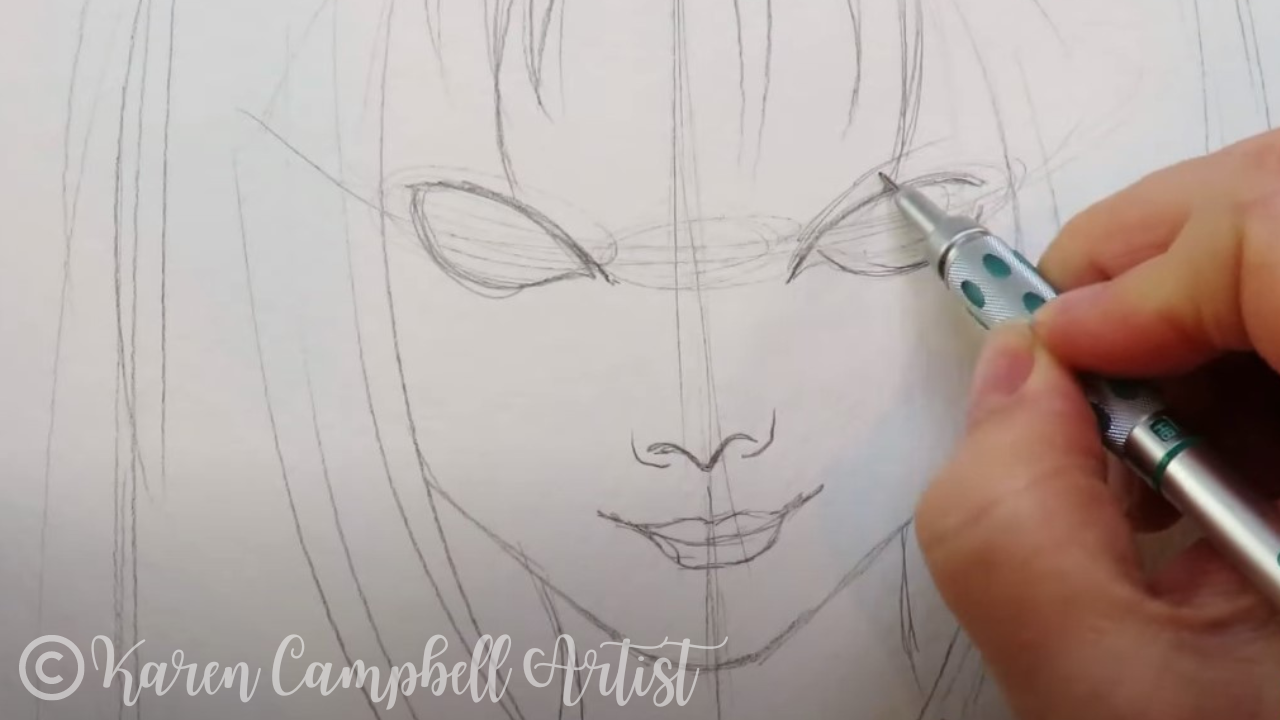
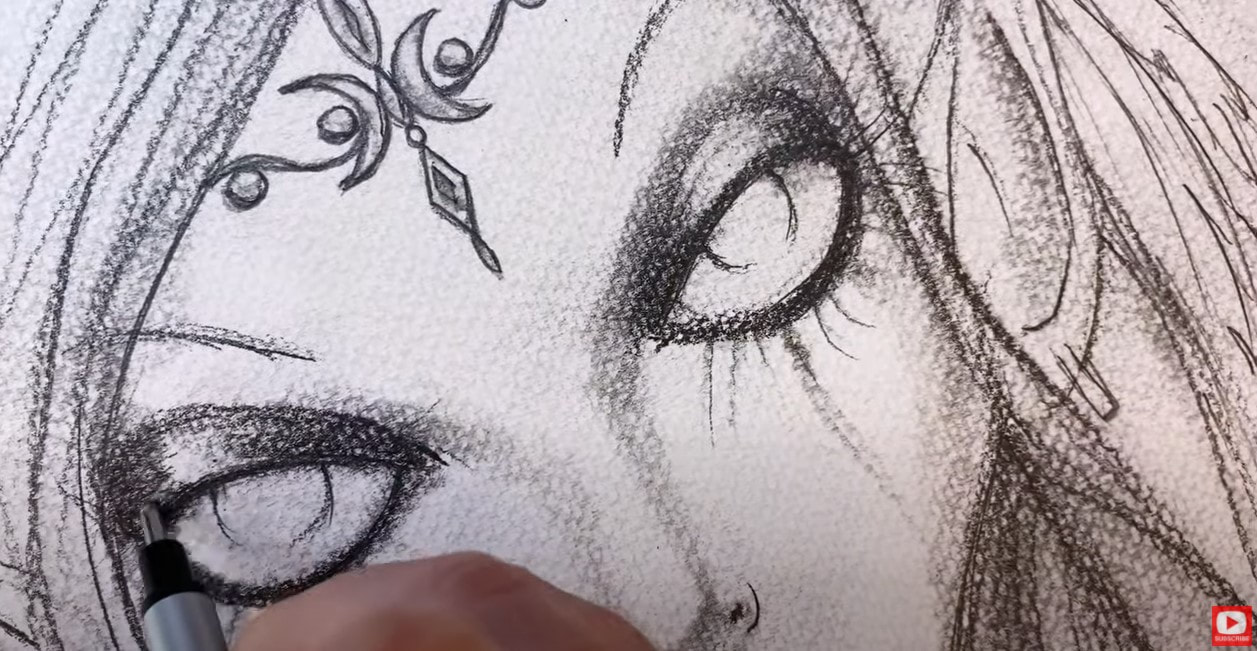
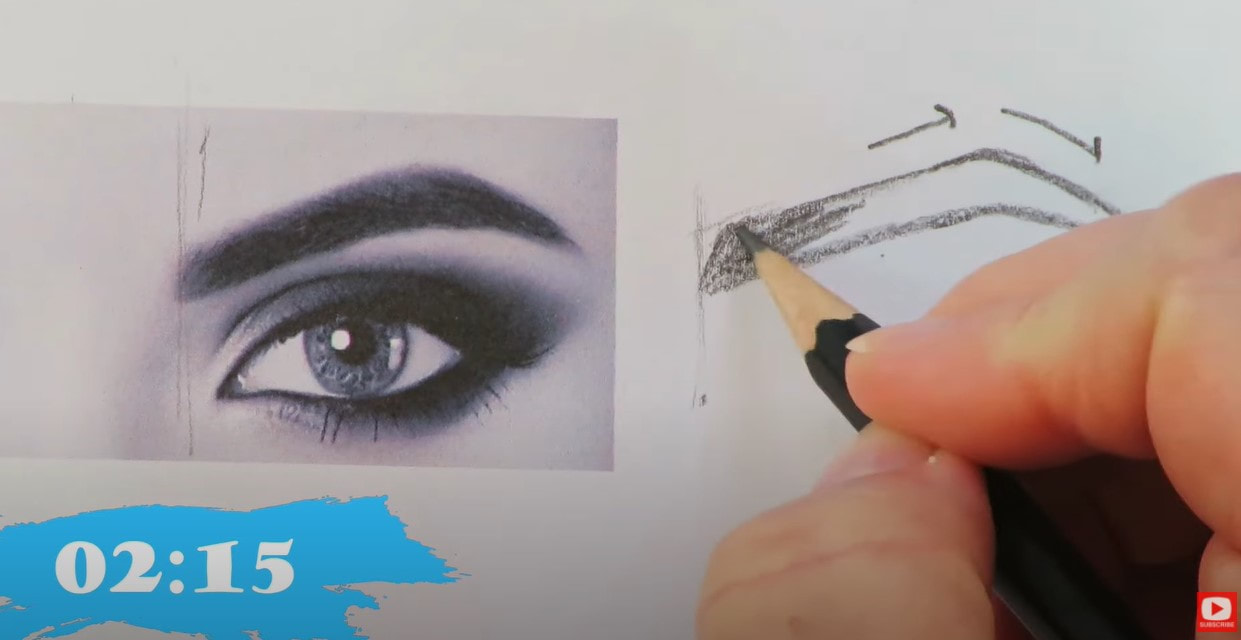
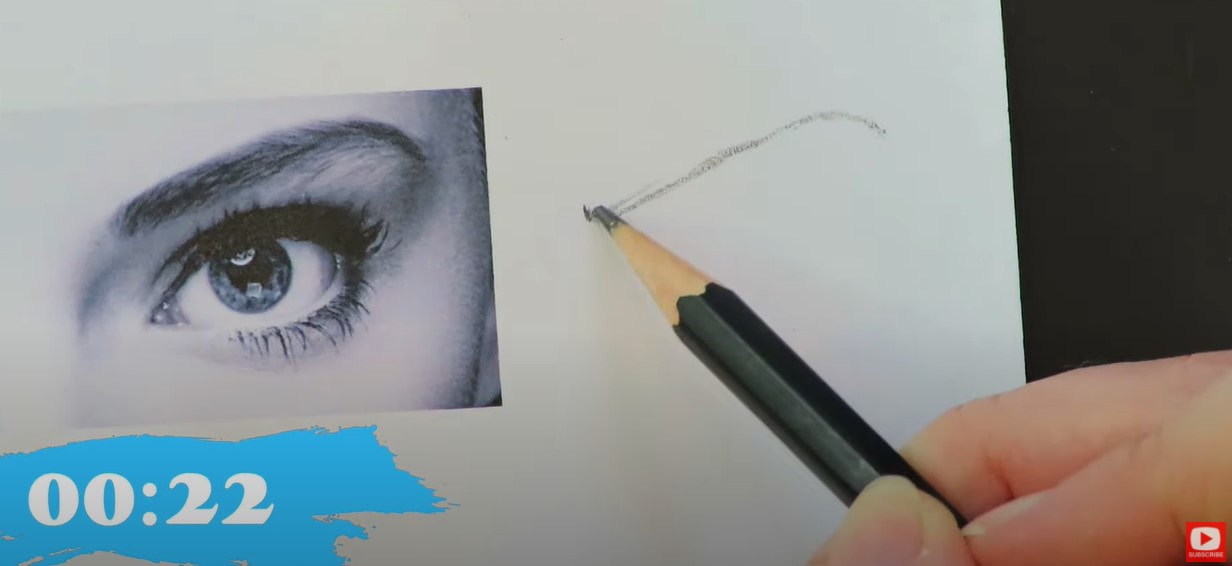
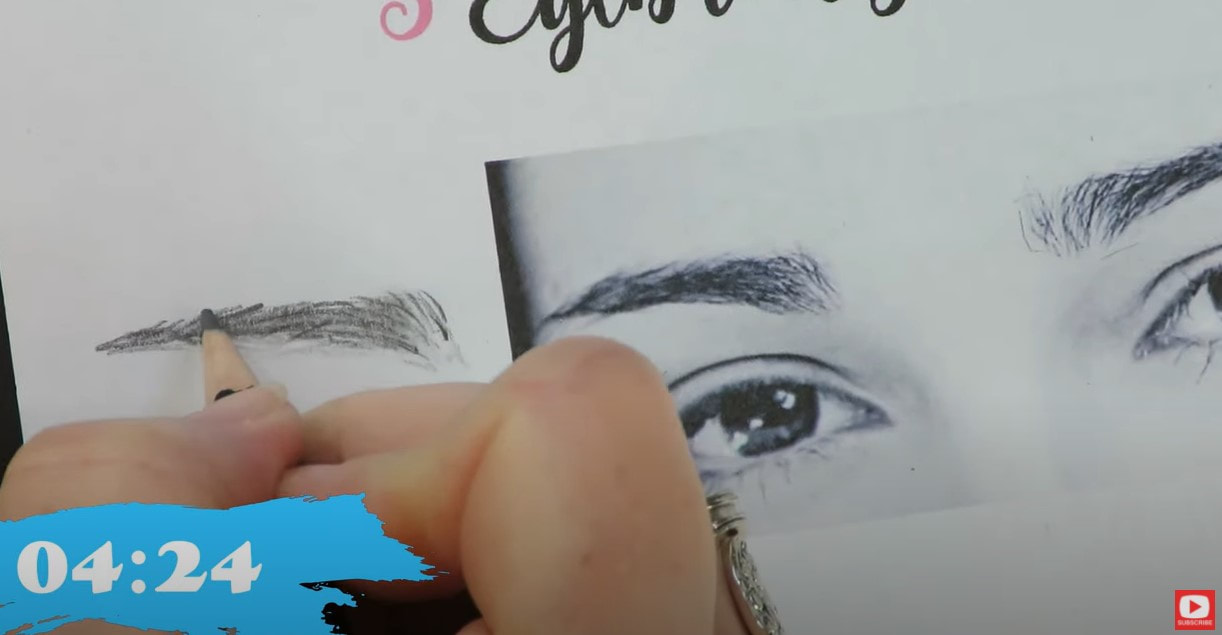
If drawing eyes evenly is something you're trying to work on, watch how I sketch the eyes in for this fairy. I often tend to go back and forth between each eye - drawing one line at a time, then mirroring what I just did on the first eye to the second.
I've found this process of building both eyes up at the same time is much easier than drawing one whole eye and trying to draw the second eye to match. If you feel like your eyes are still coming out uneven, don't stress. None of us are exactly proportional as humans anyway. Just keep practicing - sometimes that's all you need! 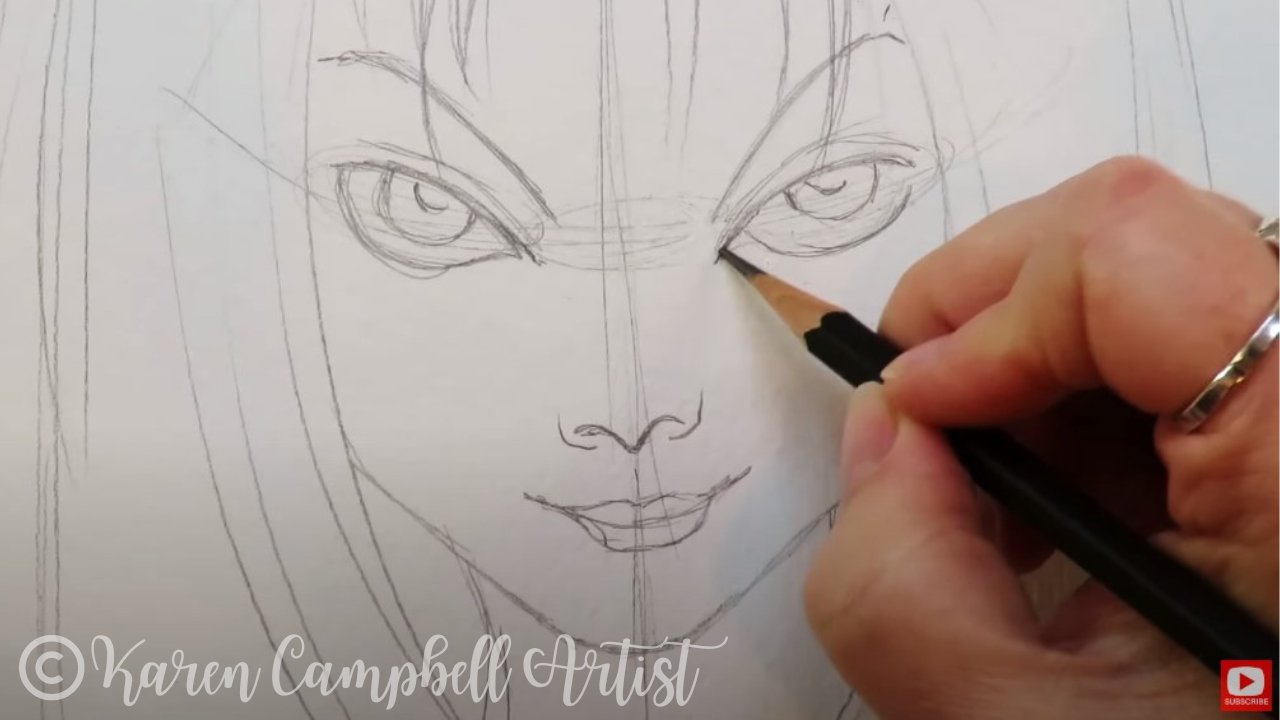
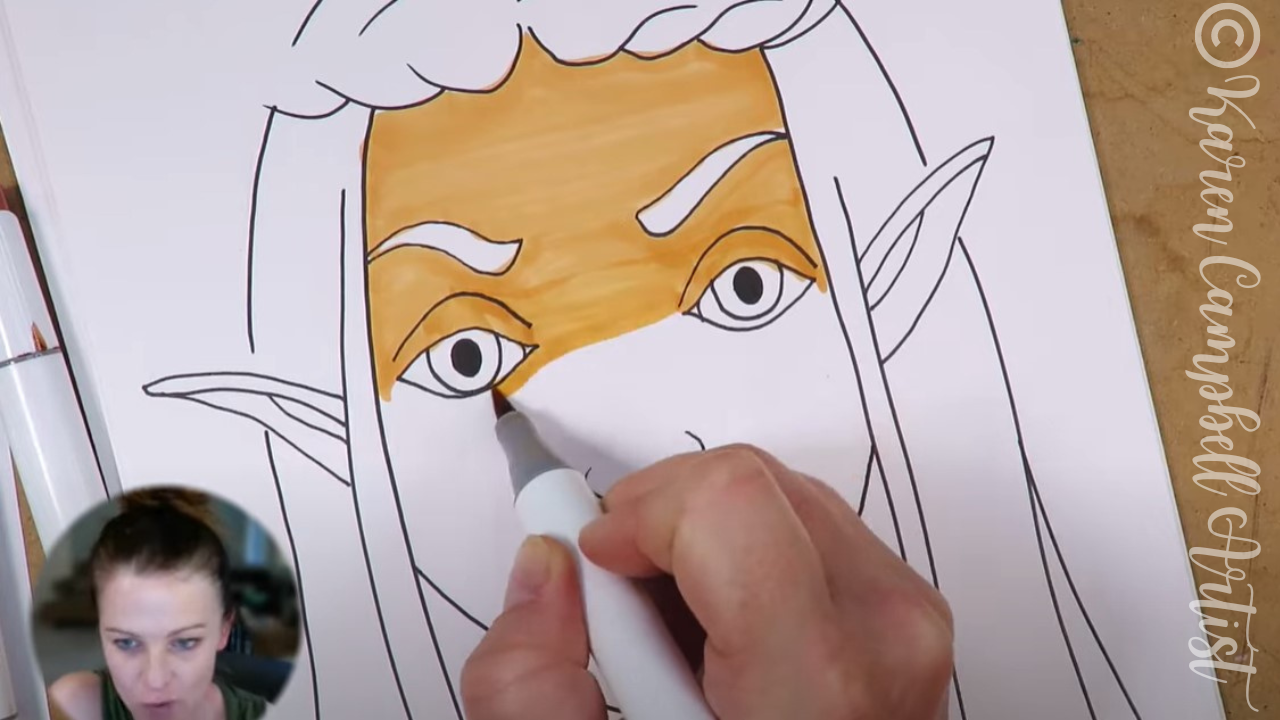
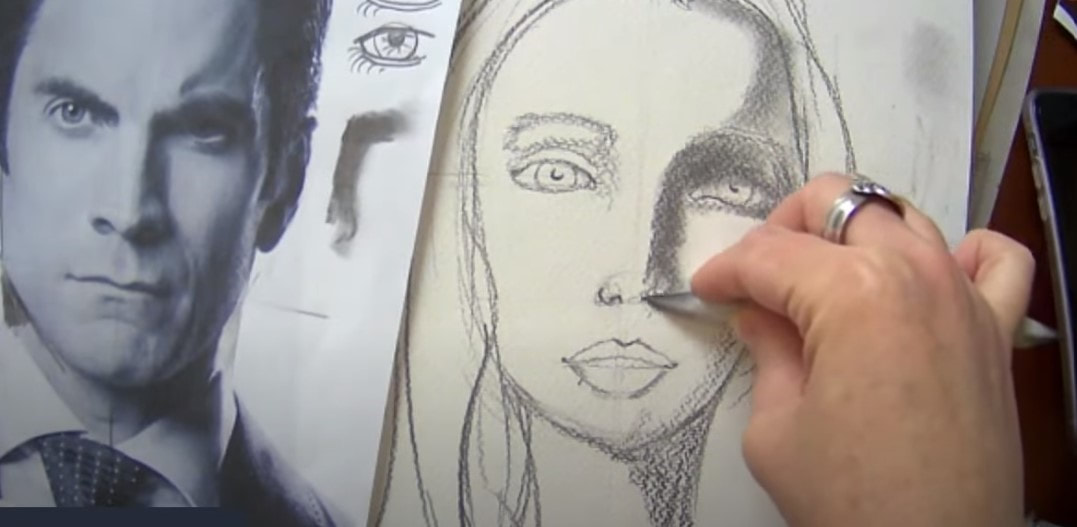
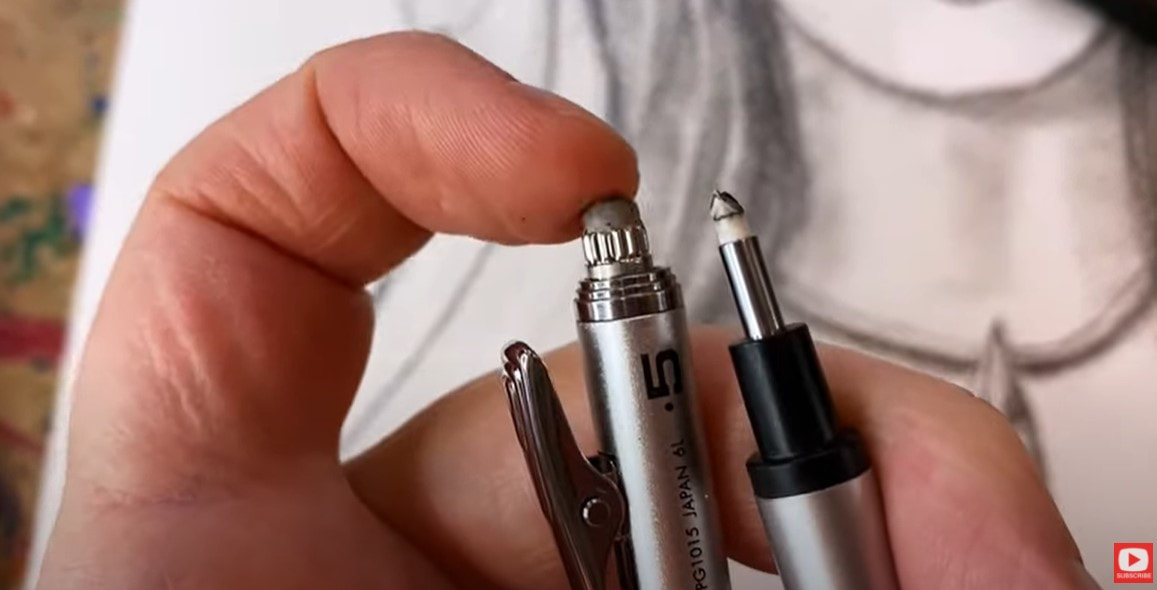
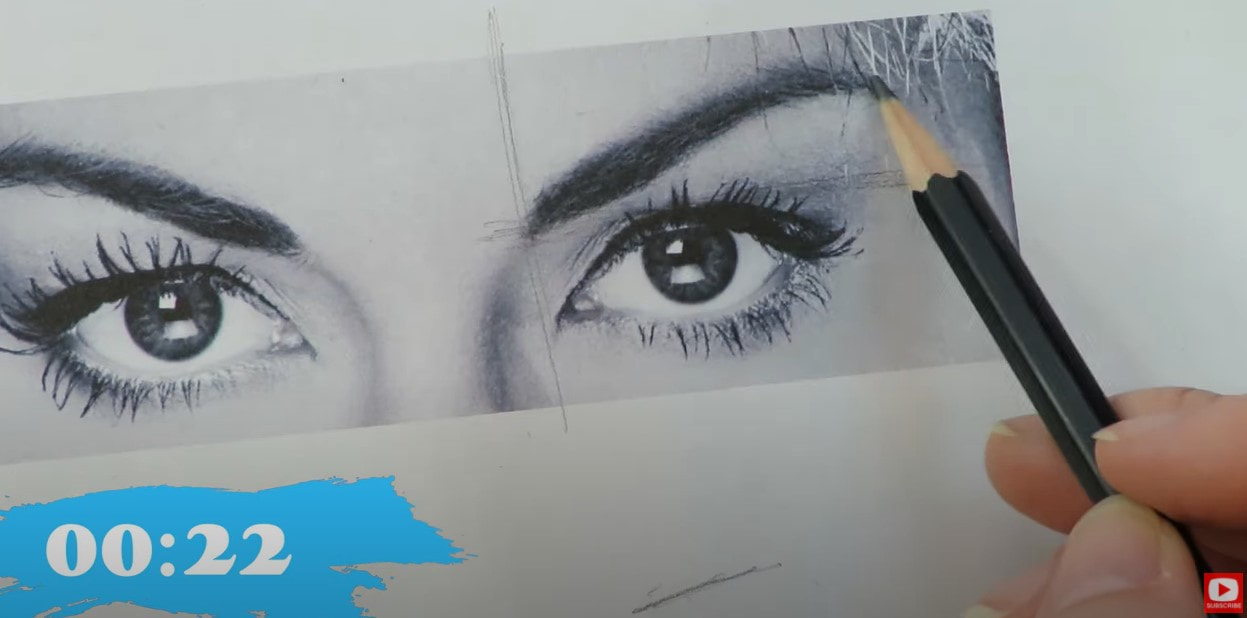
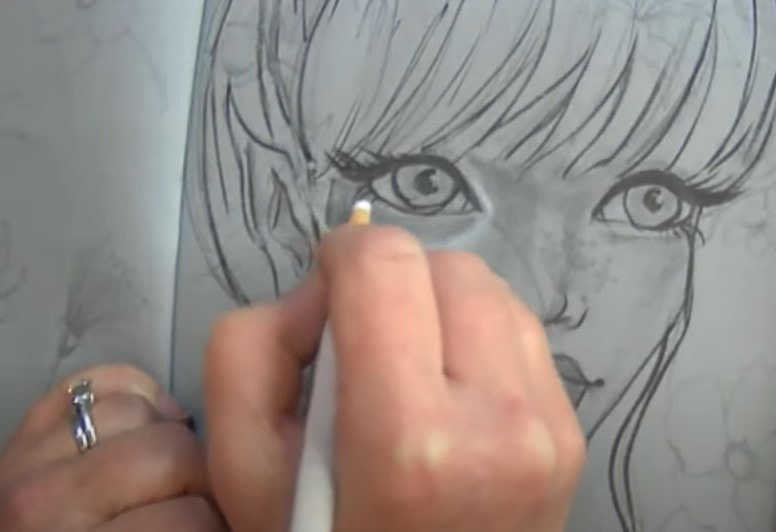
After I get the main lines of our fairy sketched in with my mechanical pencil, I switch over to my Blackwing pencil to add a little face shading. I'm obsessed with these because they're SO soft and make shading a breeze.
These are fairly expensive, so don't feel like you have to buy them in order to be successful. Blackwings feel like a 6B or 8B drawing pencil to me, so reach for one of those if you have a drawing pencil set already. If you don't, that's fine too! Use what you have on hand. A #2 school pencil is totally fine! 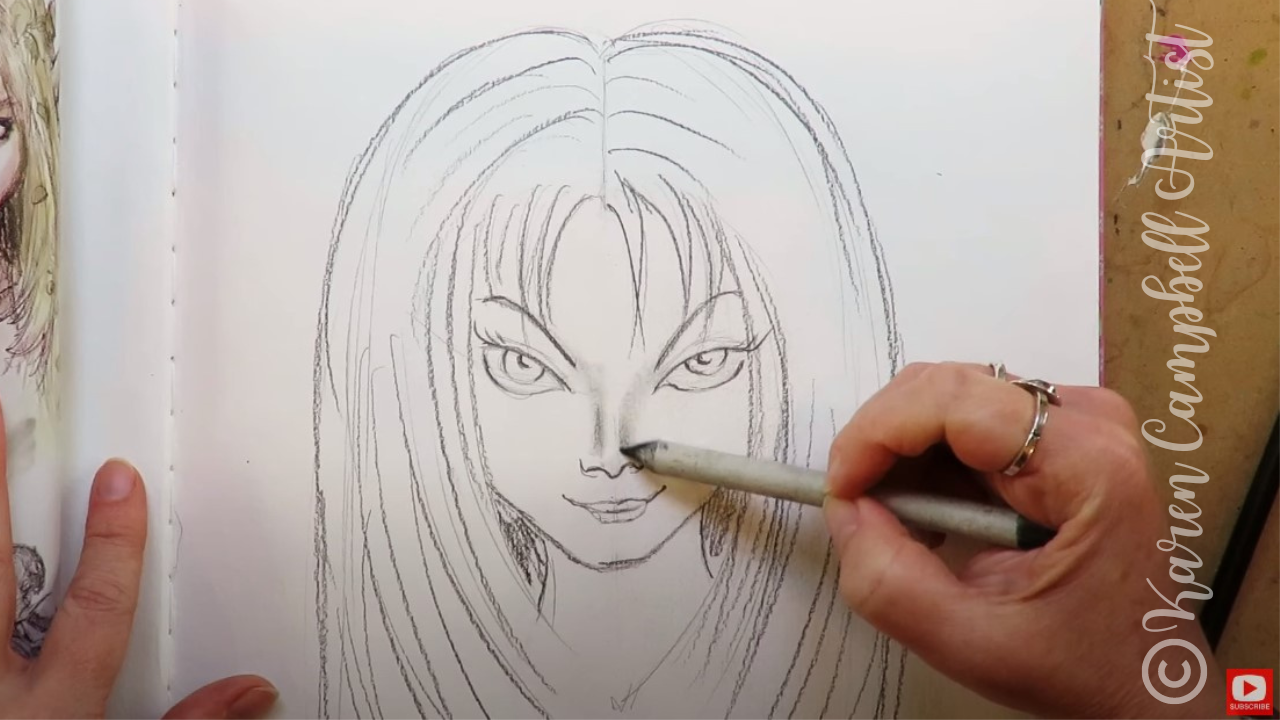
My face shading technique for today is super simple. Just grab a dirty blending stump and "moosh" the graphite around wherever you want to add shadows. If you don't have a blending stump, a cue tip or your finger will do the trick.
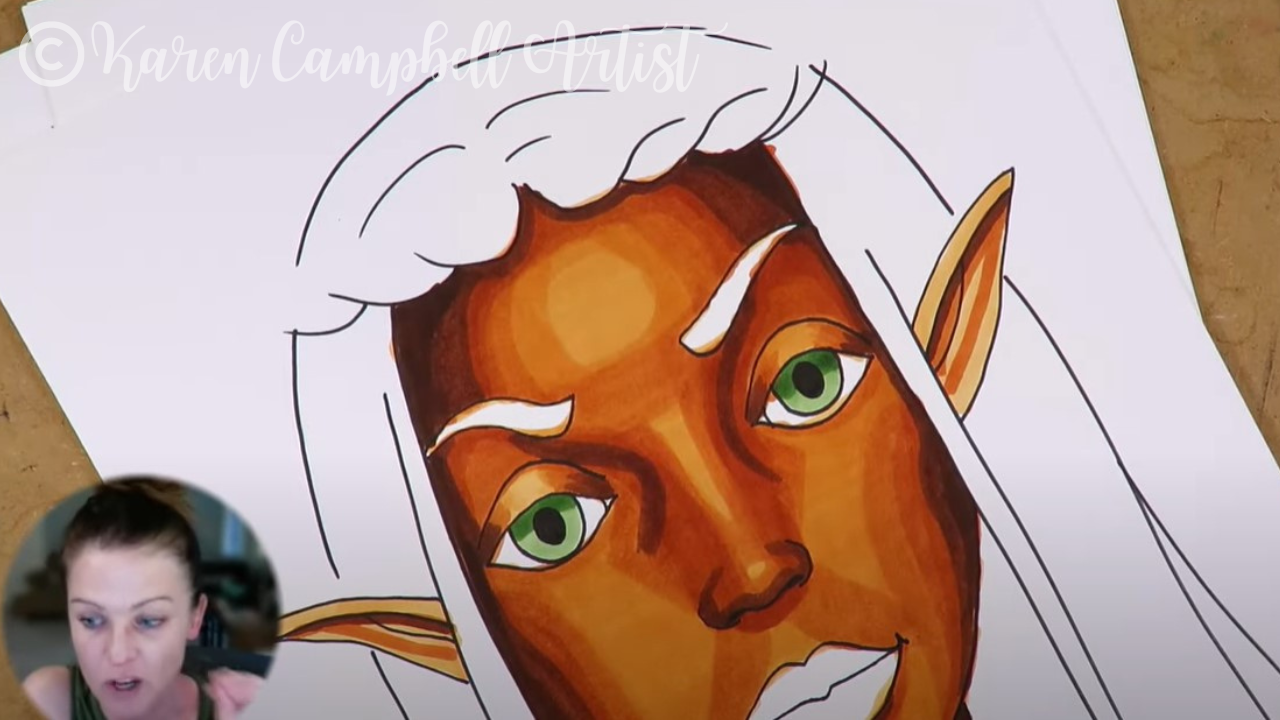
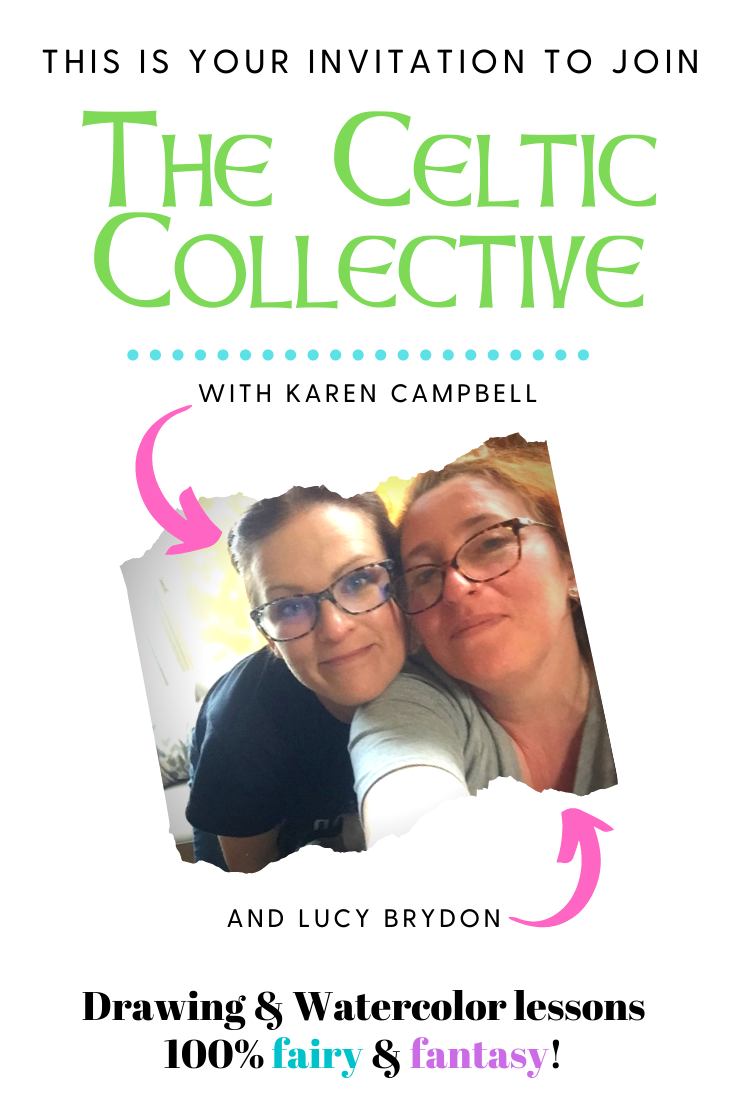
Did you notice I forgot to draw in some fairy ears? ? Head over to PART TWO of this project to sketch those in, and learn how to add a layer of watercolor to really make your drawing pop! When you're finished drawing her, watch this video next to add watercolor! If you're OBSESSED with fairies and fantasy art like this, you might just LOVE the Celtic Collective over at Awesome Art School that I run with my Scottish bestie, Lucy Brydon. Add your name to the waitlist to be notified when it's open for enrollment. You might ALSO enjoy our podcast 1Scot,1 Not. We talk about everything under the sun to do with Scotland - whether it's historical, fantasy, whatever. Just a quick warning - we have a blast and are totally ourselves on the podcast, which means there is some drinking and swearing. ❤️ CHECK OUT ALL my art books on AMAZON ❤️ MY FAVORITE ART SUPPLIES on AMAZON ❤️ MY BELOVED FACEBOOK GROUP ❤️ FOLLOW ME ON INSTAGRAM
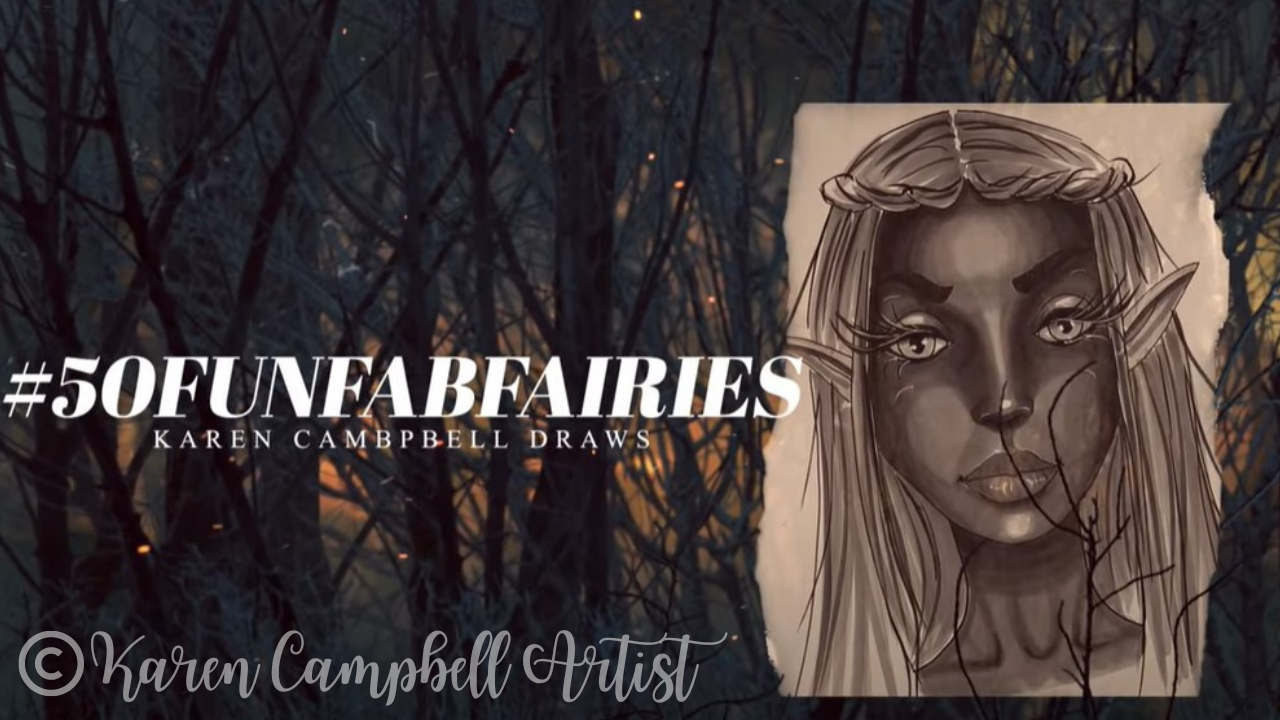
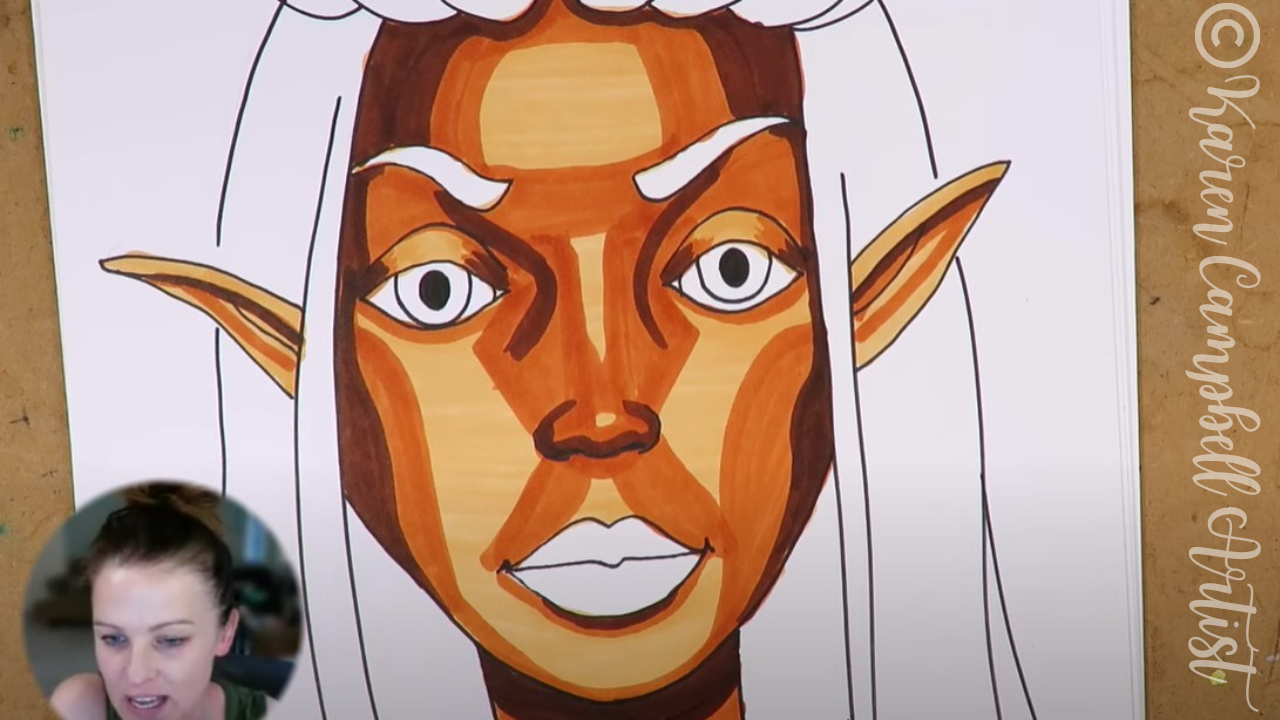
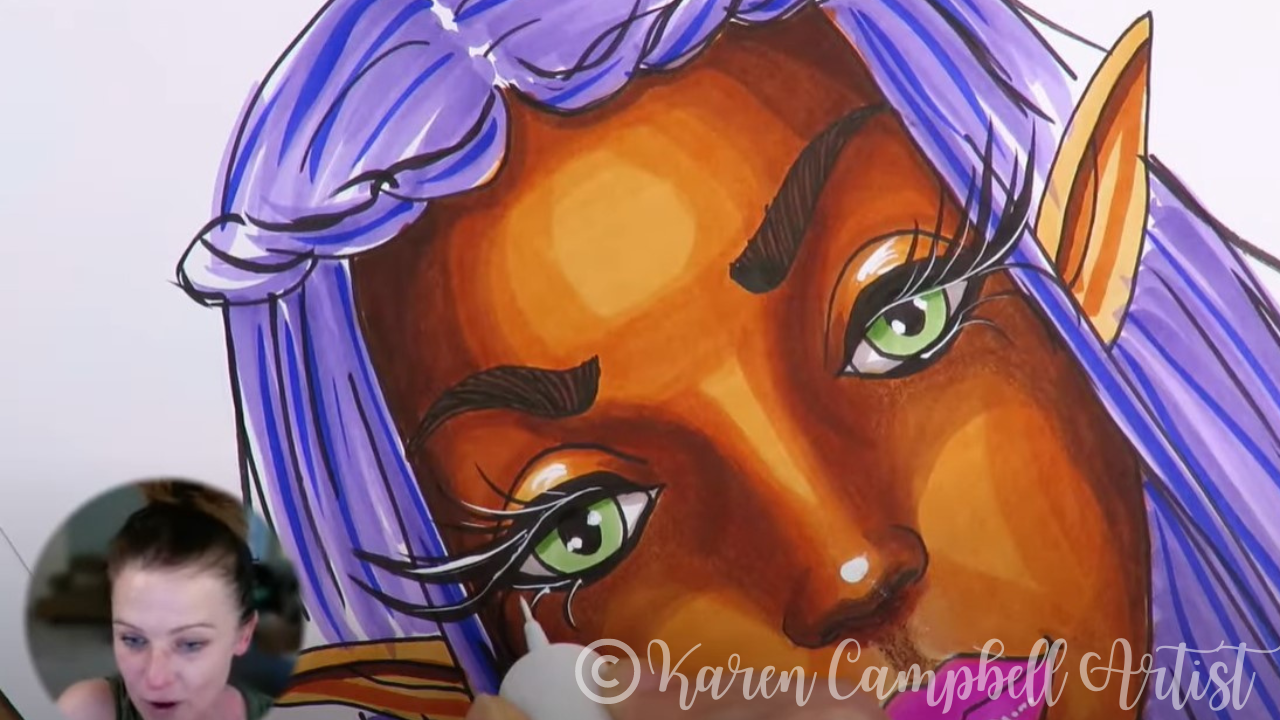
SCARED of your DARK skin tone markers? You are NOT alone! The process for shading faces with dark skin is EXACTLY the same as shading faces with light skin tone markers. Press play to CONQUER these fears once and for all and to see my BEST alcohol marker blending tips in action. Playing along with my #50FunFabFairies drawing challenge? Today's FAIRY face drawing and shading tutorial is lesson 8!
Want easy access to today's lesson and even MORE fairy drawing ideas? Join my FREE #50FunFabFairies drawing challenge over at Awesome Art School!
Simply click the button below to receive instant access to ALL the fairy reference images for each drawing prompt (including today's elf ears drawing reference!), plus info on supplies, cheatsheets, and more! 
Wanna become a better artist? Do today's lesson (and every lesson of the challenge) five times, making a few creative alterations of your choice, and watch your skills soar as you practice fairy eyes drawing, fairy and elf ears drawing AND fairy hair drawing 50 different ways!
Before we continue, super quick announcement: All product links are Affiliate. I may earn a small commission if you choose to order through these links but by law there is never any additional cost to the consumer for doing so. I thank you for your support.
|
Karen CampbellFounder of Awesome Art School. Mixed Media Artist. Author of 19 Instructional Art Books! 
Whose work has appeared in...
   
 Archives
July 2024
Categories
All
|


 RSS Feed

"Karen is flipping hilarious and she's very real...I like the way she teaches in a way that really gives you confidence, whether you're a beginner or advanced there's always something new to learn!"
- Elizabeth W. |
What Fans Are SayingKaren, you are absolutely fabulous! You make me feel like I can draw anything. I have recently retired and finally have the time to do some of the art that I have loved since I was in school. I am really at the beginning of my art journey and I hope to learn as much as I can. Thank you for all you do. |
Contact ME |