
|
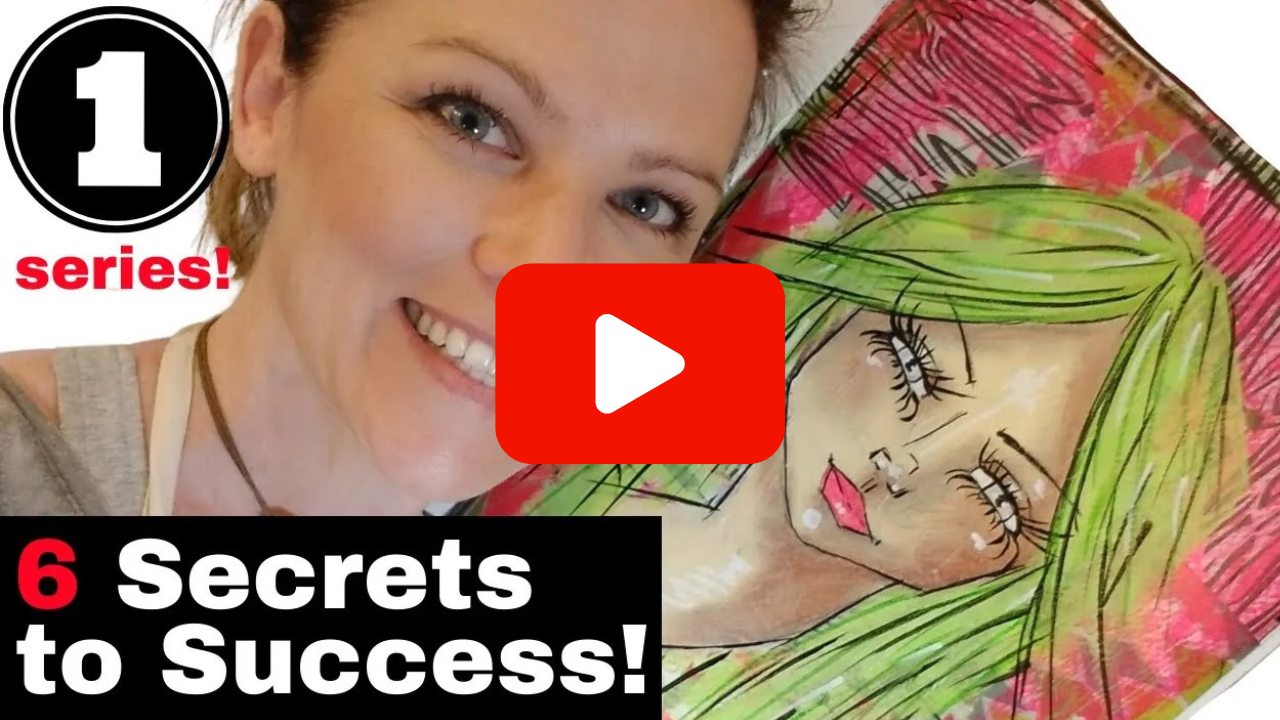
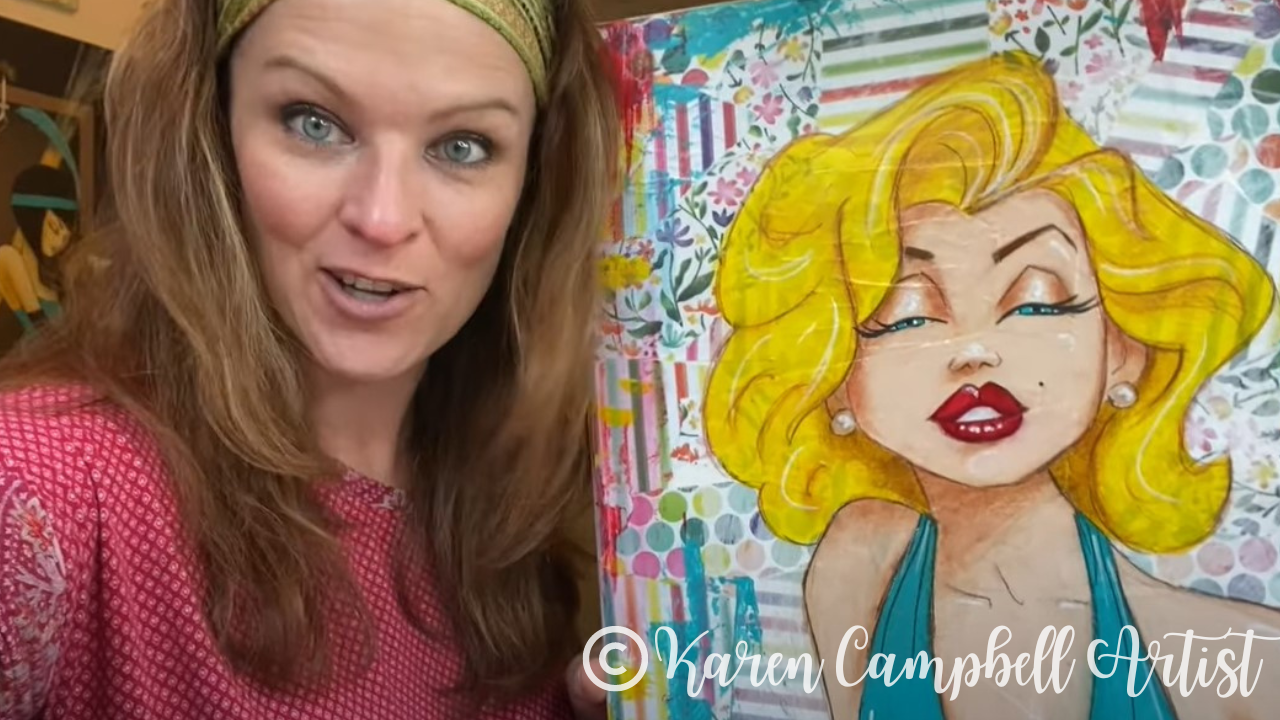
I KNOW you've seen these foam heads in your local craft store before. But have you ever picked one up and brought it home to create some mixed media art?!
These funny foam heads have WAY more purposes than you'd think :) From Halloween decorations (heck ya - see the black widow girl in the far right below?!), to eye-glass holders (much-needed, thank you), or something that's plain old FUN to liven up a boring corner of your house! 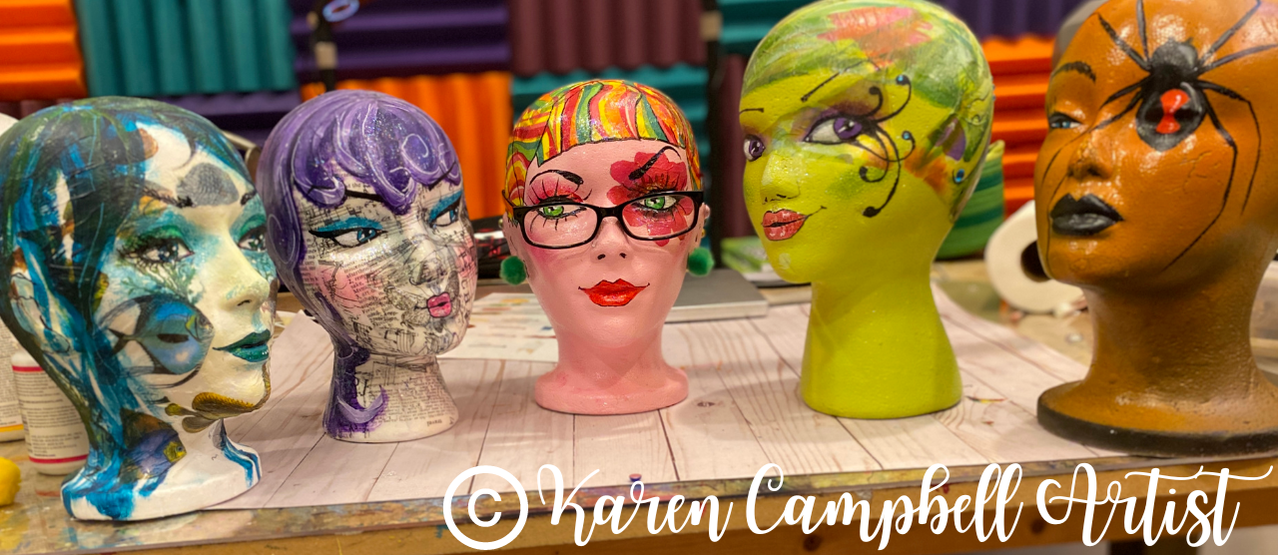
*All product links are affiliate and for U.S. residents only.*
I've made quite a few mixed media foam heads over the years, and am excited to make a new one today! I hope you enjoy this EXTRA FUN experience on YouTube today because this entire mixed media art tutorial is step-by-step so you can join in the fun and create along with me at home :)
Supplies Needed
Use what you have and love at home! Here's what I'm using:
Click here to start the full step-by-step mixed media art tutorial in my signature "Hamburger" style! 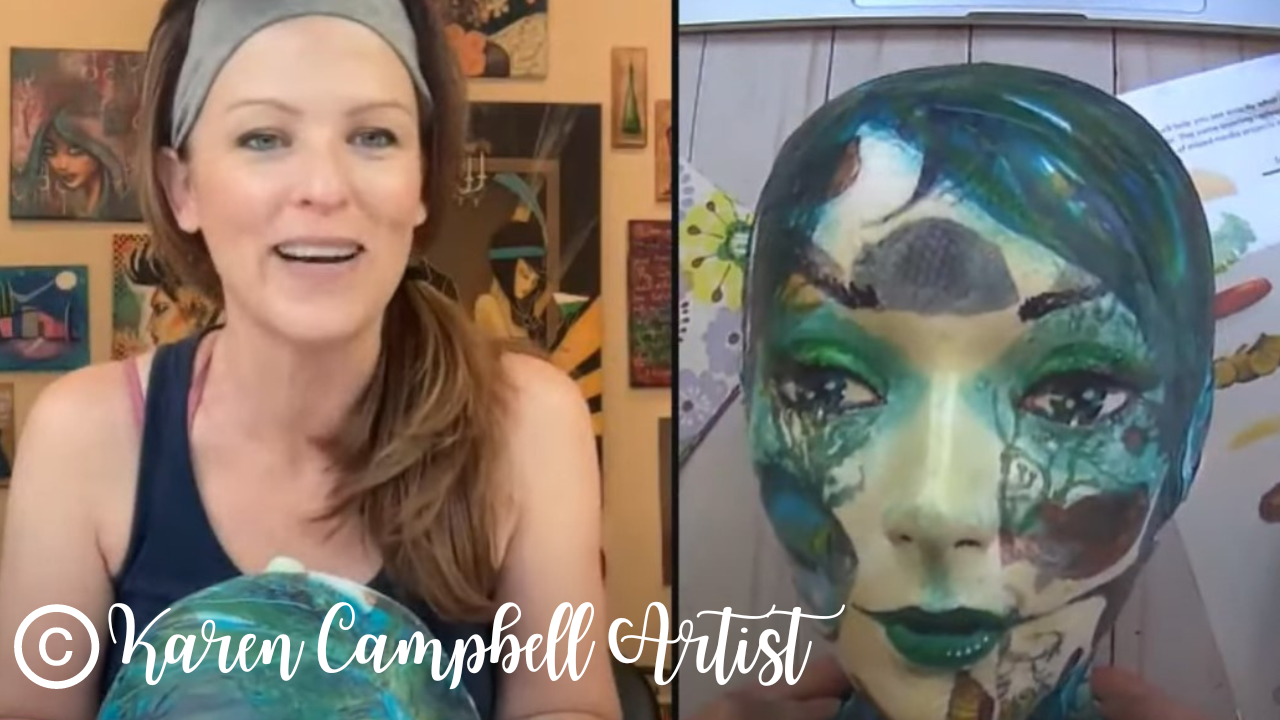
Not sure what I mean by Hamburger System? This is my tried-and-true mixed-media layering process for creating mixed-media masterpieces EVERY TIME. Wanna try it at home with me?
Grab my Hamburger System cheatsheet and follow along layer by layer just like you're following a recipe. 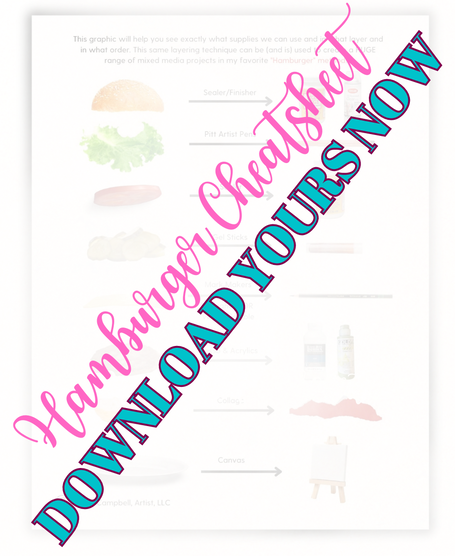

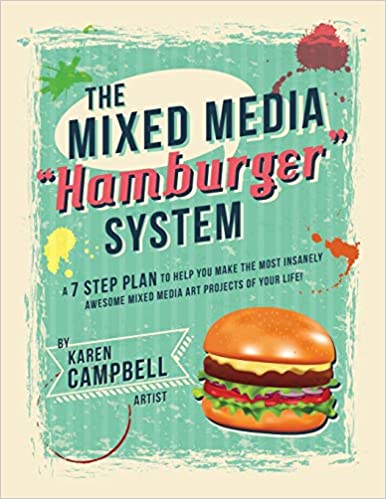
I love the Hamburger System SO much, I turned it into a book :)
Feel free to grab that on Amazon if you'd like to dig a little deeper into how your supplies work, and how to combine them successfully to create art YOU love! 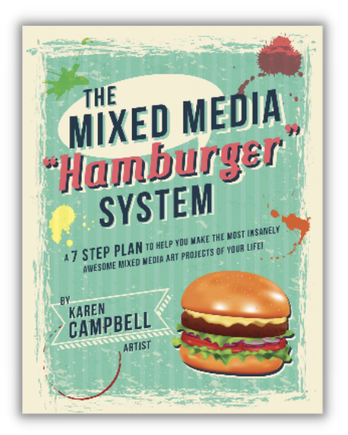
Back to today's project! As you can see in the first step - I'm layering tissue paper with TONS of mod podge under and on top to eliminate as many wrinkles as possible. Then, I use my hair dryer to make sure it's completely dry before moving on to my acrylic paint layer.
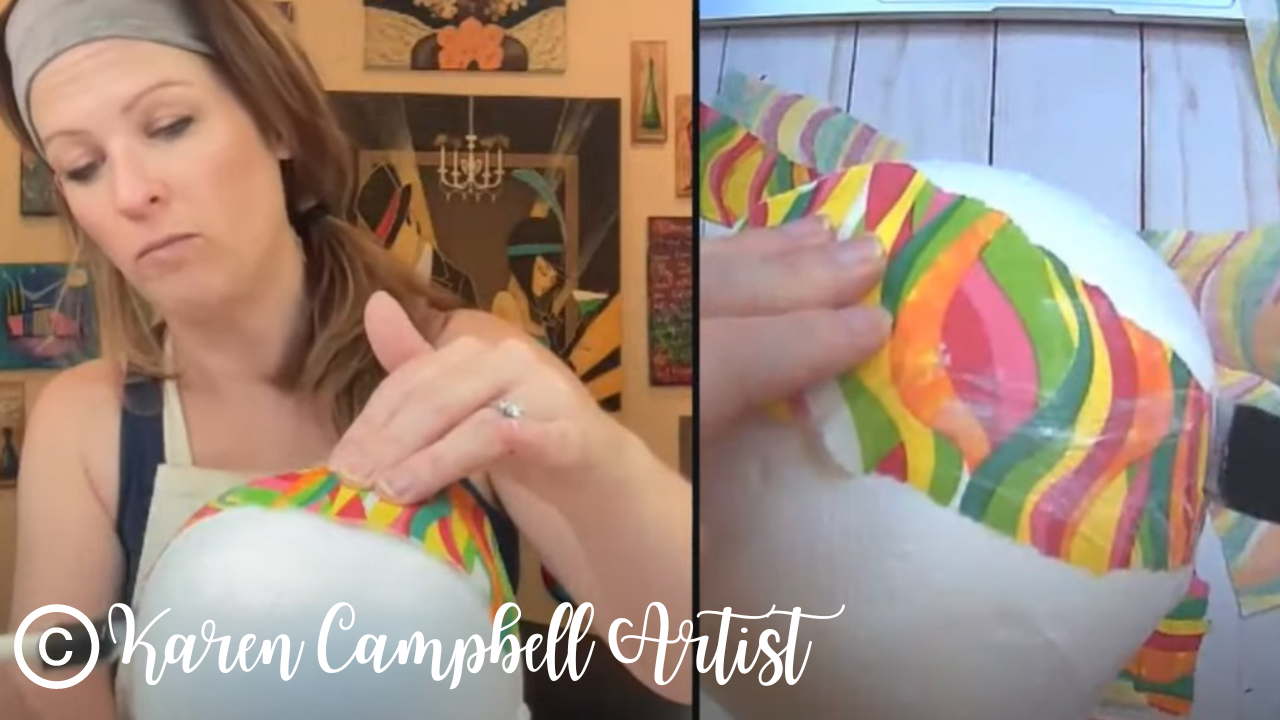
Once it's dry, it's time to choose the color scheme for my acrylics. Lots of my students get overwhelmed with how to make this decision. There are SO many colors in the rainbow (these are some of MY faves!!), how can you ever decide which ones to use with confidence?!
I'm SUPER literal about this decision every time, and simply look to my collage materials for guidance. I've found this to be a fail-safe way to create, and it never lets me down! Typically I pick 3 colors from my collage paper and move on! Today I decided to zero in on a lighter variation of my hot pink because it looks a little more like skin tone to me, and that's what I'm in the mood for :) 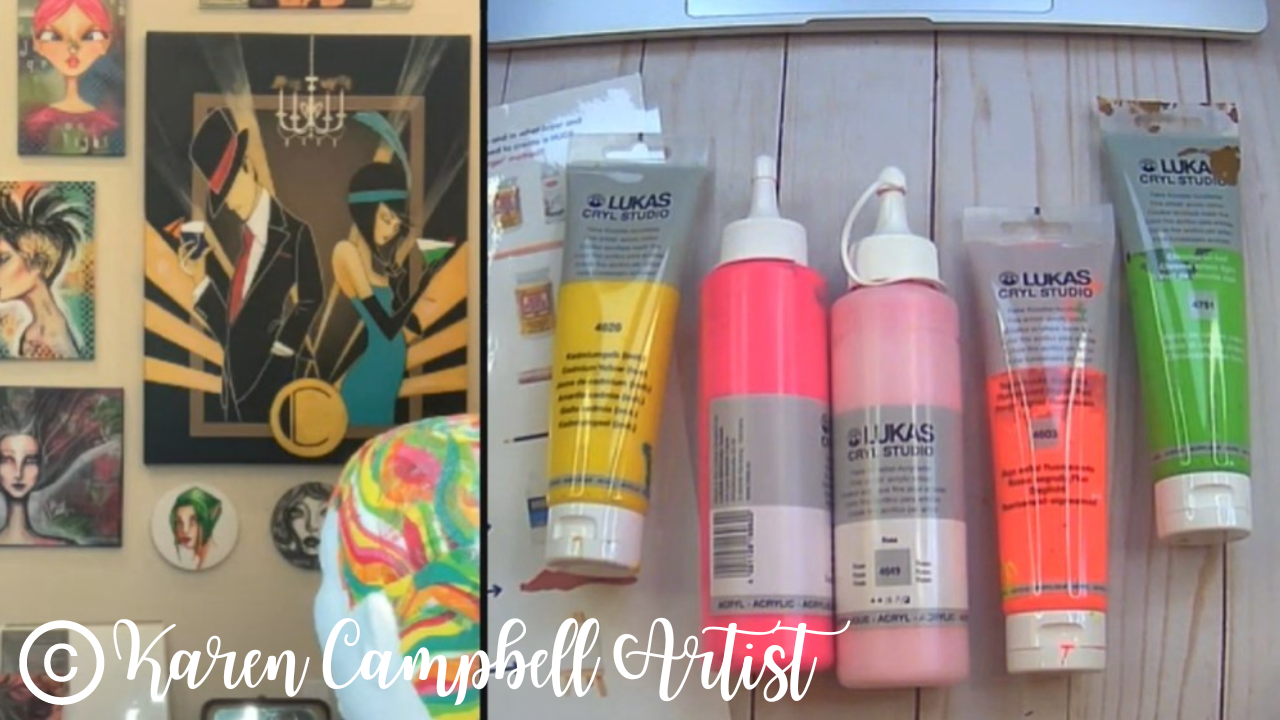
Click over to watch exactly which brushes I'm using, and which mixed media art supplies come next! If you don't have brushes for acrylic paints, these are great - just choose what size you want. For lots of coverage for something like today's project, I'm using a big fat version, like a #20.
Stay with me till the end of this FUN tutorial because there are LOTS of SPARKLES coming this foam head's way :) She even gets a nose ring (below left!). Go grab your supplies and come get creative with me!! 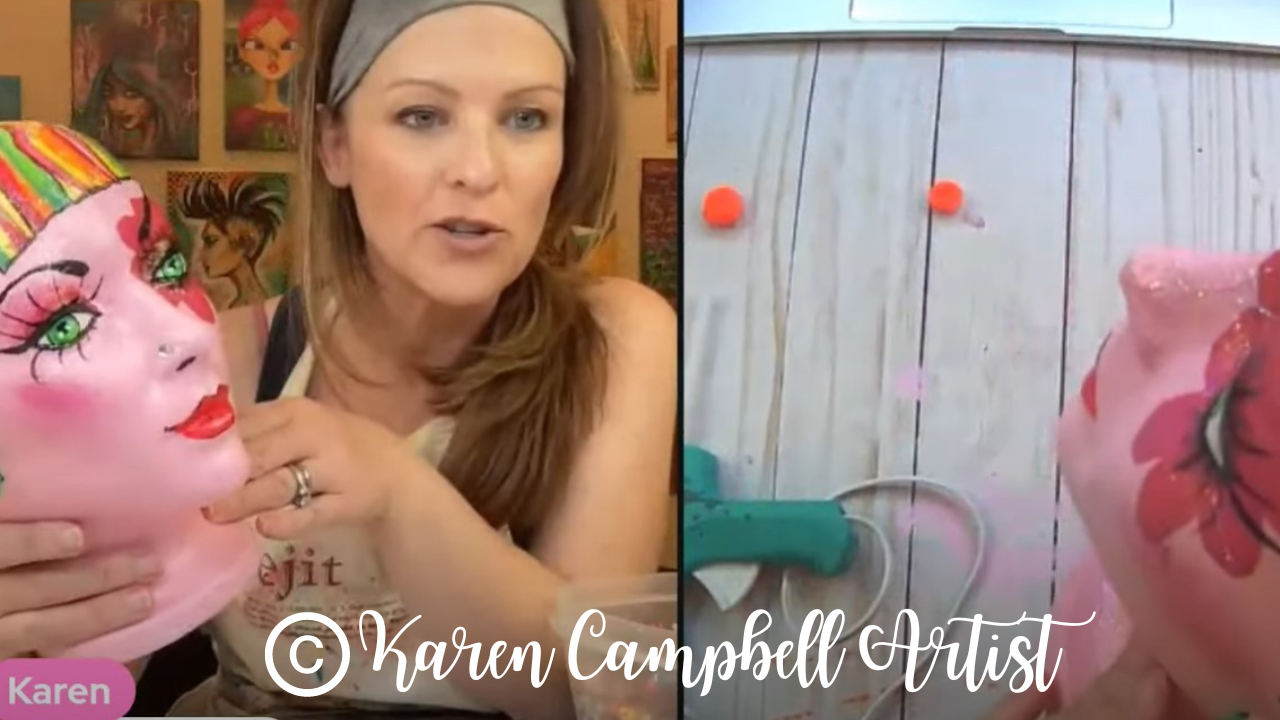
Want MORE Projects Like This?
You might just love my Mixed Media Society art club over at Awesome Art School! We'll dig deep into the world of mixed media art supplies to understand their qualities, and more importantly HOW to use them together to create mixed media art we can be proud of on canvas, in art journals - you name it! Learn more and get notified next time we're open for enrollment here!
What to Watch Next...
Wanna learn MORE about my Hamburger System? This FREE video series on YouTube has SO much to teach you!! I start at the very beginning to teach you about what surfaces you can art on, and how to layer each step of my process - just like a recipe for building the perfect burger :) Check it out!!
Need More Resources?
0 Comments
If you're a watercolor beginner or new mixed media, watercolors and water-soluble art supplies can feel a little intimidating and unpredictable.
In today's YouTube video, I'd LOVE to blow those feelings away for you by demo-ing 3 BASIC watercolor techniques to give you a dose of confidence: ✨Wet-on-Wet (creates beautiful blooms) ✨Wet-on-Dry (offers more control) ✨Dry-on-Dry (adds texture) Let's get comfy with watercolors!! 
All links are affiliate and are for U.S. residents - always use what you have on hand!
I've REALLY been enjoying working with a variety of my watercolor sets by Prima lately. If you've been hanging out with me on YouTube, you may have seen my videos reviewing both the Terrain watercolor set, and the Currents watercolor set. Missed those?Watch this playlist!
I first got into Prima watercolor sets with the Complexions set because I absolutely LOVED having a little palette of skin tone watercolors all in one place that I could dip right into, without mixing!!
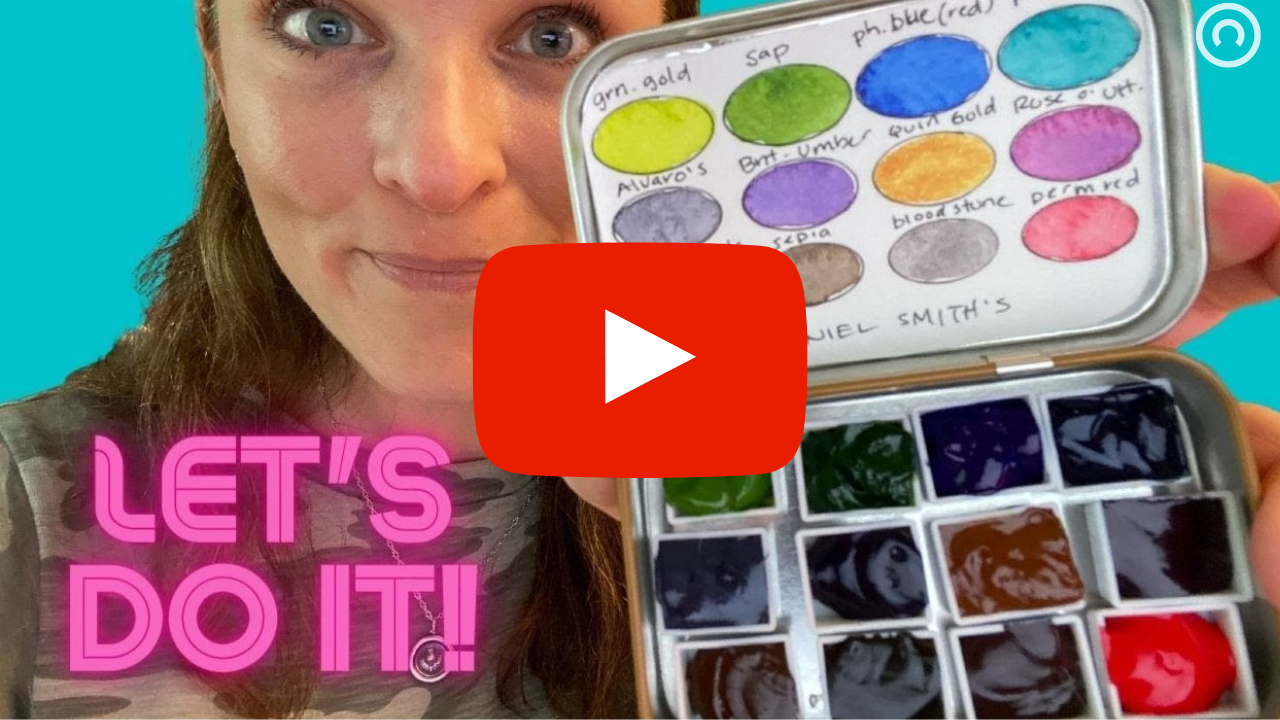
If you're new to me, I'm OBSESSED with Daniel Smith watercolors, and have done LOTS of videos from How to Start Your first Daniel Smith Watercolor Collection, to How to use the Daniel Smith Dot Cards, and How to Build Your Own Custom TRAVEL Daniel Smith Watercolor Palette.
Daniel Smith makes GORGEOUS, fine art watercolors. BUT... I know they're SO expensive!! Because of that, I'm always on the lookout for Daniel Smith alternatives for my students.
Prima palettes, while not a fine art product, are affordable, and offer great quality and value for their price point of $25 or less, if all ya wanna do is have a little FUN!! I love how the colors in each Prima palette already all go together (making them perfect for projects!), plus they have cute, inspirational names for the sets and individual colors. WHY Watercolor Paper is So Important
Before we get into today's project, I can't emphasize enough how IMPORTANT paper is when it comes to watercolor (or using water soluble mixed media art supplies).
You always need to be working on paper that's been created exactly for watercolor. If you don't, your paper will tear because it can't handle all the water. There are two main types of watercolor paper I use: cold press watercolor paper (which is bumpy and textured, I love this one), and hot press watercolor paper (which is smooth, I love this one). 
Typically I reach for cold press paper (shown above), because it's a little more like a sponge than hot press, and I love the texture.
If you'd like to learn more about watercolor paper - this vid's for you and will give ya all the deets!! Wet-on-Wet Watercolor for Beginners
Let's dig into technique #1 for today. Wet-on-wet watercolor is exactly like it sounds. All you need to do to play with this technique is to first, wet your watercolor brush and drag it all over your watercolor paper (or on the parts where you intend to use the wet-on-wet technique). Then, wet your brush again, dip it into the watercolor, and place that directly onto your already wet paper. EASY, right?!
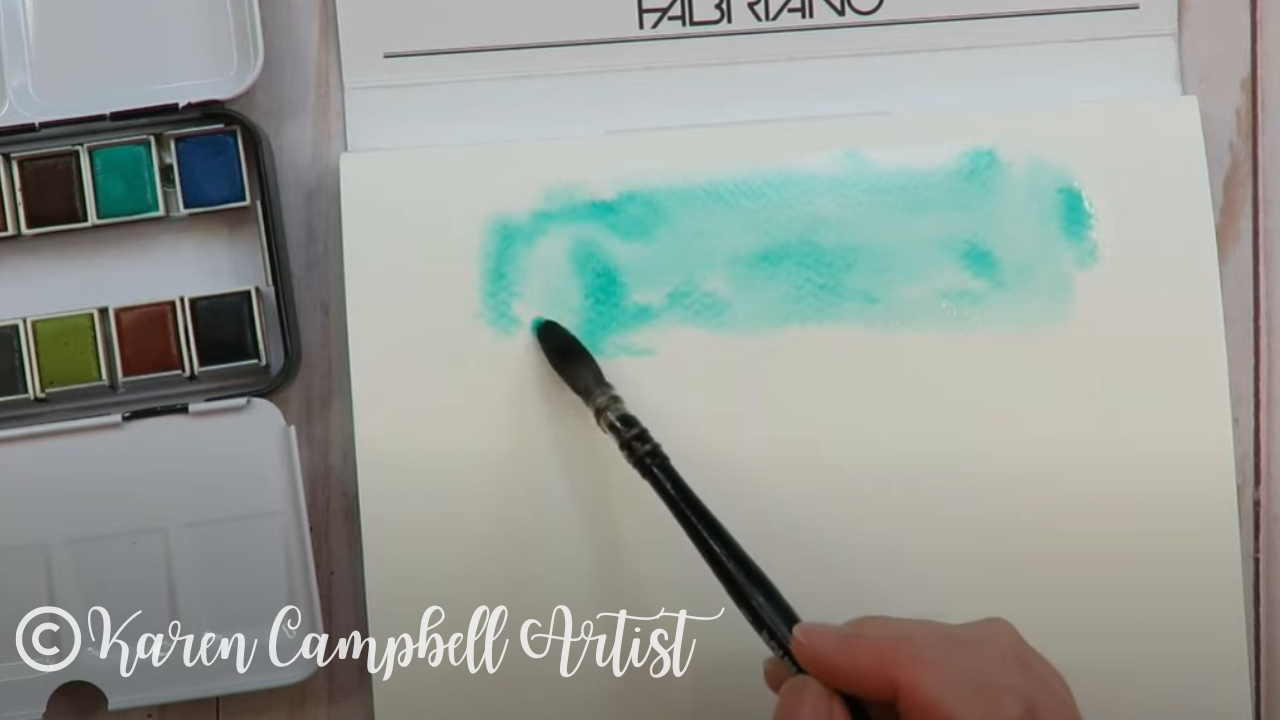
This super simple watercolor technique will make your paint spread or bloom quickly into all the areas where your paper is wet! It's soooo fun!!
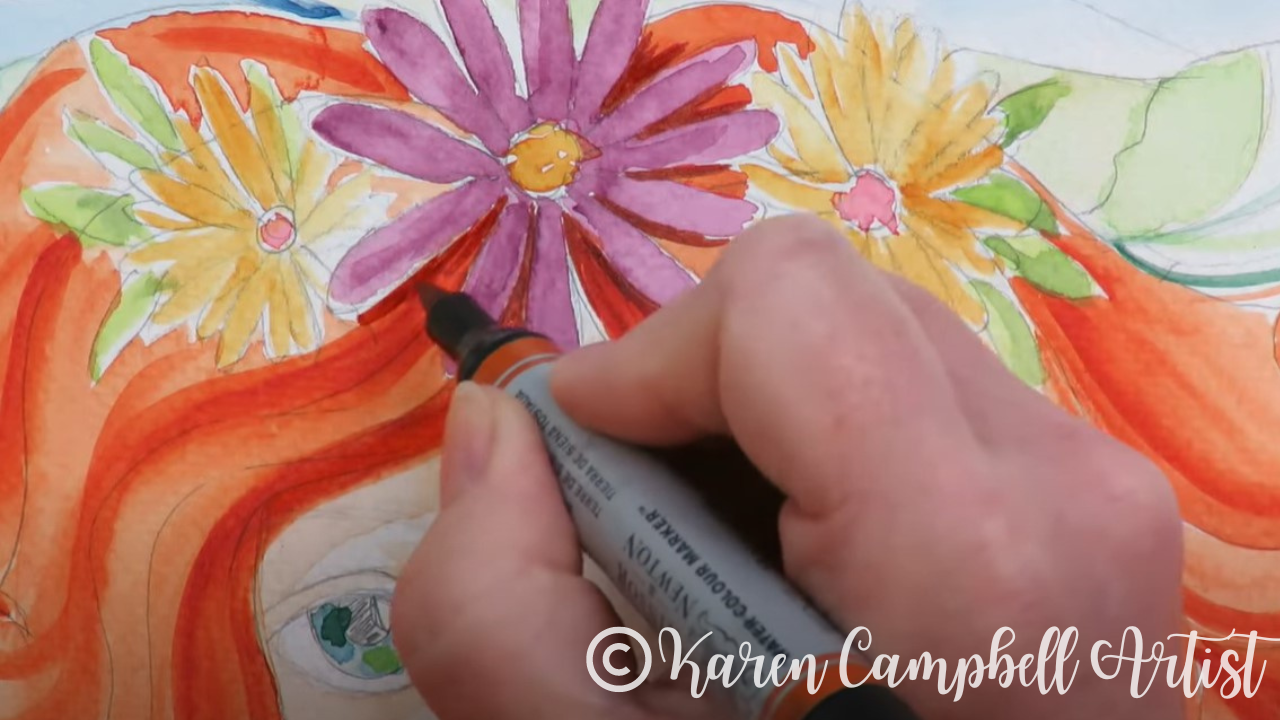
Love that shade of turquoise? Me too!! It's from the Woodland Watercolor Set by Prima :) Wet-on-Dry Watercolor Technique for Beginners
Wet-on-Dry watercolor technique is basically the opposite. It's simply dipping your watercolor brush into water, wetting your paint, and putting it on dry watercolor paper.
As you can see below, the second line of color demos the wet-on-dry watercolor technique, and looks much different from the wet-on-wet section above it. Wet-on-dry will give you a much harder line, and more control than wet-on-wet. 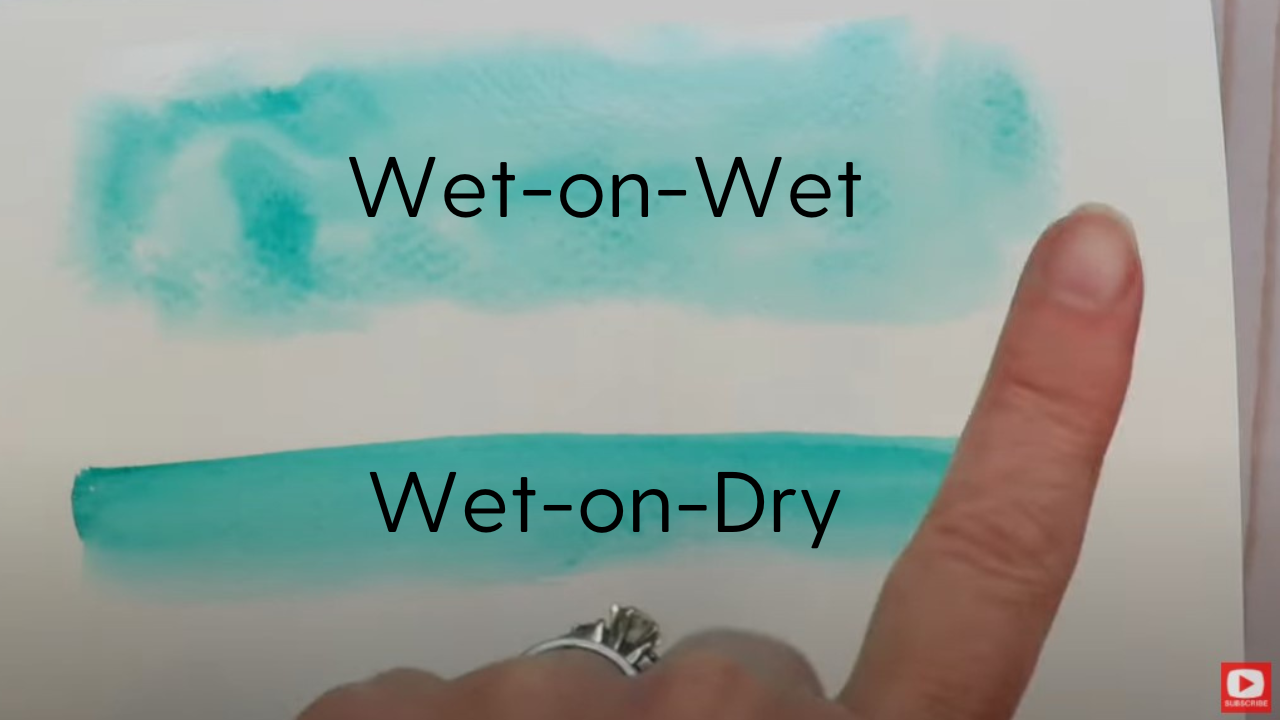
Dry Brushing Watercolor Technique for Beginners
To achieve a dry-on-dry look in watercolor, dip your dry brush (or whatever applicator YOU want - I'm using a sponge in today's video), into damp watercolor. The watercolor can't be too wet, you want it to kinda feel "tacky."
Then, tap or drag your brush or applicator around on your paper wherever you'd like this effect. This will create vibrant and VERY different marks on your paper compared to wet-on-wet or wet-on-dry watercoloring techniques. 
Dry-brushing can really give you some awesome textures to create depth, and can kinda have the look of acrylics.
Ready for a little timelapse? Kick back and relax as I watercolor this adorable fairy in a jar project using all three of the techniques demo-ed today, for one of my online art clubs at Awesome Art School, the Celtic Collective! 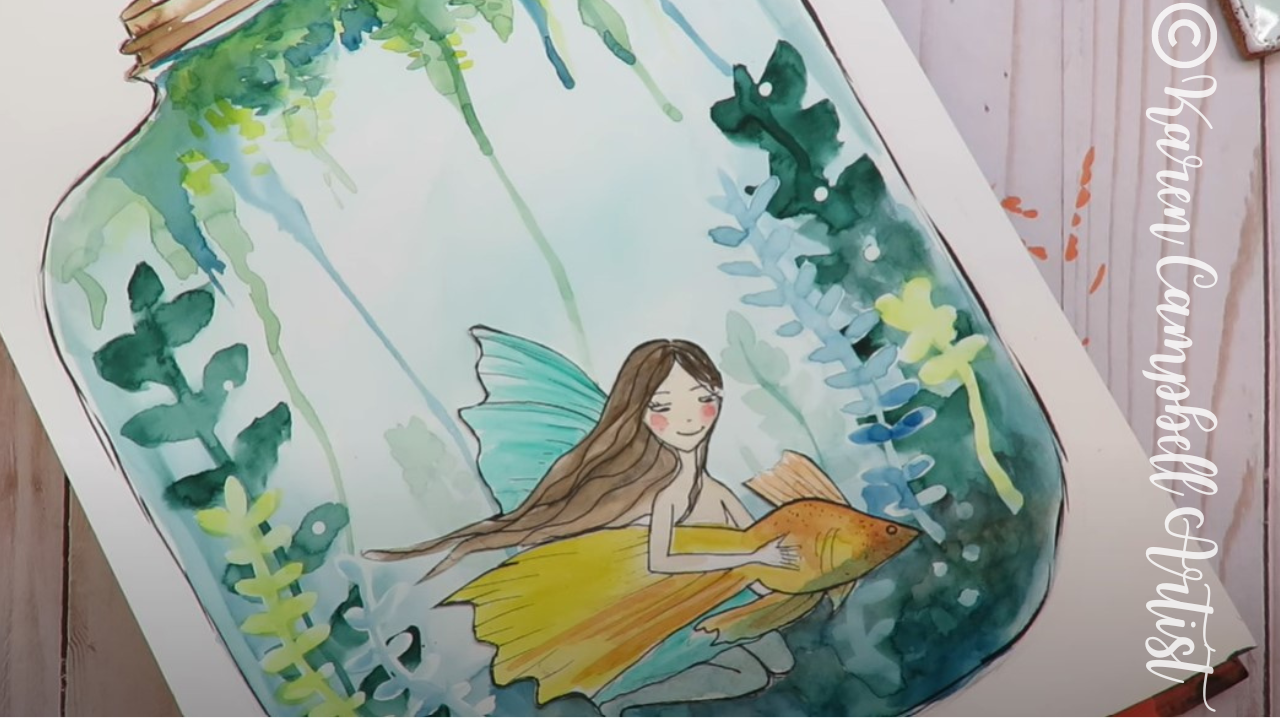
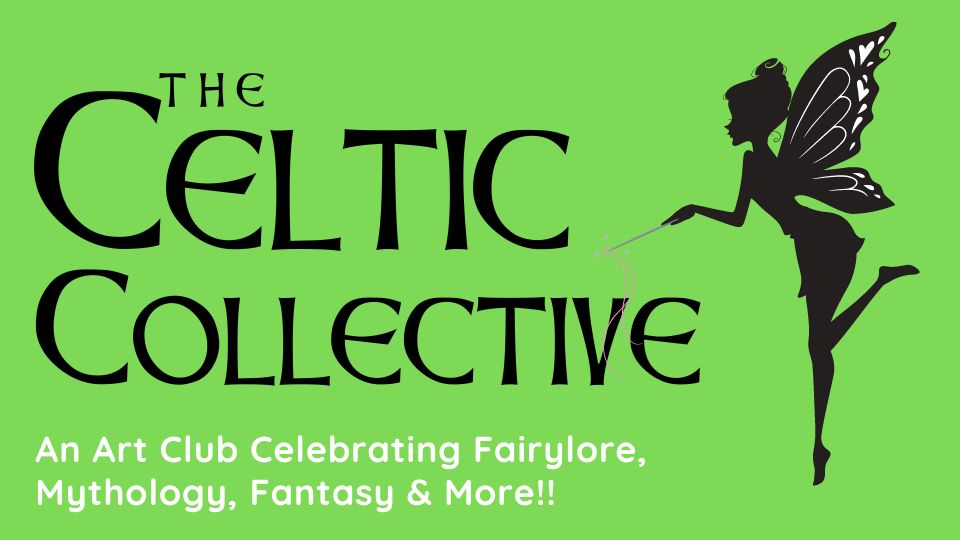
Wanna Learn MORE About the Celtic Collective?
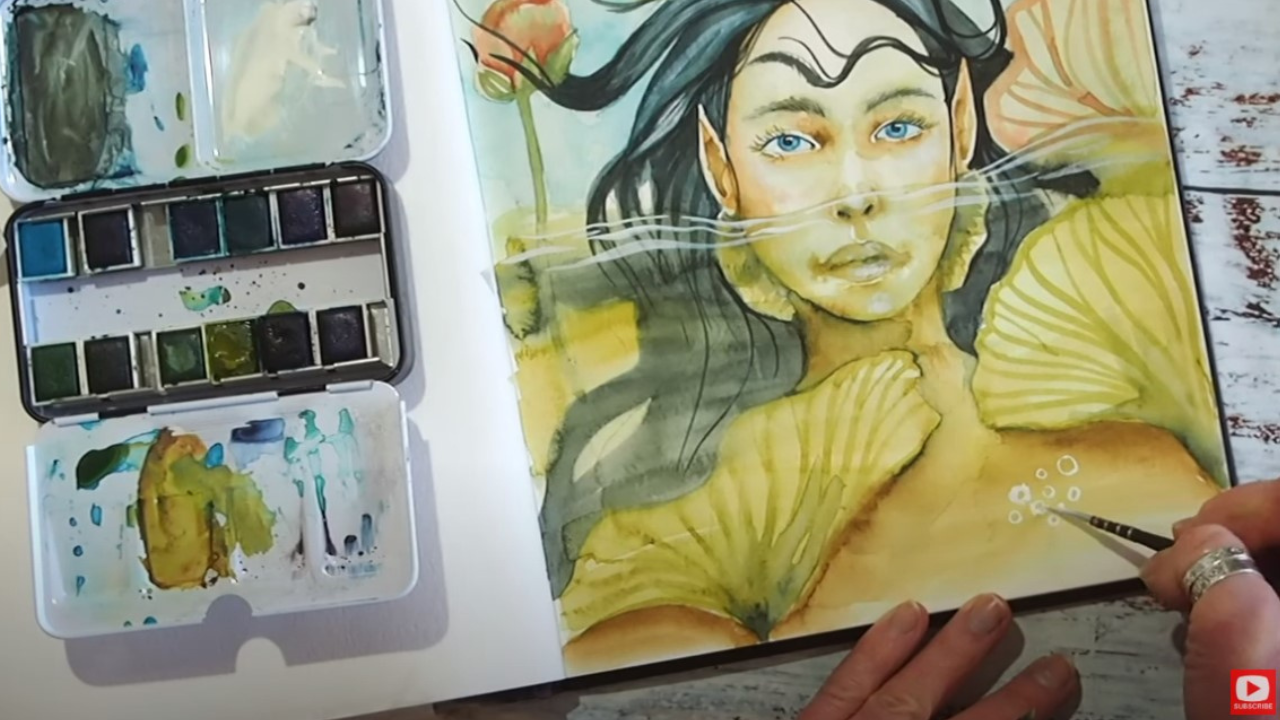
Or do the project featured in today's video step-by-step with me? Awesome!! I run the Celtic Collective art club with my Scottish bestie, Lucy Brydon. This online art club is all about fantasy art and features drawing, watercolor, and mixed media art lessons on fairies, unicorns, mermaids, mythical creatures, castles and so much more!! We'd love to have you join us! Learn more here.
What to Watch Next
Check out this FREE watercolor tutorial for beginners, as I teach you step-by-step how to paint watercolor poppies! Can you tell which watercolor technique I'm using from the image below??
Need More Resources?
If you've been following me for a while, you know how much I LOVE the Complexions Watercolor set by Prima. Since falling in love with that little palette for creating watercolor portraits, I've continued to add MORE Prima watercolor sets to my art supply stash- just like the Terrain set I reviewed last week.
While I was in Scotland for my last Scottish Castle Art Retreat, I happened to be in a little art shop and noticed the CURRENT watercolor set by Prima that I'm reviewing today. It's kind of hilarious because I've been meaning to buy this little set forever, at home, and just hadn't. So, while in Scotland, I decided it could be an artsy keepsake from my trip, so into my suitcase, it went! 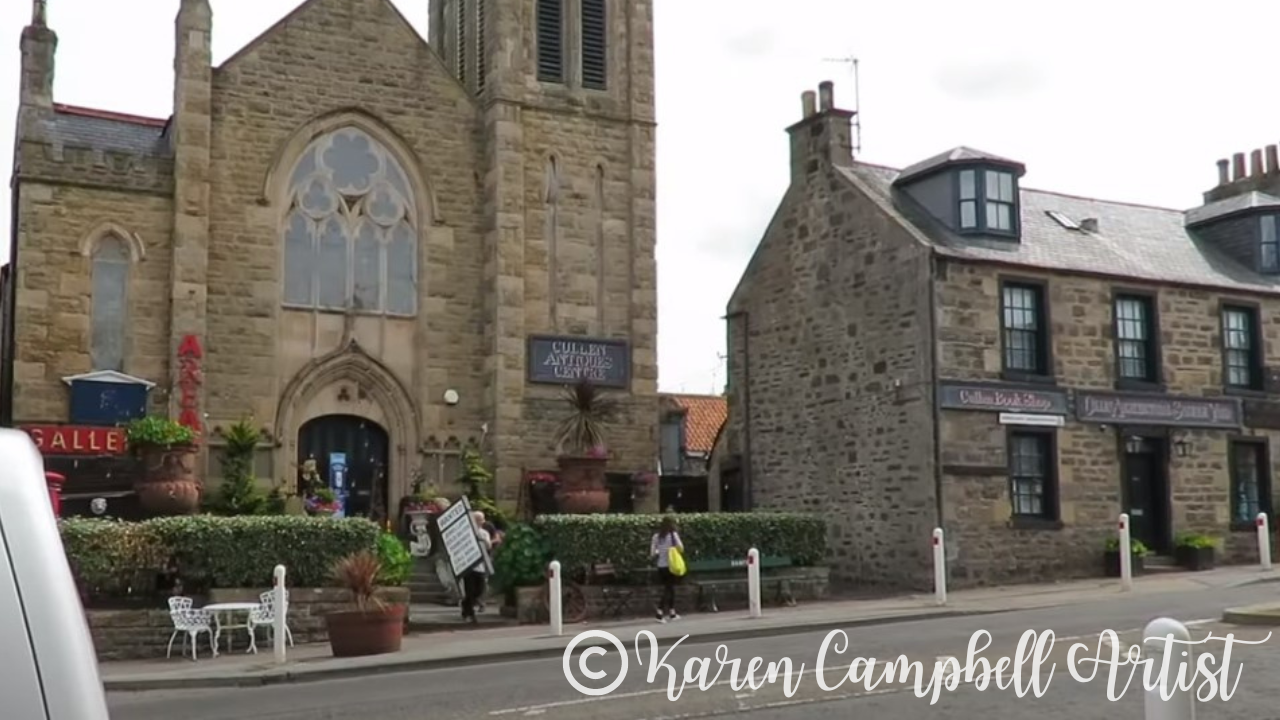
All product links are Affiliate. I may earn a small commission if you choose to order through these links but by law there is never any additional cost to the consumer for doing so. I thank you for your support.
If you aren't familiar with any of the Watercolor Confections sets by Prima, there are TONS of things to love! First off, they're SO AFFORDABLE! A cute little palette of 12 half pans will only run you about $20-25 on Amazon, or just $2 per little half pan of color!
Love the paintbrush shown below and featured in ALL of my watercolor and fountain pen ink videos? ME TOO! It's by the lovely and talented Polina Bright. Learn more about WHY I love them in this video (or get 10% off your own brushes on her website using the coupon code KARENCAMPBELL at checkout!). 
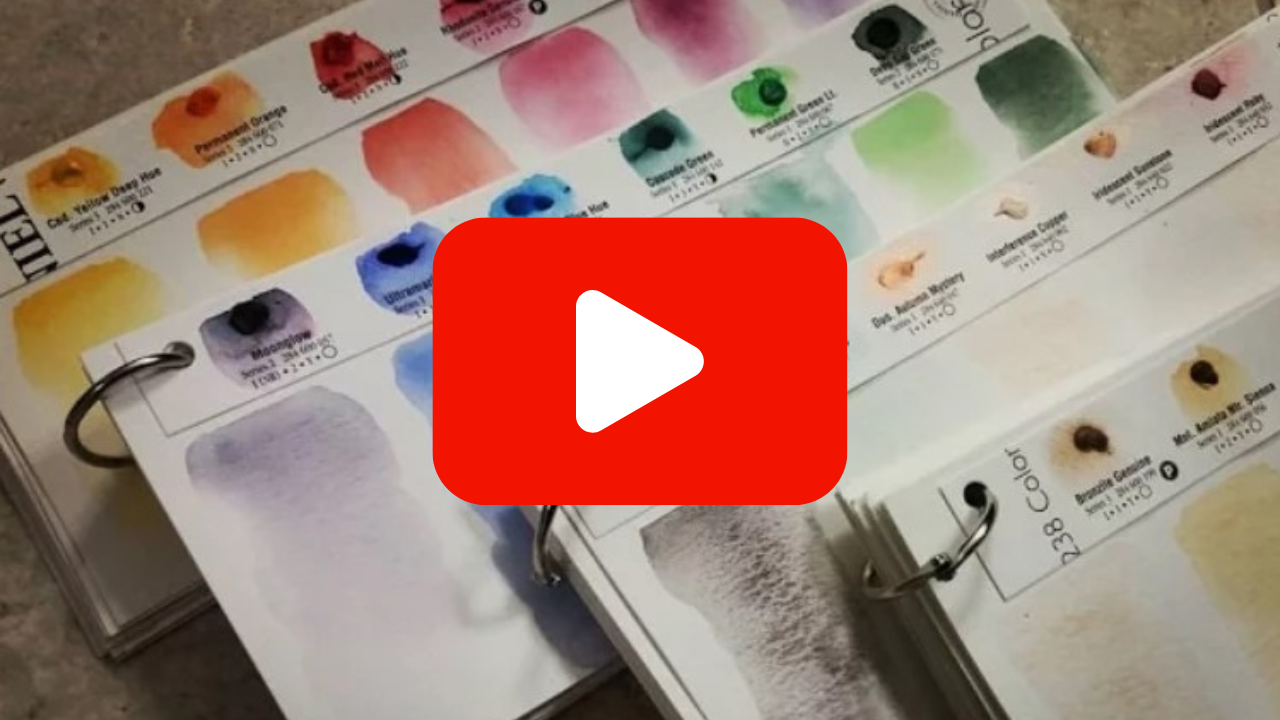
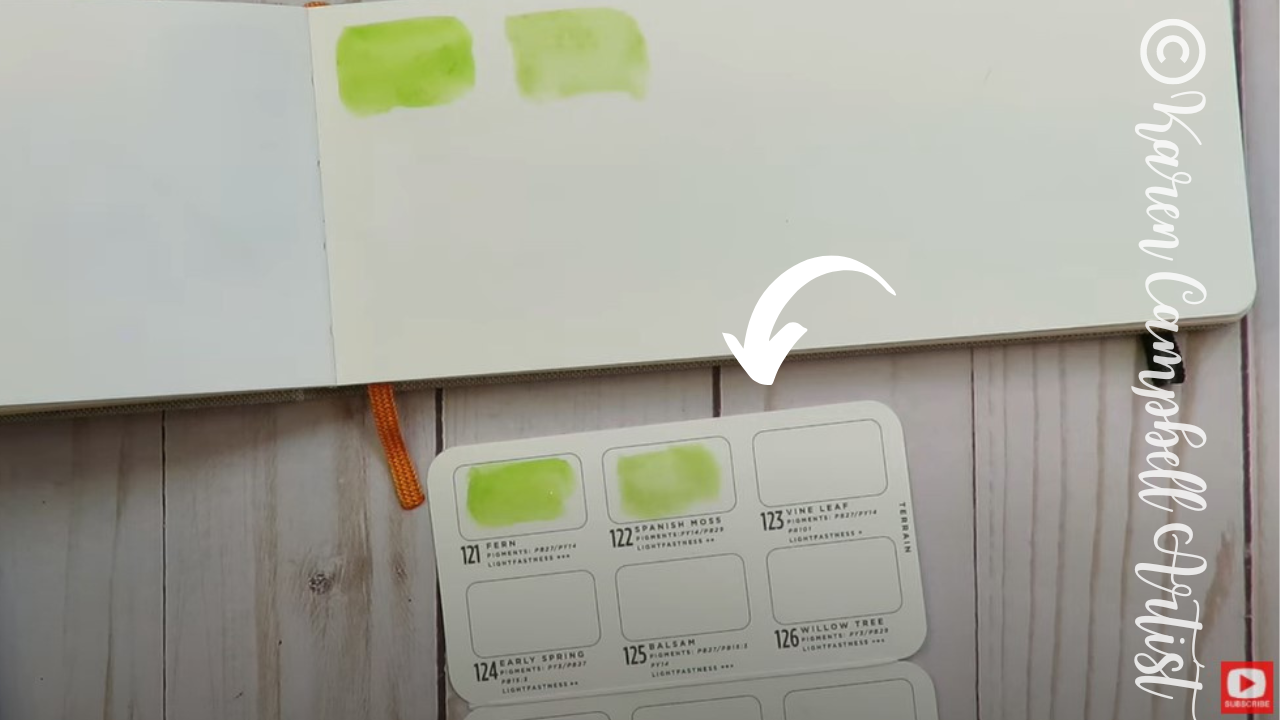
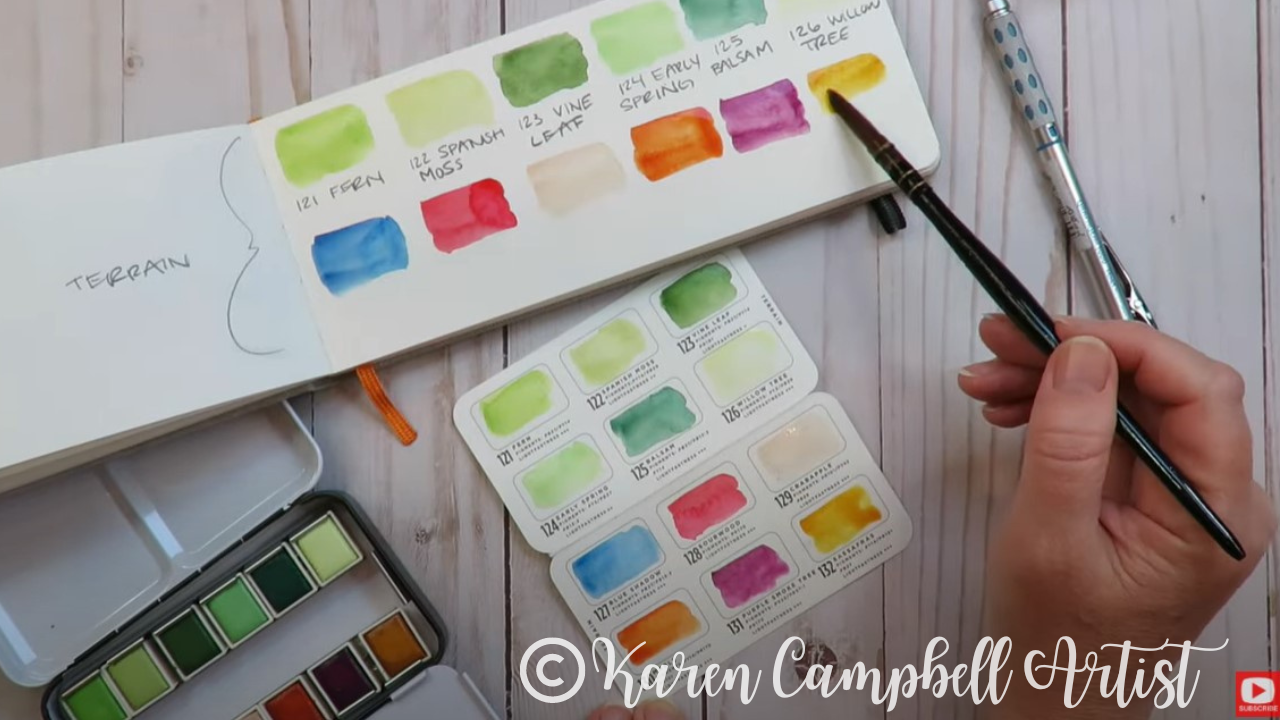
Last week on YouTube, I reviewed the Terrain watercolor set by Prima, and shared with you how much I also love the cute little swatching card Prima includes with their watercolor sets.
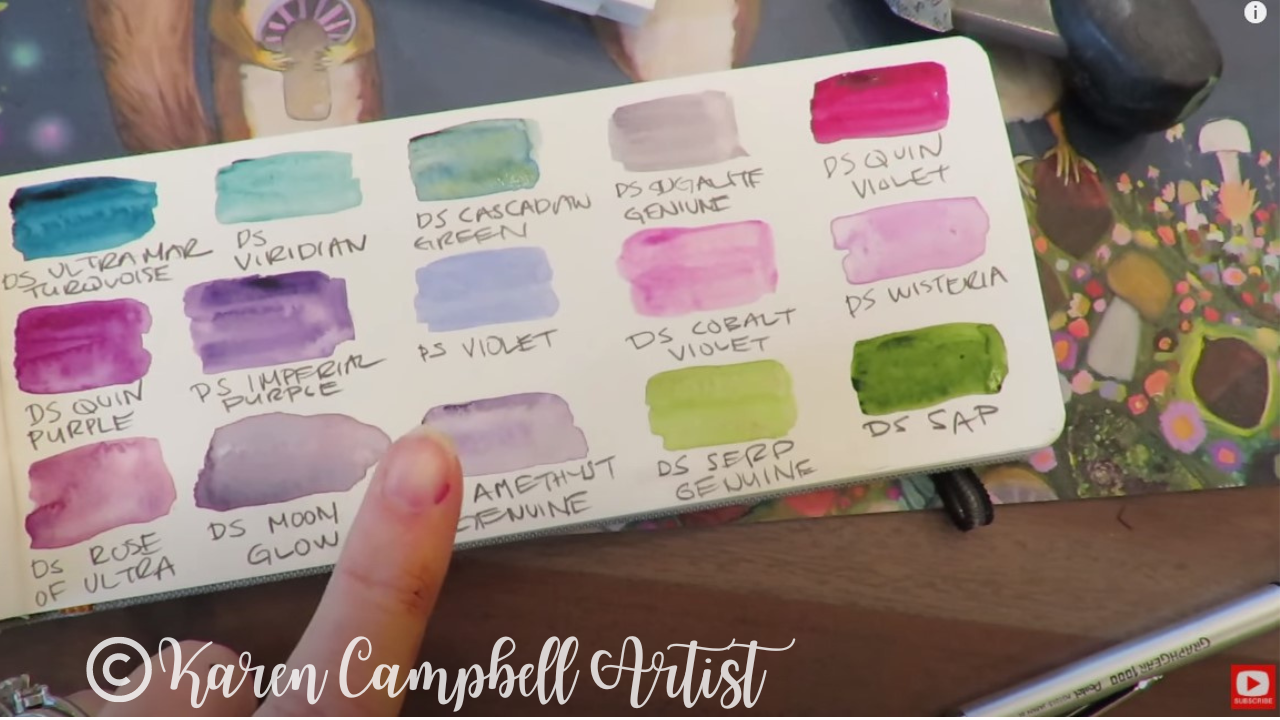
As you can see below, somewhere in my swatching journey over the years, I decided to DOUBLE swatch my watercolors using these cute, skinny watercolor journals - even when a swatch card is included with my set! The main reason I do this is because the little swatch cards are exactly THAT- small. It can be super easy for these little cards to fall out and slip away into oblivion when you open and close the palettes. 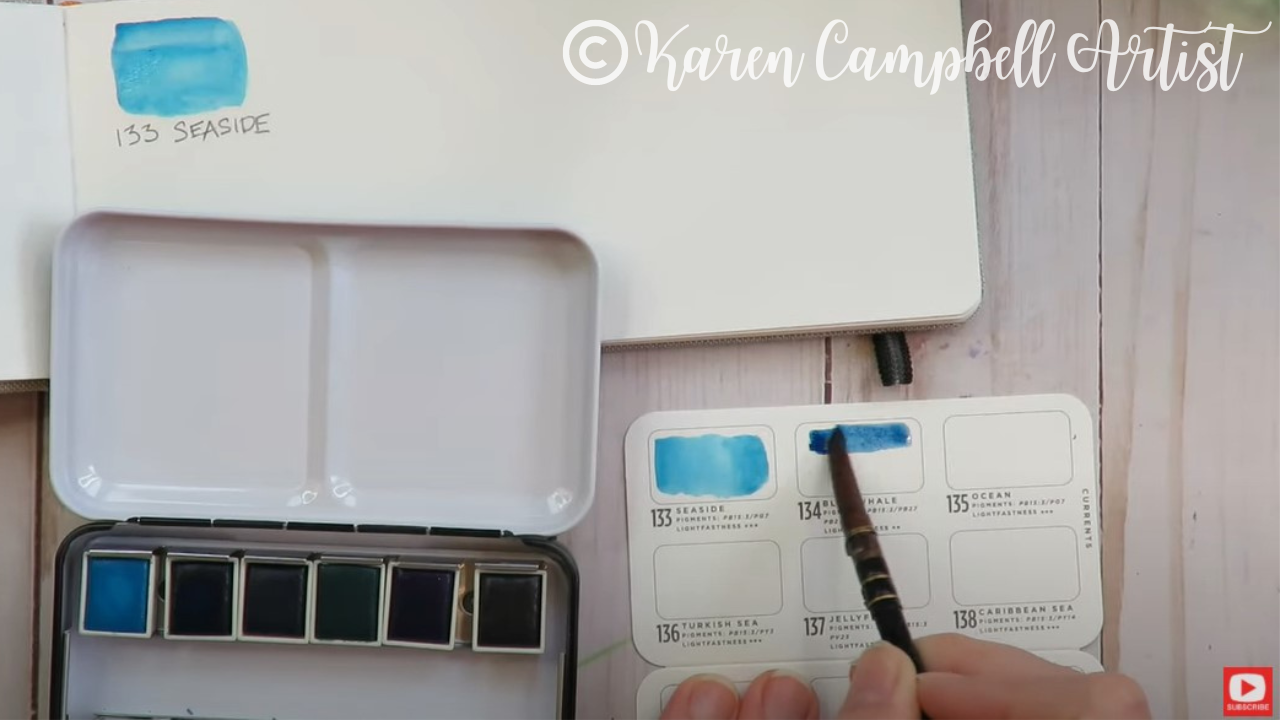
Because it's a LOT harder to lose an entire watercolor journal, I started doing this as a backup, just in case :) Plus- I've kinda just fallen in love with the mindless activity of swatching watercolors. It's like art therapy! There is no skill involved, and zero pressure of any kind. I simply put on whatever music suits my mood, grab a paintbrush and totally enjoy myself. Something about it feels kinda like spending time getting to know a quality, new friend to me.
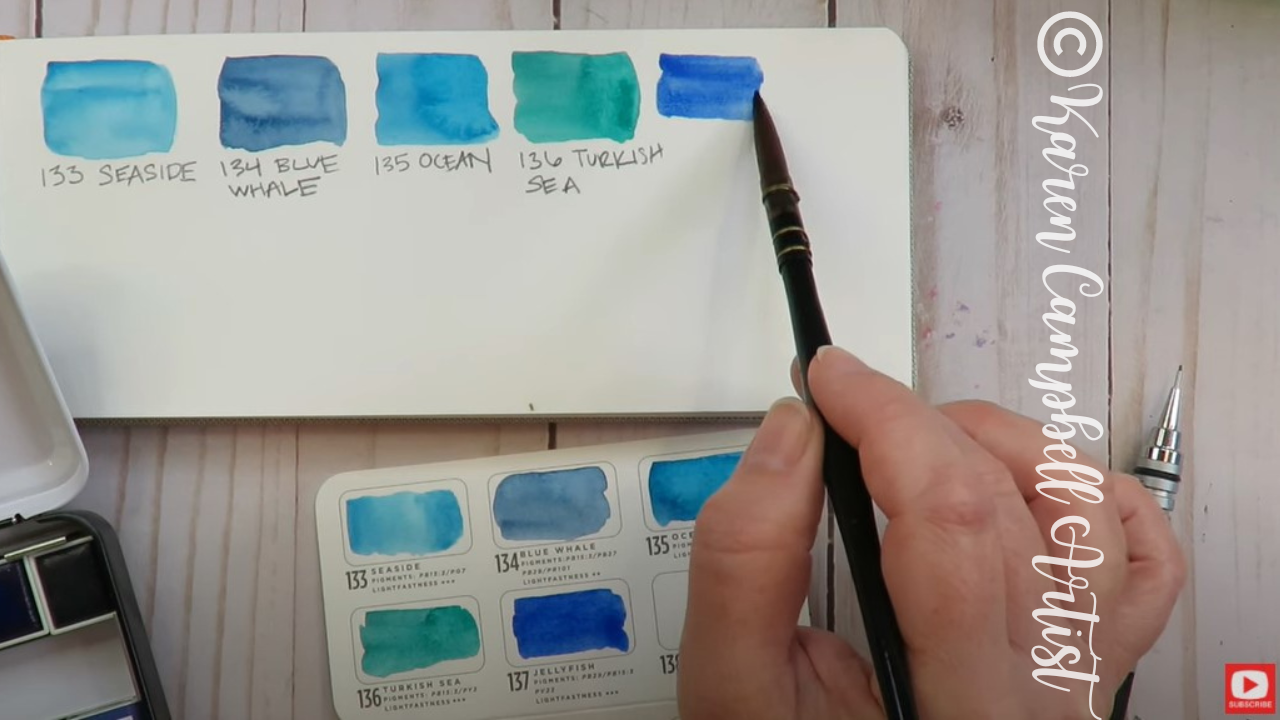
In terms of the colors represented in the Current watercolor set I'm demo-ing today, I LOVED them. I did, however, feel there were a couple of shades that were SO similar to another one that they almost felt redundant.
I know!! That's if I'm being really picky. Instead of focusing on that, I tried to appreciate the subtle differences of the colors that felt alike, and challenged myself to use EACH and EVERY shade in the project you're about to watch unfold! 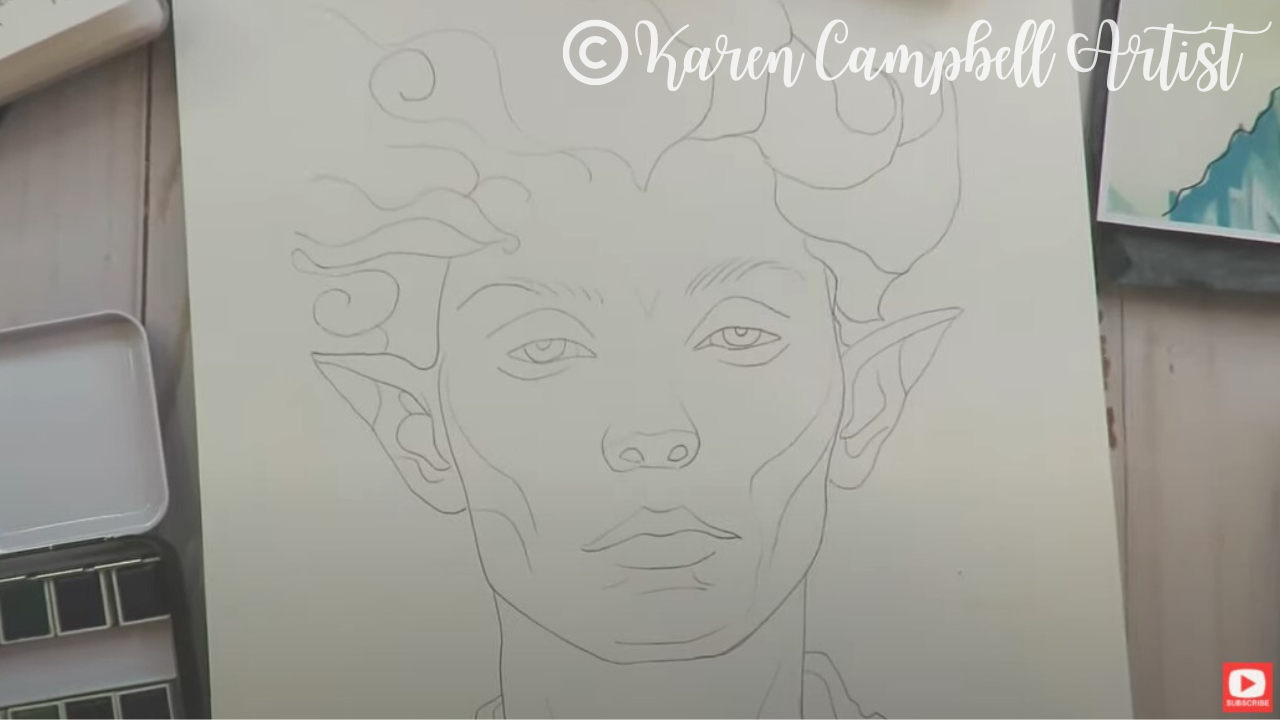
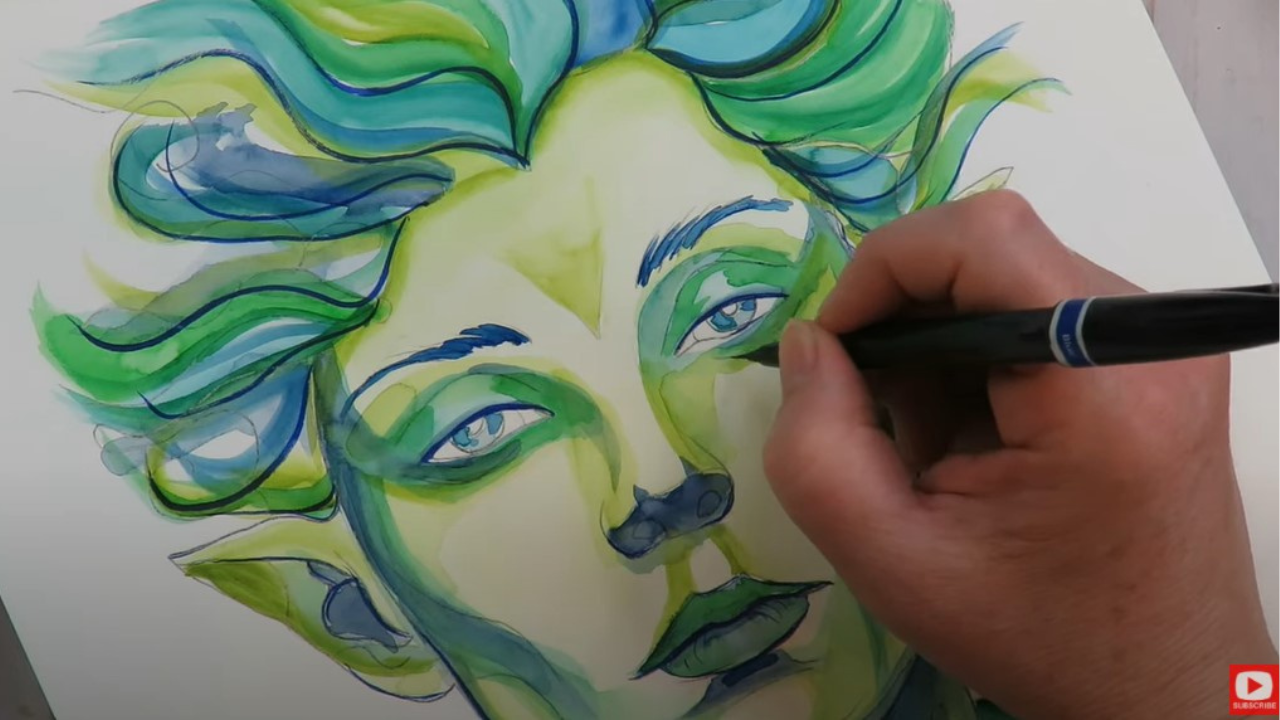
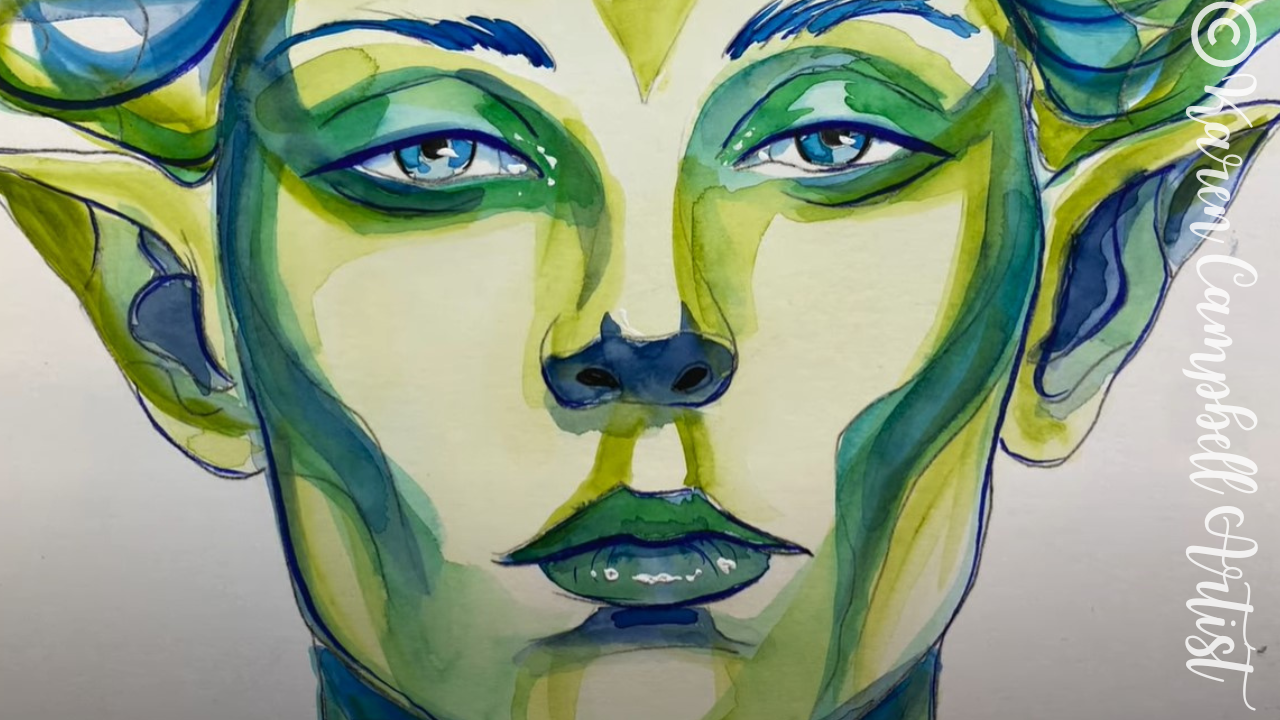
The project featured in today's video is from a lesson in my Celtic Collective art club over at Awesome Art School. The Celtic Collective is ALL about fantasy art drawing and painting, all things fairies, elves, castles, unicorns, you name it! If you'd like to learn how to draw AND paint this magical (dare I say, HOT?!) elf - hop over to the Celtic Collective for the step-by-step drawing and painting lessons in real-time (no timelapse!). You're also in luck if you happen to be reading this in July 2023, because I'm currently taking on NEW Celtic Collective members right now (enrollment is also currently open for the Mixed Media Society and Fun Fab Drawing Club if those are more your style!). Can't decide which club sounds more fun?! Me either!! I love them all!! There's a club for that too, called The Wonder Bundle. Buy two clubs, and get ONE ABSOLUTELY FREE!! Enrollment for new club members only happens 3 times a year, so if you're looking for an amazing art community overflowing with FUN lessons designed to make YOU an awesome artist - I'd love to have you!! 
If you're not in the mood to draw or paint along today, and would rather watch this hottie come together in minutes, meet me over on YouTube instead!
|

|
|
And - in case you're a newbie here, or just need a reminder, paper is JUST AS IMPORTANT as the other art supplies in your stash (these are all my faves on Amazon). Sometimes paper is THE MOST important art supply - like in the case of watercolors and water-soluble mixed media art supplies.
Wanna learn MORE about how to choose the right paper for your mixed media art projects? This one's for YOU!
Want MORE Prima
Watercolor Confections Set Demos/ Reviews?
Need More Resources?
Today's video is perfect for watercolor beginners who might not know which watercolor sets to buy, people looking for a little stress relief/ enjoyable art therapy activities, and advanced watercolorists looking for ways to challenge their creativity by limiting themselves to ONE palette of color.

I've also enjoyed watercolor sets by Prima for years - and recommend their Complexions Set to ALL my students because it's amazing to have a little palette filled with SO many perfect pre-mixed skin tones right at your fingertips.

In case you're not familiar with Prima Confections Watercolor sets, these are NOT fine art quality paints, they're basically mid-range products and considered a "craft-grade" product. This doesn't mean they're bad in any way or that you have to spend more money on your supplies- they just may not all be light-fast, so if you're creating a gift or a commission for someone, your work could fade over time. Just something to be aware of :)
If you're just creating for fun, Prima sets are awesome because they're super affordable and the color combos they've developed are beautiful and richly pigmented.
How to Unwrap Watercolor Half Pans
Make sure youclick over to watch today's video because the demo shows you exactly how to unwrap each tiny half-pan of watercolor and assemble your palette before you start painting.
Why You NEED to Swatch Watercolors
Here's what I learned the hard way, and want to help you avoid...
I spent YEARS grabbing the wrong colors and diving right into my creation process. Years, throwing what I *thought* I wanted on my paper based on the color cap or what it looked like in the pan, etc.
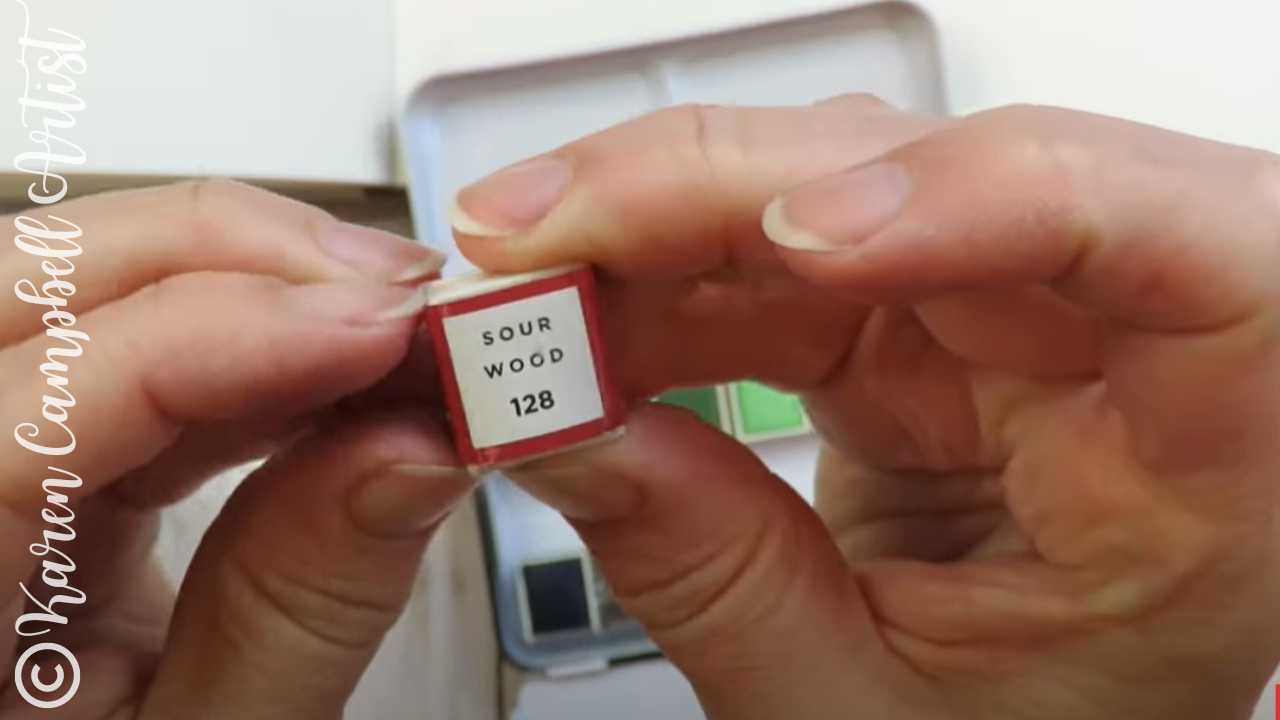
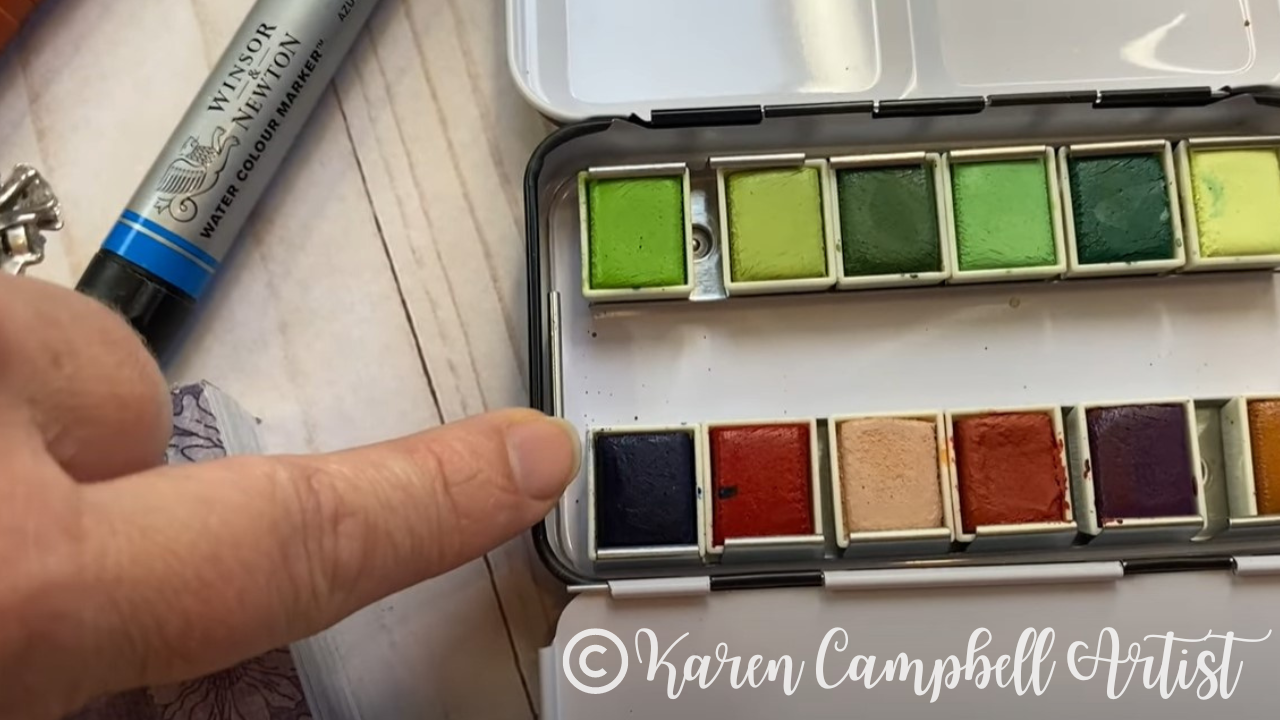
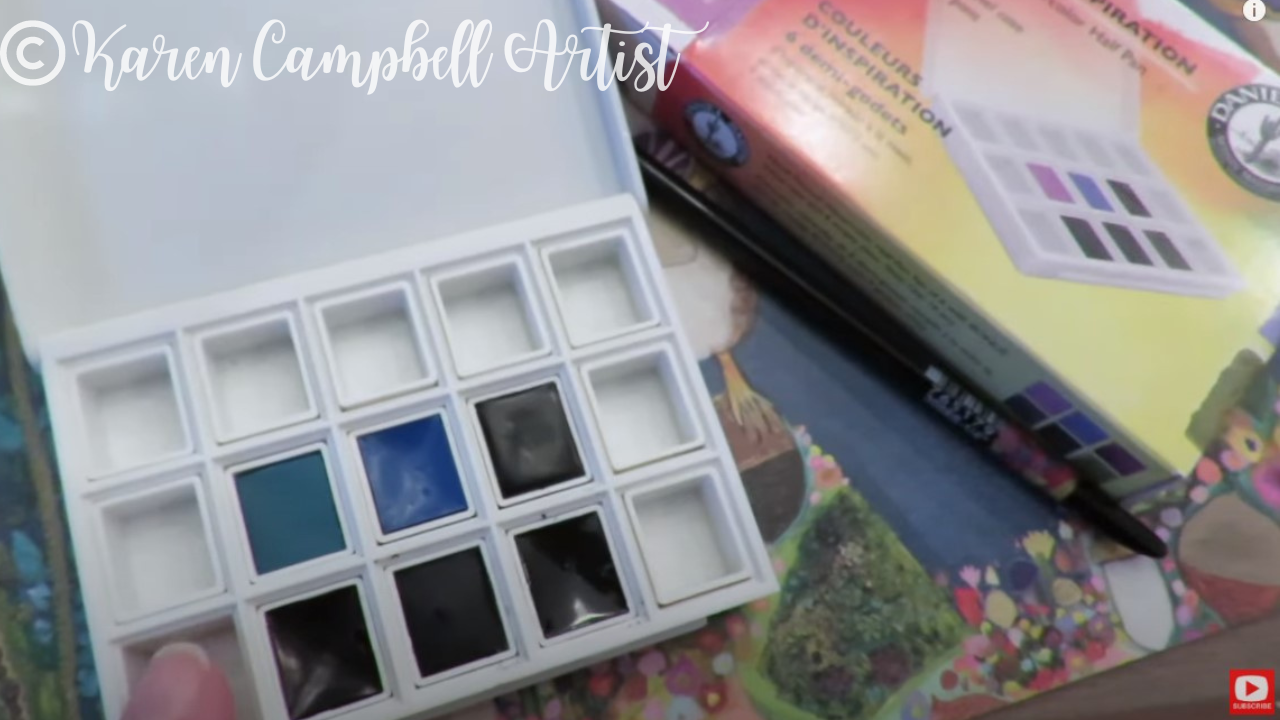
There are SO many things wrong with those choices! For starters, check out the first color in the second row of the set I'm demo-ing today. It looks like a super dark blue, almost black right?
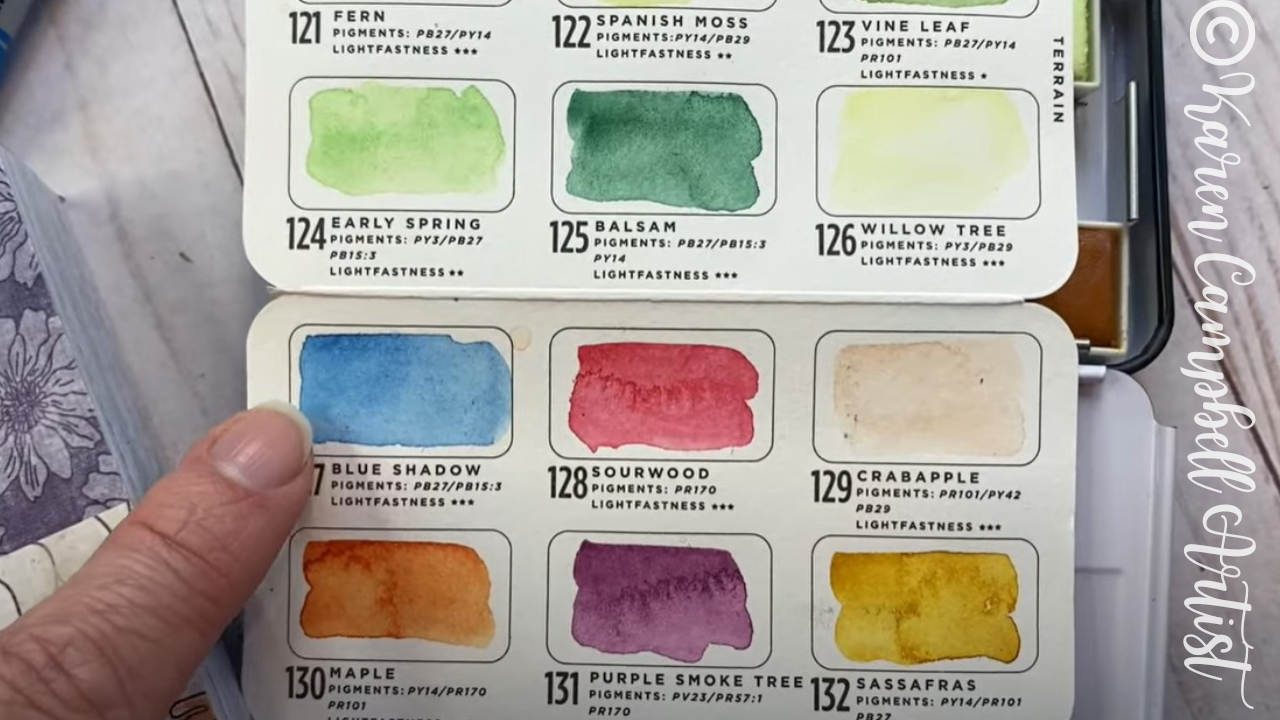
I also love that the swatch card provided by Prima has been printed on watercolor paper (SUPER important if you're a newbie - never swatch watercolors or water-soluble products on just any old paper - you need a thicker, sturdier paper that can absorb the water - so always use watercolor paper or watercolor journals).
Color Swatching Reference Books
Remember, for watercolor swatching and swatching water-soluble art supplies, you always need to be working on watercolor paper or watercolor journals.
If you love the swatching backgrounds or faces in these books, feel free to freehand them into your own watercolor journals to make swatching even more fun for you at home!!
Why I LOVE Collecting Watercolor Sets
(Even Though I Already Have a Bazillion Colors!)
This may seem super simple, but this means you can do your art projects with CONFIDENCE AND EASE because you already know the colors and patterns will work together in your project. You can spend more time CREATING, and less time wondering what colors of paint to grab, etc! I don't know about you, but I'd much rather spend more time creating and less time planning :)
This might feel super simple too, but I've learned over the years, I gravitate to blues and greens. Why fight that?! Lean into it and own that part of you!! If you find a watercolor set pre-filled with your favorite colors - grab it!! The colors will make you happy and you'll enjoy your art time with them even more.
Which Mixed Media Art Supplies
Go Well With Watercolors?
DO I WANT THIS WATERCOLOR TO MOVE? (Because it will!).
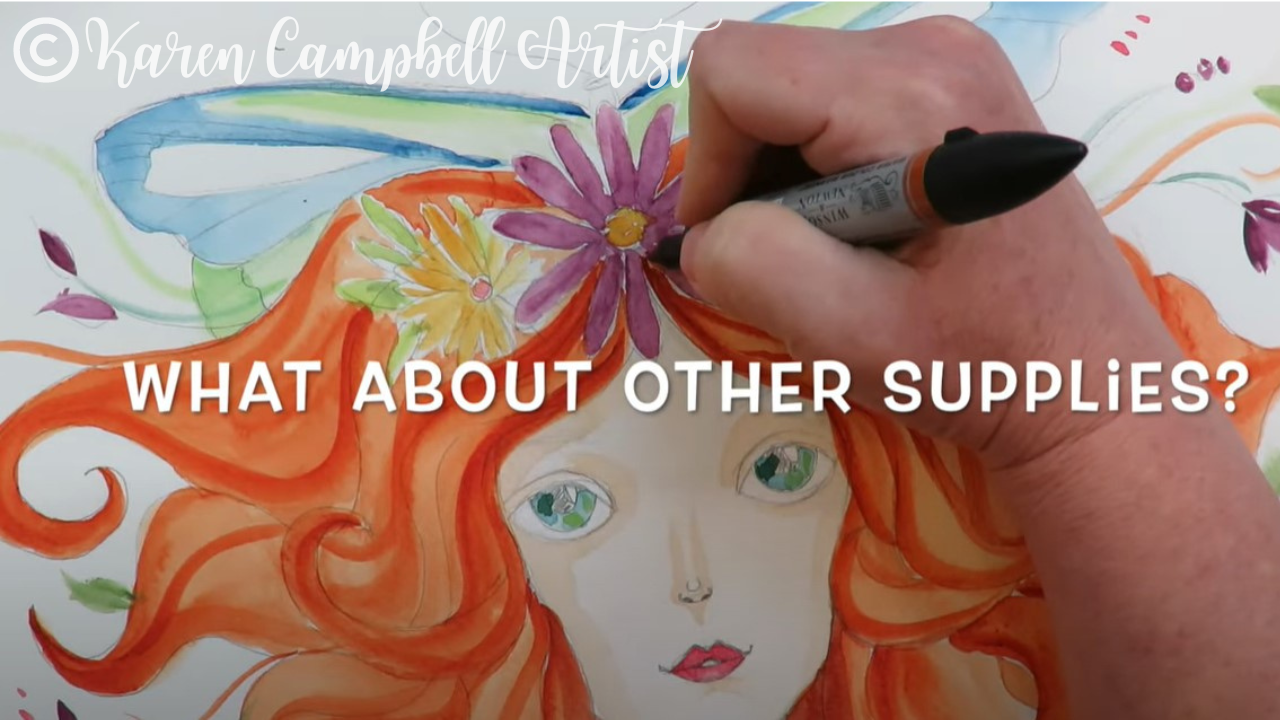
If you're a watercolor beginner or mixed media beginner, it's important to understand that dry watercolor WILL re-activate if you add more water to it, or add another water-soluble art supply on top of it like I do in today's video with my watercolor markers.
If you really love the way your dry watercolor layer looks, and don't want it to re-activate, DON'T add any doodles or additional shading with a water-soluble product. Reach or something permanent like Molotow fineliners, colored pencils, etc.
If you DO want your dry watercolor layer to move or blend - try adding some shading with water-soluble supplies like watercolor markers, watercolor pencils or NeoColor IIs!


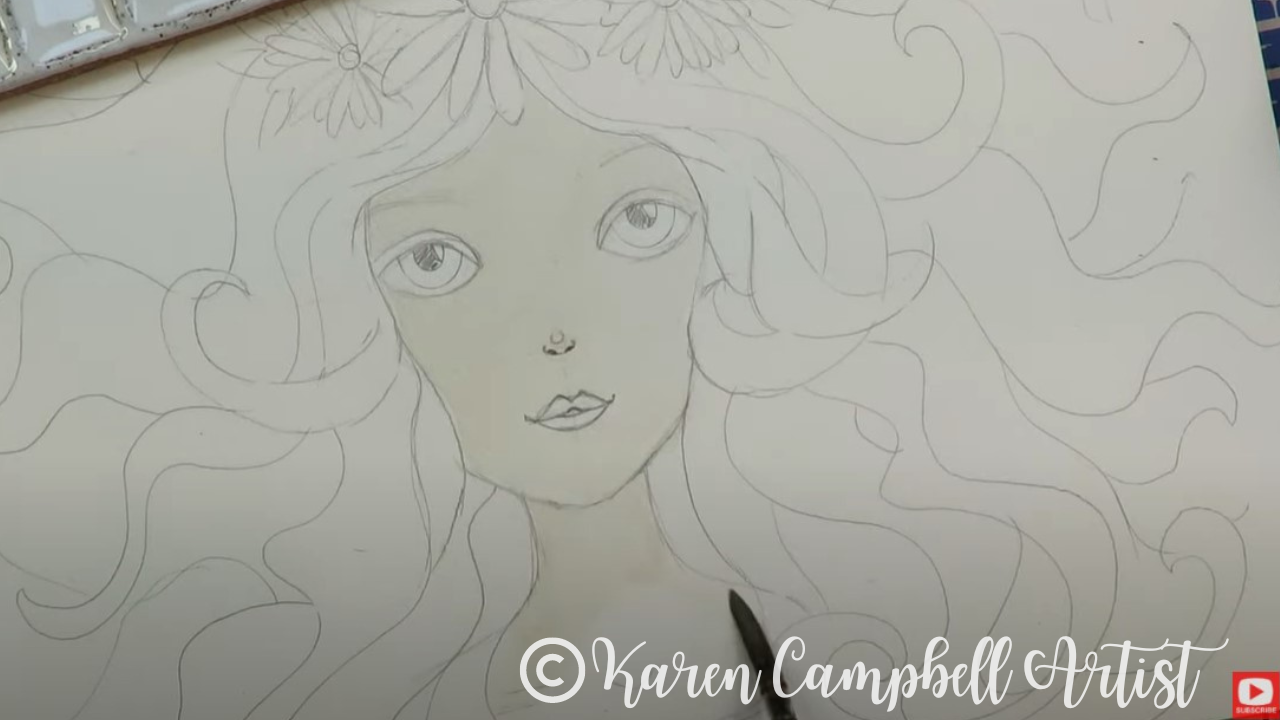
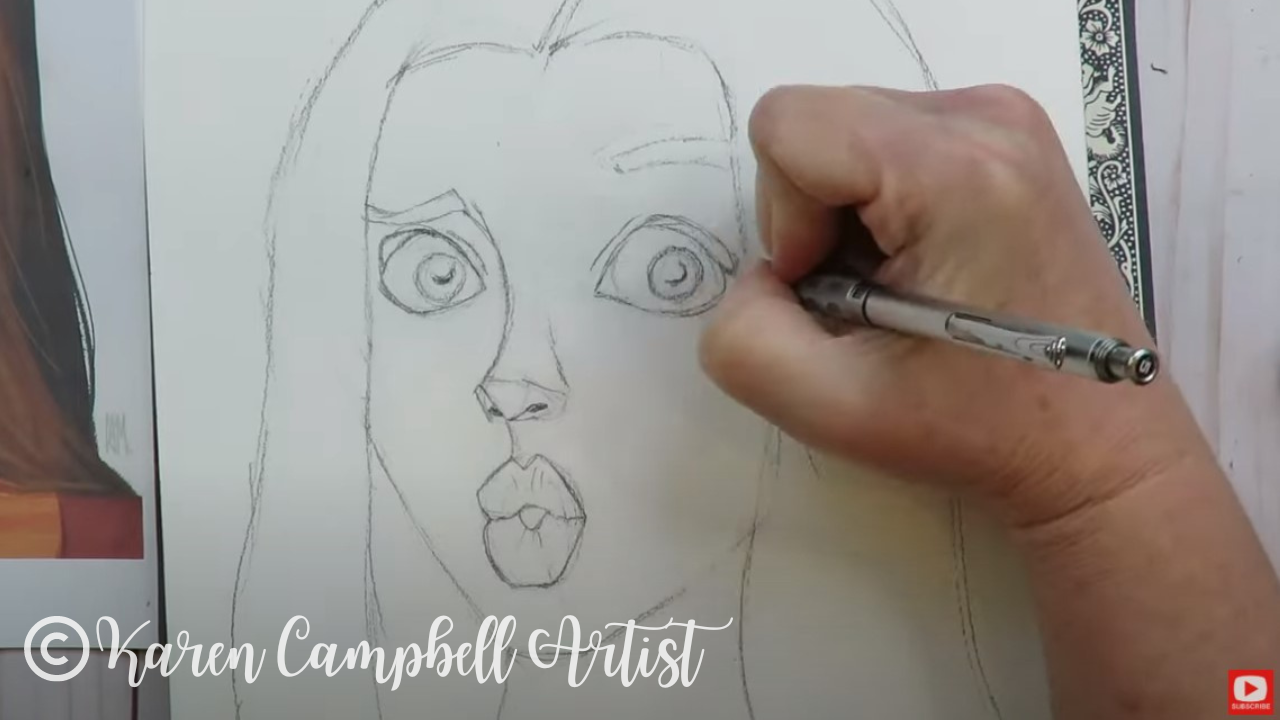
Wanna Learn How to Draw the Girl in Today's Demo?
What to Watch Next
Need More Resources?
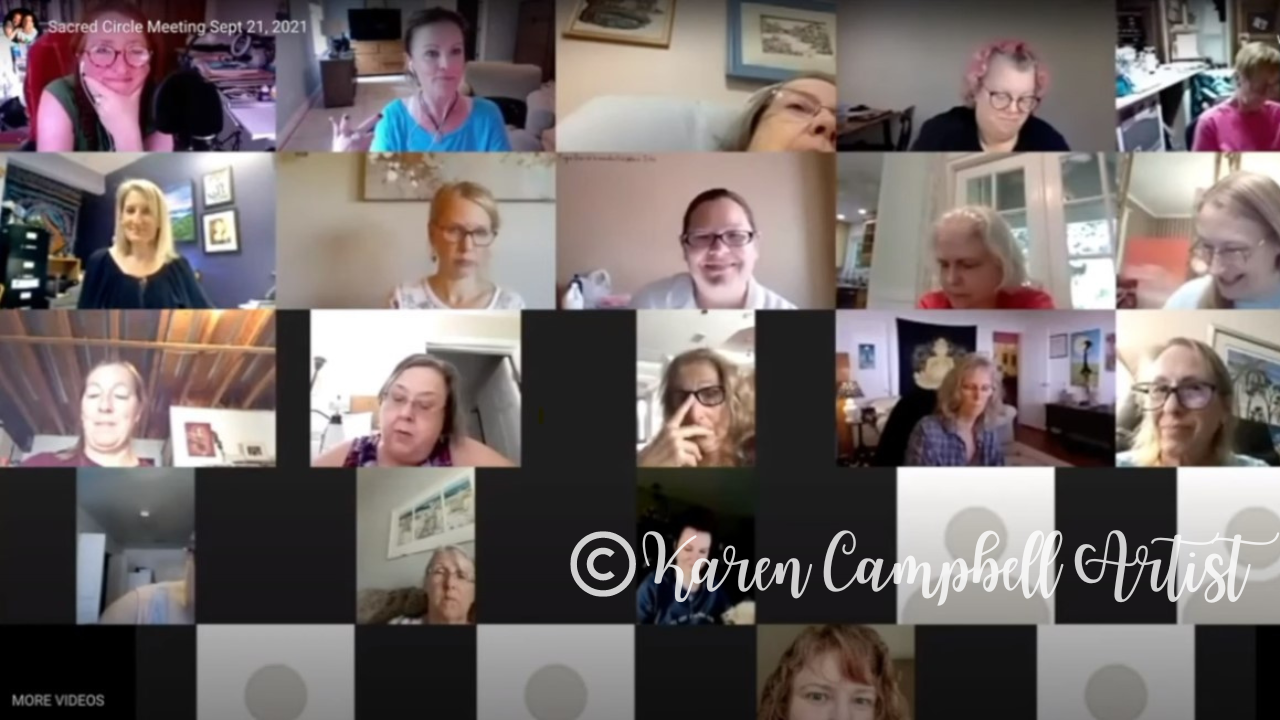
The fun didn't stop there!! In 2020, we decided to form an art membership just for people who loved all things fantasy art and have been having a blast with our artsy community ever since.
Here we are (below) on one of our monthly zoom calls together!! We have so many awesome members, we'll never all fit on one screen together!!
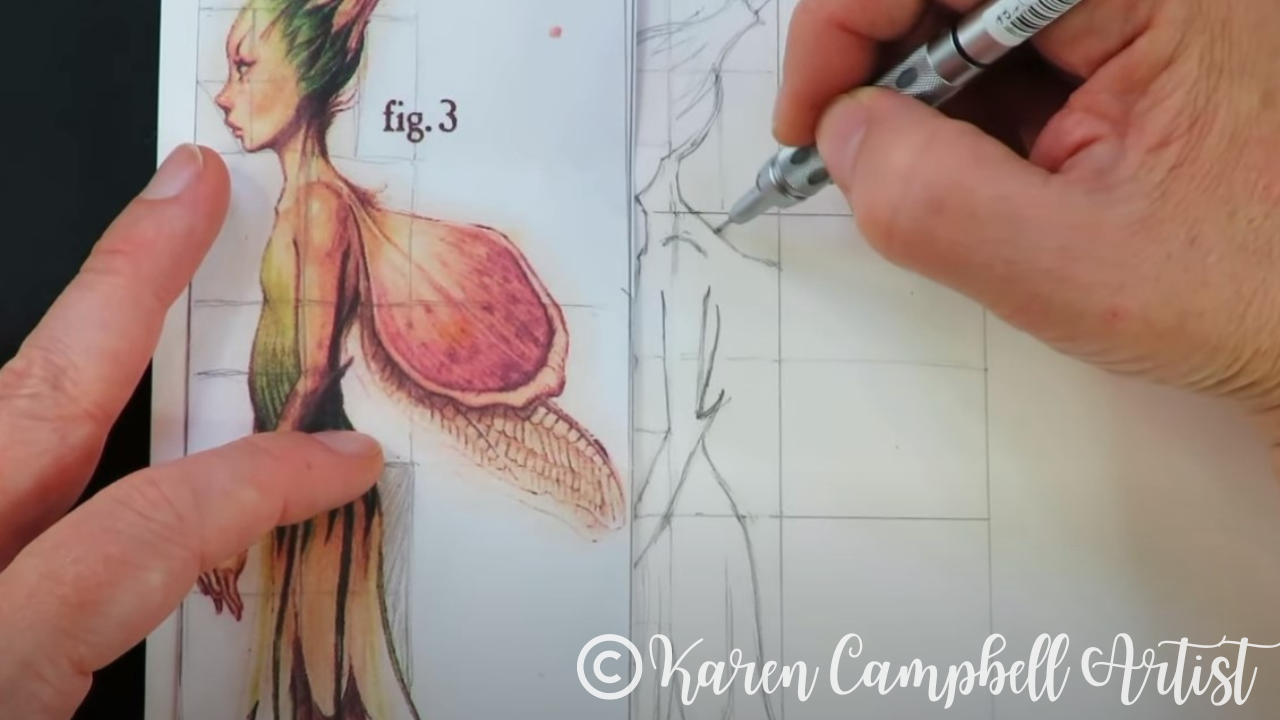
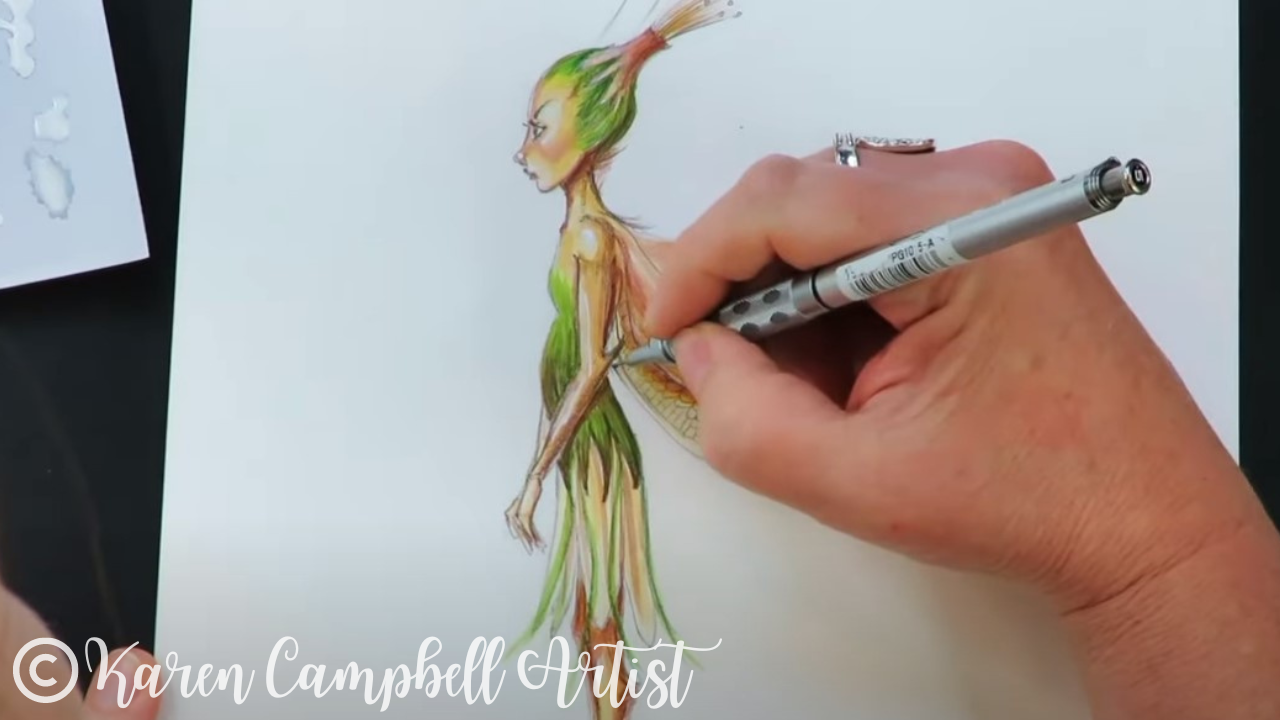
If you've always been drawn to fantasy art but have NO IDEA where to start - we've got you covered!! As teachers, Lucy and I always take our time making sure our students feel supported with EVERY line drawn and painted - no matter what level of art experience they have.
Once youjoin the Celtic Collective, you can choose to start with the basics or refresh your knowledge if you're a returning artist who hasn't created in a while.
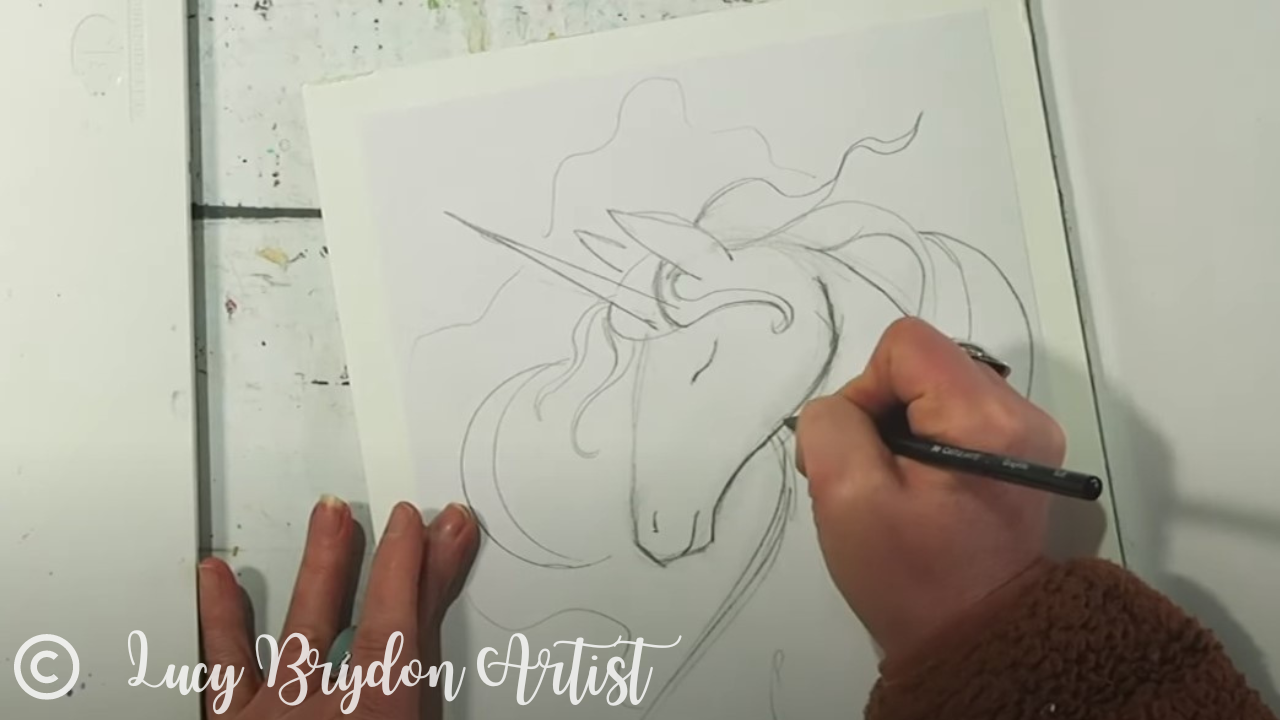
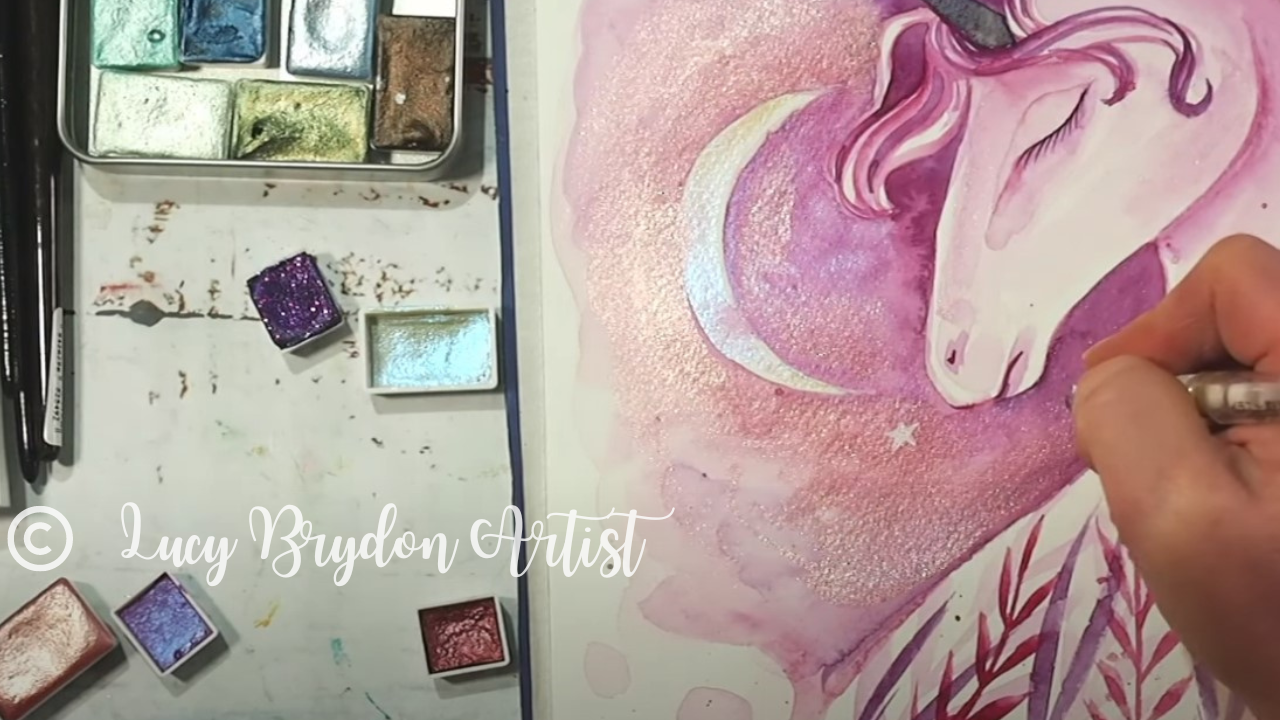
Check out this recent unicorn lesson from Lucy! See it in progress during today's Celtic Collective sneak peek on YouTube!!

Not sure what you'll be in the mood to create from one day to another? You're gonna LOVE our Visual Project Index!! Check this out - once you're a member, simply log in, scroll through the Visual Project Index, and click on whatever floats your boat that day!! OR -- you can choose where to begin based on your level of art experience.
We'd love to have you join us!! Learn more about the Celtic Collective and how to join, HERE at Awesome Art School.
Need Other Resources?
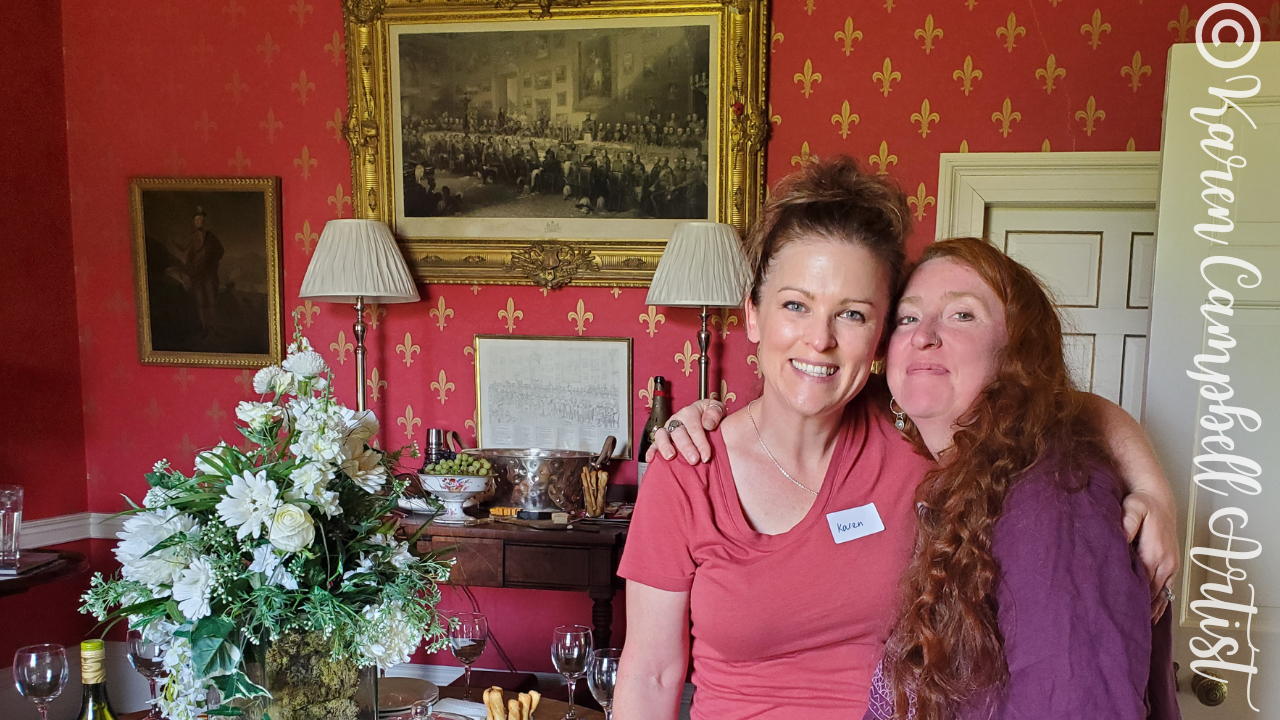
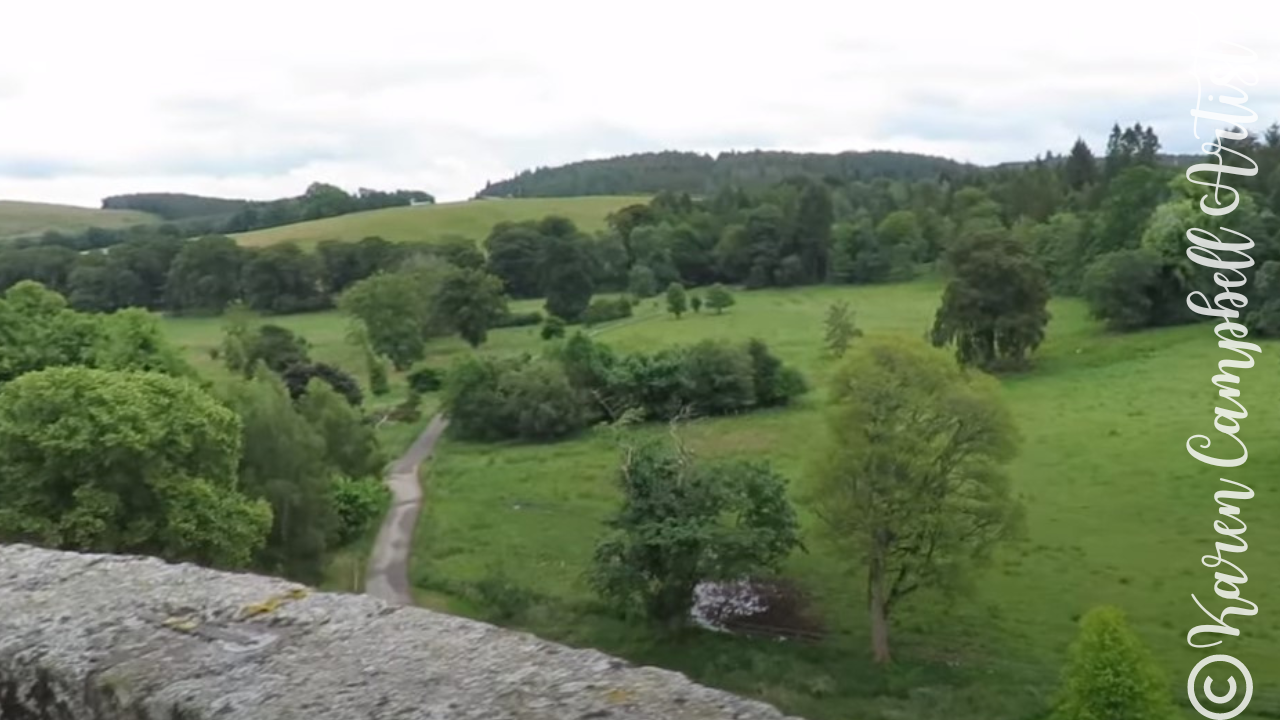
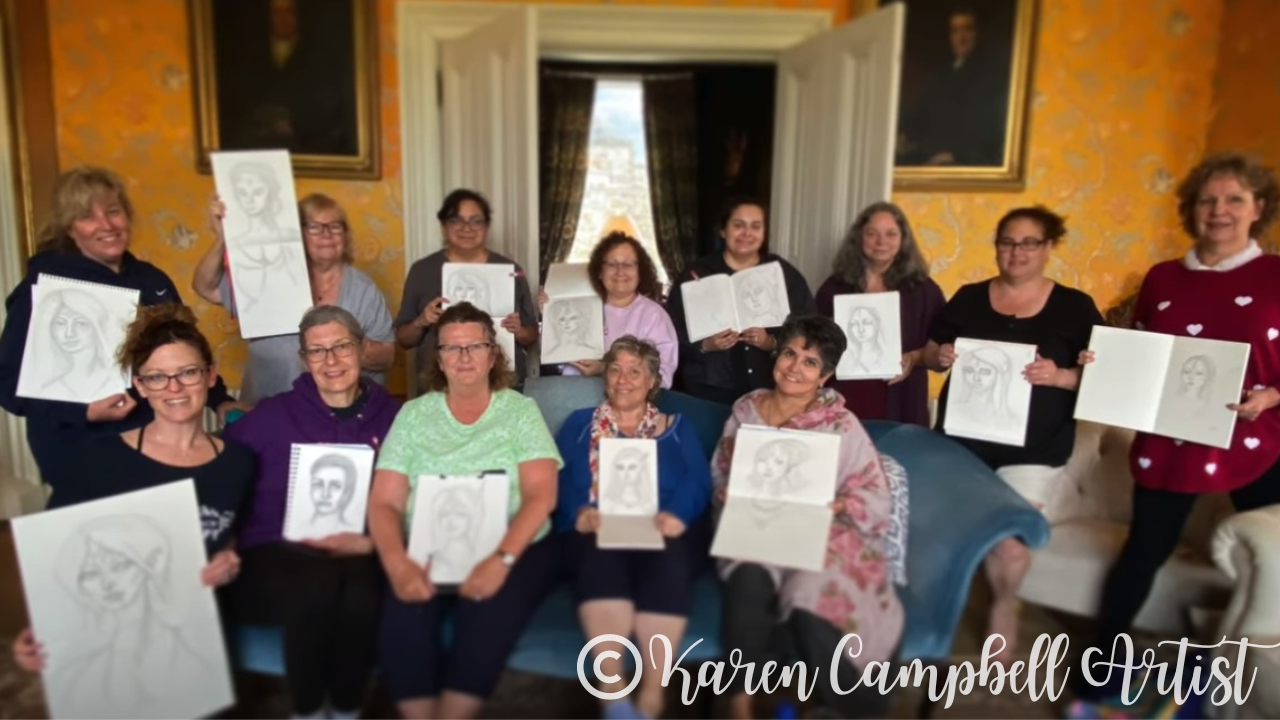
Join me for a behind-the-scenes peek into how it felt to be on this super special art retreat last week!


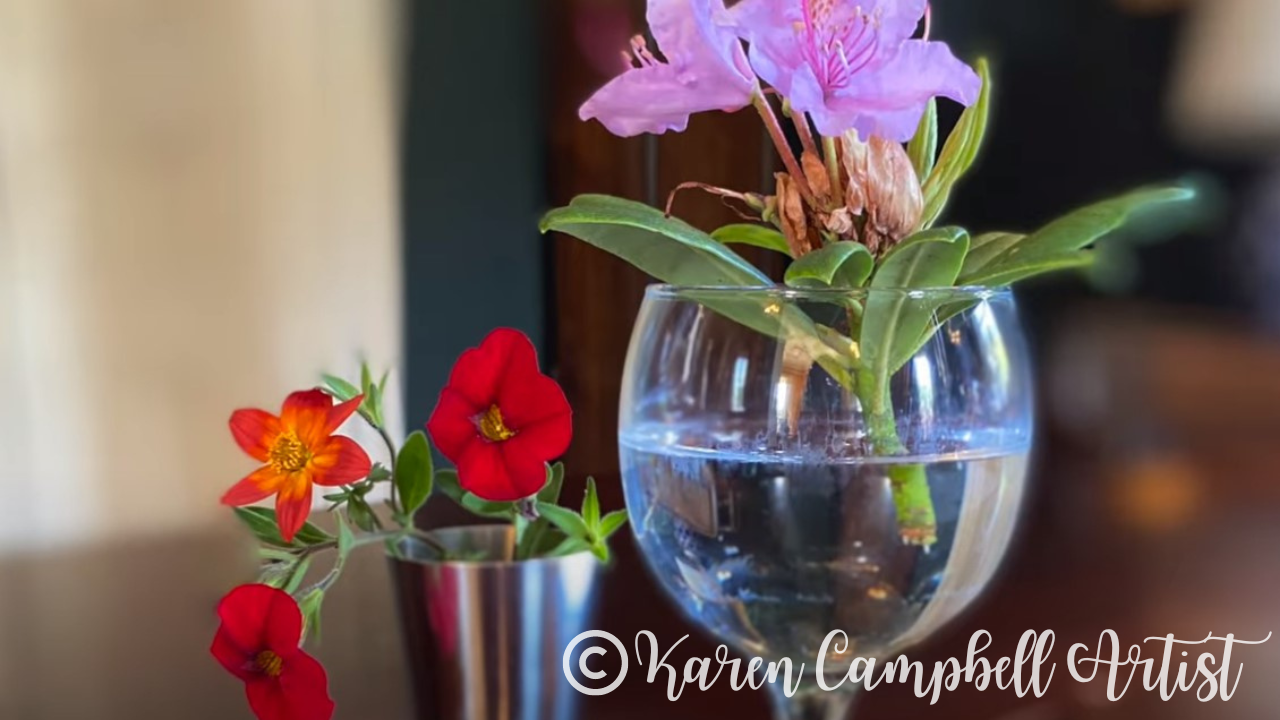
We just loved sketching and painting the rooms, grounds, portraits, patterns in the wallpaper, and still-life arrangements we made with flowers from the castle grounds!


Interested in the Art Projects Featured in Today's Video?
We have SO much fun drawing, painting, and enjoy getting to know our students during our monthly zoom calls!! Learn more here.
Need More Resources?
Not sure what "Hamburger Style" is? It's my signature mixed media process - or recipe- for using my favorite, tried-and-true mixed media art supplies and layering techniques to achieve mixed media success EVERY time I sit down to create.
The BEST part is how EASY this fun system is for ANYONE to replicate at home!! Check it out ...
Need a Cheatsheet to Follow Along?

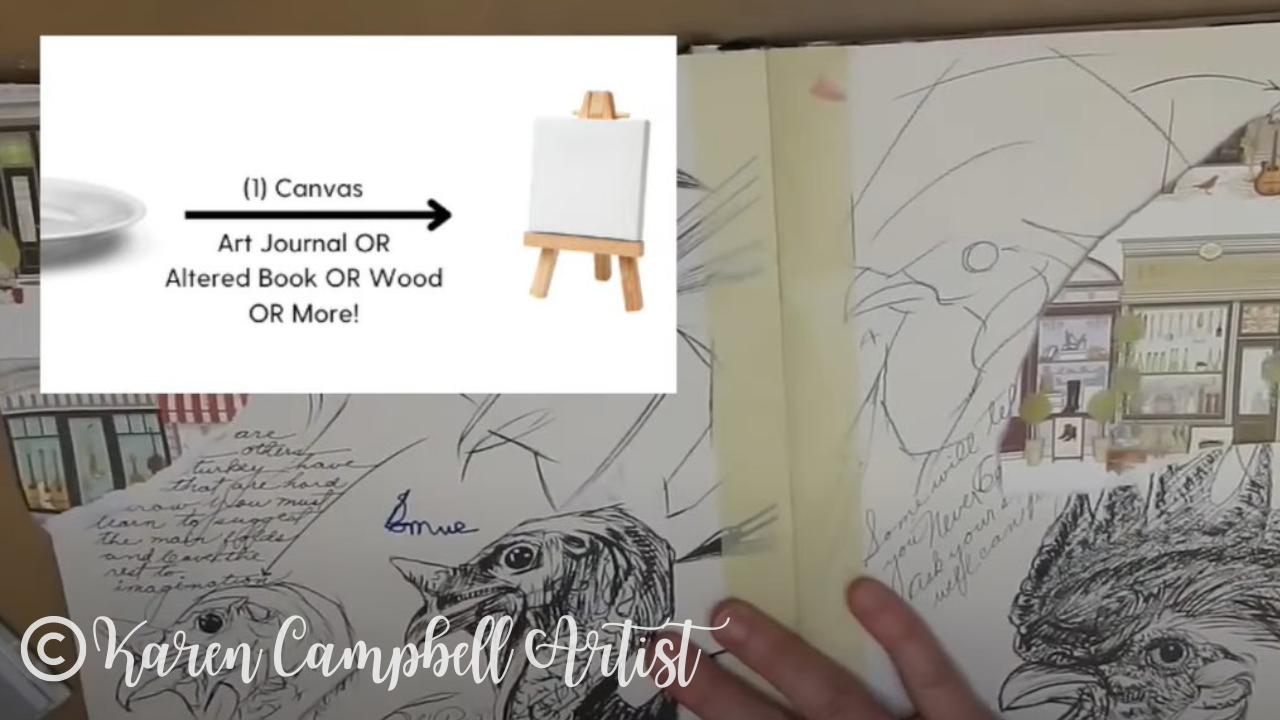
The first layer of the Hamburger System is our "plate," or our substrate. A substrate is simply the surface we're art-ing on. In this particular project, I'm working on an 18 x 24 stretched canvas.
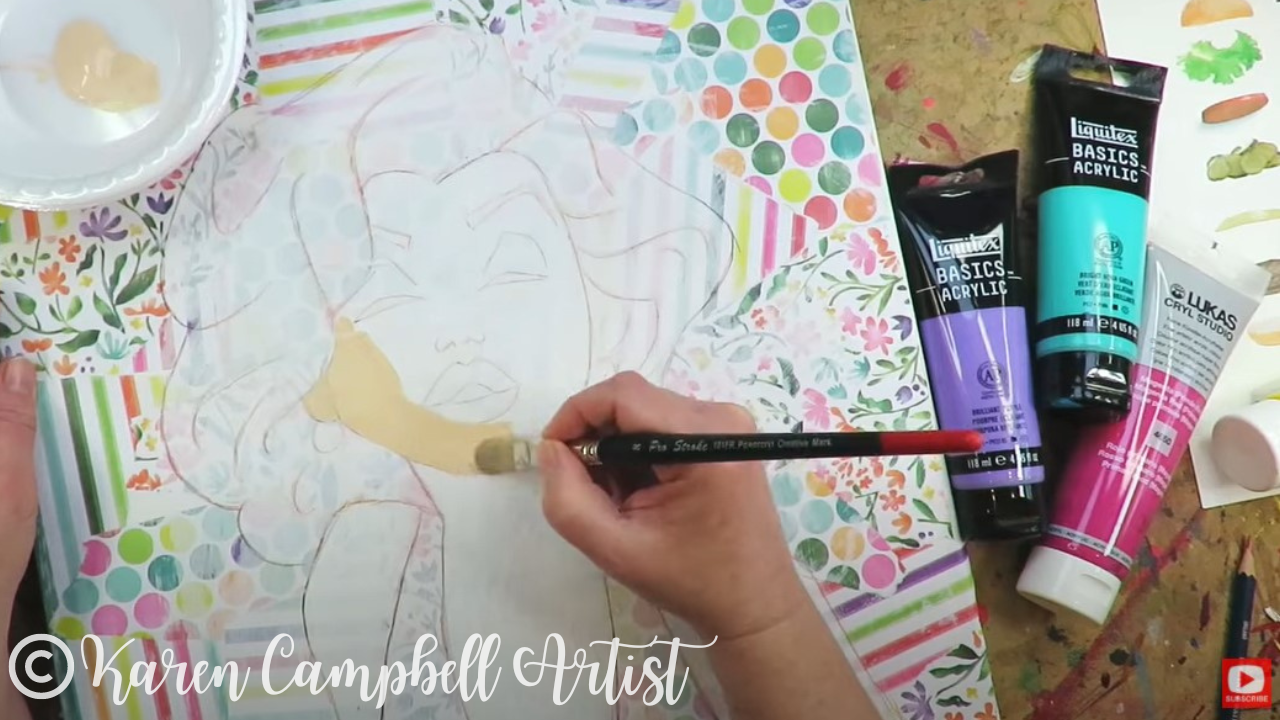
For the acrylic layer, I grabbed three tubes of Lukas acrylic that matched the color scheme in my collage, plus a skin tone. You can totally grab any of these at your local craft store or on Amazon. If you know me, I LOVE hoarding art supplies as much as the next girl, but ALWAYS recommend you use whatever you've got on hand before running off to add more supplies to your stash!
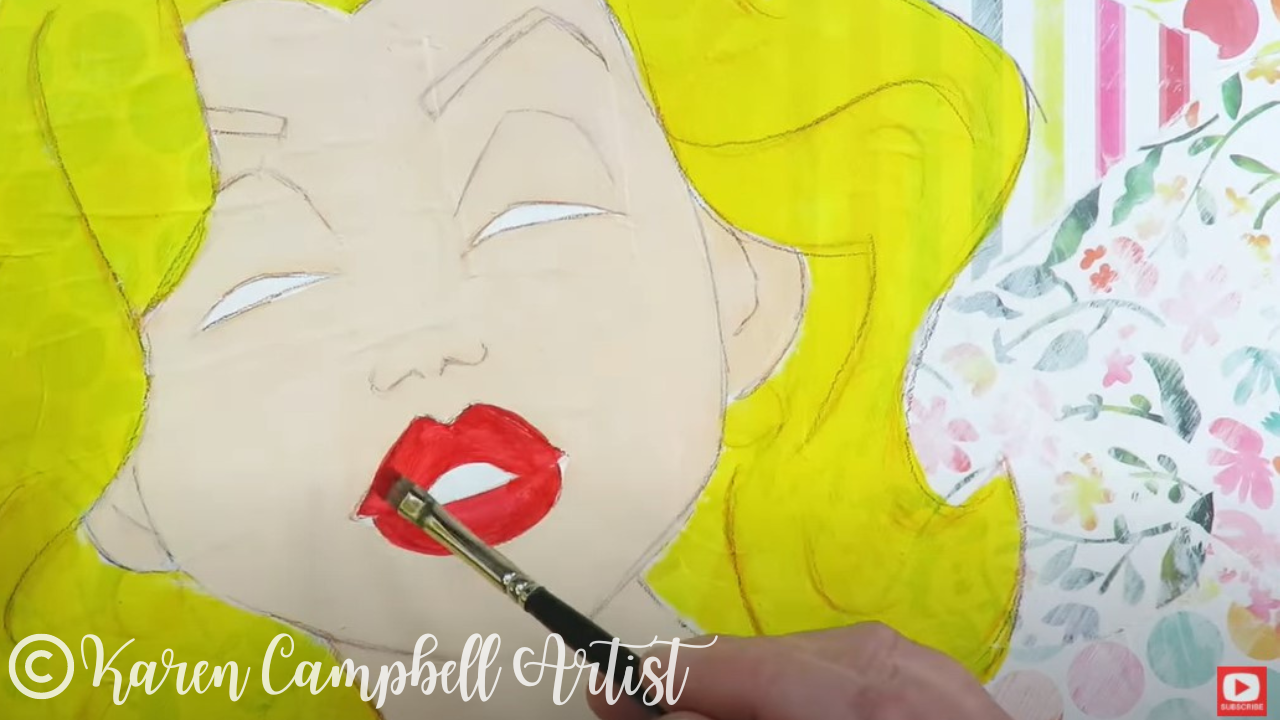
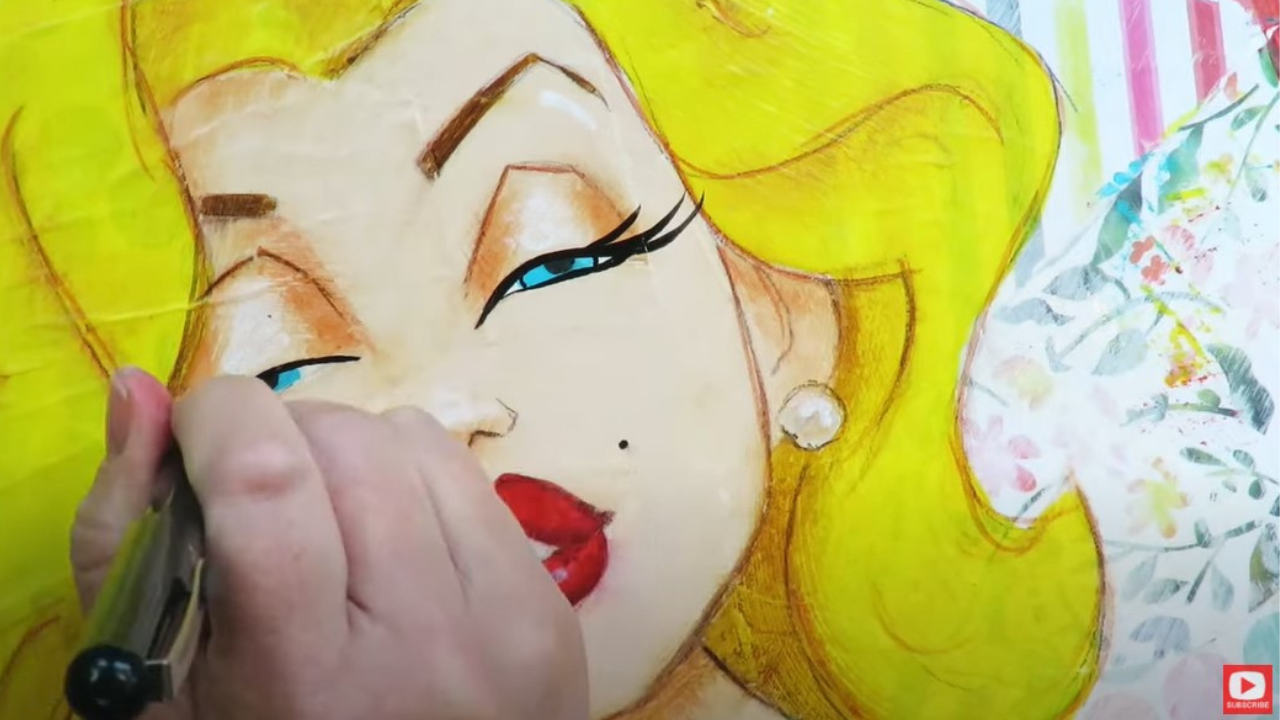
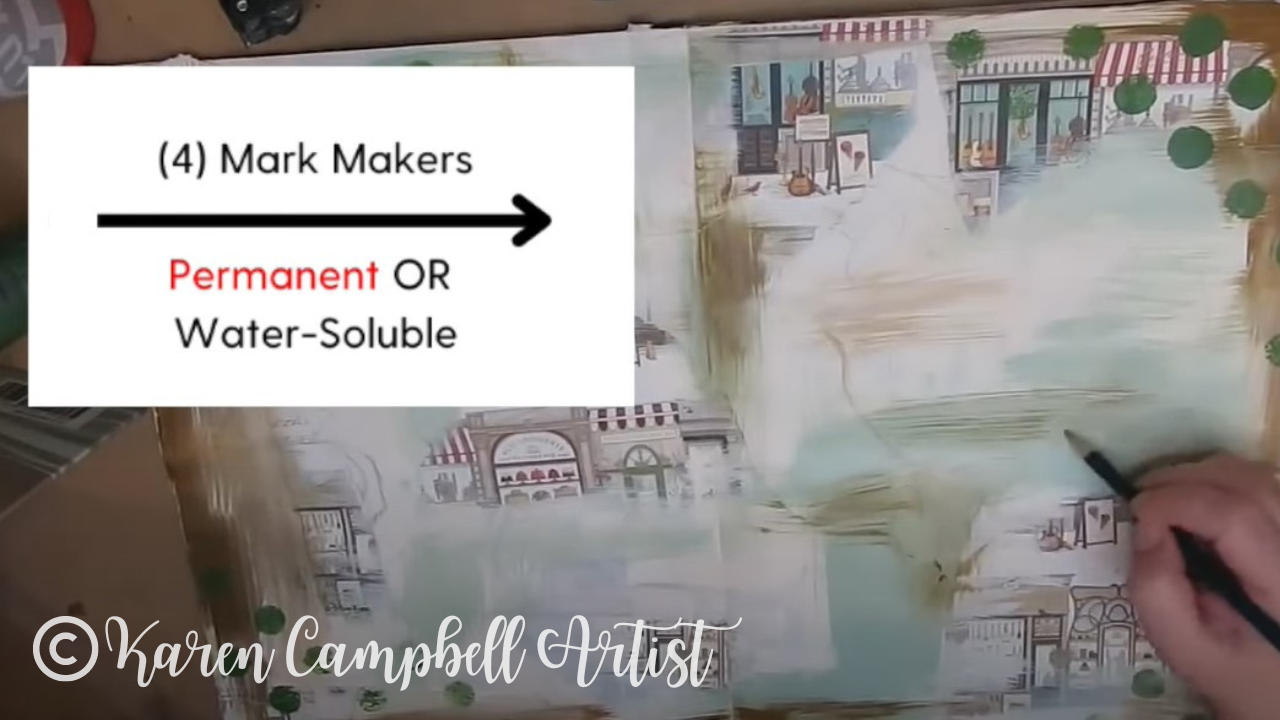
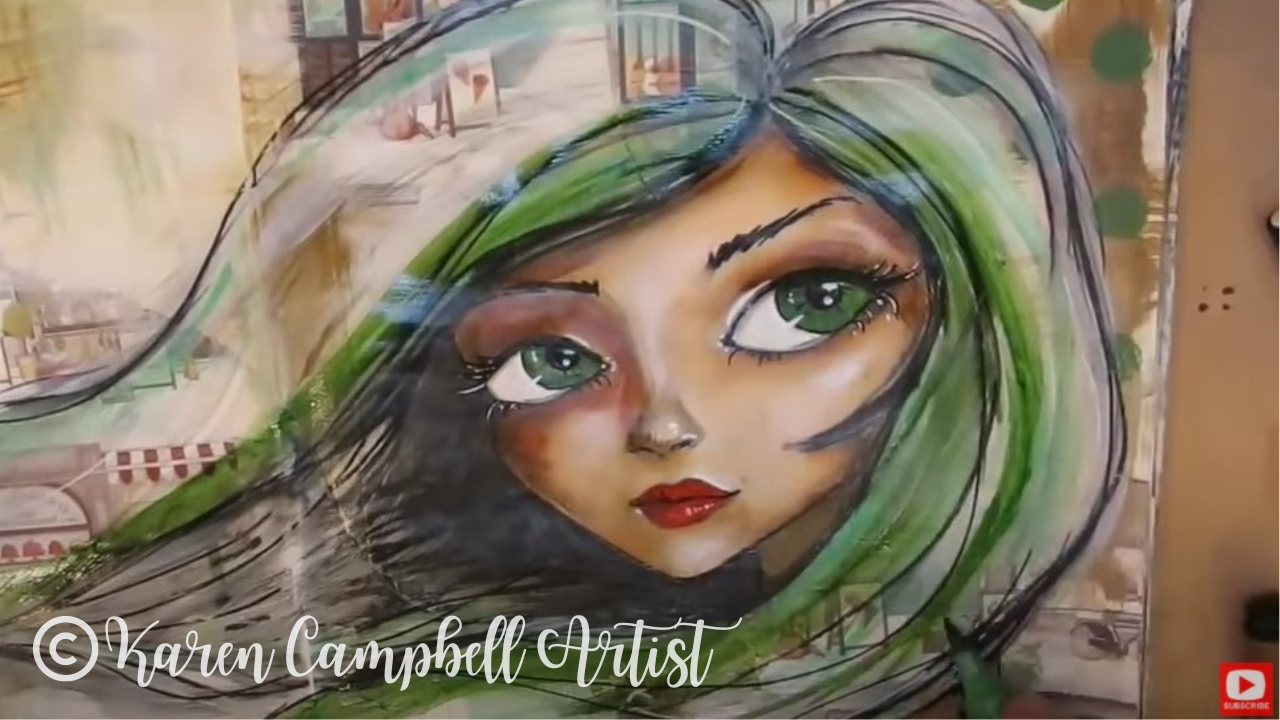
Once I'm done with my acrylics, it's time for Layer #4 - gelatos and art crayons! These are SO fun for adding shadows and SO MUCH FASTER to work with than acrylics to add depth.

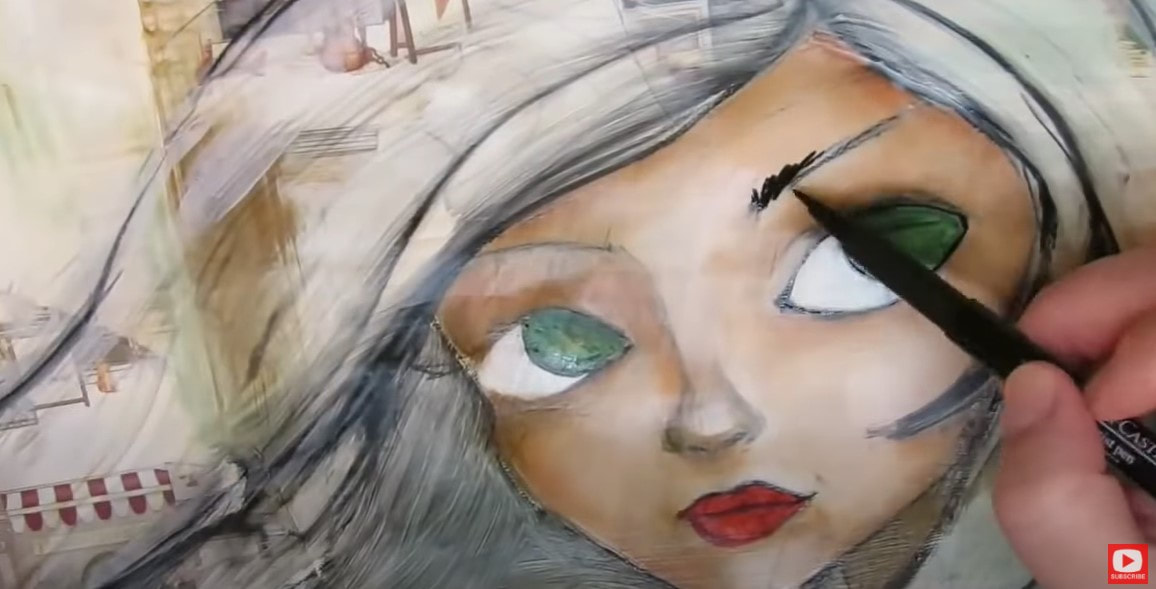
I LOVE the feeling of the dry, slick mod podge in this process. It's the perfect surface for using Pitt Pens to add some additional details and outlines throughout. They're also kinda magical because if you make a mistake, you can reach for a baby wipe and ERASE what you don't love!! Awesome right?!
So FUN and EASY, right?!
Wanna Dive Deeper into The Hamburger System?
Want Access to Today's Lesson in Real-Time?
The Mixed Media Society is only open for enrollment three times/year. Add your name to the waitlist here to get notified next time we're taking on new members!
Need More Resources?
I've got a solution that will make it super easy and fun for you. I call it "The Hamburger System," and it's seriously going to revolutionalize your approach to mixed media art (if it hasn't already!).
In my signature 7-step process, you'll learn MORE about your art supplies (what they do & if they play nicely with others), plus I'll teach you exactly how, and when to layer your supplies to set you up for mixed media success EVERY time you sit down to create.
Let's dive in!!
Need a Cheatsheet Before We Get Started?


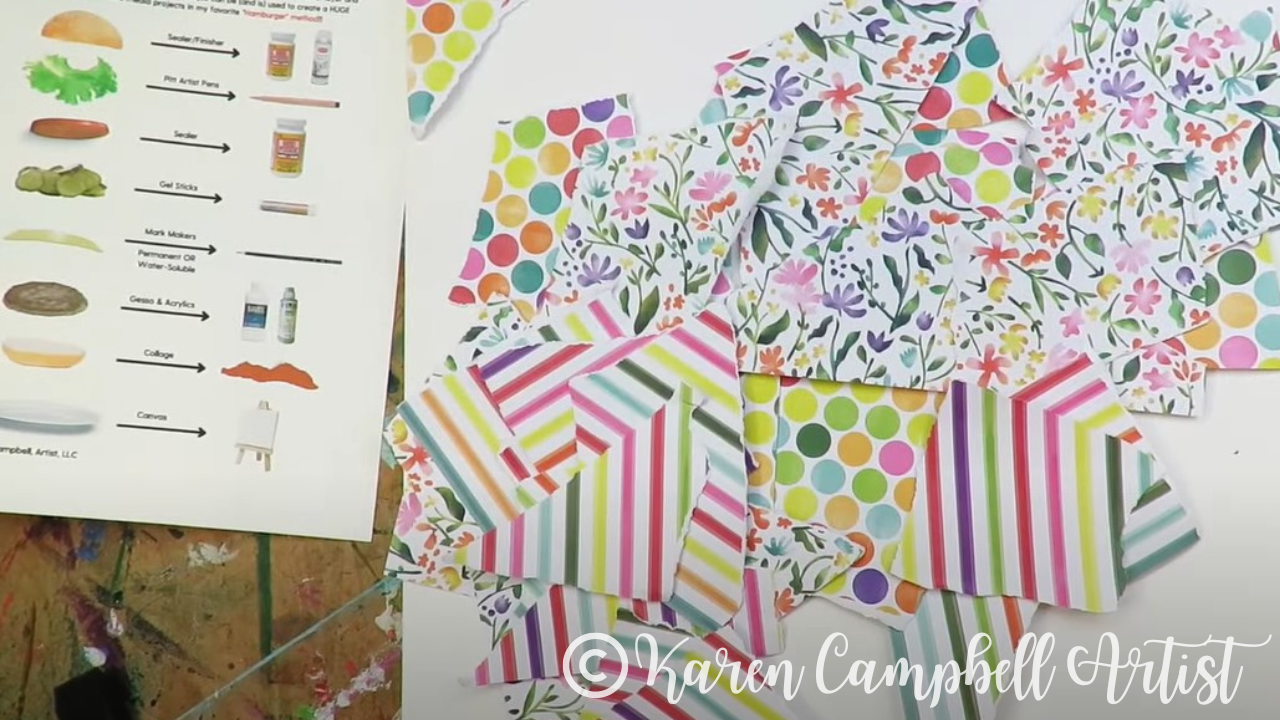
Layer 1: Substrate
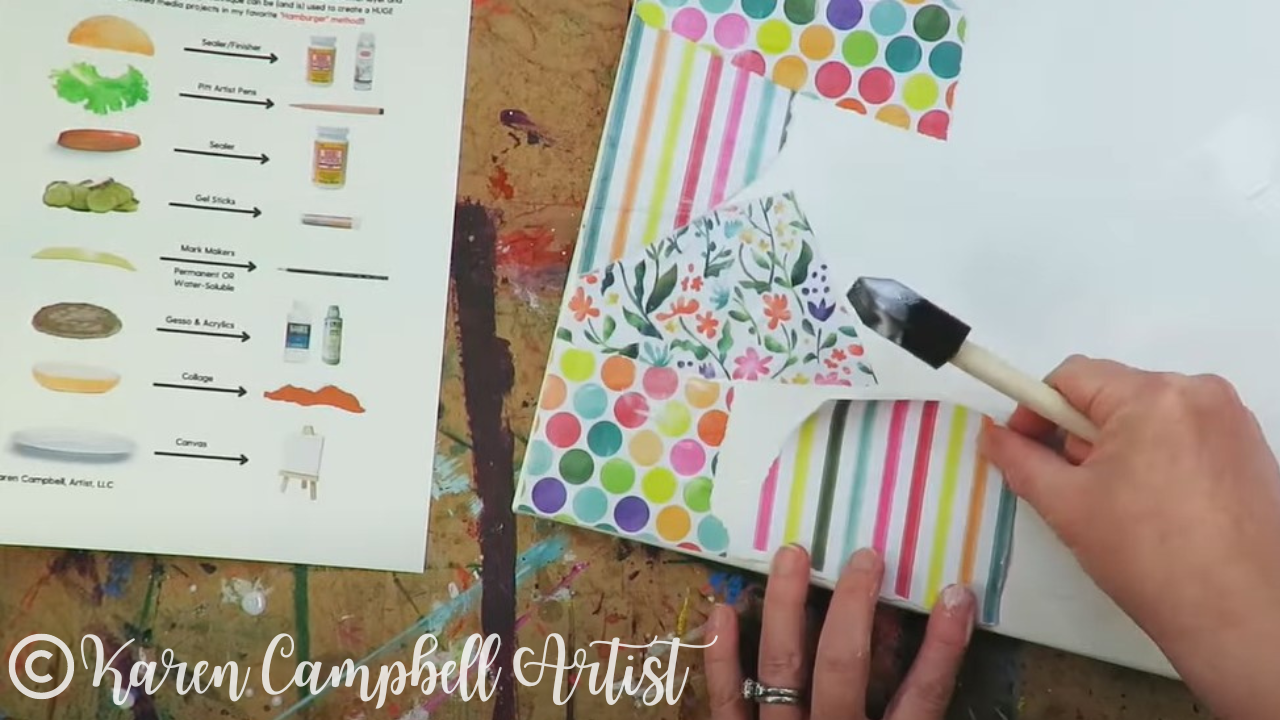
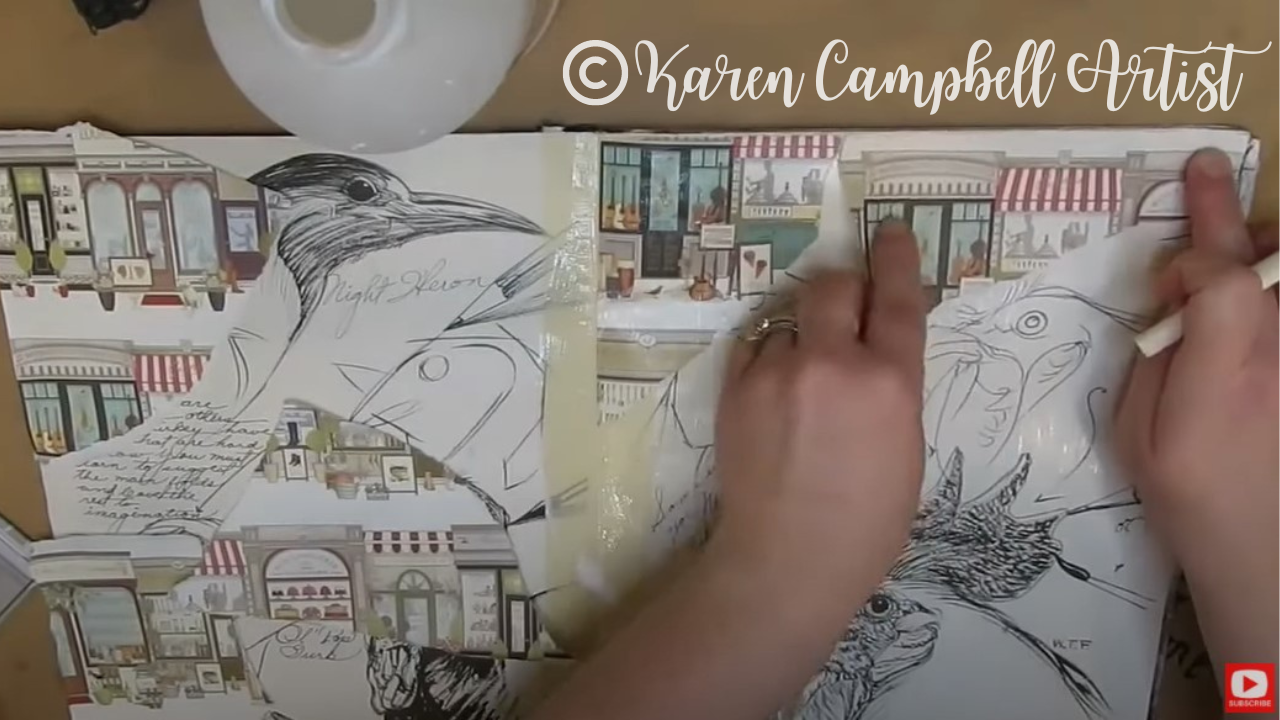
Layer 2: Collage
Grab your matte medium (or any adhesive YOU like) along with a few sheets of scrapbook paper. Then rip the scrapbook paper into chunks and start gluing it to your substrate. I think collage is an awesome foundation for your piece and adds visual sophistication to your work!
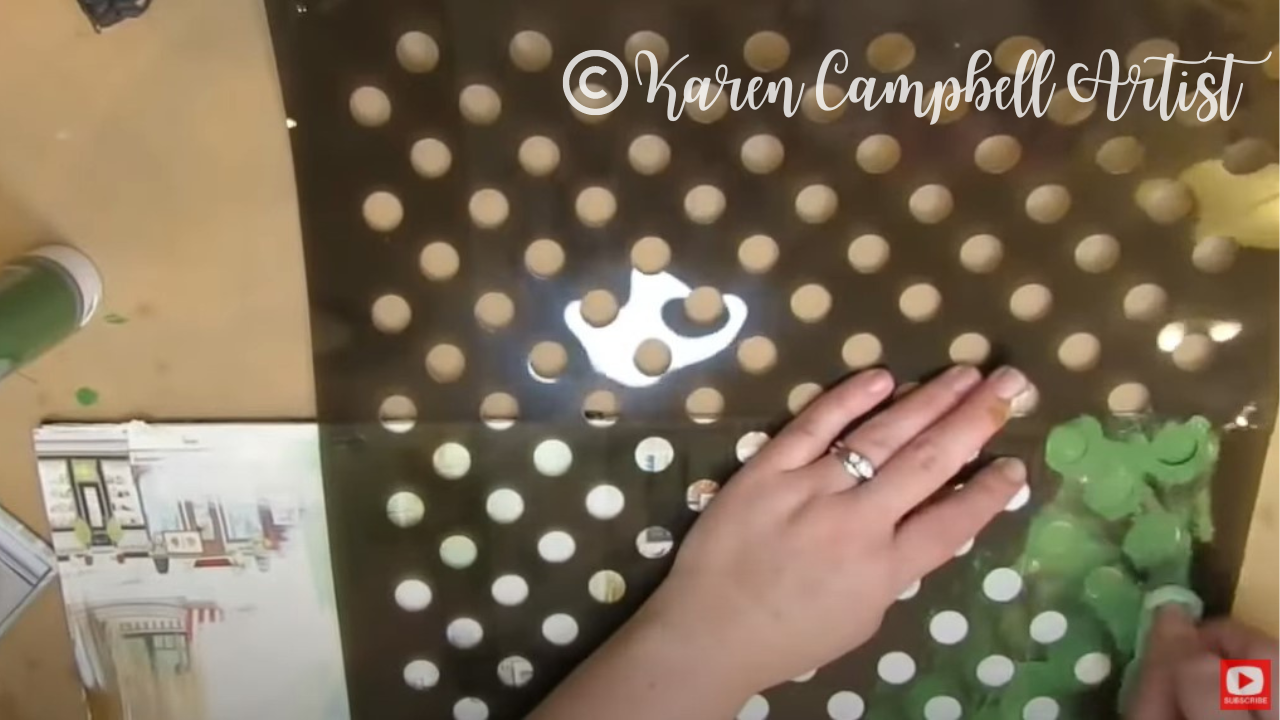
Layer 3: Acrylic Paints (This Includes Stencils!)
Lots of people ask me how I choose my paint colors for each project. Typically I look to my collage layer for inspo, and simply pull 3 shades of paint that match my scrapbook paper. Easy, right?
Once you've got your colors, add them throughout your collage layer wherever you want to jazz things up, or even cover something up that you don't like.
Feel free to experiment with different colors and techniques like stenciling to achieve the effect you're after.
Layer 4: Mark Makers
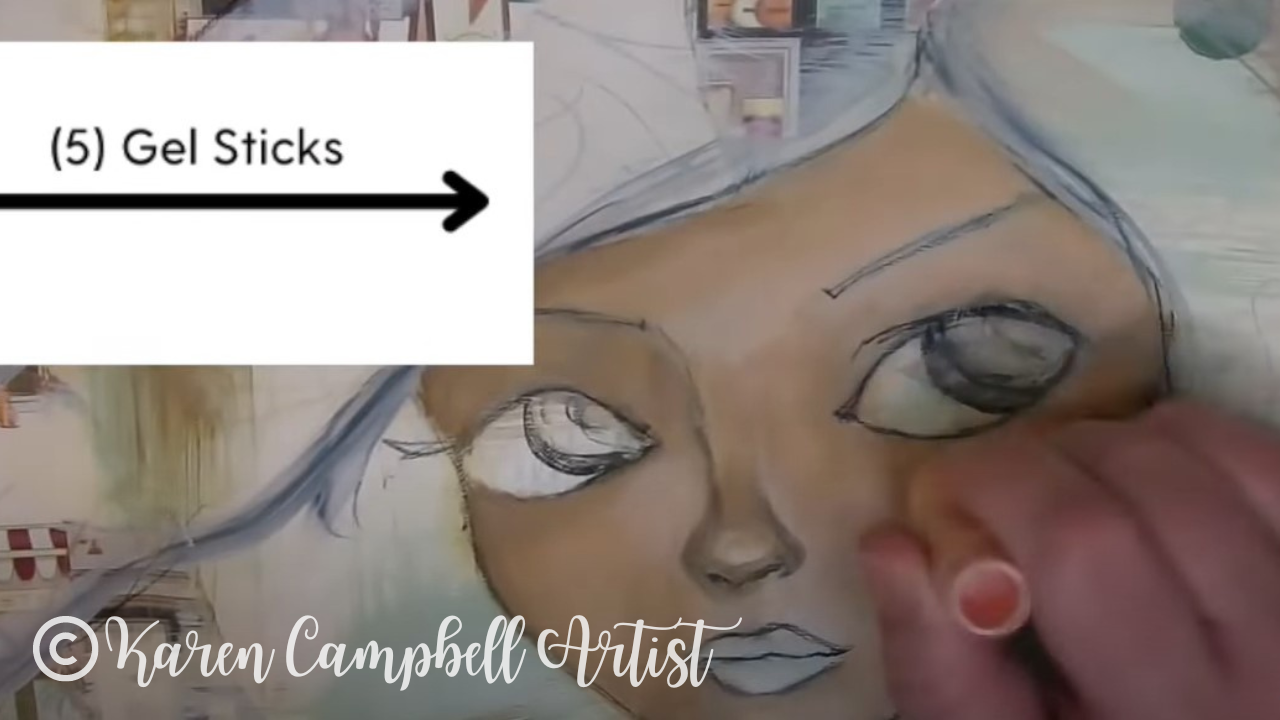
Layer 5: Gel Sticks
Layer 6: Pitt Pens
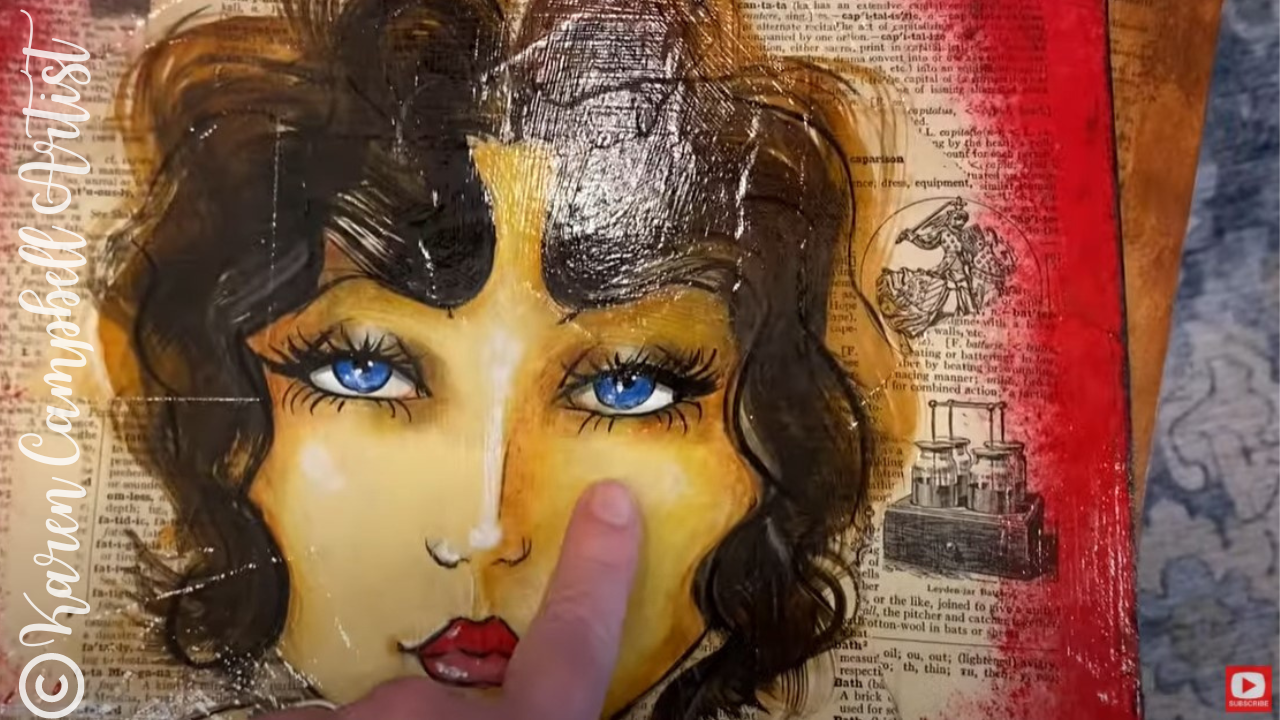
Layer 7: Sealer
Not long ago I tested Mod Podge against SEVEN other sealers to see if there were any others I wanted to start working with. Check out what I learned and which glossy one I I fell in love with!
Did you grab my Hamburger Cheatsheet yet? Here's that button again in case you need the link again!

Dying to TRY the Hamburger System with Me?!
Add your name to the waitlist to be notified the next time I'm taking new members!
Wanna See MORE "Hamburger Style"
Mixed Media Art Projects on YouTube?
Need More Resources?
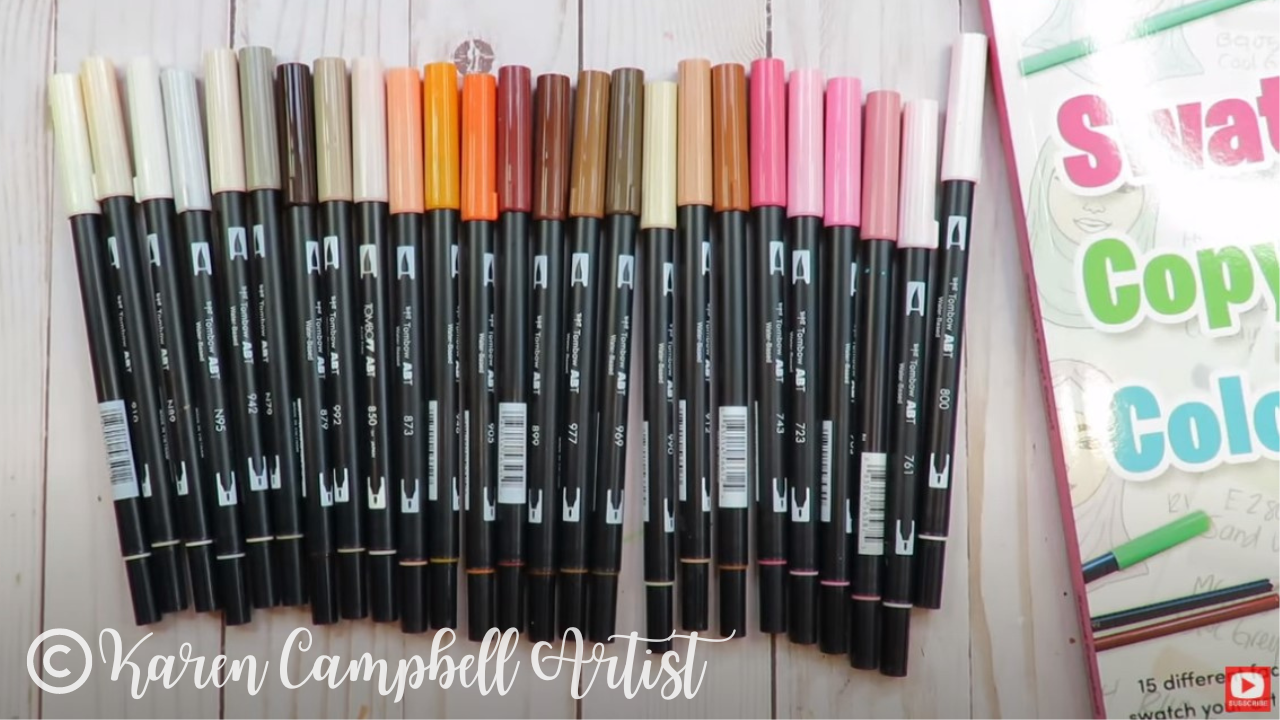
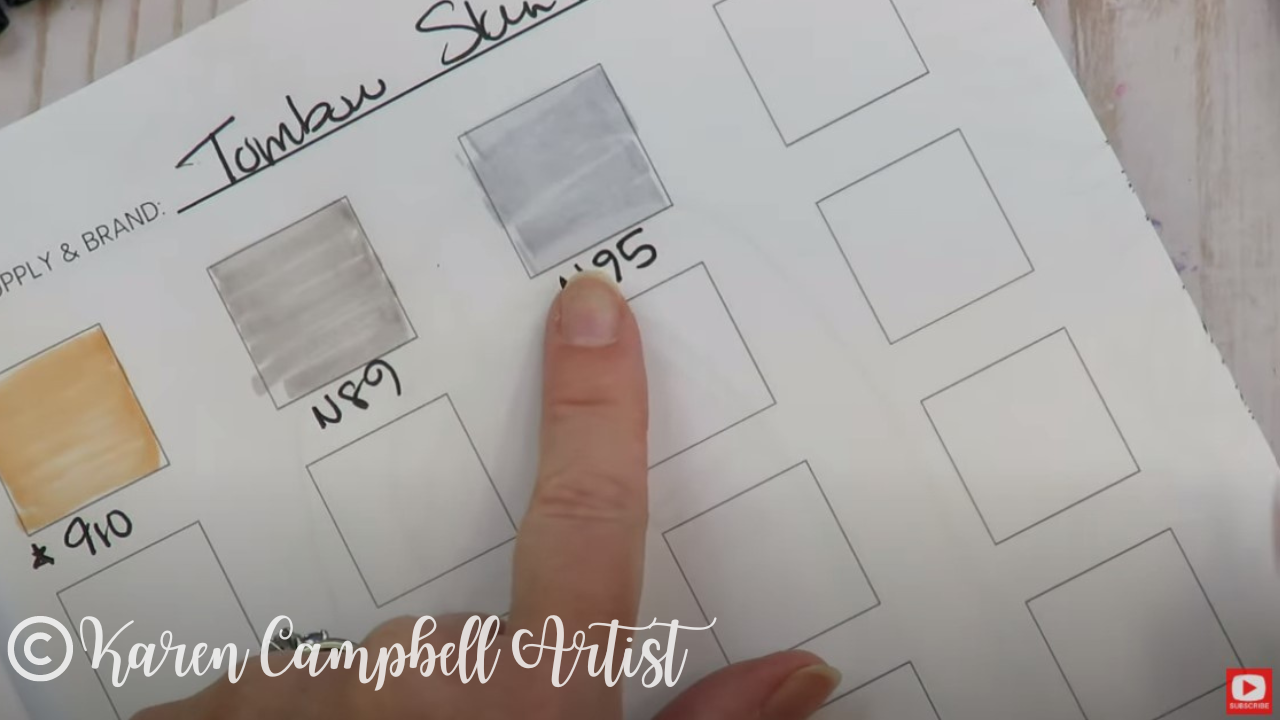
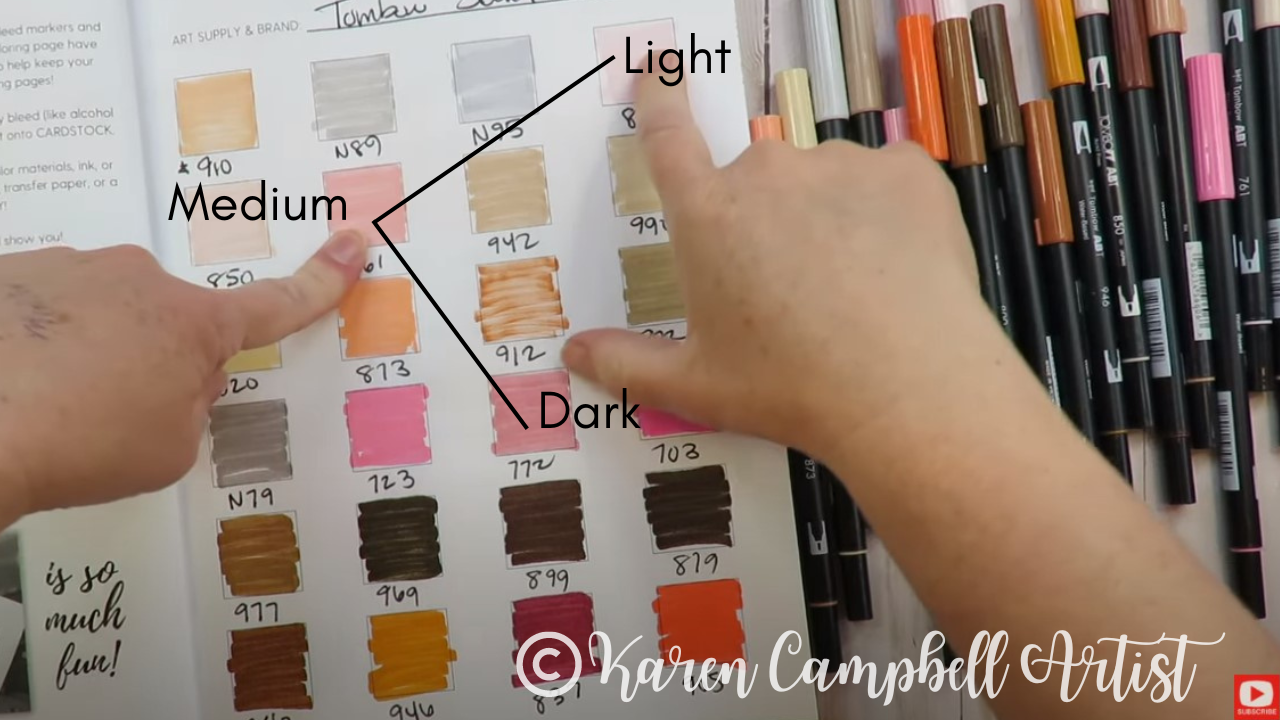
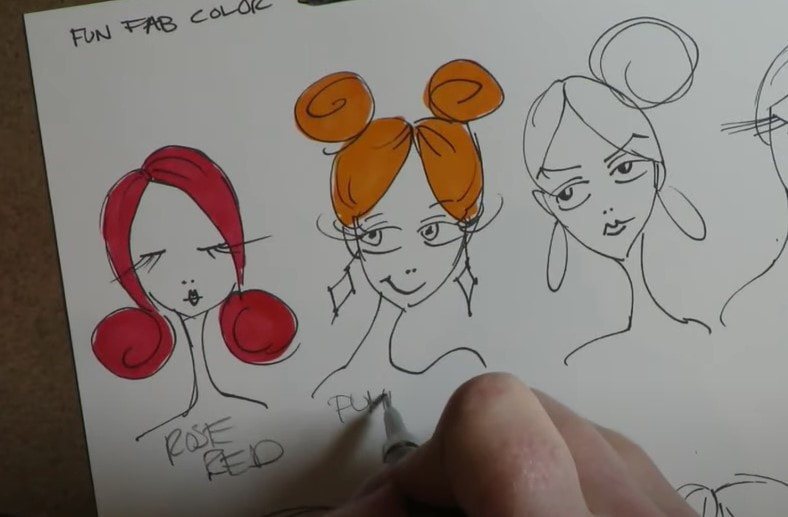
Before we dive into our project, we need to figure out exactly what colors we've got to work with. Taking a glance at the caps on our markers will definitely give us a clue, but THE BEST way to prevent surprises mid-project is to do a little pre-project swatching!
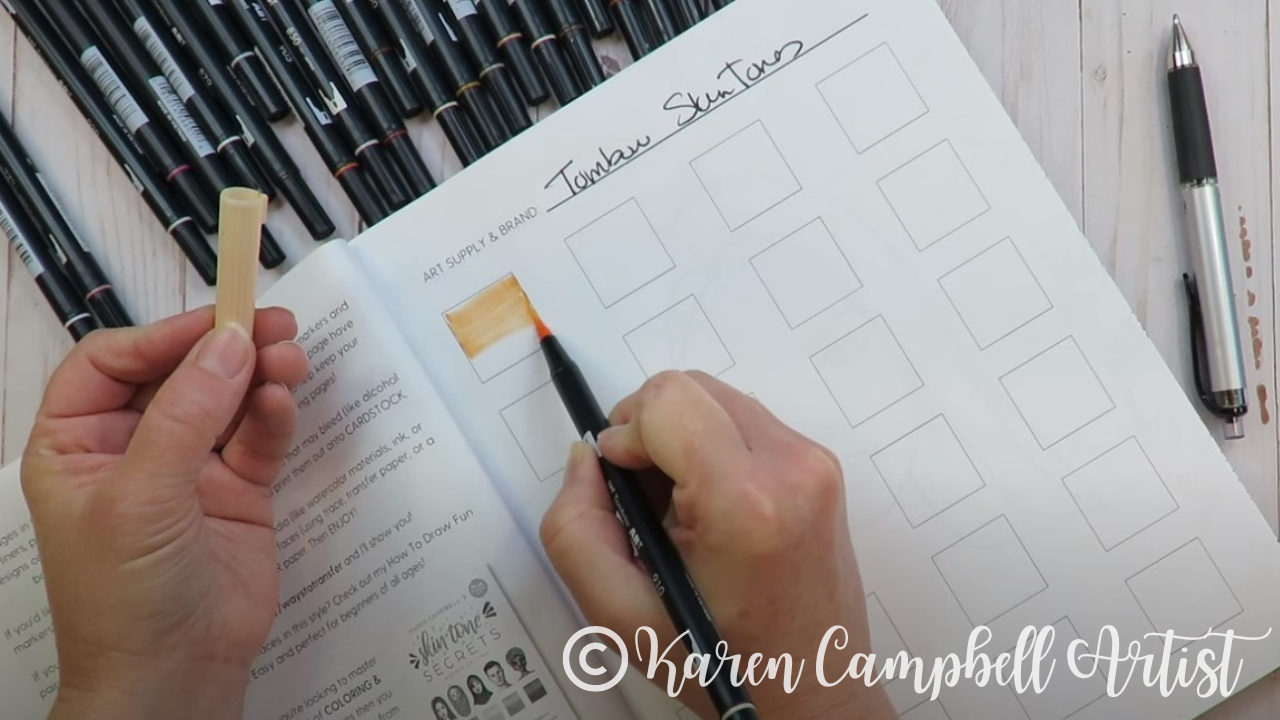

Can't wait for the book to ship and need to swatch NOW?! Download my FREE Fun Fab Swatch Sheet and I'll send it straight to your inbox!!

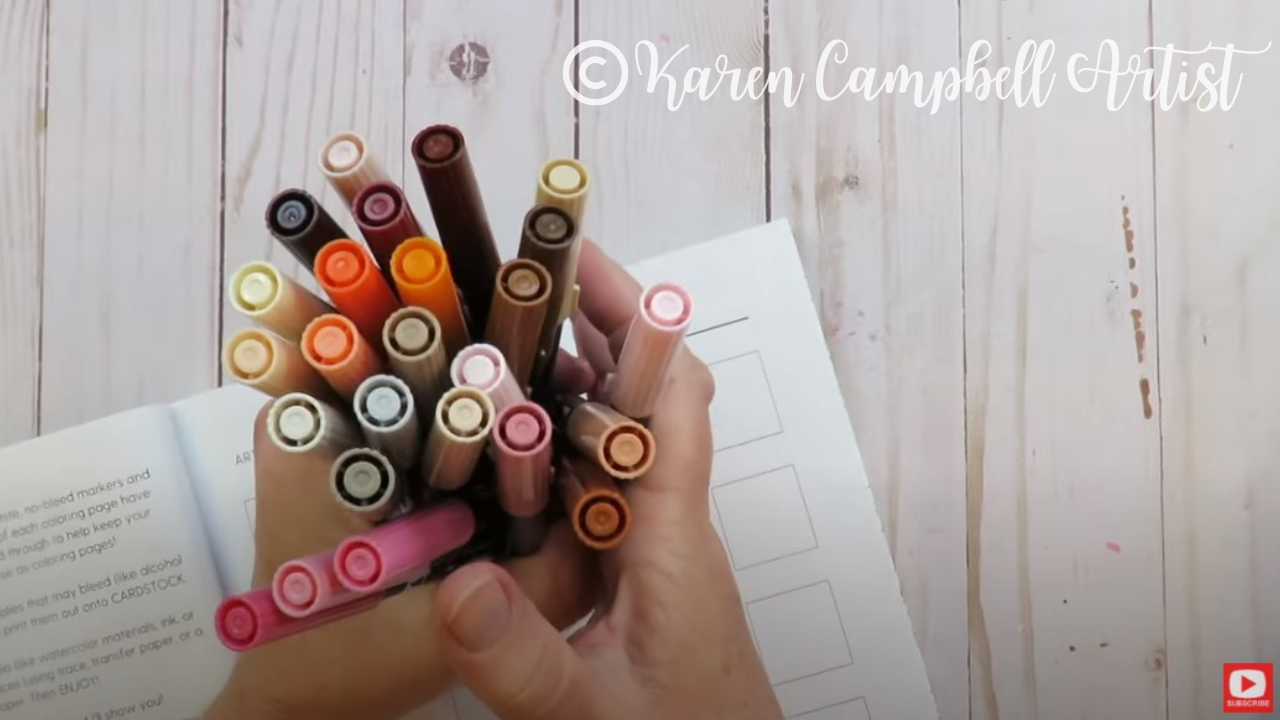
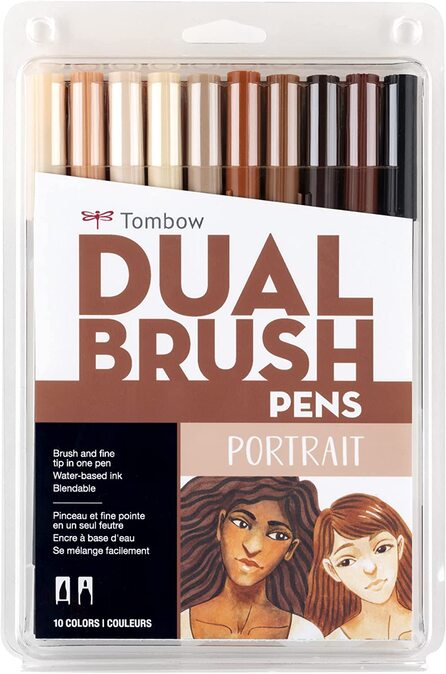
If you don't have Tombows at home and are thinking of adding a set to add to your art supply stash, this is the one I recommend for shading faces.
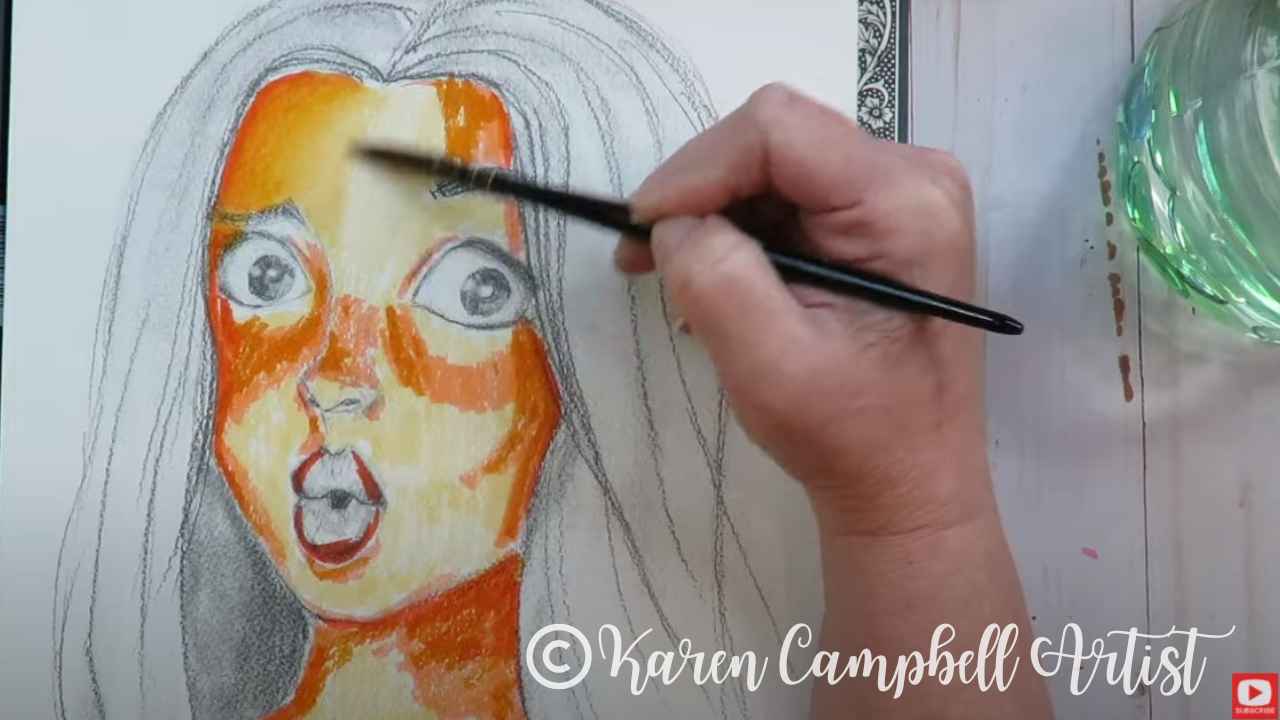
To color along with me step-by-step in real-time, hop over to the Mixed Media Society. You'll be amazed at how EASY it is to achieve watercolor effects in your shading just by adding a little water!
Stay tuned for more inspiring content and exciting projects. Until then, keep drawing, experimenting, and enjoying the artistic process.
Remember, you can't get worse with MORE practice!!
Need More Resources?
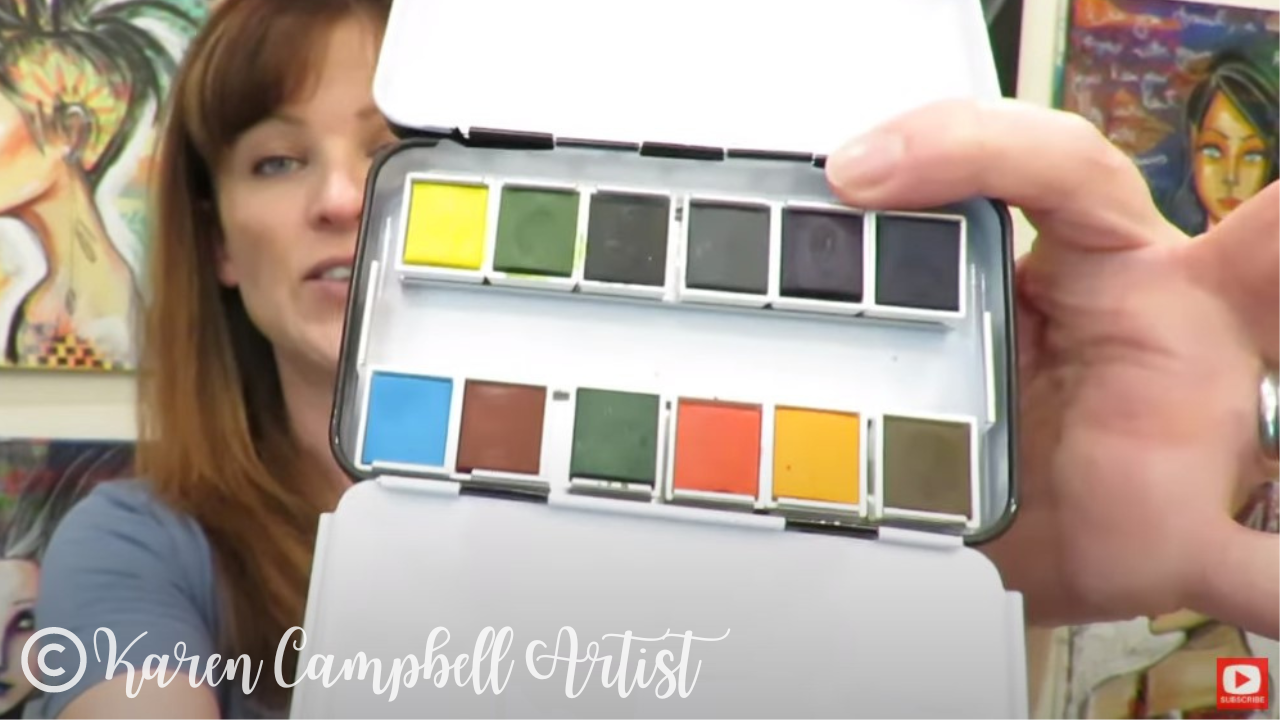
Today I'm diving into ALL these questions, and can't wait to show you not one, but THREE ways to decide which colors are coming along for your next trip!

There, I said it!! LOL.
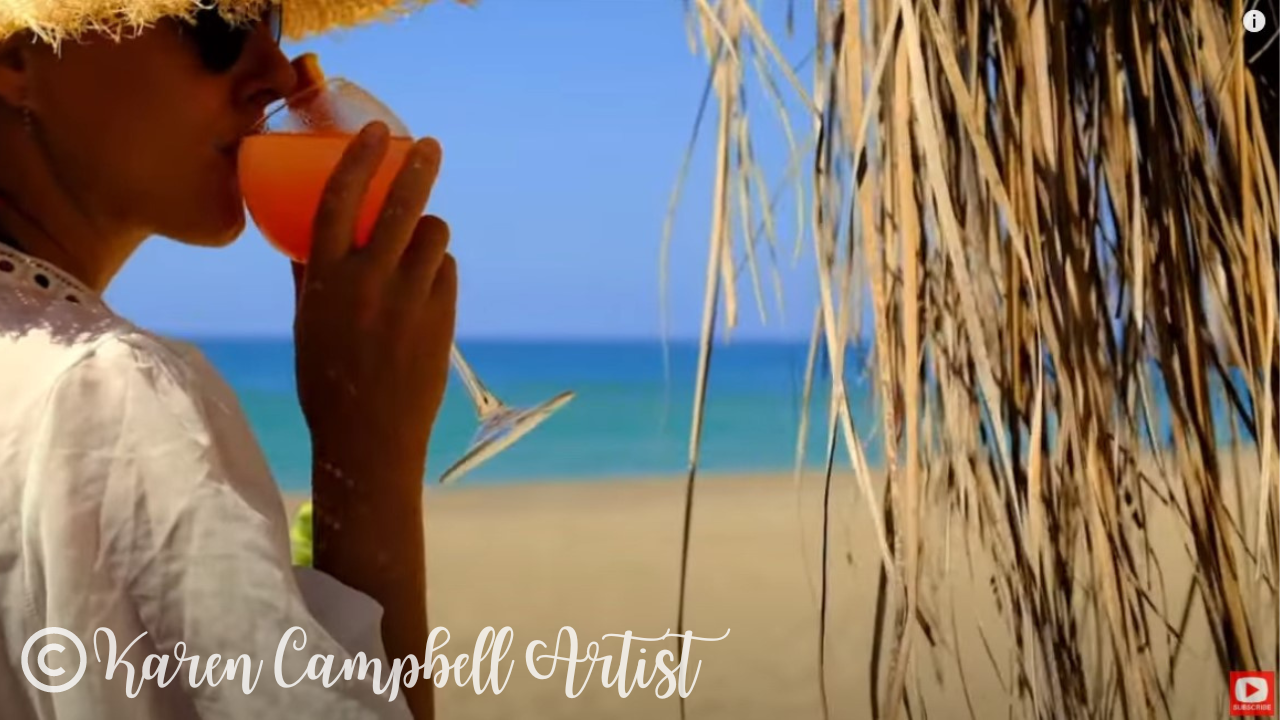
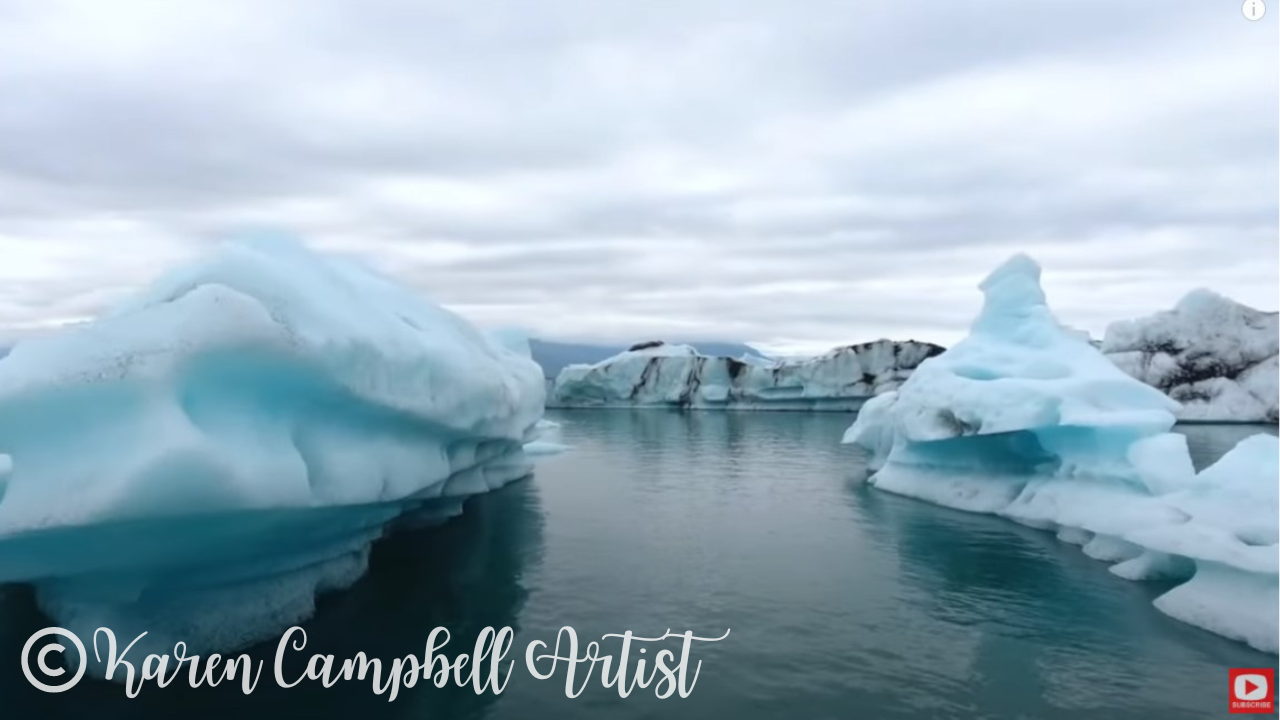
One of the AWESOME ways I totally enjoy choosing which watercolors get to come on a trip is by looking to my DESTINATION for inspiration! This is especially important if you plan to do landscapes and cityscapes.
Here's an example of what I'm talking about. If you're headed to the beach, you'll want a palette filled with colors like this to paint those gorgeous waves, skies and cocktails you'll be sipping (or I would be sipping, LOL!).
When it comes to which colors I choose or recommend YOU choose, it's personal. I'm NOT gonna tell ya what to bring, and there are NO WRONG ANSWERS :) Just bring what YOU LOVE, and don't worry about anyone else!
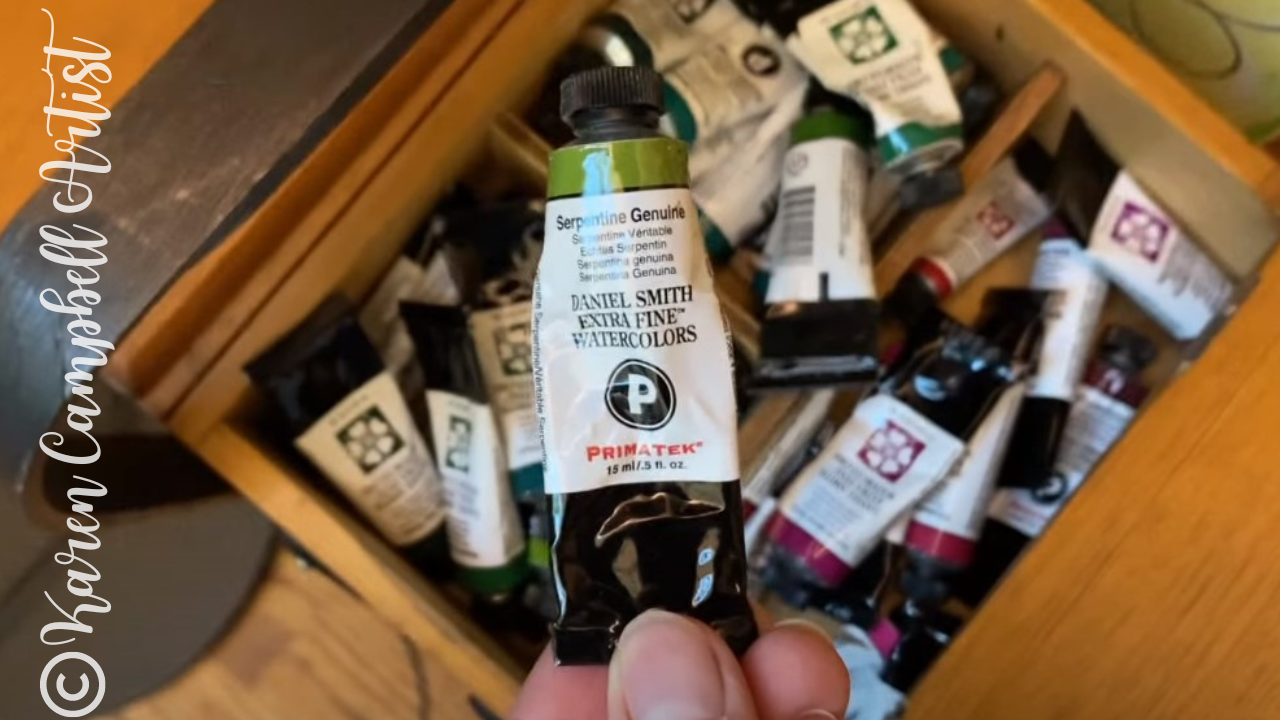
For me, Daniel Smith Serpentine Genuine (below), goes wherever I go!
Just look at how beautiful these color selections are!!

If you're NOT getting ready for a trip and just want something to make swatching a little more fun, make sure you download my FREE Swatch Sheet! You can use it for watercolors, markers, colored pencils, you name it!!

And if you DON'T have any travel plans right now, who cares?!! You can STILL create some little custom watercolor palettes for yourself.
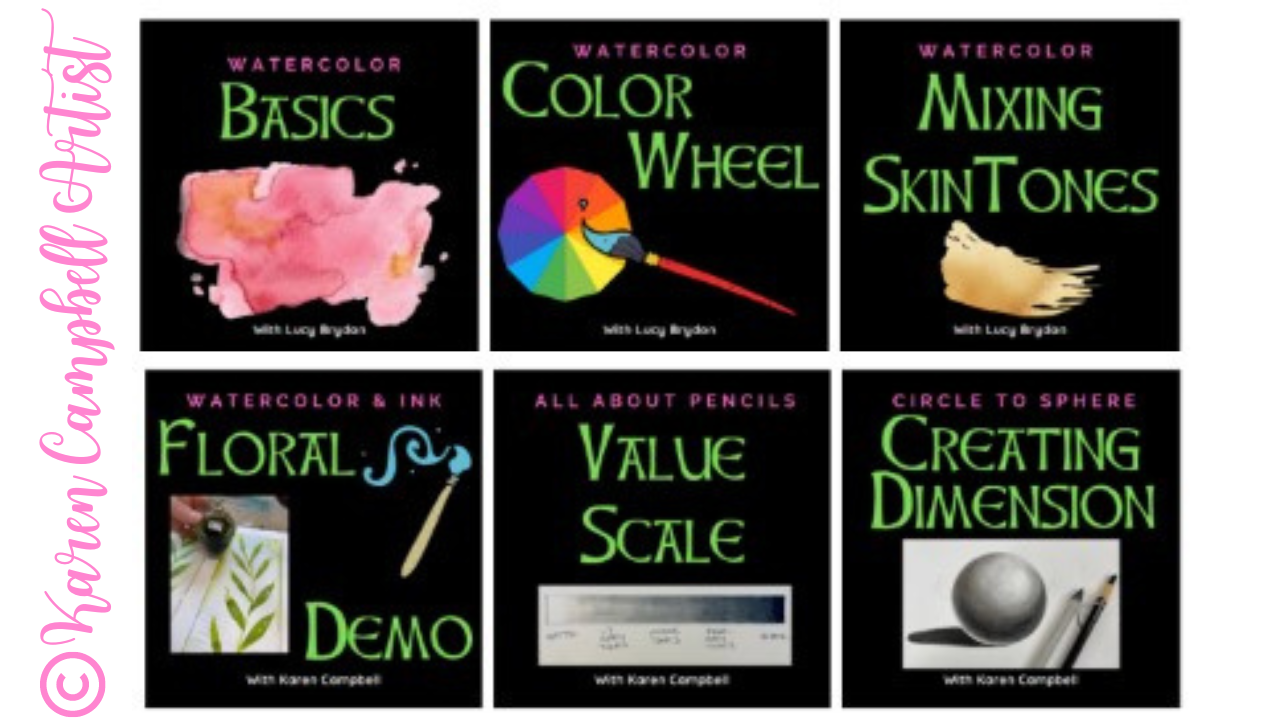
Need Some Awesome Watercolor Lessons?
Lucy Brydon and I are having a blast with our students, and would LOVE for you to join us!! You don't have to have ANY watercolor skills to join. We'll teach you everything you need to know from the ground up!!
Wanna Watch Another Video?
Need More Resources?
Karen Campbell
Founder of Awesome Art School. Mixed Media Artist. Author of 19 Instructional Art Books!
Posting on YouTube every single Wednesday of the year!

Whose work has appeared in...


Archives
April 2024
March 2024
February 2024
January 2024
December 2023
November 2023
October 2023
September 2023
August 2023
July 2023
June 2023
May 2023
April 2023
March 2023
February 2023
January 2023
December 2022
November 2022
October 2022
September 2022
August 2022
July 2022
June 2022
May 2022
April 2022
March 2022
February 2022
January 2022
December 2021
November 2021
October 2021
September 2021
August 2021
July 2021
June 2021
May 2021
April 2021
March 2021
February 2021
January 2021
December 2020
November 2020
October 2020
September 2020
August 2020
July 2020
June 2020
May 2020
April 2020
March 2020
February 2020
January 2020
December 2019
November 2019
October 2019
September 2019
July 2019
June 2019
May 2019
April 2019
March 2019
February 2019
January 2019
December 2018
November 2018
Categories
All
#50FunFabFairies Drawing Challenge
5 Minute Drawing Practice
Acrylic Brushes
Acrylic Painting Basics
Acrylic Painting For Beginners
Acrylic Painting On Canvas
Acrylic Painting Supplies
Acrylic Painting Tutorial
Acrylic Paint Types
Alcohol Ink Painting
Alcohol Ink Tutorial
Alcohol Marker Art
Alcohol Marker Blending
Alcohol Marker Brands
Alcohol Marker Drawing
Alcohol Markers By ArtBeek
Alcohol Markers Tutorial
Altered Book
Altered Book Art Journal
ArtBeek Alcohol Markers
Art Book Reviews
Art Books I Love
Art Deco
Art Deco Drawing
Art Deco Mixed Media Projects
Art Deco Style
Art For Beginners
Art Heals
Artist Collaboration
Artist Encouragement For Beginners
Artist Positive Mindset For Beginners
Art Journal
Art Journal For Beginners
Art Journal Ideas
Art Journal Inspiration
Art Journal Page
Art Journal Techniques
Art Retreats
Art Studio Makeover
Art Supplies
Art Supply Demos
Art Supply Reviews
Art Supply Storage
Asian Eye Drawing
Beginner Drawing Projects
Beginners
Behind The Scenes
Blackwing Pencils
Blackwing Volumes
Brush Pens
Canvas Painting
Cartoon Cat Drawings
Castle Drawing Lesson
Cat Art
Celtic Collective
Charcoal Drawing
Charcoal Portrait
Christmas Watercolor Ideas
Collage
Collage Ideas
Collage Techniques
Collage Tutorial
Colored Pencils
Copic Marker Alternative
Copic Marker Art
Copic Marker Drawing
Copic Marker Tutorial
Copic Skin Tones
Copic Vs Ohuhu Alcohol Markers
Craft Gem Projects
Create Your OWN Custom Watercolor Palette
Daniel Smith
Daniel Smith Watercolor Palette
Daniel Smith Watercolors
Dip Pens
DIY Travel Watercolor Palette
Drawing
Drawing A Baby Face
Drawing Books On Amazon
Drawing Cats
Drawing Challenge
Drawing Erasers
Drawing Eyelashes
Drawing Eyes In Pencil
Drawing Faces
Drawing Faces For Beginners
Drawing Facial Features
Drawing Female Hairstyles
Drawing For Beginners
Drawing Hairstyles
Drawing Highlights
Drawing Ideas For Travel
Drawing Necks Realistically
Drawing Pencils
Drawing Tutorial
Drink & Draw
Ear Drawing Practice
Easy Acrylic Painting
Easy Drawings For Beginners
Easy Face Drawing Tutorial
Easy Mixed Media Projects
Easy Owl Painting
EASY Watercolor Tutorial
Easy Zen Doodle
Ecoline Brush Pens
Elegant Writer
Erasers
Eyelashes Drawing
Faber Castell Gelatos
Faber Castell Watercolor Markers
Facebook Live Lessons
Face Chart Inspired Drawing Tutorial
Face Drawing
Face Drawing Guidelines
Face Drawing Practice
Face Drawing Tutorial
Face-shading
Face-shape-drawing
Face-sketch
Fantasy-art-drawing
Fantasy Art Drawing Projects
Fantasy Art Painting Projects
Fashion-face-drawing-tutorial
Fashion-figure-drawing
Fashion-illustration-for-beginners
Fineliner-tips
Flip-throughs-of-my-books
Foam Head Projects!
Fountain-pen-ink
Fountain-pen-ink-painting
Free-art-lesson
FREE Cheatsheets!
Free-drawing-lesson
Free-lesson
FREE LIVE Art Alongs
Free-watercolor-lesson
Free-watercolor-lesson
Full Length Drawing Tutorial
Full Length Face Drawing Tutorial
Full Length Face Shading Tutorial
Full Length Mixed Media Projects
Fun Fab Drawing Club
Fun-fab-fairies
Fun Fab Famous People & Paintings
Gesso-brush
Gift Cards
Gift Ideas For Artists
Gift Ideas For Beginners
Glass-dip-pens
Gouache-meaning
Graphite-transfer-paper
Halloween-face-drawing-tutorial
Halloween-projects
Hamburger
Hamburger System
Hot-dog-system
How To Add Highlights To Face Drawings & Mixed Media Portraits
How To Art Journal
How To Become An Awesome Artist
How-to-choose-face-drawing-references
How-to-color-a-baby-face-in-copic-markers
How To Create A Watercolor Palette
How To Draw
How To Draw A 34 View Face
How-to-draw-a-babys-face
How-to-draw-a-face
How-to-draw-a-fairy
How-to-draw-a-fairy-face
How To Draw A Fun Fab Face
How-to-draw-a-male-face
How-to-draw-and-shade-a-face-in-copic-markers
How-to-draw-and-shade-a-whimsical-african-american-face
How To Draw Anime & Manga
How-to-draw-art-deco-style
How-to-draw-asian-eyes
How-to-draw-a-smile-with-teeth
How-to-draw-bangs
How-to-draw-cartoon-cats
How-to-draw-dreadlocks
How-to-draw-ears
How-to-draw-expressions
How-to-draw-eyebrows
How To Draw Eyelashes
How To Draw Eyes Realistically
How To Draw Fairy Ears
How To Draw Figures
How To Draw Freckles
How To Draw Hair
How To Draw Lips
How To Draw Lips Realistically
How To Draw Noses Realistically
How To Draw Realistic Ears
How To Draw Teeth
How To Draw Wrinkles
How To Paint Eyelashes
How To Seal Your Work
How To Shade
How To Shade A Face In Color
How To Shade DARK Skin Tones With Alcohol Markers
How To Shade Faces With Alcohol Markers
How To Shade Faces With Tombow Markers
How To Sketch A 3 Quarter Portrait
How To Sketch A Face
How To Swatch Art Supplies
How To Transfer A Drawing
How To Use Gloves In A Bottle
How To Use Linseed Oil
How To Use Oil Pastels
LARGE Canvas Painting Technique
Lickleyhead Castle
Line Drawing
Magical Mashup
Marker Storage Solutions
Marker Tips
Martini Glass Drawing
Mermaid
Mixed Media
Mixed Media Art
Mixed Media Art Books I Love
Mixed Media Art Ideas
Mixed-media-art-journal
Mixed Media Art Journaling
Mixed Media Art Journal Tutorial
Mixed-media-art-supplies
Mixed Media Art Techniques
Mixed Media Art Tutorials
Mixed Media Backgrounds
Mixed Media Brushes
Mixed Media Canvas
Mixed Media Challenge
Mixed Media Collage
Mixed Media Collage Background
Mixed Media Collage Tutorial
Mixed Media Drawing
Mixed Media Eyes
Mixed Media Faces
Mixed Media Face Shading
Mixed Media Foam Heads
Mixed Media Girls
Mixed Media Hamburger
Mixed Media Hot Dog System
Mixed Media Ideas
Mixed Media Layering Process
Mixed Media Paintbrushes
Mixed Media Painting
Mixed Media Portraits
Mixed Media Project
Mixed Media Society
Mixed Media Techniques
Mixed Media Tutorial
Mixed Media Tutorials
Mixed Media Watercolor
Mixed Media YouTube
Monochromatic Drawing
My Favorite Art Supplies
My Favorite Watercolors
My Journey As An Artist
My Mixed Media Layering Process
New Book!
No Draw Mixed Media Art Project
Noodler's Ink
Nose Drawing Practice
Ohuhu Alcohol Markers
Oil Pastels & Acrylic Paint
Oil Pastels Brand Comparison For Beginners
Oil Pastels & Colored Pencils
Oil Pastels For Beginners
Oil Pastels + Linseed Oil
Oil Pastel Tutorial
Old Book Crafts
Owl Painting
Paint Brush Types
Painting On Canvas
Painting With Ink
Paint Markers
Palette Knife Painting
Pan Pastels
Paper Napkin Art Journal Background
Pastel Watercolor Sets
Pencil Drawing Tutorial
Portrait Drawing
Portrait Drawing Tutorial
Posca Alternatives
Posca Paint Pens
Prima Watercolor Sets
Profile Drawing
Profile Drawing Tutorial
Quadrant Method
Quick & Easy Face Drawing Tutorial
Reference Drawing
Scotland
Scottish Castle Art Retreat
Sealers Vs Fixatives
SEE INSIDE MY Art Books!
Shading Faces
Sheet Music Art
Side Profile Drawing
Side View Drawing
Silver Black Velvet Brushes
Sketching Tutorial
Skull Watercolor Tutorial
Spray Paint On Canvas Idea
Stabilo All Pencil Projects
Steampunk Drawing
Stenciling & Stamping Techniques
Three Quarter View Face
Time Lapse Drawing Video
Tissue Paper Art Journal Background
Tombow Brush Pens
Tombow Mono Zero Eraser
Tombow Skin Tone Markers
Toned Paper Drawing
Travel Art Supplies
Upcycled Art
Upcycle Old Books
Value Scale Drawing
Vintage Book Pages
Wardhill Castle
Watercolor
Watercolor And Colored Pencil
Watercolor And What Else?
Watercolor Brushes
Watercolor Fairy
Watercolor For Beginners
Watercolor Markers
Watercolor Marker Tips
Watercolor Marker Tricks For Mixed Media
Watercolor Palette Setup
Watercolor Portrait
Watercolors
Watercolor Sets I Love
Watercolor Supplies
Watercolor Techniques
Watercolor Tutorial
WatercolPainting Techniques
Watersoluble Art Supply Tricks
Water Soluble Markers
Water Soluble Pencils
What Is Mixed Media Art?
Whimsical-christmas-tree
Whimsical Face Drawing Tutorial
Whimsical-face-drawing-tutorial
Whimsical Women Of The World World Portrait Drawing Series
YouTube Drawing Channel
Youtube-giveaway
Youtube-video
Youtube-video
Zentangle Drawing Ideas
Zentangle Drawing Tutorial
Zentangle Feather Drawing Tutorial
 RSS Feed

"Karen is flipping hilarious and she's very real...I like the way she teaches in a way that really gives you confidence, whether you're a beginner or advanced there's always something new to learn!"
- Elizabeth W. |
What Fans Are SayingKaren, you are absolutely fabulous! You make me feel like I can draw anything. I have recently retired and finally have the time to do some of the art that I have loved since I was in school. I am really at the beginning of my art journey and I hope to learn as much as I can. Thank you for all you do. |
Contact ME |